Do you have lingering issues from an old ankle sprain? Are you confident in your ability to quickly hop back and forth? How’s your dynamic balance? Can you perform both of these tests on your injured side just as well as your uninjured side? Check out this blog to learn everything you need to know about chronic ankle instability, including exercise progressions with exact sets and
Looking to improve the strength, range of motion, and stability of your ankles to enhance your function and performance? Check out our Ankle Resilience program!
Chronic Ankle Instability
According to Hertel and Corbett in 2019, “chronic ankle instability (CAI) is a condition characterized by repetitive episodes or perceptions of the ankle giving way; ongoing symptoms such as pain, weakness, or reduced ankle range of motion (ROM); diminished self-reported function; and recurrent ankle sprains that persist for more than 1 year after the initial injury.”
The initial injury in this instance is referring to a lateral ankle sprain. The ligament usually involved is the anterior talofibular ligament (ATFL), and sometimes the calcaneofibular ligament (CFL). Both are located on the outer part of your ankle.
Why is this blog so important? Because, according to Doherty et al in 2016, up to 40% of individuals develop chronic ankle instability after a first time ankle sprain. Fortunately, systematic reviews with meta-analysis by Doherty et al in 2017 and Bleakley et al in 2019 found that exercise therapy is helpful for the treatment and prevention of chronic ankle instability.
Exercises
Before diving into the exercises, I want to share my rationale for their selection. The following changes have been associated with chronic ankle instability:
- Reduced ankle dorsiflexion range of motion during the weight bearing lunge test (Hoch 2012, Plante 2013, Kosik 2019)
- Decreased ankle and foot strength and muscle volumes (Feger 2016, Fraser 2018, Park 2019, Khalaj 2020)
- Proximal weakness of the hip and knee (Dejong 2020)
- Biomechanical alterations during walking, running, landing, and cutting (Moisan 2017, Simpson 2018, Theisen 2019, Kim 2019)
- Delayed peroneal reaction time (Sierra-Guzman 2018)
- Diminished plantar sensation and increased reliance on visual information during single limb stance (Hoch 2012, Powell 2014, Burcal 2016, Song 2016)
- Impaired stability and proprioception (McKeon 2012, Simpson 2018)
- Decreased spinal reflex excitability in the soleus and peroneus longus (Kim 2019, Suttmiller 2020)
Therefore, the exercises, based on the research and my experience as a physical therapist, are intended to target many of these associated changes to improve function and reduce the risk of injury.
The following categories of exercises are purposely placed in the order that they would be performed based on their complexity and difficulty. I’m also going to provide an option A and an option B for many of the exercises so there’s some variability in training. I will lay out a detailed plan in the summary section of this blog.
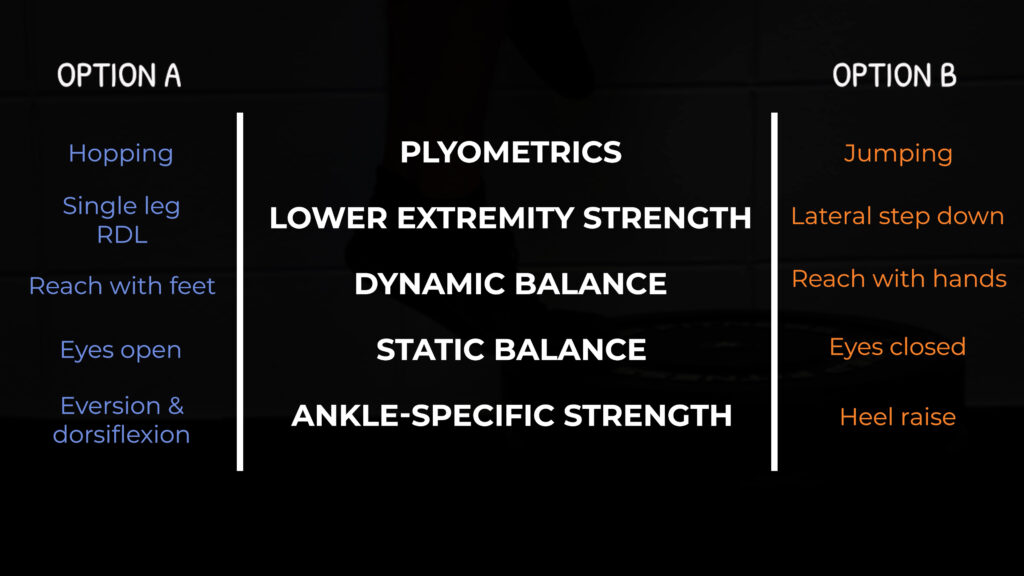
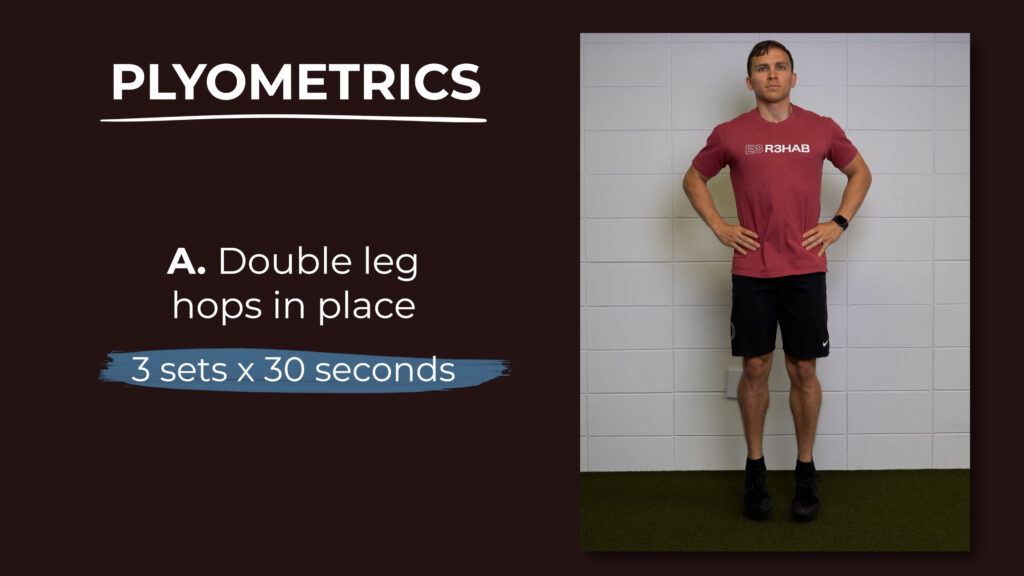
Plyometrics
For progression A, begin by hopping in place on both legs for 3 sets of 30 seconds while keeping your hands on your hips.
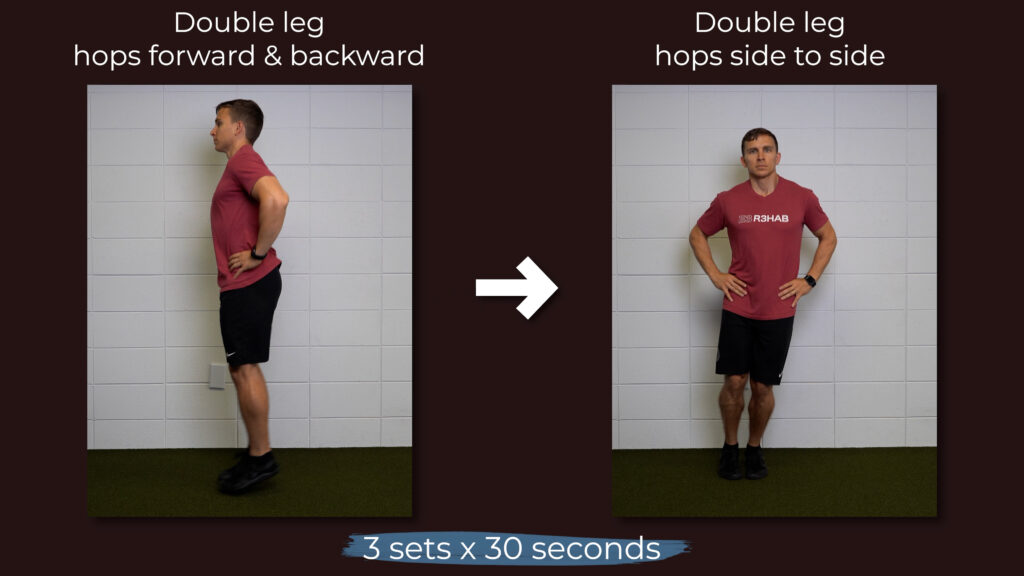
When you can do that without discomfort, progress to hopping forward and backward. Finish the double limb progression by hopping side to side.
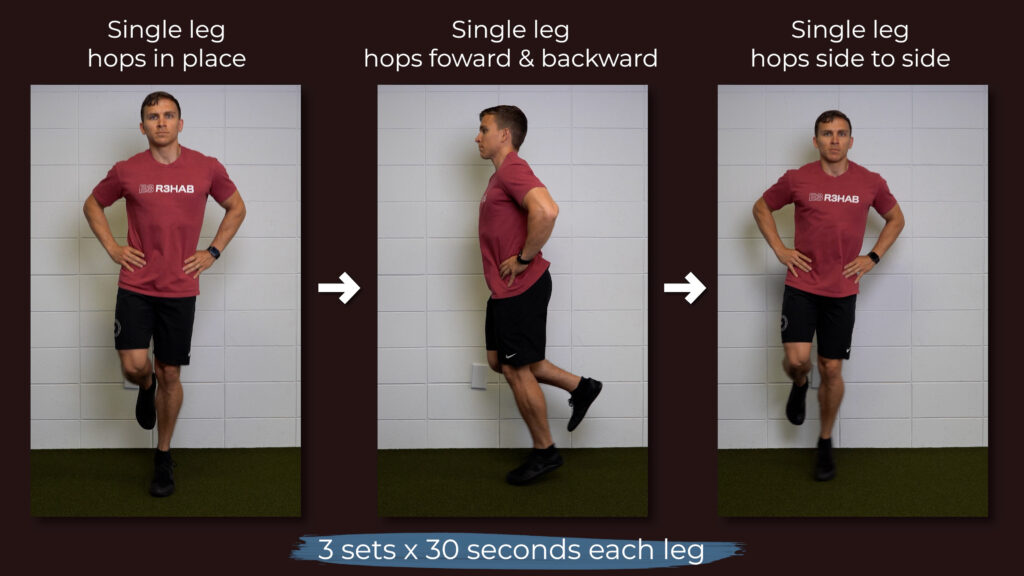
You’ll then work through the same progression on a single leg.
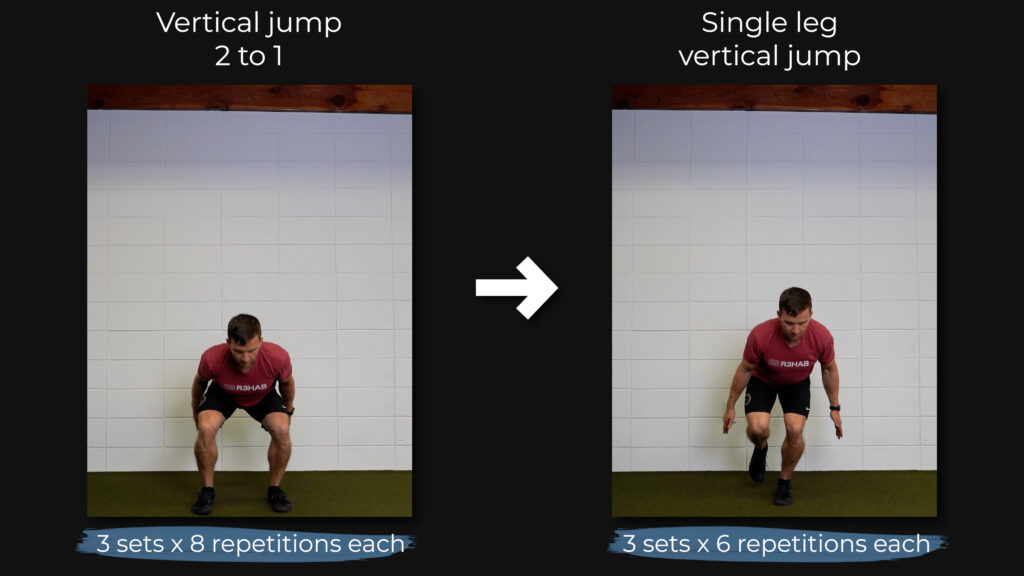
For progression B, jump straight up off 2 legs and land on 2 legs.
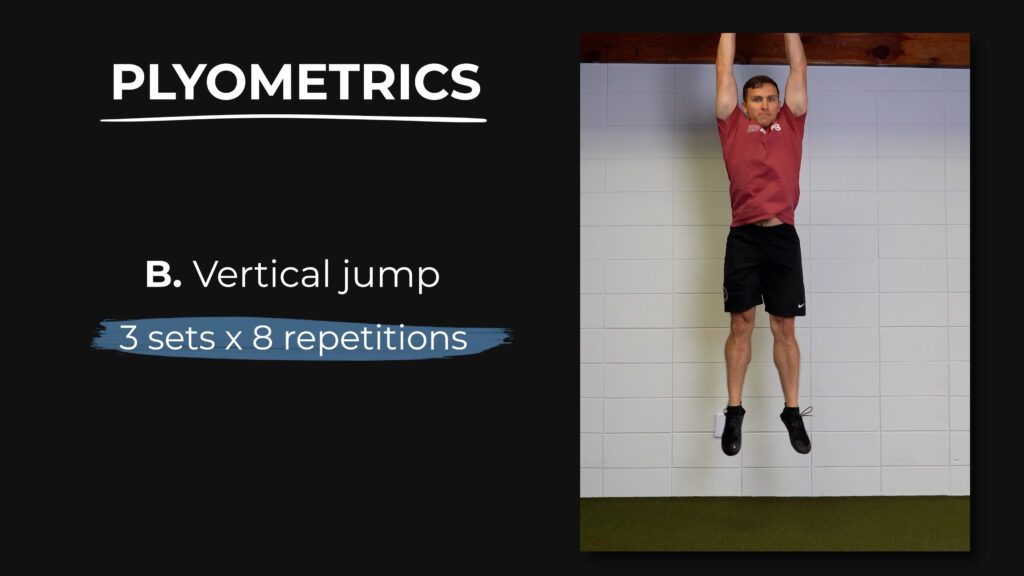
When you can perform 3 sets of 8 repetitions without discomfort, progress to jumping off 1 leg and landing on 2 legs for the same parameters. Finally, jump off 1 leg and land on 1 leg for 3 sets of 6 repetitions. Be sure to stick the landing every time.
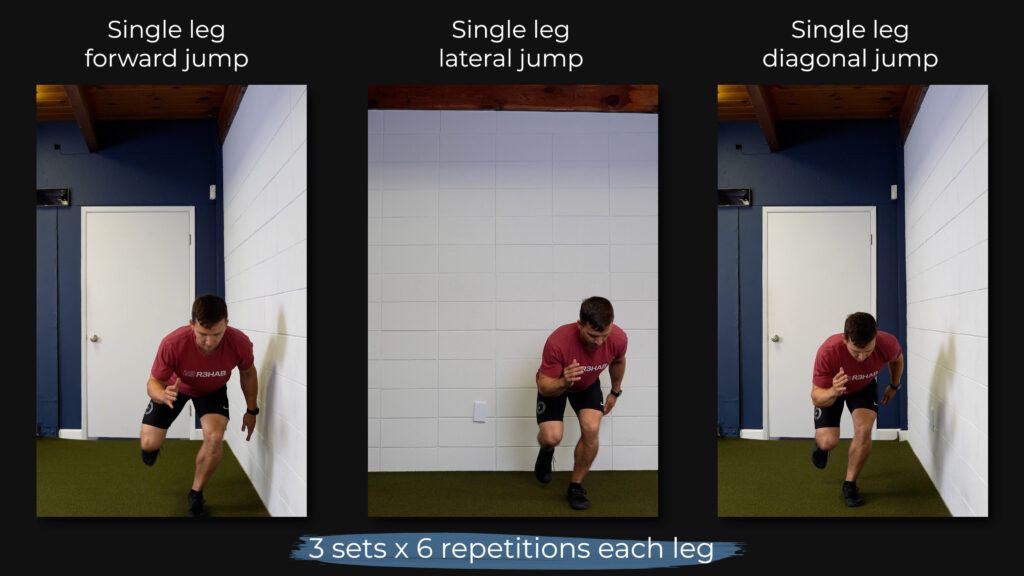
Other progressions include jumping forward, laterally, and diagonally.
Lower Extremity Strength
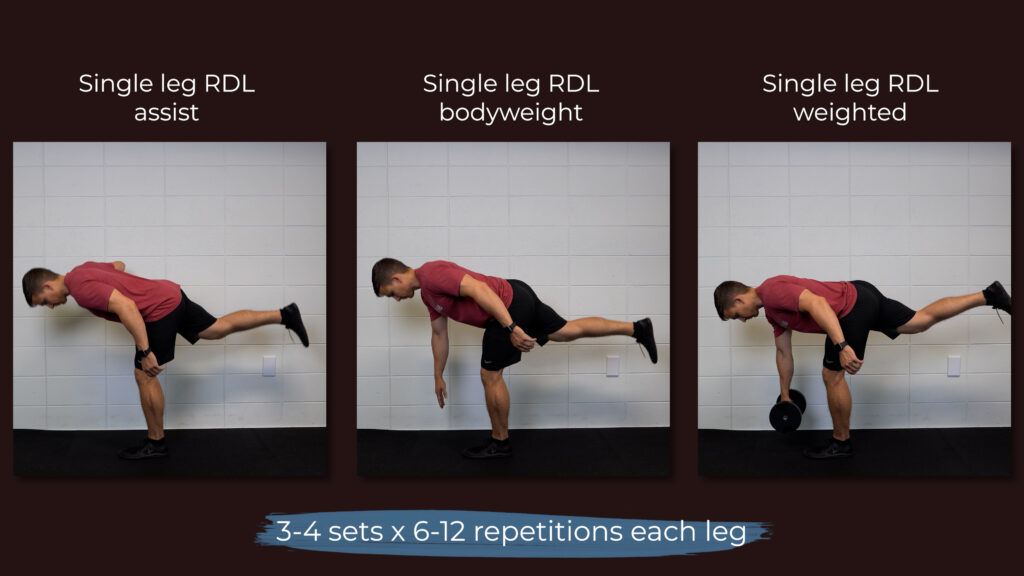
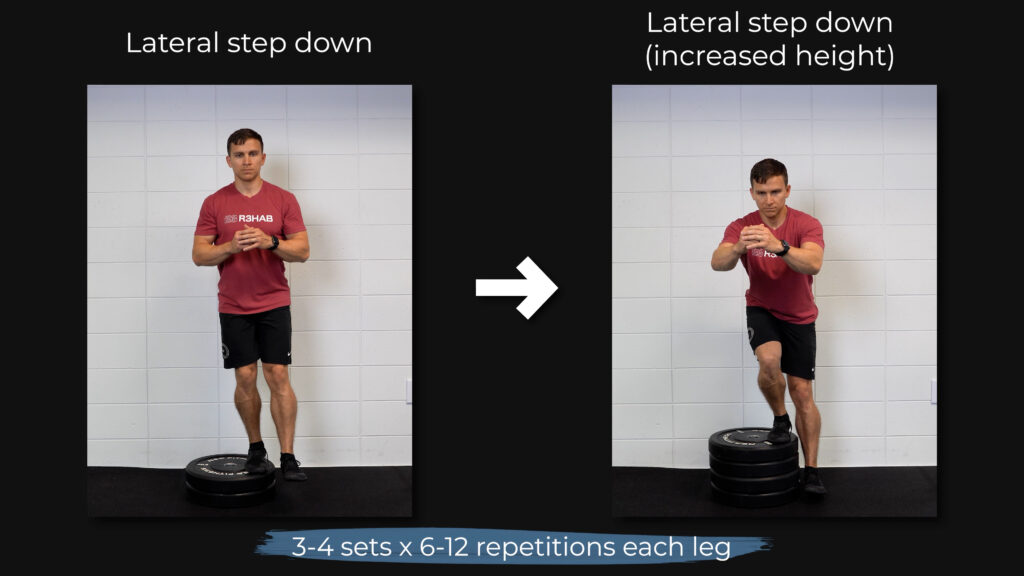
I’m going to keep this category pretty simple. Option A is a single leg RDL and option B is a lateral step down.
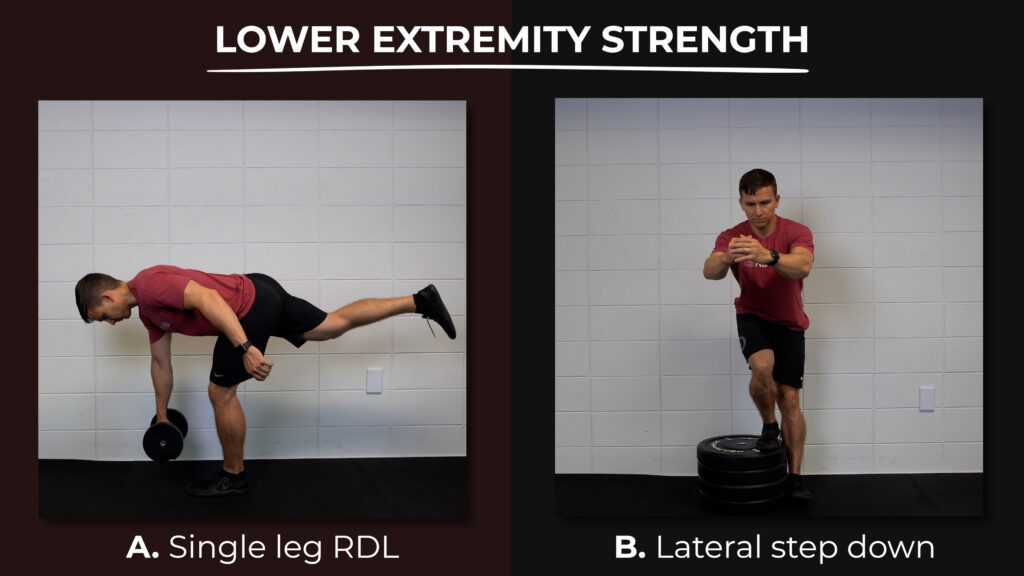
For the single leg RDL, begin with a handhold assist by using a dowel or wall. Then master the movement without any assistance. Finally, hold a dumbbell in the opposite hand of the standing leg. Shoot for 3-4 sets of 6-12 repetitions.
For the lateral step down, start with a small step and progress the height over time. You want to keep your trunk fairly upright and let your knee travel as far over your toes as possible. Aim for 3-4 sets of 6-12 repetitions.
You do NOT want to stand on an unstable surface for these exercises.
Dynamic Balance
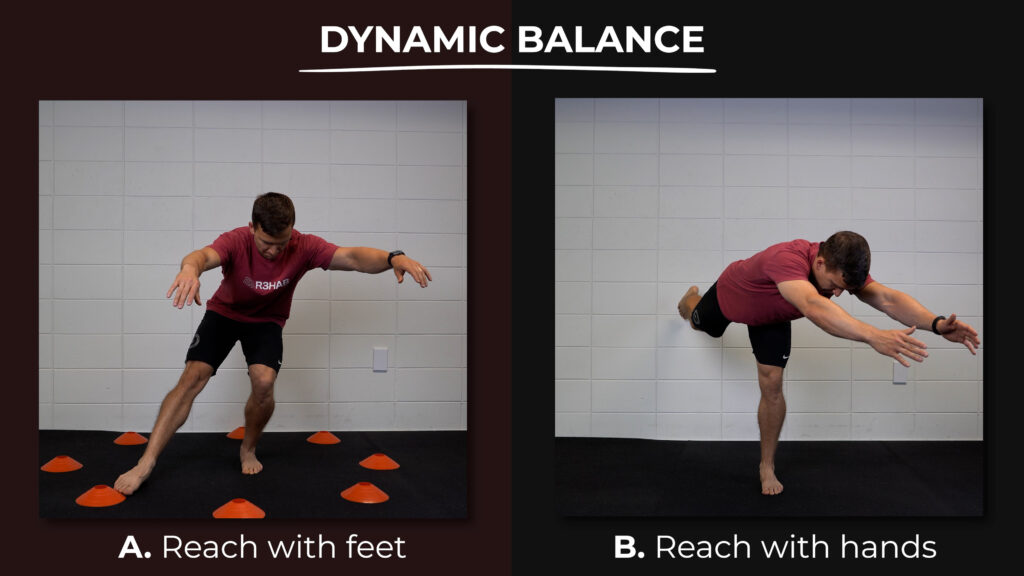
Option A (Modified Y Balance) involves reaching with your feet and option B (3 Way RDL) involves reaching with your hands.
Imagine you’re standing in the middle of a clock. If you’re standing on your left leg for option A, you’re going to use your right foot to tap 1:30, 3 o’clock, and 4:30. If you’re standing on your right leg, you’re going to use your left foot to tap 10:30, 9 o’clock, and 7:30. Do not put any weight through the foot that is tapping the ground. You can start with small reaches and gradually reach further as your stability improves. Perform 3 sets for 30-60 seconds each.
Option B is similar except you’re using both hands to reach for 10:30, 12 o’clock, and 1:30.
Static Balance
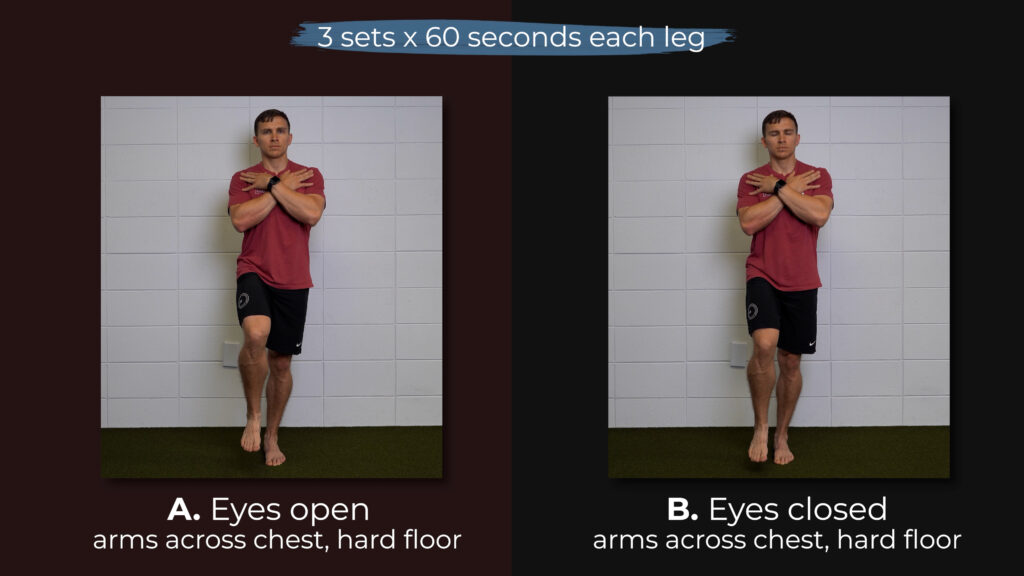
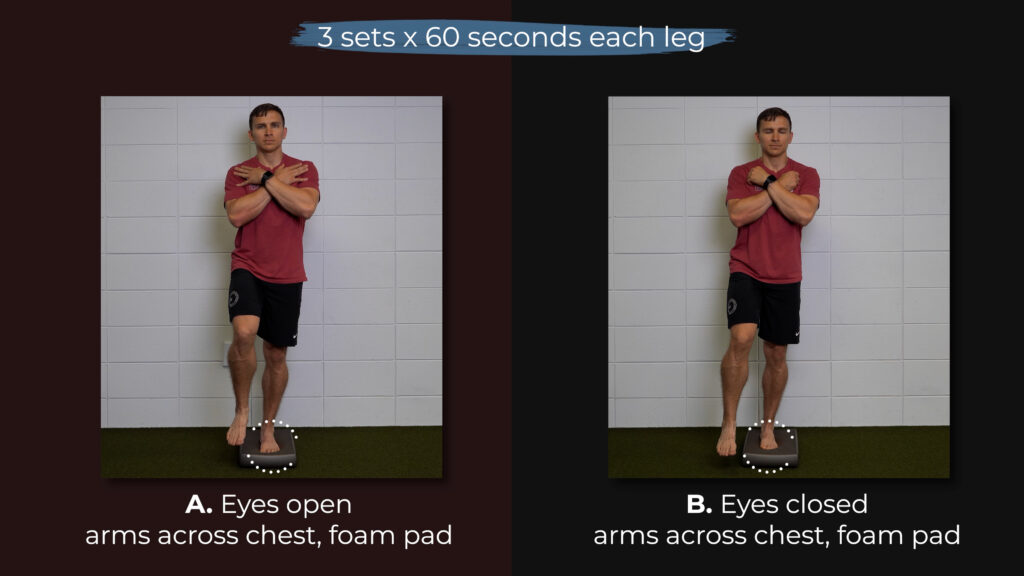
The single limb stance activities stem from the work of McKeon et al in 2008. Option A is done with your eyes open and option B is done with your eyes closed.
The first progression requires you to work up to standing on one leg with your arms across your chest for 3 sets of 60 seconds. These are done barefoot on a hard floor.
In order to move on to the next stage, you should be able to complete these exercises without the following errors:
- Touching down with the opposite limb
- Excessive trunk motion
- Removal of arms from across the chest
- Bracing the non stance limb against the stance limb
Next, you want to accomplish the same task without errors on a foam pad. If you don’t have a foam pad, you can use pillows, towels, or other soft surfaces around your home.
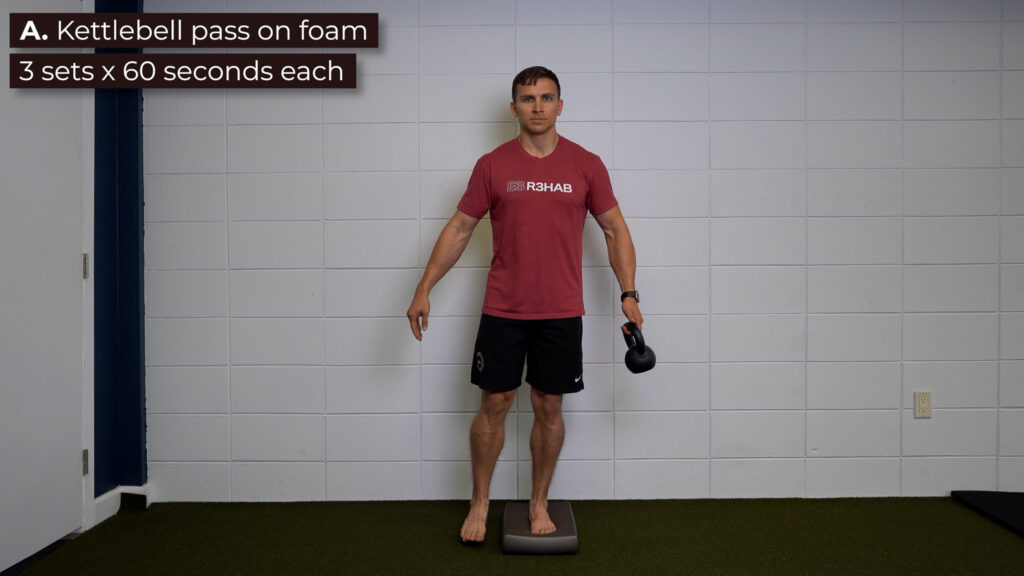
Lastly, you’ll add a component of self-perturbations to the eyes open option by passing a kettlebell or weighted object back and forth.
Keep in mind that you’ll progress through the eyes open option faster than the eyes closed option.
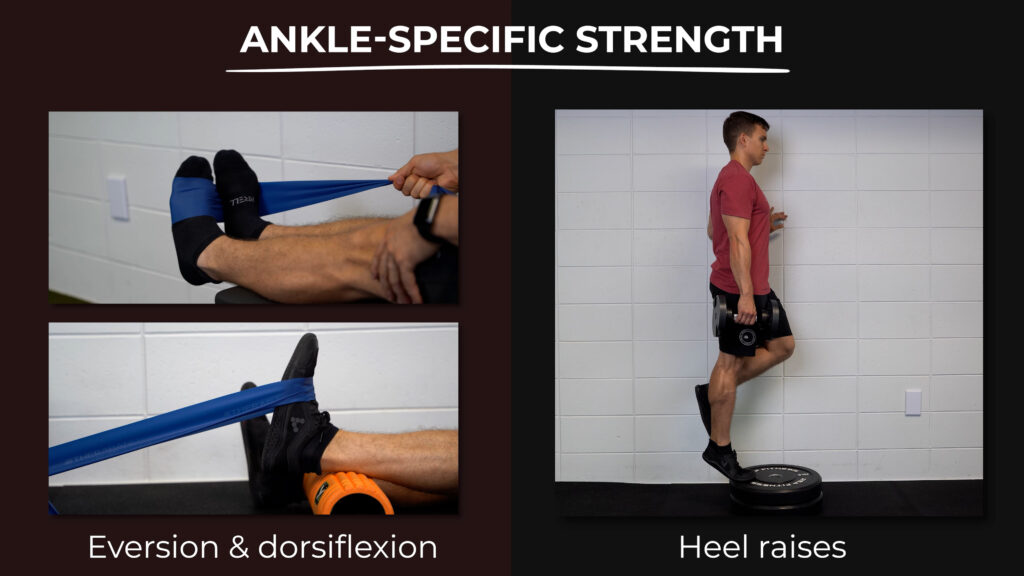
Ankle-Specific Strength
You are going to target your ankle evertors and dorsiflexors by using a resistance band, and your ankle plantar flexors and invertors by doing heel raises.
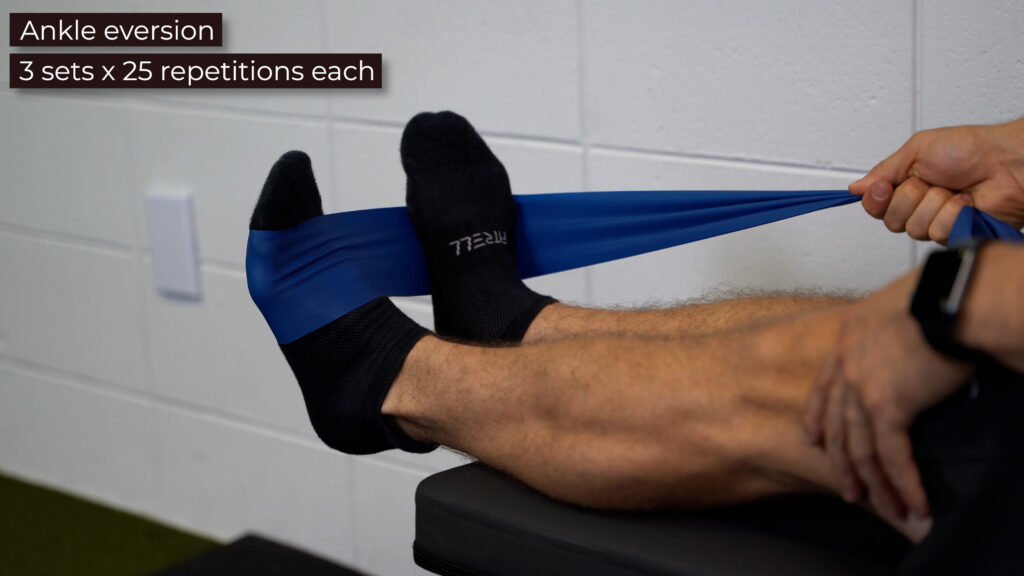
Let’s walk through the set up for ankle eversion on the left leg. Wrap a resistance band around the end of your left foot, bring it across the bottom of your right foot, and hold it firmly with your right hand. Your left hand is going to ensure that you don’t compensate by performing external rotation of the hip as opposed to eversion of the ankle. Work up to 3 sets of 25 reps using the most challenging resistance band you can find.
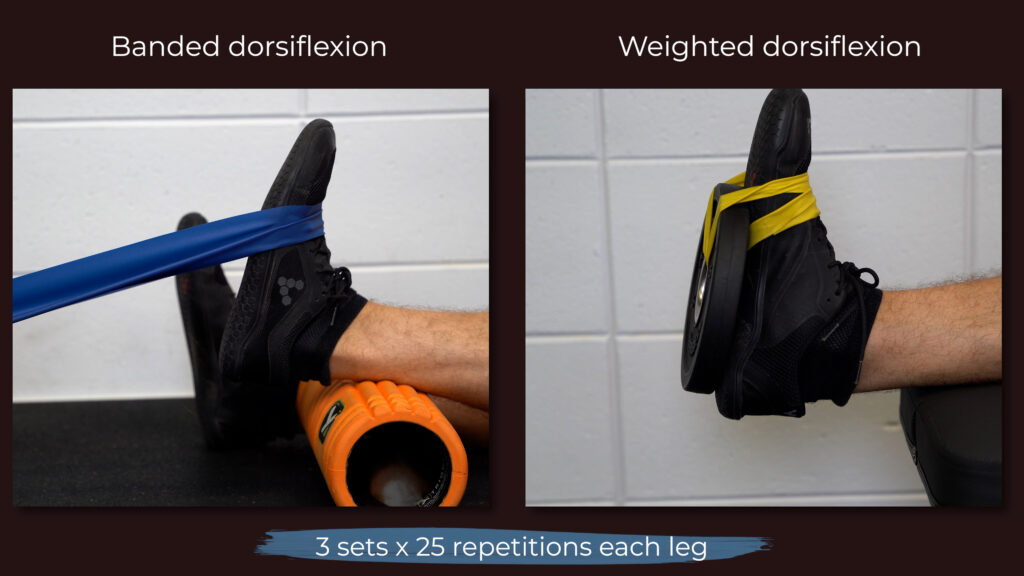
For ankle dorsiflexion, anchor the band and loop it around the middle of your foot. Pump your ankle up and down through its full range of motion. You can also use a weight attached to your foot. Work up to 3 sets of 25 and progress the resistance over time.
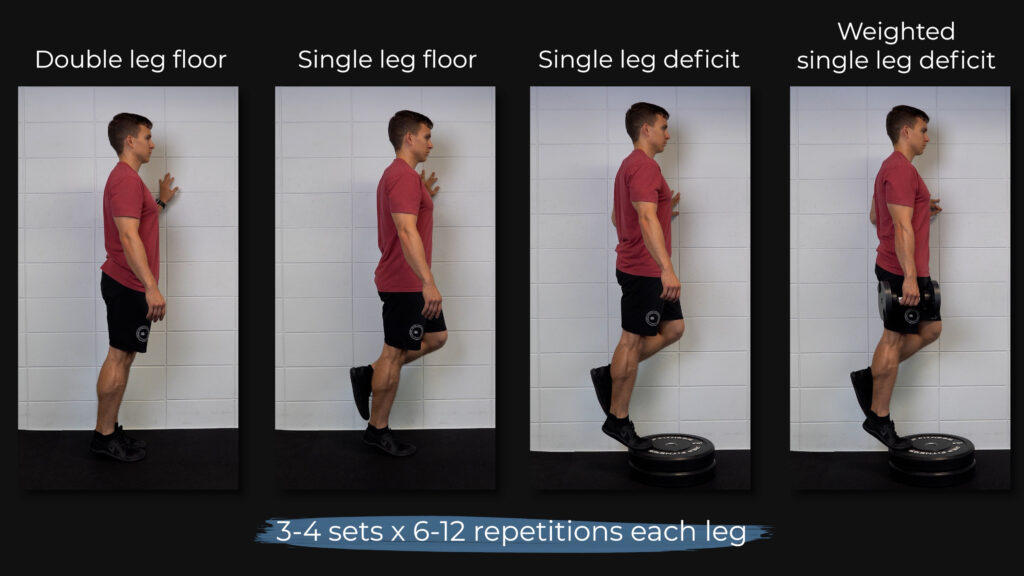
For heel raises, progress from double leg on flat ground to single leg on flat ground to single leg on a step to single leg on a step with weight. When you get to the point that you can do single leg heel raises on a step with a weight in your hand, aim for 3-4 sets of 6-12 repetitions using a slow tempo and full range of motion. Progress by gradually using more weight over time.
Walking
If you’ve been following me for any length of time, it’ll come as no surprise that I’m including walking as an exercise recommendation. Research by Hershkovich, McCann, and Baldwin have reported associations between BMI, higher body mass, and increased waist circumference with chronic ankle instability. Hubbard-Turner and Turner in 2015 found that individuals with chronic ankle instability were less physically active, including taking 2100 steps less per day than healthy controls.
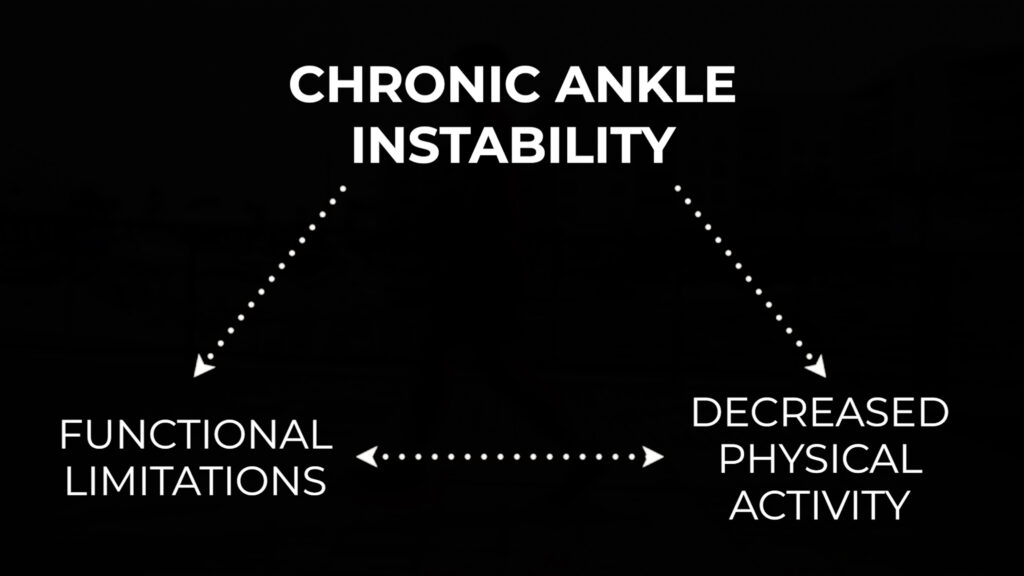
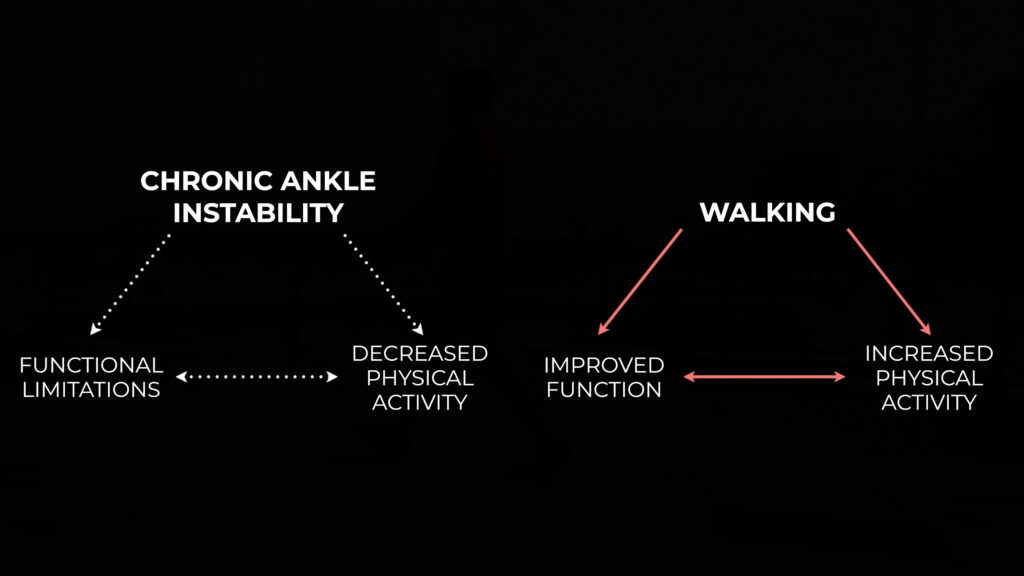
I want to be very clear – I’m not saying that being overweight or obese necessarily causes or even contributes to chronic ankle instability. Instead, chronic ankle instability likely leads to functional limitations and decreased physical activity levels which can become a vicious cycle.
But you can use something as simple as walking to create a virtuous cycle. For example, you increase your physical activity levels by gradually walking more which leads to less functional limitations which leads to more physical activity and that positive recurring cycle continues.
Chronic ankle instability can be very debilitating and discouraging, but some level of physical activity is always better than none, regardless of how trivial it may seem.
Guidelines, Not Rules
The exercises described are generally helpful for people with CAI, but responses will vary. Therefore, please understand that this blog is providing guidelines, not hard and fast rules. The frequency, intensity, and volume of exercises in your program should be individualized based on your training history, symptoms, goals, etc. Some people may benefit from partially progressing 1-2 exercises while others may benefit from fully progressing all of the exercises. This is also not an all-inclusive list due to time constraints and the infinite possibilities.
Activity Modifications
According to research by Swenson et al in 2013, you are more likely to sustain a lateral ankle sprain during sports competition compared to practice, and a large proportion of those injuries are due to contact with another person. A different systematic review and meta-analysis by Doherty et al in 2014 concluded that athletes competing in indoor and court sports are at the highest risk.
Therefore, it might be helpful to temporarily modify the sports you play or reduce your total participation if you’re struggling with chronic ankle instability. This is obviously much easier to do if you’re performing these activities recreationally compared to a high school, college, or professional athlete, or someone whose livelihood depends on it.
Bracing
The authors of the systematic review by Doherty et al in 2017 conclude that “…there is strong evidence for exercise therapy AND bracing in preventing recurrence of an ankle sprain.” In addition to reducing the risk of an ankle sprain, braces aid in reducing the severity of an injury. Lace-up ankle braces are preferred, and are recommended for a minimum of 6 months and up to 1 year following an ankle sprain.
Surgery
Based on the clinical guidelines for the surgical management of chronic lateral ankle instability by Song et al in 2019, “surgery is suggested when patients continue to have symptoms of CLAI after 3 to 6 months of nonsurgical treatment and have indications of CLAI on physical and imaging examinations.” Surgery is a viable choice in some cases, but I usually recommend people exhaust their non-surgical options such as exercise therapy, bracing, and appropriate activity modifications before considering it. If you’re even remotely unsure, see a sports physical therapist near you.
Summary
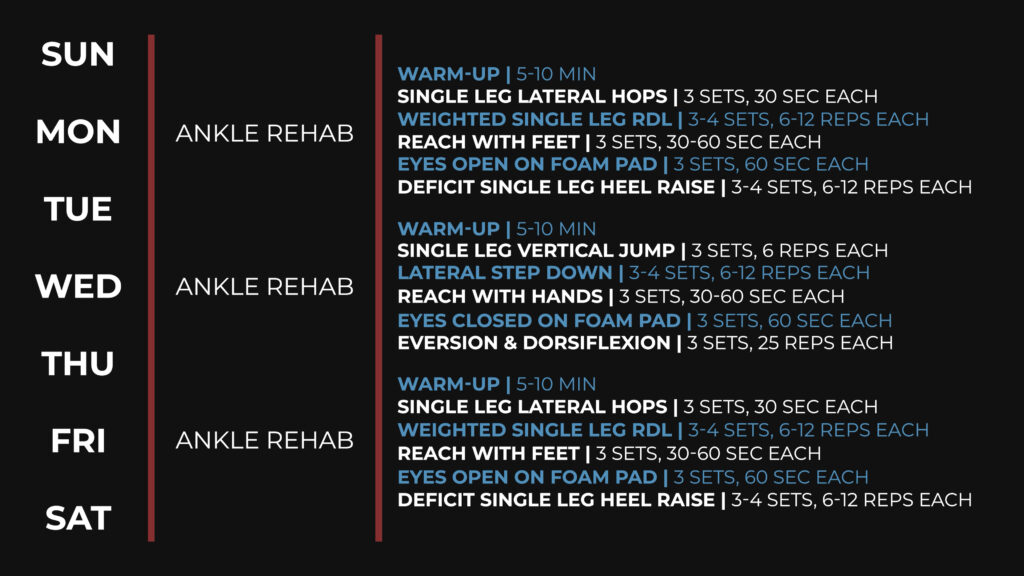
In summary, chronic ankle instability is associated with persistent problems at least 12 months after an initial lateral ankle sprain. Individuals often experience changes in strength, range of motion, motor control, and other factors, and the best way to address those changes is through a comprehensive rehab plan. Here’s an example week based on the exercises I presented:
On Monday, Wednesday, and Friday, start with a 5-10 minute warm up of your choosing; you’re aiming to break a light sweat. Then you’ll perform 3 sets of 30 seconds of single leg lateral hopping or 3 sets of 6 repetitions of single leg jumping and landing. Next, you’ll either perform a single leg RDL with a dumbbell in the opposite hand or a lateral step down for 3-4 sets of 6-12 repetitions. You’ll move on to reaching with your feet or hands for 3 sets of 30-60 seconds. After working on dynamic balance, you’ll work on static balance by standing on a foam pad with your eyes open or closed for up to 3 sets of 60 seconds. You may add a kettlebell swap to the eyes open option. You’ll finish the workout by performing single leg heel raises on a step with a weight for 3-4 sets of 6-12 reps, and ankle eversion and dorsiflexion for 3 sets of 25 repetitions each.
On your off days, you can perform upper body movements, technical sport-specific exercises, or cardiovascular conditioning.