In this blog, I am going to review a comprehensive rehab program for a calf muscle strain injury, including exercises and guidelines for returning to running and sports.
Looking to improve the strength, range of motion, and stability of your ankles to enhance your function and performance? Check out our Ankle Resilience program!
Calf Anatomy & Function
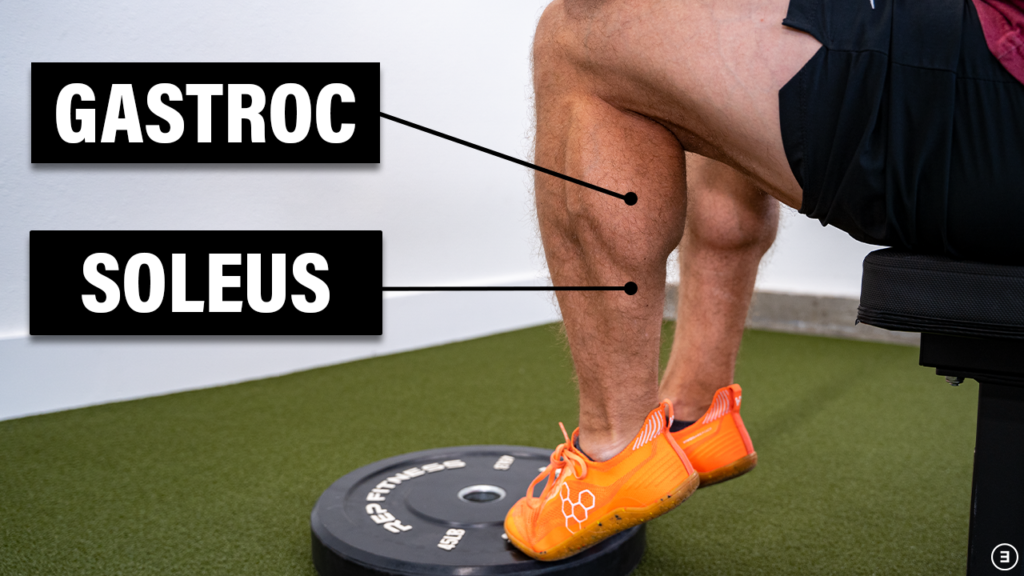
Your calf muscles primarily consist of the gastrocnemius and the soleus. The gastrocnemius has medial and lateral heads that attach to your femur, while the soleus originates lower down on your tibia and fibula. Both insert on your calcaneus, or heel bone, via the Achilles tendon.
Their primary action is to plantar flex your foot, however, the gastrocnemius also helps flex the knee since it crosses this joint.

Calf Muscle Strain Injury
A calf strain can occur in one or both of these muscles. There are a few characteristics that differentiate the two.
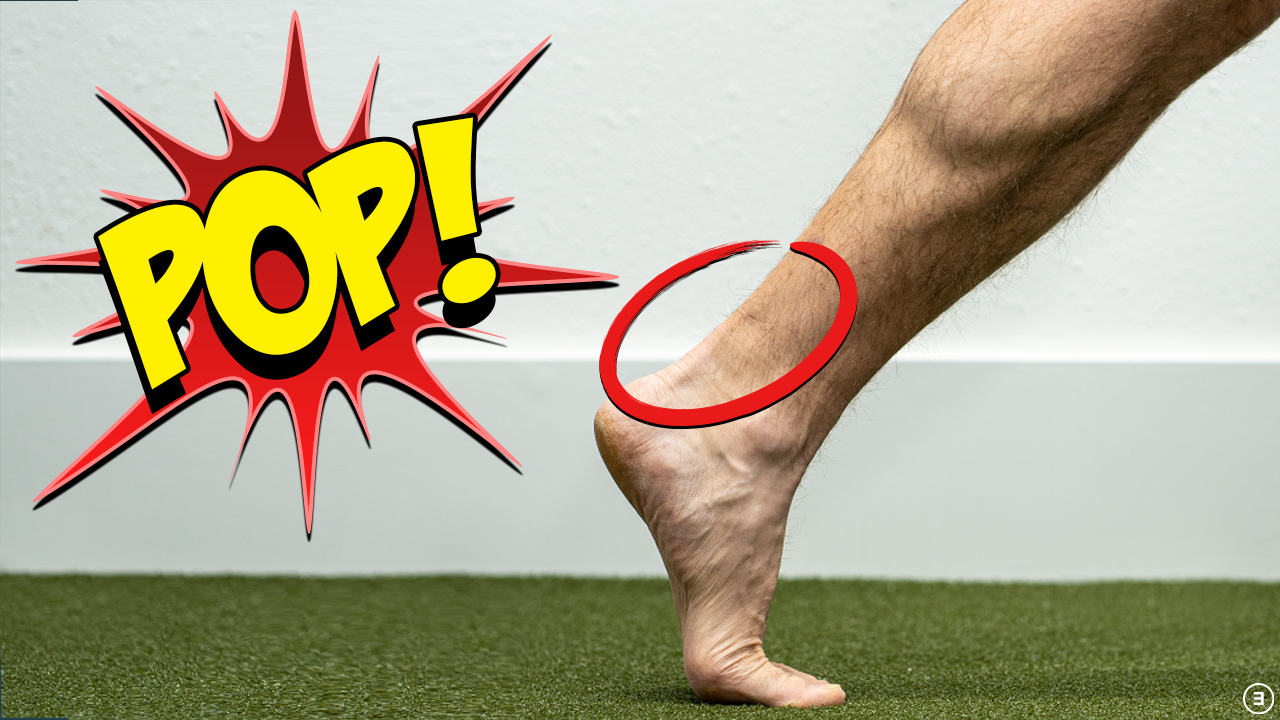
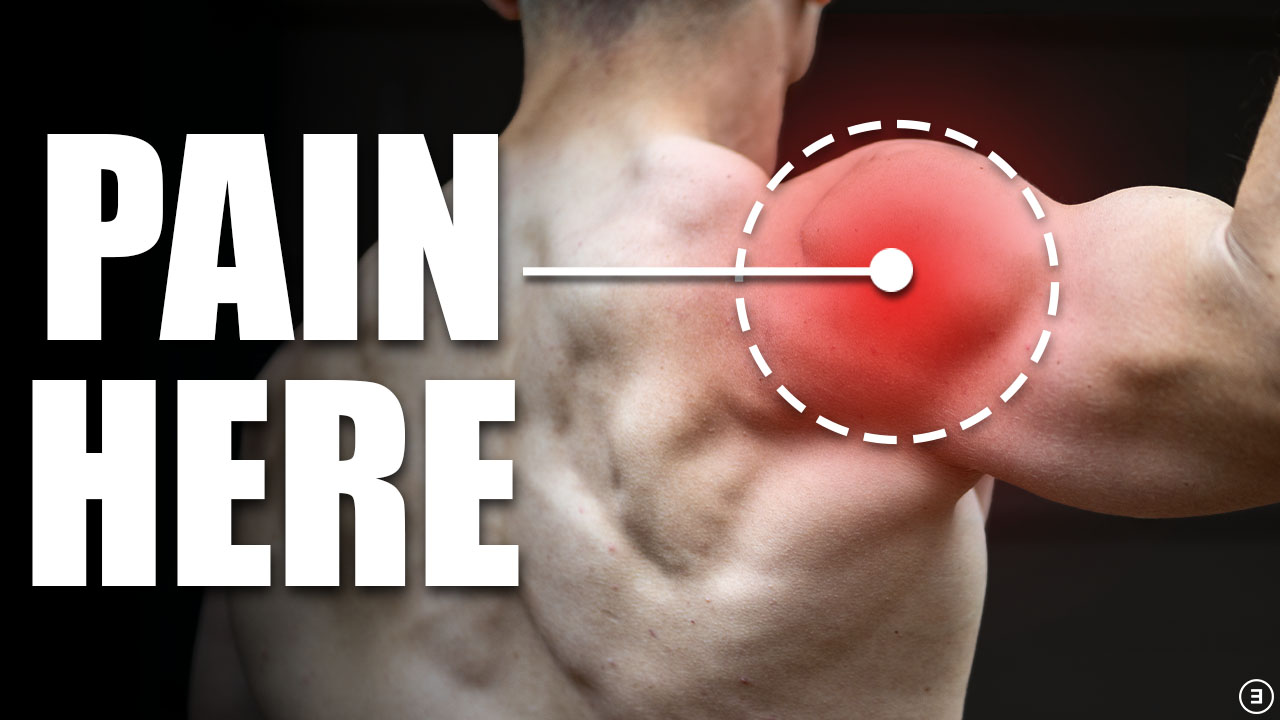
A gastrocnemius injury usually has a sudden onset that presents with localized pain and often occurs during quick movements, such as sprinting, cutting, or jumping. You might say it felt “like you got shot in the back of the leg.”
In contrast, a soleus injury typically has a gradual onset with poorly localized symptoms that you might describe as “tightness” or “cramping”. These often result from activities like long-distance running (Green et al. 2022).
In either scenario, most calf strains happen from doing too much too soon.
Did you decide to start playing pickup basketball 3 days a week after being relatively inactive for the last 5 years? Or did you suddenly increase your running mileage in preparation for an upcoming race?
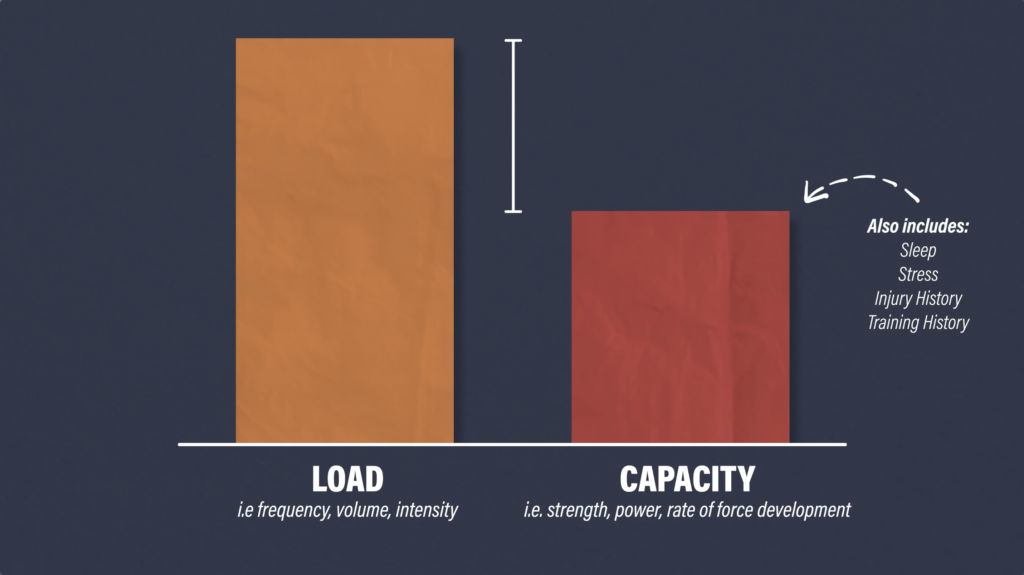
Simply put, there was likely a discrepancy between the load you placed through your calf muscle(s) and your capacity to tolerate and recover from that given load.
Note: Capacity also includes factors like sleep, stress, injury history, and training history.
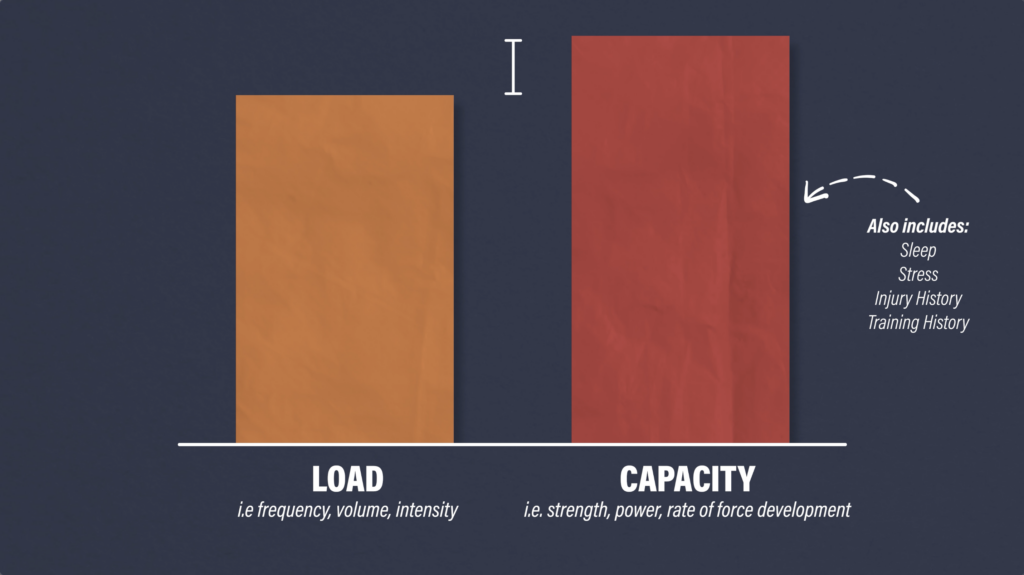
The goal of rehab is to gradually improve your capacity so it is eventually greater than or equal to the loads experienced during running or your preferred sport.
Calf Muscle Strain Injury Exercise Overview
Therefore, exercises will focus on improving various performance attributes necessary for these activities, such as strength, endurance, and power. This includes progressive loading through knee straight & knee bent heel raises and plyometric & power exercises.
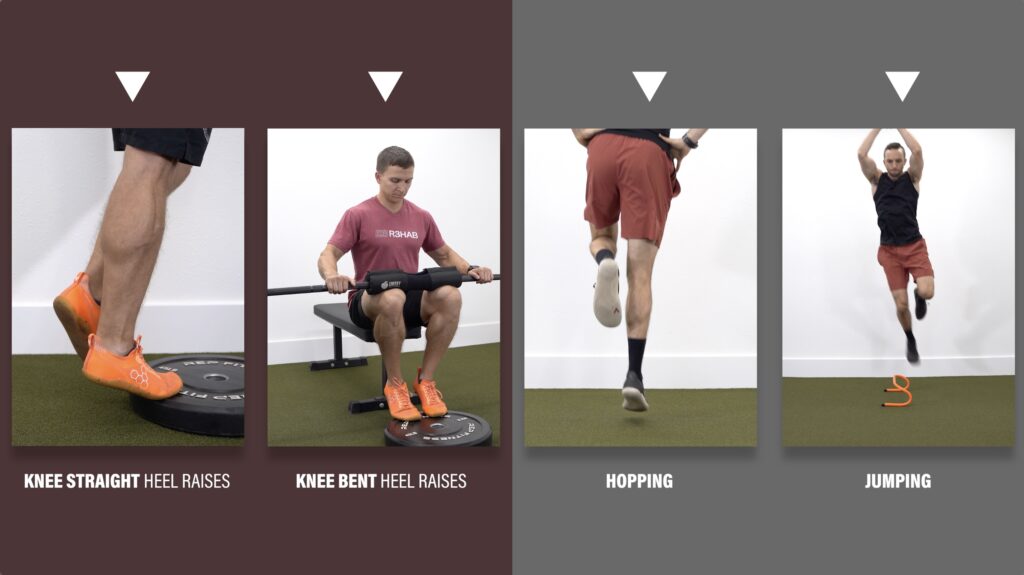
Regardless of which muscle you strained, the exercises you perform will be similar. The primary difference between rehab for a gastrocnemius and soleus injury will be considerations during return to running and sport, which I will discuss after reviewing the exercises.
Calf-Specific Loading Exercises
This category includes multiple options for knee straight and knee bent heel raises.
Knee Straight Heel Raises
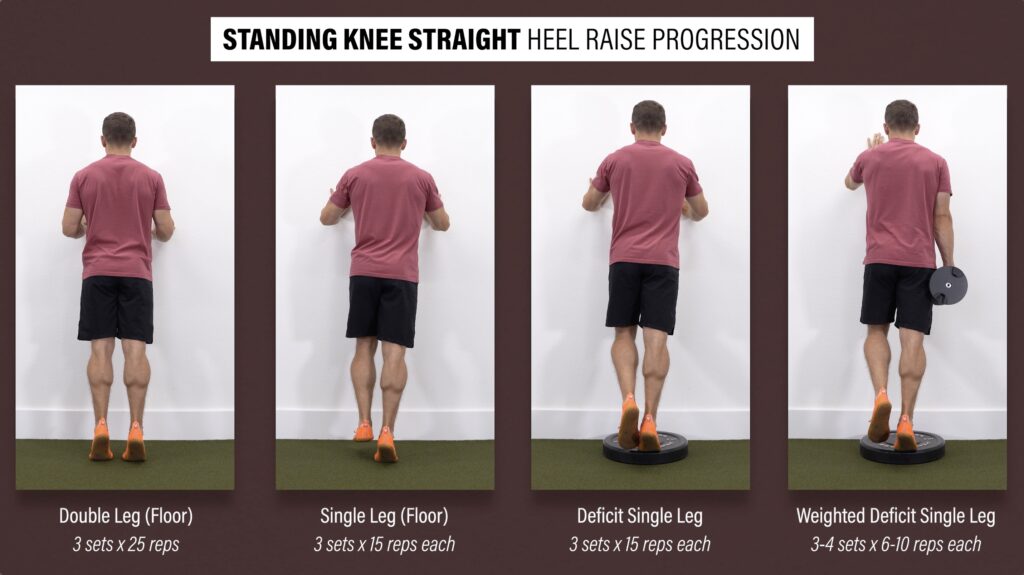
Option #1: Standing Progression
Level 1 – Double Leg Heel Raises. Aim for 3 sets of 25 reps through your full range of motion without pain.
Level 2 – Single Leg Heel Raises (Floor). Your goal is 3 sets of 15 reps on each leg, again through your full range of motion without pain. If you meet this criterion, progress to level 3.
Level 3 – Deficit Single Leg Heel Raises. Aim for 3 sets of 15 reps on each leg.
Level 4 – Weighted Deficit Single Leg Heel Raises. Perform for 3-4 sets of 6-10 challenging reps on each leg.
Other Options
Other knee straight options include variations that have a horizontal and lateral component. This can be particularly beneficial if your sport involves rapid acceleration and cutting.
For horizontal, put your foot on a box or bench in front of you, and for lateral, place it on an object directly to your side. Then, perform a heel raise on the “down” leg, leaning slightly toward your elevated foot. Start with body weight, and once you can complete 3 sets of 15 reps on each side, progress by adding weight. You can perform either of these for 3-4 sets of 6-10 reps on each leg.

Knee Bent Heel Raises
Next are two progressions for knee bent heel raises – a variation that will bias your soleus muscle.
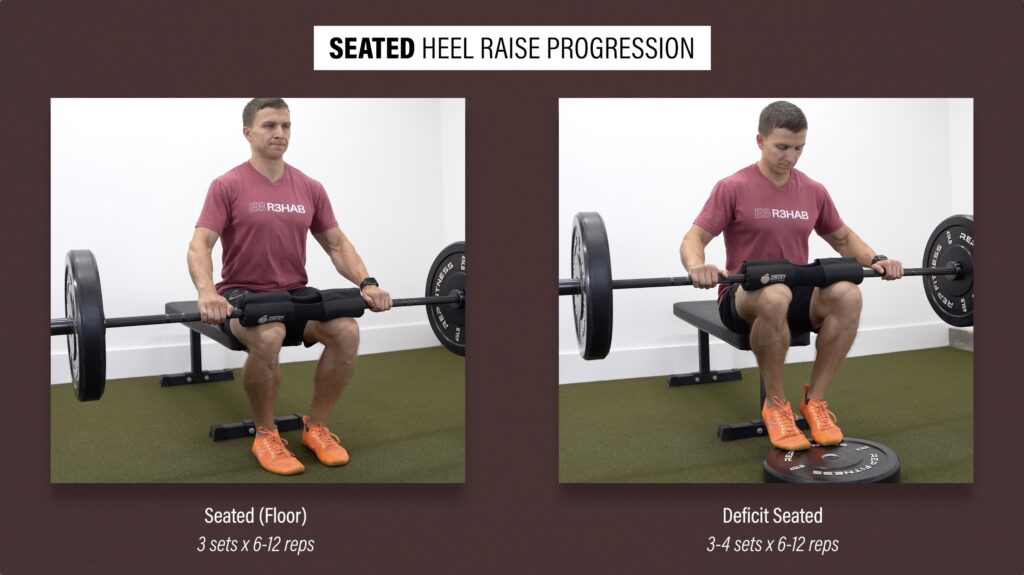
Option #1: Seated Progression
Level 1 – Seated Heel Raise. Add weight using dumbbells or a barbell. Aim for 3 sets of 6-12 reps.
Level 2 – Deficit Seated Heel Raise. Increase the range of motion you move through by placing your feet on a step or plate. Perform 3-4 sets of 6-12 reps, progressing weight as tolerated.
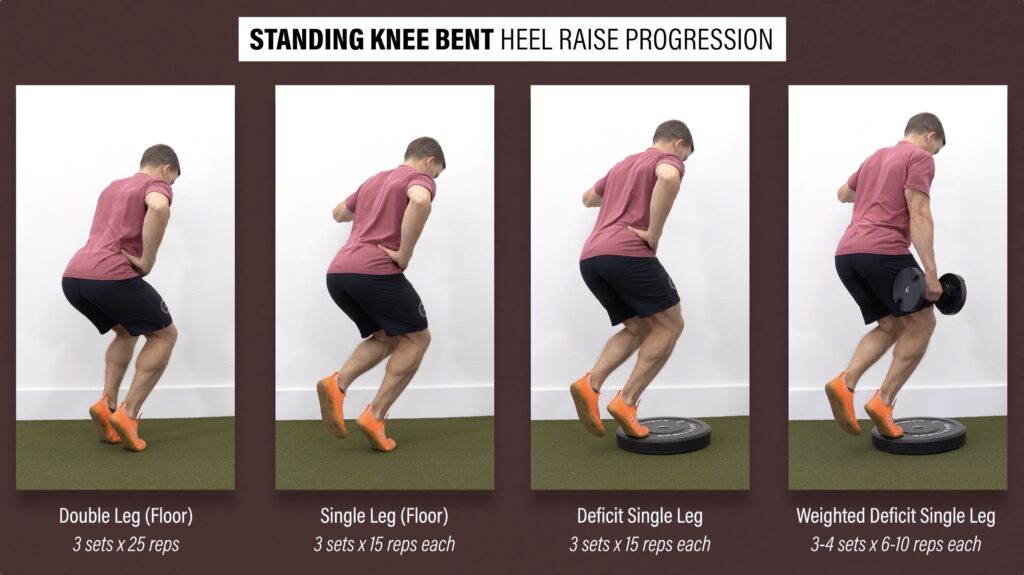
Option #2: Standing Progression
Level 1 – Double Leg (Floor). Stand on two legs, bend your knees, and perform a heel raise while maintaining a bent knee position during each repetition. Once you can complete 3 sets of 25 reps, progress to level 2.
Level 2 – Single Leg Heel Raises (Floor). Aim for 3 sets of 15 reps on each leg.
Level 3 – Deficit Single Leg Heel Raises. Stand on a step or object. Aim for 3 sets of 15 reps on each leg.
Level 4 – Weighted Deficit Single Leg Heel Raises. Perform for 3-4 sets of 6-10 challenging reps on each leg.
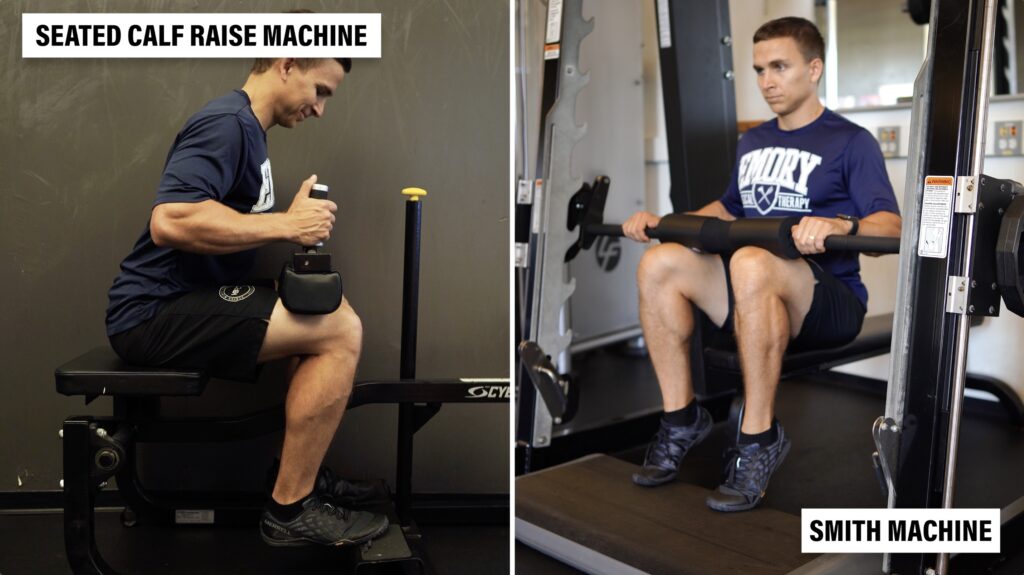
Other Options
If you have access to a seated heel raise machine or a smith machine, these are both great alternatives for performing knee bent heel raises. You may even find that these allow you to maintain better control as you progressively overload the movement.
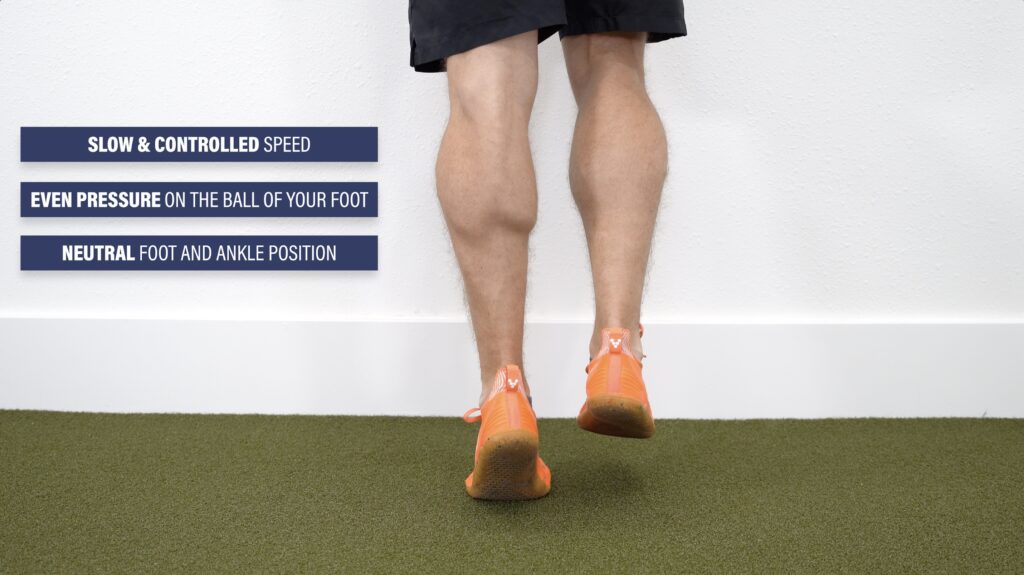
Heel Raise Execution & Common Mistakes
To maximize desired adaptations for both heel raise variations, you want to make sure you are executing these exercises optimally. This means you are performing a controlled tempo from start to finish and are maintaining even pressure on the ball of your foot.
Common mistakes include:
- Rolling off your big toe and your ankle moving outward as you rise up
- Clawing the toes into the ground
- Poor eccentric control, or in other words, lowering down too fast.
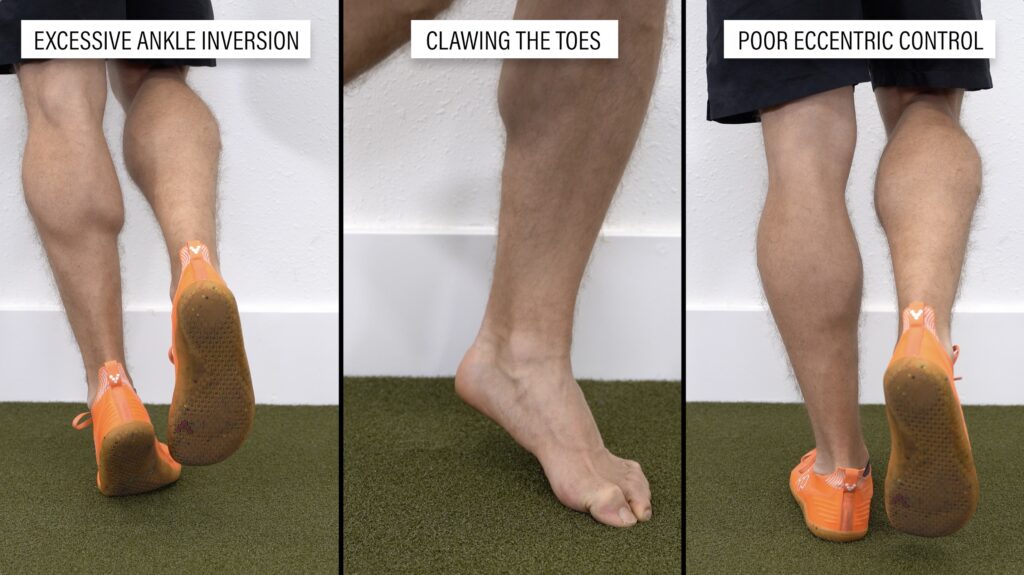
Keep your toes pointing straight ahead, squeeze your calf muscle at the top of the movement, and move slowly throughout each repetition.
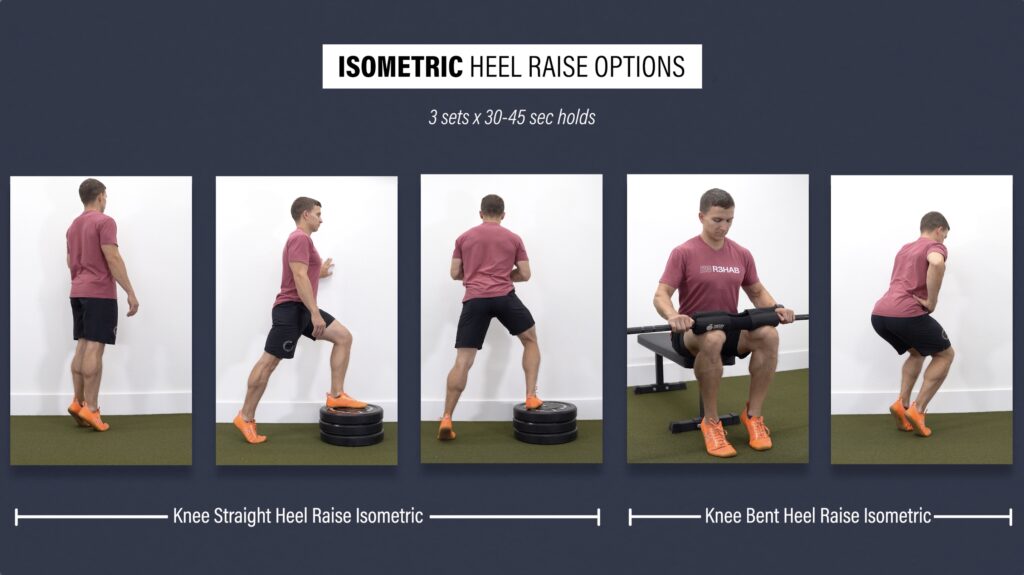
Isometric Heel Raises
If you are unable to perform the previous level 1 heel raises secondary to pain, try starting with an isometric variation. These involve contracting the calf muscles with little to no ankle movement.
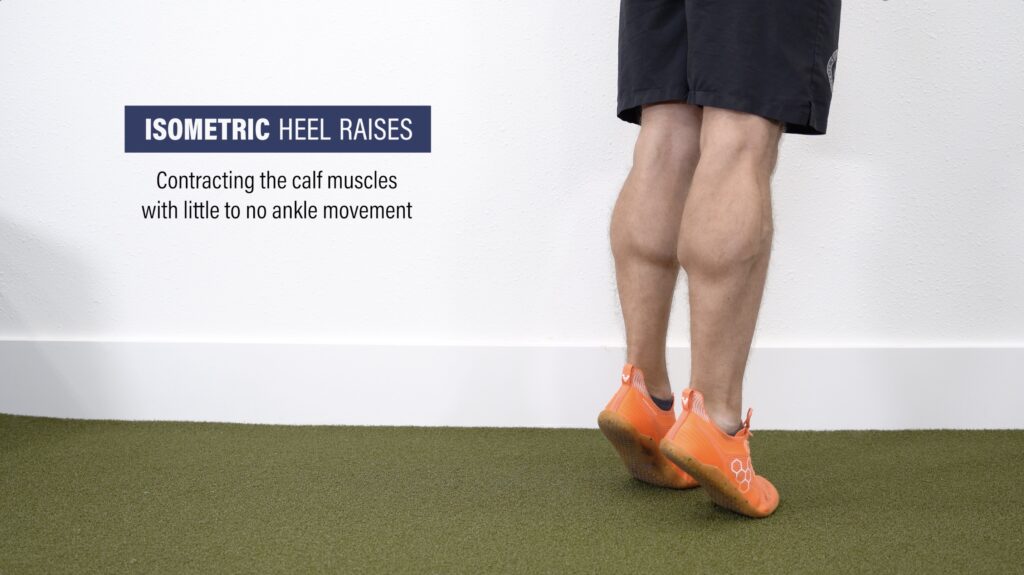
Pick one knee straight and knee bent variation and aim for 3 sets of 30-45 second holds until you can tolerate the level 1 exercises.
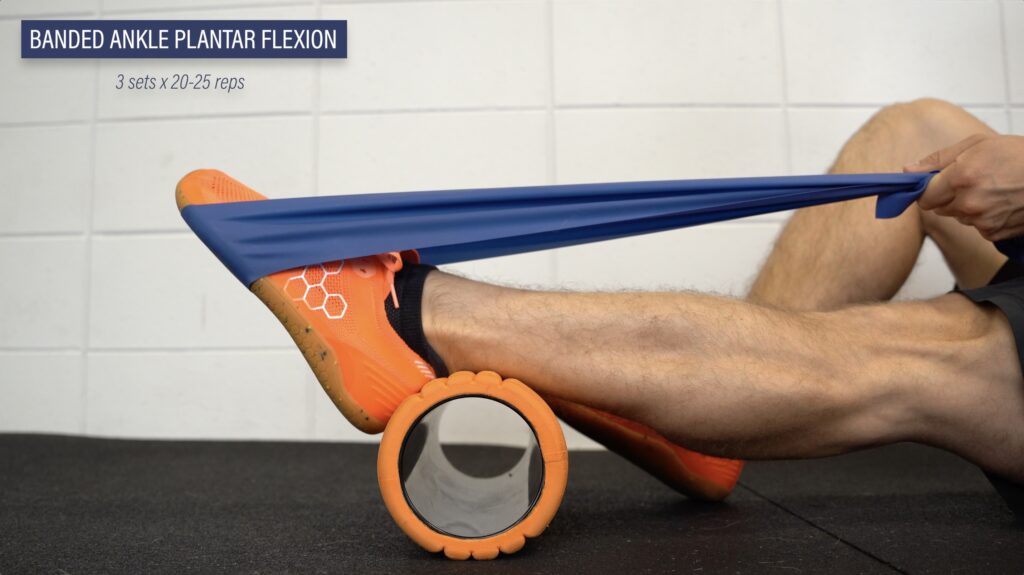
Non-Weight Bearing Calf Strength
With some severe calf strains, you might not tolerate any weight-bearing loading. Therefore, you may need to start with a non-weight bearing exercise like resisted ankle plantar flexion. Perform for 3 sets of 20-25 reps until you can tolerate isometrics or the level 1 heel raises.
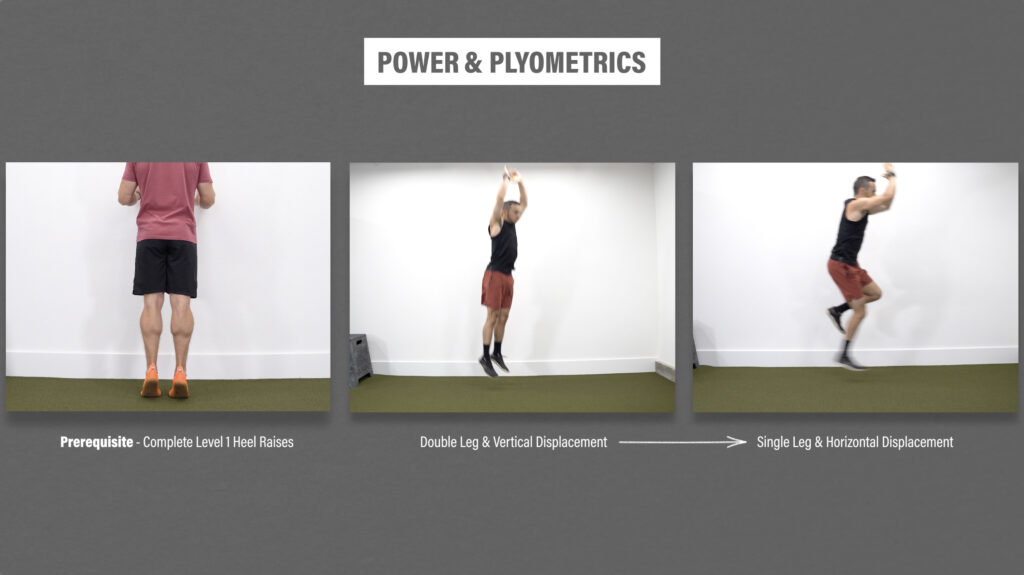
Power & Plyometric Exercises
The second and final category is power and plyometrics exercises which will follow a general progression from vertical to horizontal displacement and from double to a single leg. Before starting these exercises, you should first be able to complete the level 1 heel raise variations. I will review 2 progressions.
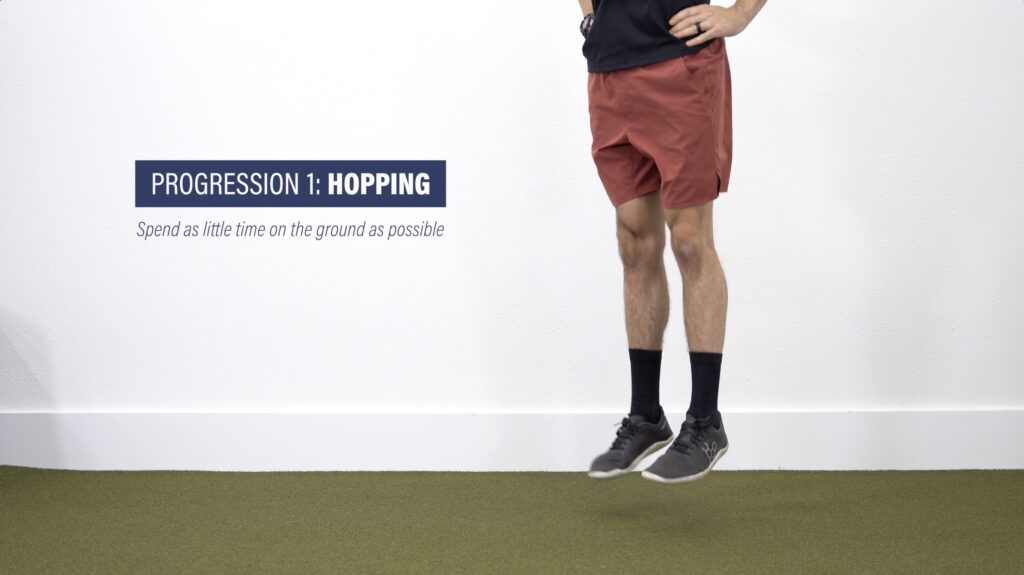
Option #1: Hopping Progression
Place your hands on your hips and perform quick jumps while keeping your knees relatively straight. Focus on spending as little time on the ground as possible.
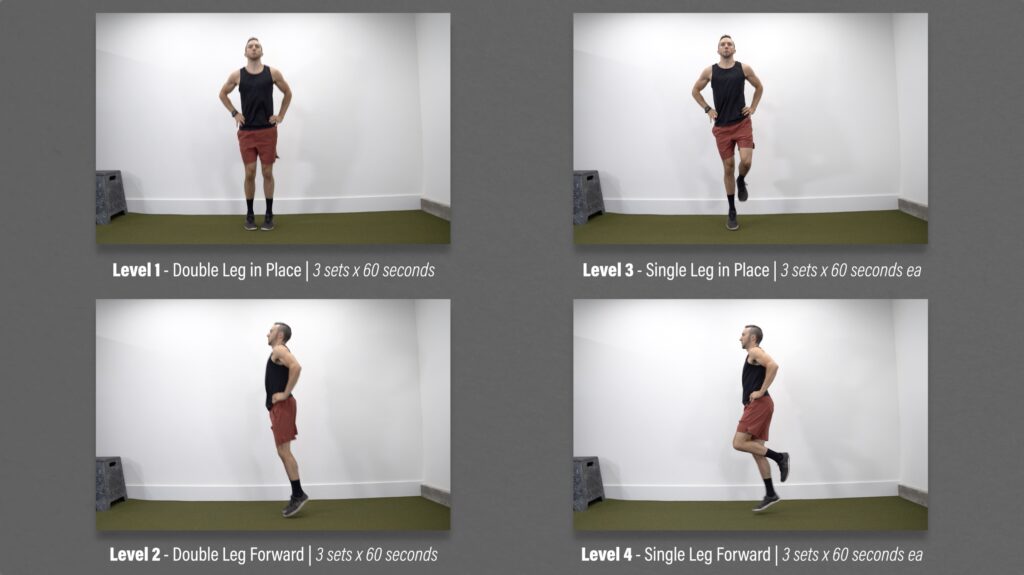
Level 1 – Double Leg Hopping in Place.
Level 2 – Double Leg Forward Hopping.
Level 3 – Single Leg Hopping in Place.
Level 4 – Single Leg Forward Hopping.
For all levels, aim for 3 sets of 60 seconds without pain. If achieving 60 seconds is too challenging, start with a lower time. However, you should be able to complete 60 seconds before progressing levels.
Option #2: Jumping Progression
Focus on achieving triple extension in each repetition, meaning your ankles, knees, and hips are fully extended in mid-air.
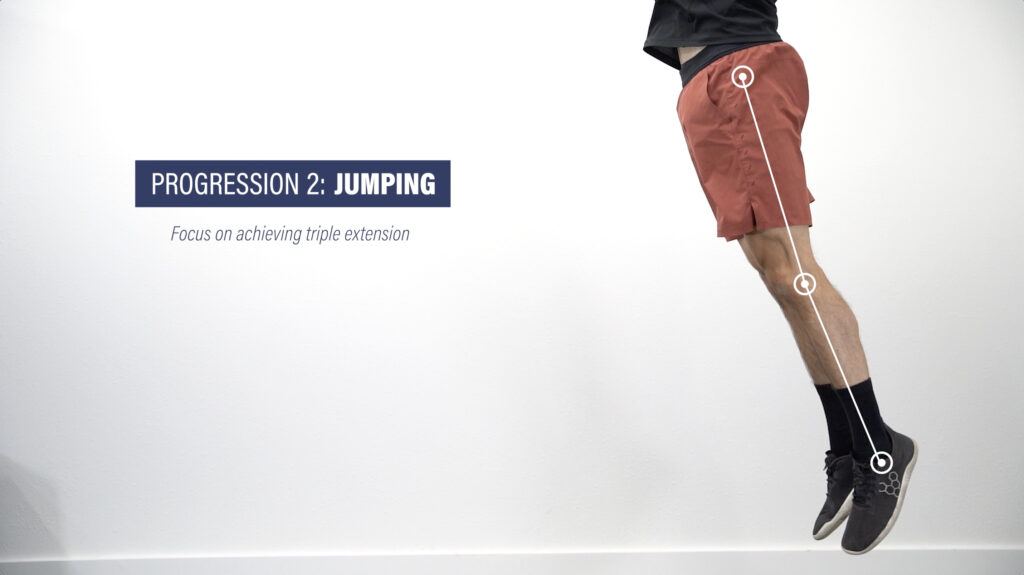
Level 1 – Vertical Jump.
Level 2 – Horizontal Jump.
Level 3 – Single Leg Vertical Jump.
Level 4 – Single Leg Horizontal Jump.
For each level, you want to build up to a maximal effort. Aim for 3 sets of 8 reps for levels 1 and 2 and 3 sets of 6 reps on each leg for levels 3 and 4. Again, you should have no pain during these exercises.

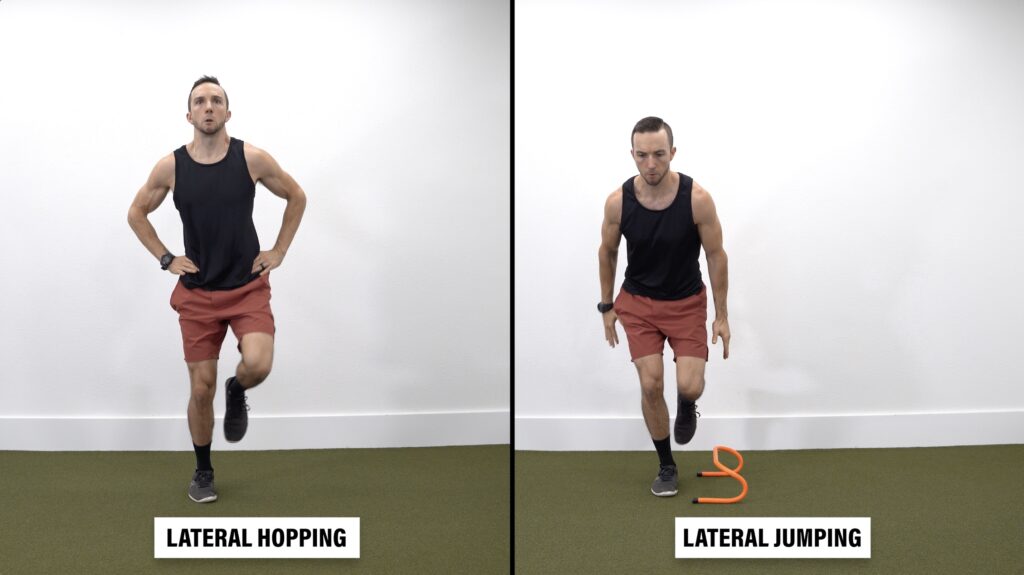
Depending on your sport, you might eventually consider other exercises that have a lateral component, such as lateral hopping and jumping.
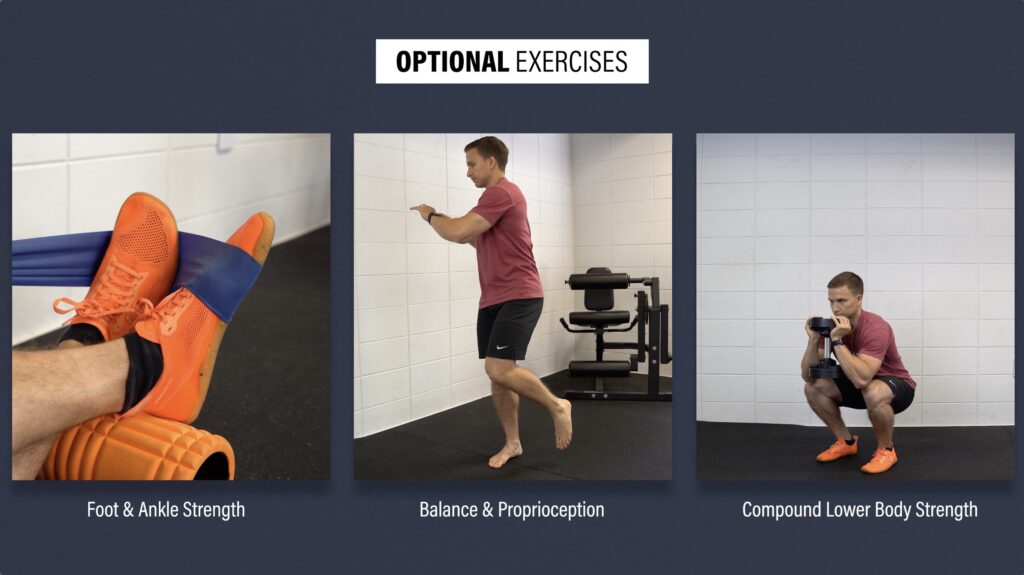
Optional Exercises for a Calf Muscle Strain Injury
In addition to the previous exercises, you should consider implementing these other exercise categories if time allows: foot & ankle strength, balance & proprioception, and compound lower body strength. These will address other possible deficits seen in calf strain injuries and help prepare you for the demands of running.
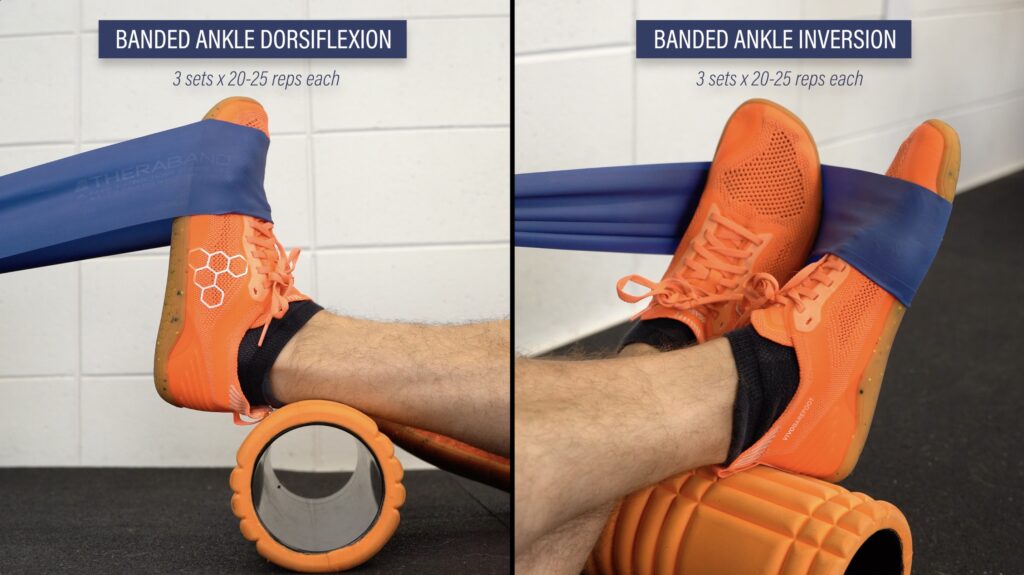
Foot and Ankle Strength
To strengthen other foot and ankle muscles you can perform band resisted ankle dorsiflexion and inversion for 3 sets of 20-25 reps on each leg.
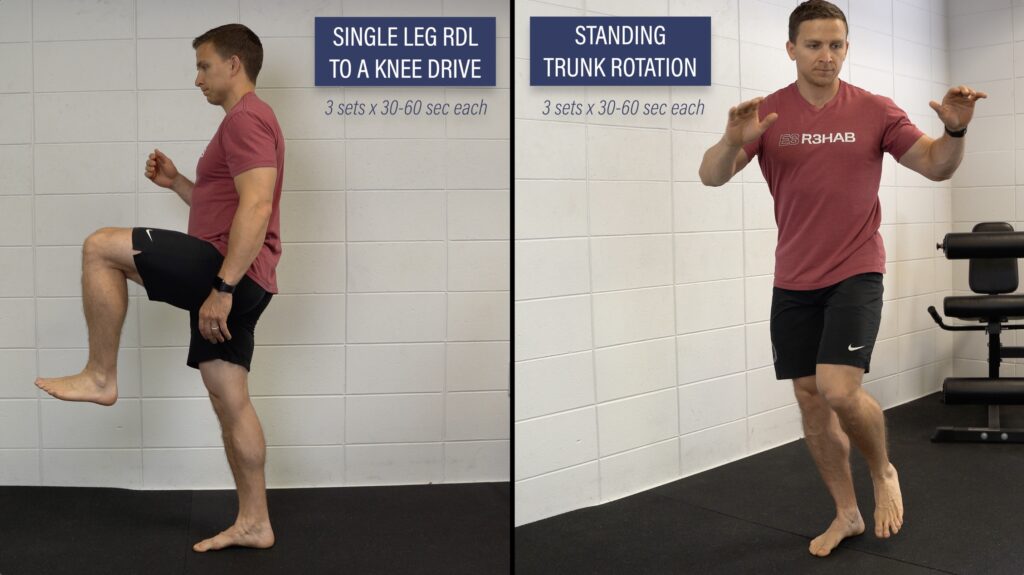
Balance & Proprioception
For balance, try a single leg RDL to a knee drive or standing trunk rotations for 3 sets of 30-60 seconds on each leg.
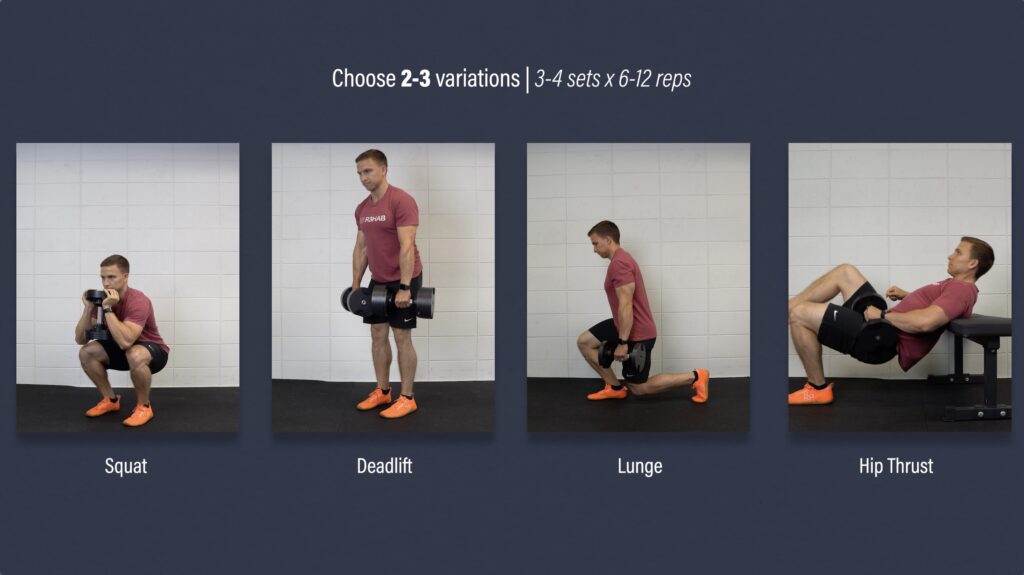
Compound Lower Body Strength
Finally, for compound lower body strength, there are endless options you might consider – squats, deadlifts, lunges, hip thrusts, etc. Choose 2-3 variations to perform each week and aim for 3-4 sets of 6-12 reps.
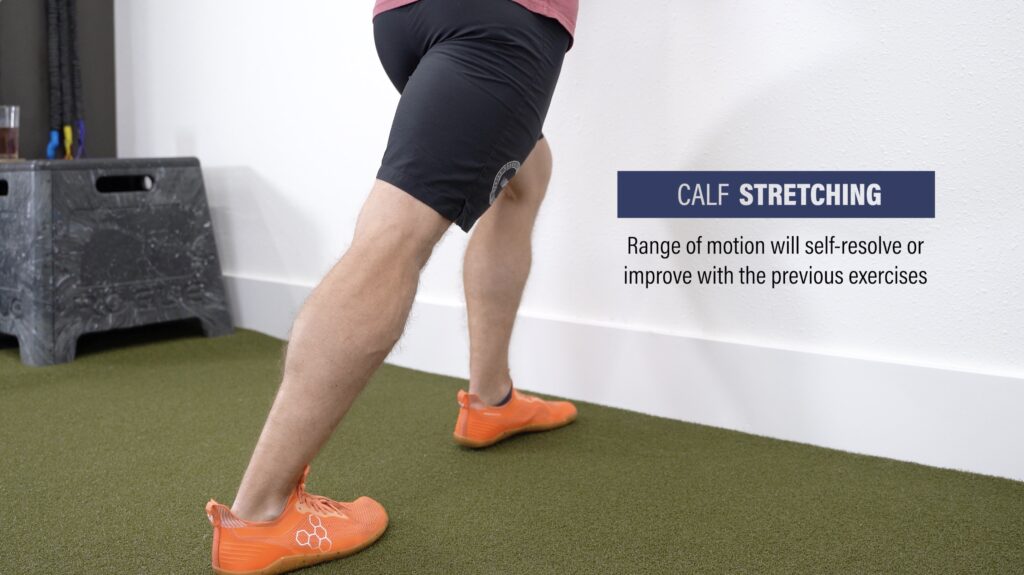
Calf Stretching
In terms of stretching, it is unlikely you will need to implement specific exercises. Typically, dorsiflexion range of motion deficits that present following a calf strain will either self-resolve with time or with the previous exercises. If you still want to include stretching exercises, that’s completely fine, but I have 2 recommendations:
- These should not be painful. You are looking for a stretch sensation, not discomfort.
- Calf-specific exercises are your priority. You can still stretch, but it should not take time away from the other exercises.
You can perform the exercises on whatever days best fit your schedule, but just make sure you rest at least one day in between workouts to allow for adequate recovery.
Do You Need Imaging?
Research looking at other lower body muscle injuries suggests MRIs do not provide additional value over a thorough clinical examination (Jacobsen et al. 2016, Wangensteen et al. 2015).
Furthermore, complete healing of a muscle strain on imaging is “not necessary for a clinically successful return to play.”
While imaging might be used in some situations, for most people, rehab is going to be primarily dictated by symptoms and function, not imaging results.
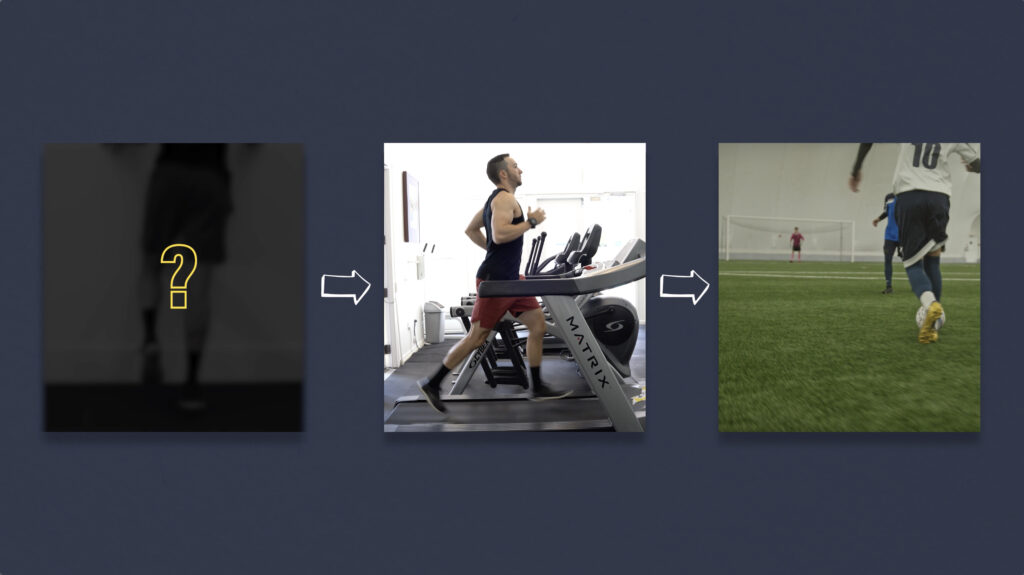
When Can You Return To Running Or Sport?
Before you can return to your sport, you need to run. And before you can run, you need to pass certain tests.
Green et al. 2022 suggest meeting these 3 criteria before running:
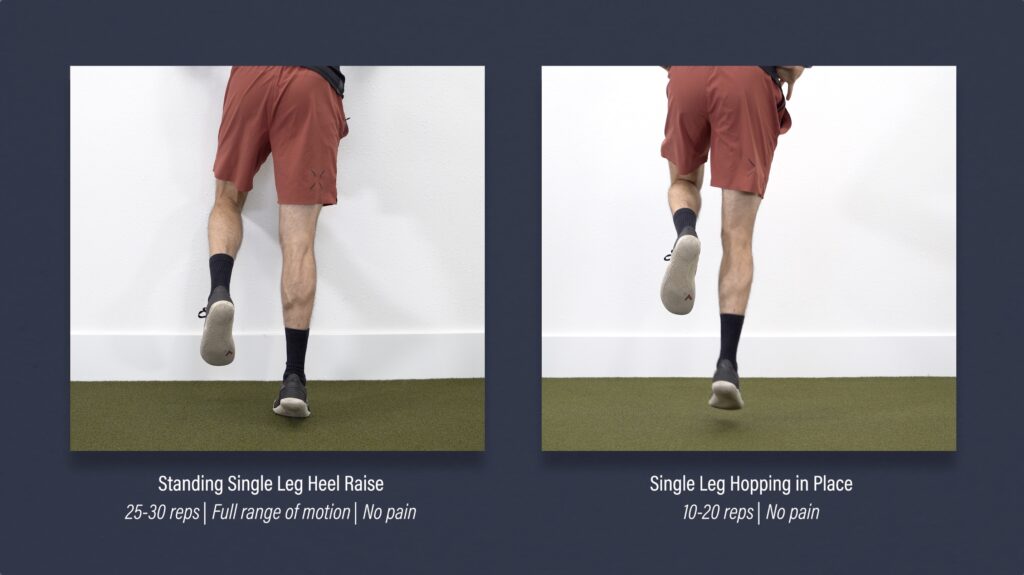
- Adequate calf strength as demonstrated by a single leg heel raise
- Tolerance to repeated hopping on a single leg
- The absence of clinical signs and symptoms.
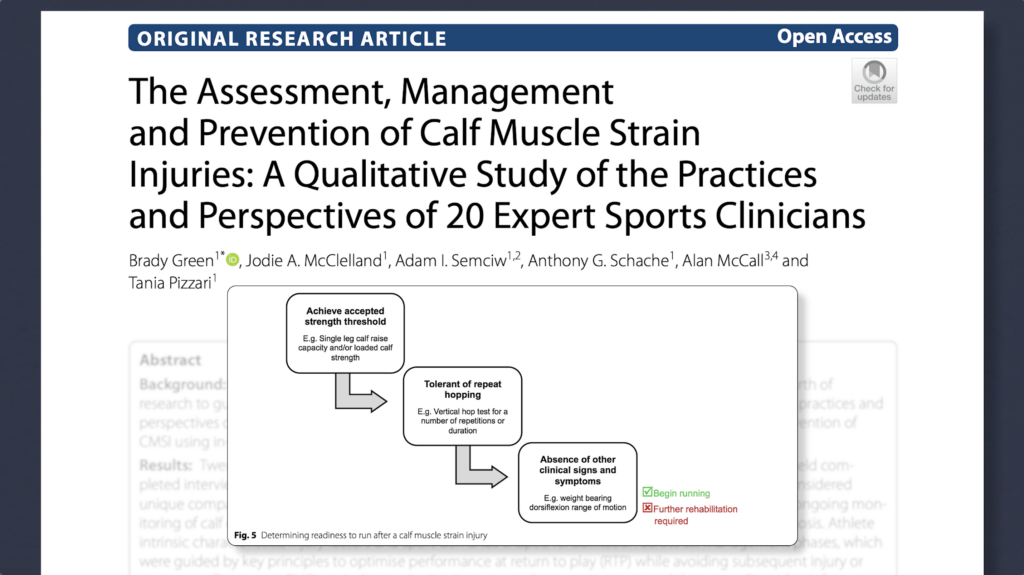
There is not one accepted benchmark for calf strength and repeated hopping, but generally, you should be able to perform about 25-30 single leg heel raises through your full range of motion and demonstrate 10-20 single leg hops in place without pain.
Once you can achieve these milestones, you can initiate running. As of now, there is not a set protocol for returning to running following a calf strain, but here are six “rules of thumb” from Green et al. 2022:
- Run on alternate days to start.
- Avoid prolonged, slow continuous running early, especially for soleus injuries.
- Do not progress volume and intensity on consecutive days.
- Schedule off-field exercises (i.e. loaded calf strengthening) after running.
- Running progressions should meet the demands of your sport. For example, don’t run excessive mileage if you don’t need it.
- Avoid sudden changes in conditions, such as the surface and footwear.
These authors also outlined a return to play checklist. A lot of the criteria will be similar for all calf strains, however, some are specific to the muscle injured.
For example, since gastrocnemius injuries usually occur from high-intensity activities, drills focusing on accelerations, cutting, jumping, maximal velocity, etc, should be a focal point before returning to sport. In contrast, soleus injuries will focus on total running volume, since these usually occur from cumulative overload during long-distance running.

Calf Strain Muscle Injury Programming
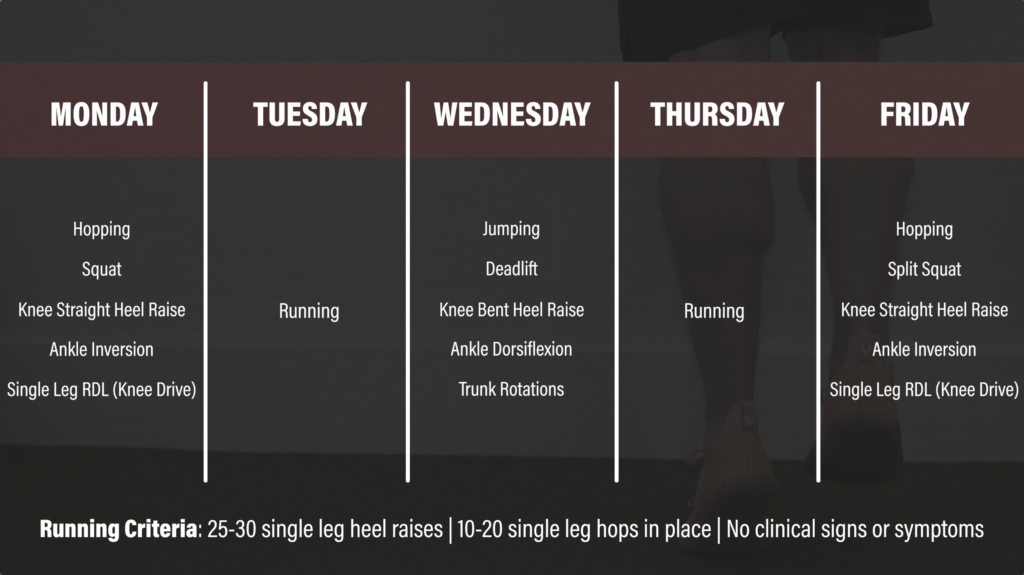
For programming, at the very minimum, you should perform the heel raises 2-3 times a week, progressing through the levels based on performance and pain tolerance. For example, you might perform a knee straight variation on Monday and Friday, and a knee bent variation on Wednesday.
Once tolerated, include hopping and jumping exercises and perform these before the heel raises. You can do the hopping progression Monday and Friday and the jumping progression on Wednesday.
Other optional exercises can be included if time allows. For example, after the hopping and jumping, you can perform squats, deadlifts, and split squats as your main compound lift. Then you can perform the other ankle and foot strengthening exercises, and single leg balance to end your workout.
When you meet the criteria to begin running, ideally, you will run on the days you do not perform the strength exercises. If you have to perform them on the same day, complete the running first. Also, it is important to continue performing the previous strength exercises even after you return to running to help reduce the risk of re-injury.
Calf Strain Muscle Injury Summary
In summary, a calf muscle strain can occur to one or both of your primary calf muscles: the gastrocnemius or soleus. There are distinct differences in their mechanism of injury and clinical presentation, however, rehab principles for either injury will be similar.
The goal is to improve various performance attributes by targeting the calves through a comprehensive program 2-3 days a week. This includes isolated loading through knee straight and knee bent heel raises and plyometric and power exercises, both of which will help prepare you for the demands of running and your sport.
Before running, it is strongly recommended you can perform 25-30 single leg heel raises through your full range of motion and demonstrate 10-20 single leg hops in place without pain.
If you strained your gastrocnemius, you should place additional emphasis on sprinting, acceleration, and cutting drills before returning to your sport. If you are recovering from a soleus injury, avoid prolonged, slow continuous running early and gradually build your total running volume over time.