The purpose of this blog is to discuss the IT band, including its anatomy and function, review and dispel previously held beliefs, outline what’s currently known, and provide exercises and management strategies to help with IT band-related symptoms.
Looking to improve your strength, range of motion, and power to enhance your function and performance? Check out our Knee Resilience program!
Anatomy & Function
The iliotibial band, commonly referred to as the IT band, is named for its attachments to the ilium, or pelvis, and tibia, or shin bone. It is the lateral thickening of the fascia lata, which is the deep fascia that envelops the thigh like a sausage casing.
In addition to its origin at the pelvis, the IT band receives fibers from two muscles of the hip: all of the tensor fascia latae and most of the gluteus maximus.
As it travels down toward the knee, the IT band firmly inserts onto the femur, patella, and tibia.
The expansive nature of the IT band allows it to contribute to stability of the hip and knee, as well as store and release energy to make bipedal walking and running more economically efficient.
Iliotibial Band Friction Syndrome (Previous Beliefs)
Iliotibial Band Friction Syndrome (ITBFS) was first described by James Renne in 1975 based on his clinical observations of military personnel experiencing lateral knee pain during walking or running that developed after long distance running (2+ miles) or hiking (10+ miles).
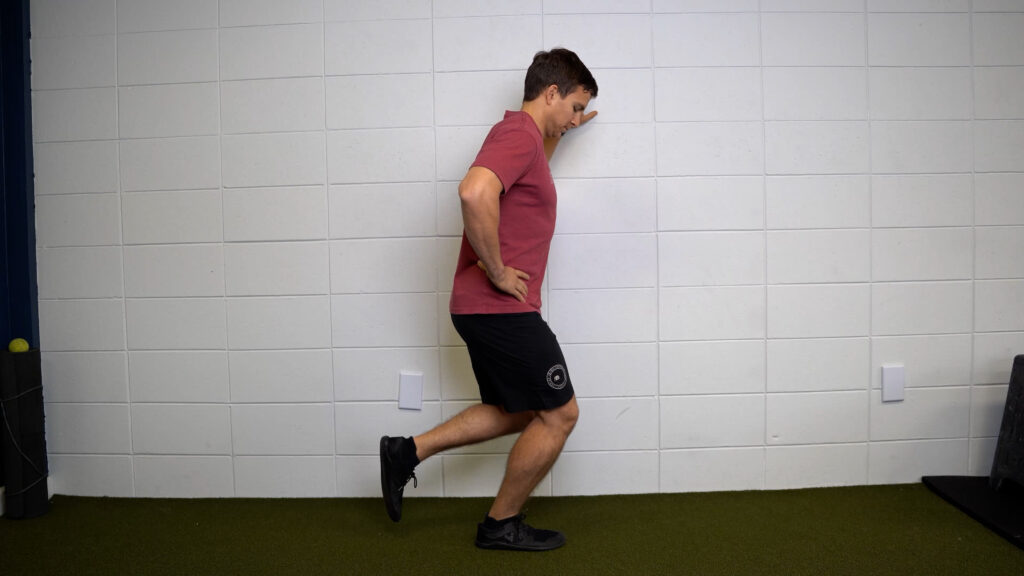
He noted that all patients had focal tenderness over the lateral epicondyle of the femur, which is a bony prominence on the outer portion of the knee. Renne also discovered that he could reproduce his patients’ symptoms by having them stand on their affected leg and bend 30-40 degrees.
Based on his findings and previous anatomical descriptions of the IT band up to this point, Renne concluded that the IT band was repetitively rubbing back and forth over the lateral epicondyle of the femur, resulting in irritation and inflammation. Hence the name – Iliotibial Band Friction Syndrome (ITBFS).
In 1978, Dr. Orava supported these findings with 88 patients of his own. He described ITBFS as “an exertional non-traumatic disorder connected with increased physical activity.”
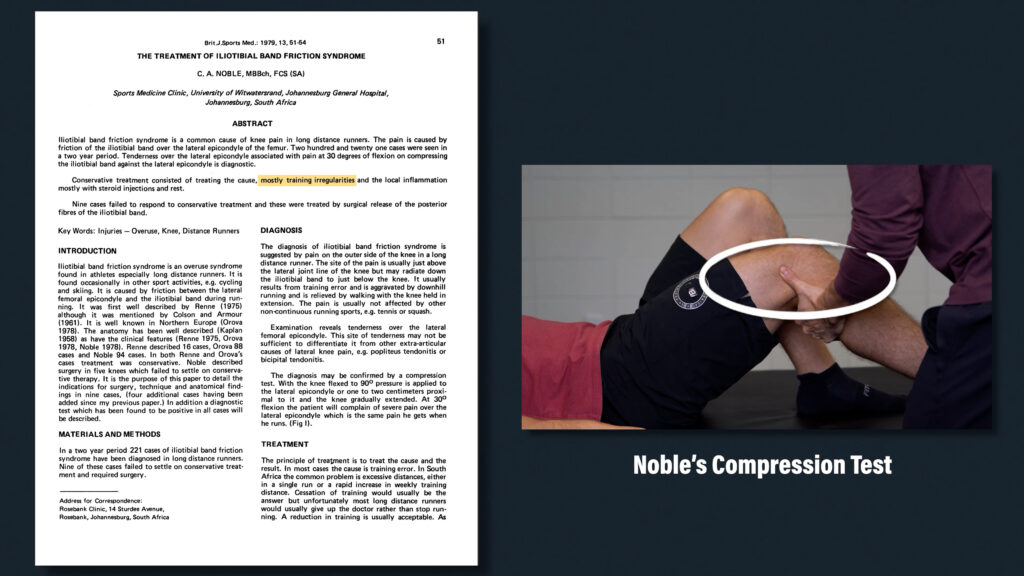
In 1979, Dr. Noble expanded on this idea by explaining that it is usually the result of training error, and developed a diagnostic assessment in which the clinician applies direct pressure to the lateral epicondyle and brings the knee from a flexed position to an extended position. A positive test would recreate the patient’s symptoms, usually at about 30 degrees of knee flexion (Noble’s Compression Test).
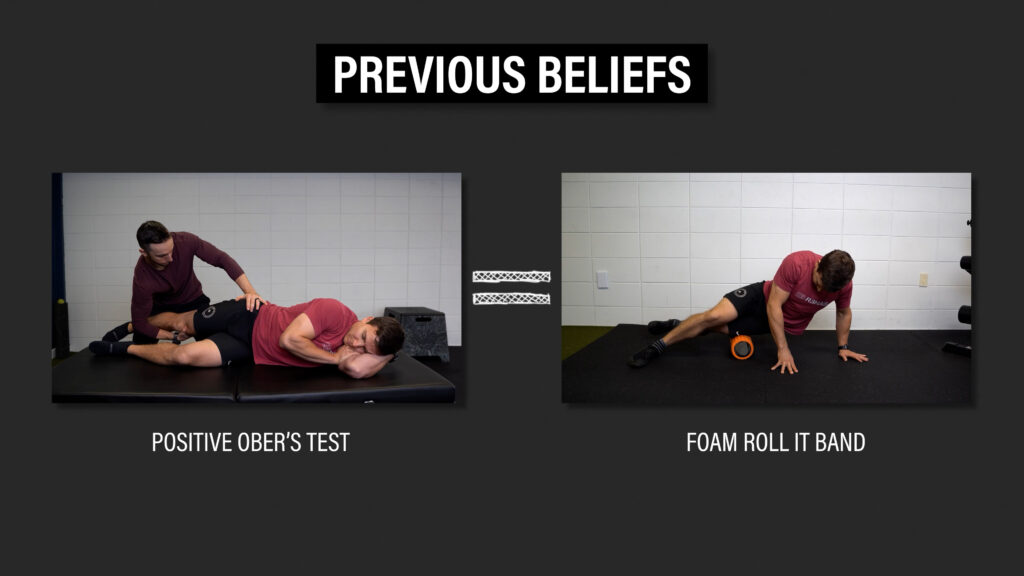
Over the years, a “tight” IT band was thought to be one of the primary drivers of this condition, which was assessed with what is known as Ober’s Test. If your Ober’s Test was positive, then it was believed you had a tight IT band that needed to be stretched to elongate it or foam rolled to break up scar tissue and release adhesions.
Dispelling Myths
Our understanding of the IT band has improved since then.
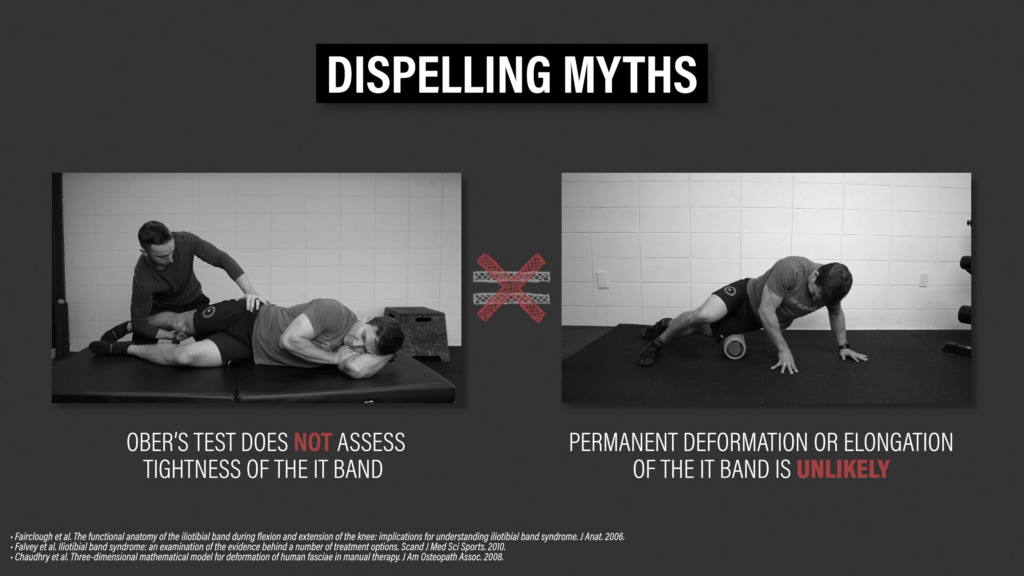
For example, papers by Fairclough et al in 2006 and 2007 reported the perception of movement of the IT band in a forward and backward direction over the lateral epicondyle of the femur is actually an illusion created by changing tension in its various fibers during bending and straightening of the knee. Based on their anatomical investigations, the IT band is securely attached to the femur, so friction is not possible.
In 2016, Willet et al found that Ober’s Test doesn’t assess tightness of the IT band.
Even if it did (which it doesn’t) papers by Fairclough, Falvey, and Chaudhry suggest that permanent deformation or elongation of the IT band is unlikely. Therefore, treatments shouldn’t be aimed at trying to change its structure.
Iliotibial Band Pain (Current Hypothesis)
If friction isn’t the culprit, what is? The current predominant hypothesis, based on the work of Orchard et al in 1996 and Fairclough et al in 2006, is that underlying adipose tissue (fat), which can be highly sensitive, is being compressed between 20-30 degrees of knee flexion during repetitive activities such as running.
Envelope of Function
But you also want to know why you have pain. Most people do. And most of the time, despite what you read or hear, there’s not always a simple, clear-cut answer.
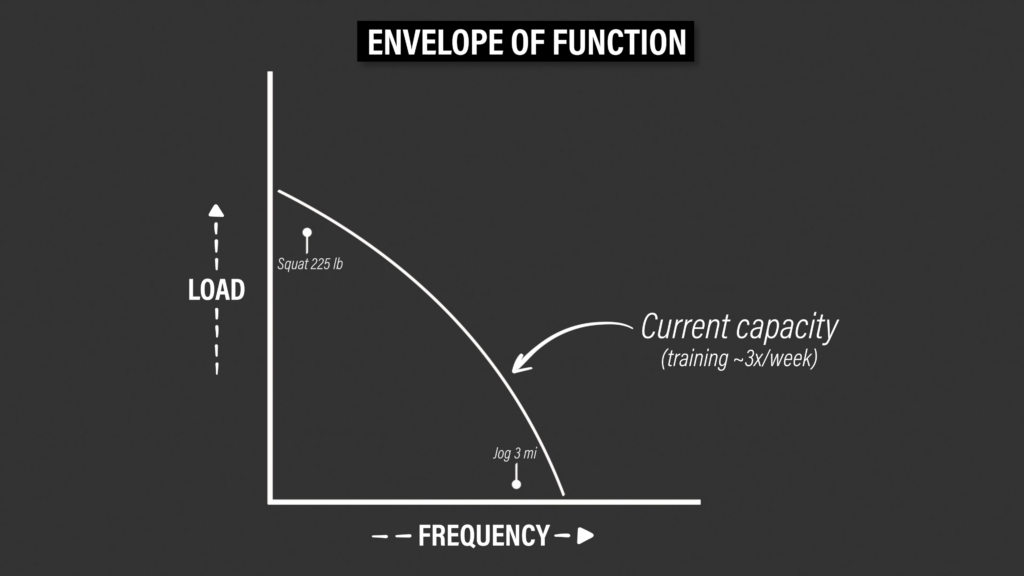
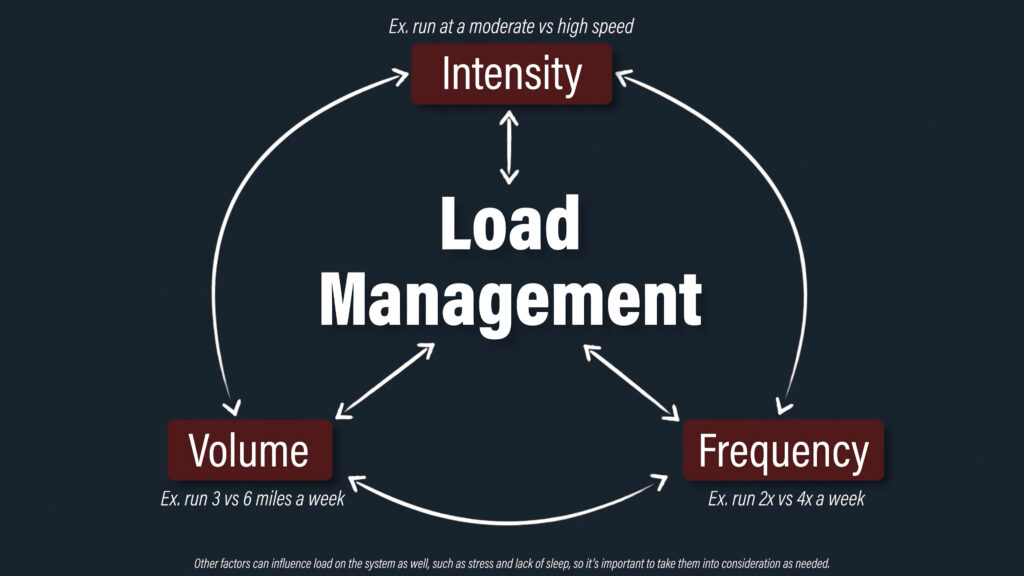
But there is a simple framework that we can apply based on a seminal paper by Scott Dye in 1996. He introduced the “envelope of function,” which he described as a “method of representing the functional capacity of the knee and of other joints to accept, transfer, and dissipate loads.”
Let’s use an example to illustrate what this means.
Load is on the Y axis. Frequency is on the X axis. Assuming you train a few times per week, you have a certain capacity to withstand various stressors on your knees without having an injury. Maybe you can jog 3 miles and squat 225lbs.
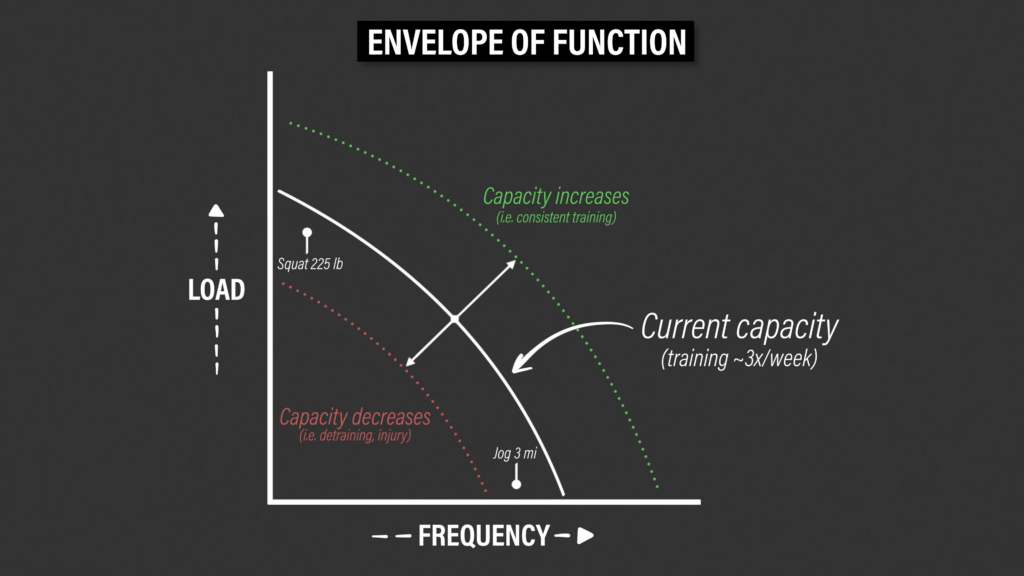
If you take a few months off, your capacity is going to decrease and your ability to withstand stressors is going to decrease.

If you train regularly over time, your capacity should increase and with it, your ability to handle more stressors.
However, if you have a spike in load or frequency that far exceeds your current capacity, such as attempting to squat 400 pounds or jog 10 miles, you might get injured.
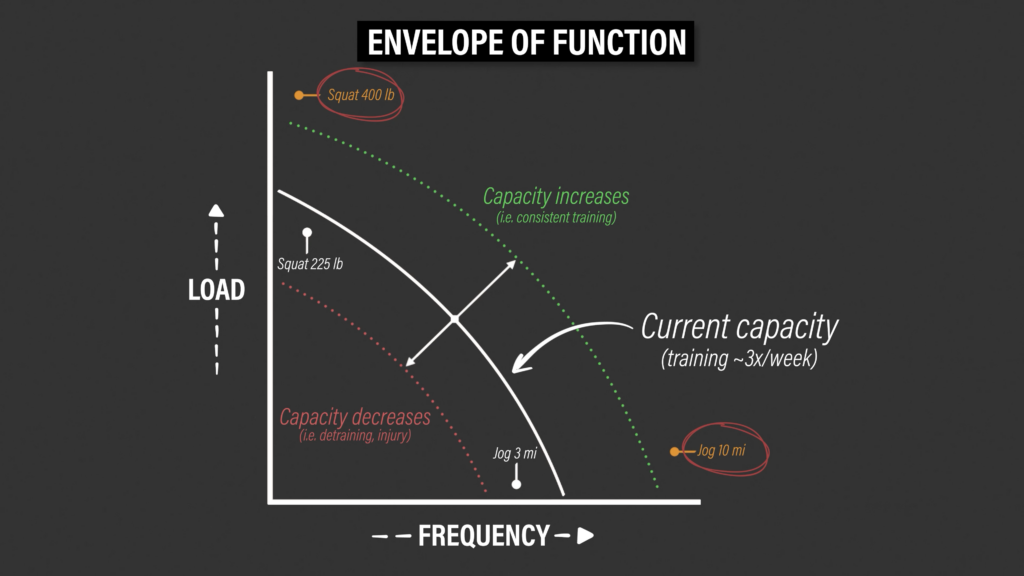
And while it may not be to that extreme, this is often the case with IT band-related pain. You do a little too much, a little too soon, and push beyond your current capacity.
Load Management & Activity Modifications
The good news is that the poison is also the antidote.
Whether you’re a runner, cyclist, or avid hiker, the first thing you want to do is reduce the intensity, frequency, and/or volume of the aggravating activity to a tolerable level. You might have to sacrifice some short-term training goals to achieve long-term success. Scale back, but don’t rest completely.
In the meantime, you can incorporate other forms of cross-training to help maintain your fitness, as well as the resistance exercises mentioned later.
If you’re a runner, it is often suggested to minimize downhill running, trail running, and running on uneven surfaces until you’re able to run in a straight line on flat ground comfortably. Keep that in mind, but you can always test out what works for you.
Running Retraining
Although load management and activity modifications are the priority, running retraining may play a small role for certain individuals.
Prospective research by Noehren et al in 2007 found that female runners who developed IT band-related pain exhibited significantly greater hip adduction and knee internal rotation during the stance phase of gait.
A follow-up study by Hamill et al in 2008 reported that the strain and strain rate of the IT band in the involved limbs were greater than those of the uninvolved limbs and controls, with strain rate being statistically significant.
Another study by Meardon et al in 2012 found that running with a narrow step width increases IT band strain and strain rate.
Finally, a study by Boyer et al in 2015 reported that shortening your stride length leads to a wider step width and less hip adduction, as well decreases in both IT band strain and strain rate.
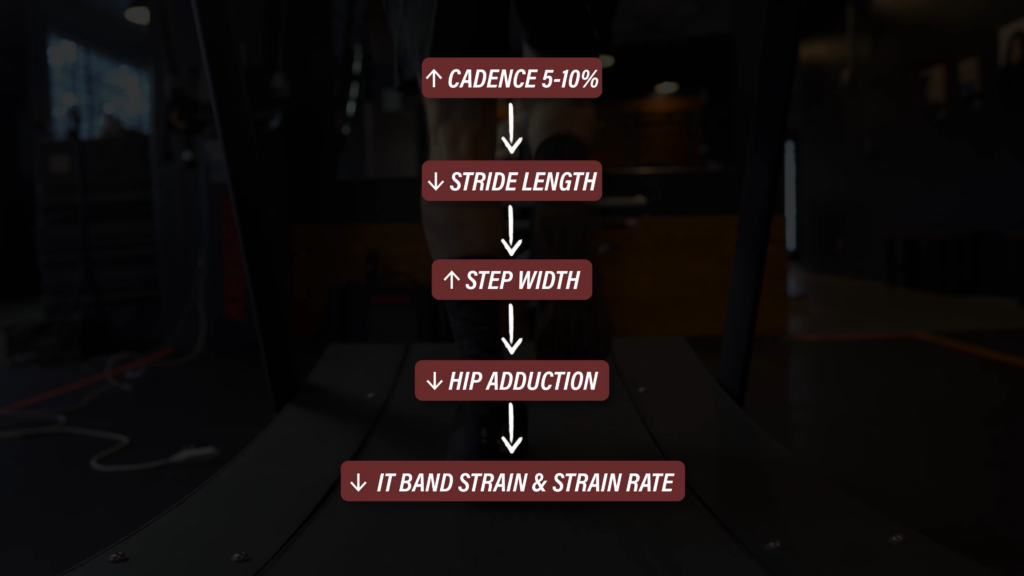
Therefore, a simple strategy to potentially decrease the load on your knee while running is to increase your cadence by 5-10%, which will shorten your stride length, increase your step width, decrease your hip adduction, and decrease IT band strain and strain rate. This can be done by using the features on your Garmin watch or app on your phone.
Resistance Exercises
With regards to resistance exercises, there’s research by Messier et al in 1995, Fredericson et al in 2000, and Friede et al in 2020 that found weakness of the hip and knee in individuals with IT band-related pain. However, there’s other conflicting research, so it’s possible that the weakness is secondary to pain rather than the cause of the symptoms.
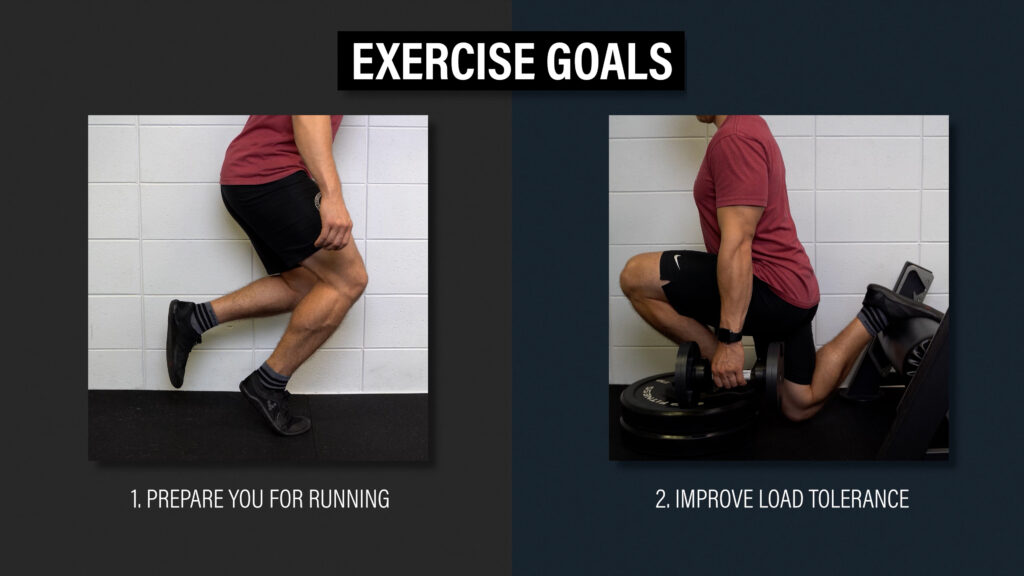
For that reason, the exercises will serve two primary purposes:
- Train the joints, muscles, and movements most associated with running to prepare you for its demands.
- Improve the load tolerance of your knee in positions that are usually most aggravating for individuals with IT band-related pain.
I’m going to provide 2 exercise progressions per category so you have the option for variability based on comfort, convenience, preference, etc.
Exercise Progression #1: Quadriceps-Focused
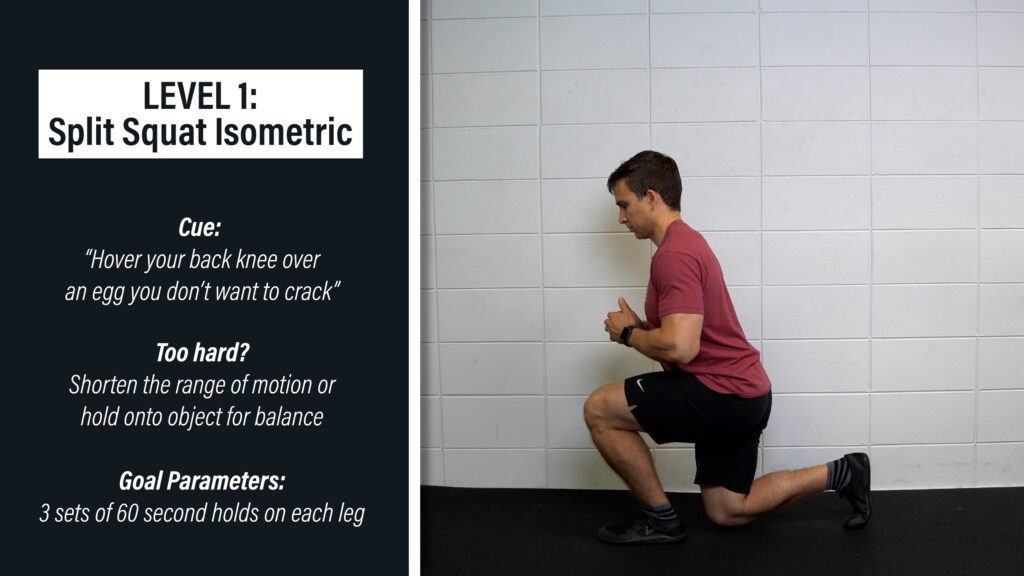
The first quadriceps-focused movement is a split squat progression.
Level 1 – Split Squat Isometric. Start in a stride stance and lower yourself straight down so that your back knee is hovering over an egg that you don’t want to crack. Shorten the range of motion or use your hands if it’s too difficult. Aim for 3 sets of 60 seconds before progressing.
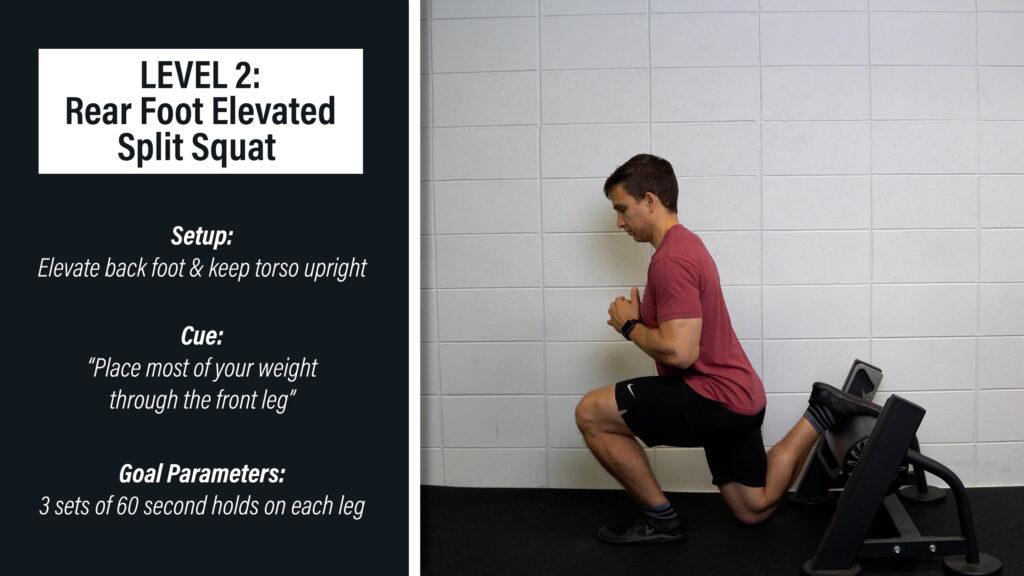
Level 2 – Rear Foot Elevated Split Squat Isometric. The overall technique of the movement and position of your torso should be similar, so use an object to elevate your back foot that isn’t too high. The majority of your weight should be through the lead leg. Aim for 3 sets of 60 seconds.
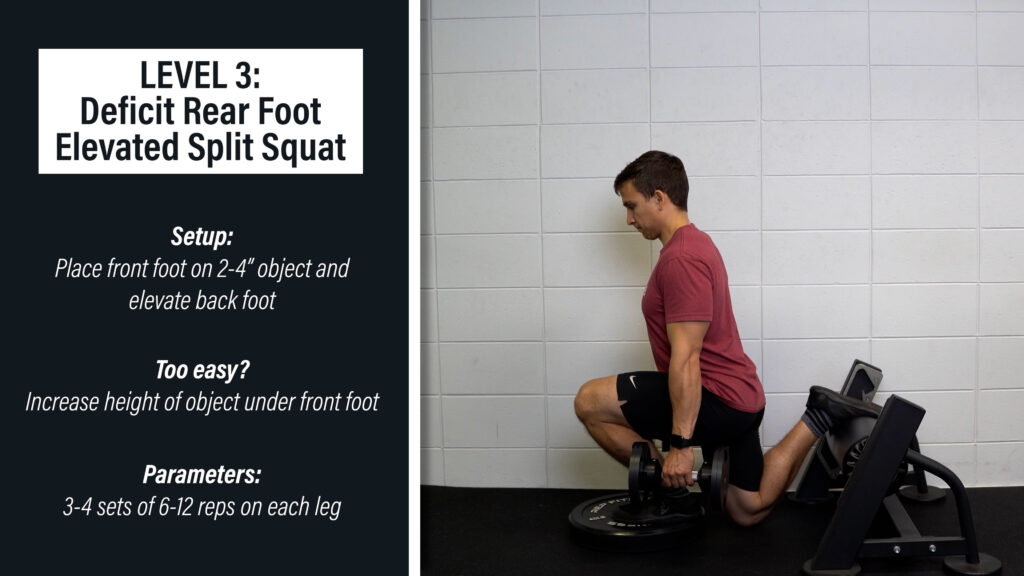
Level 3 – Deficit Rear Foot Elevated Split Squat. You’re going to elevate the front leg using a 2-4” object to start. Over time, you can progress the height. Aim for 3-4 sets of 6-12 slow and controlled repetitions. Add weight as needed.
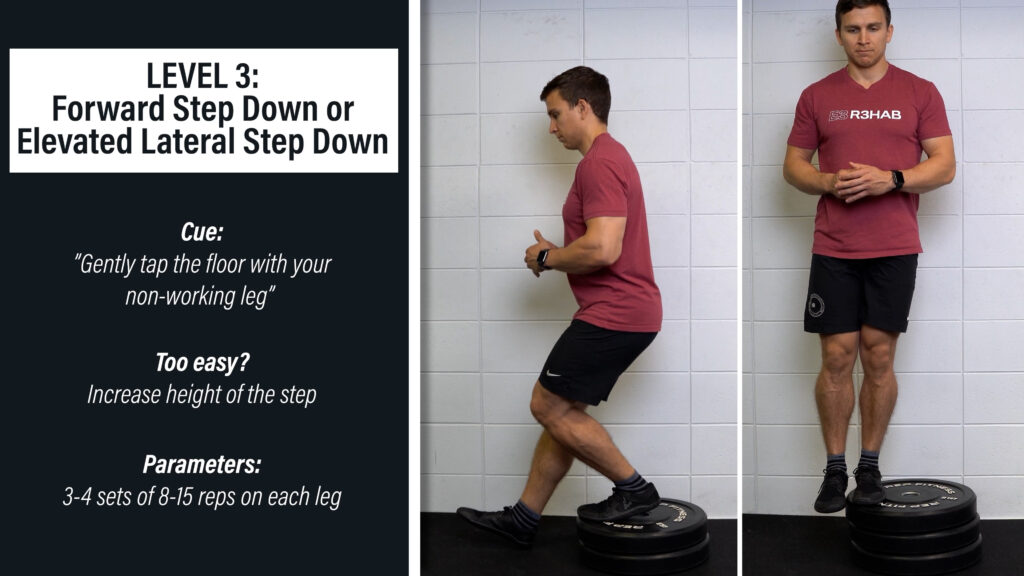
The second option is a step up/down progression.
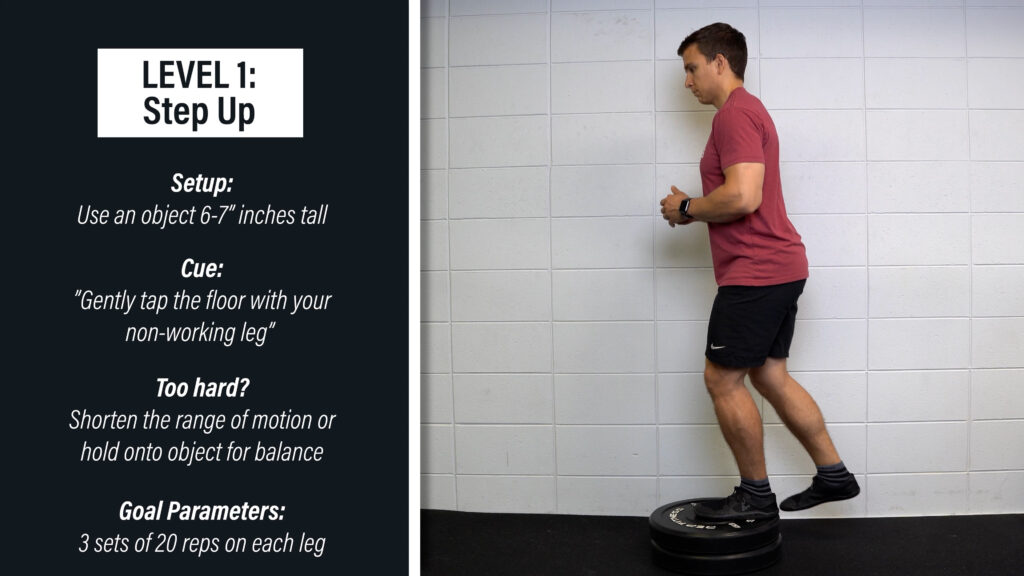
Level 1 – Step Up. Use a stair or objects stacked 6-7 inches high. Don’t push off with the back leg. Focus on putting all of your weight through the working leg and just gently tap up and down with your other heel. If it’s too difficult, decrease the height or use your hands for assistance. Aim for 3 sets of 20 reps per leg.
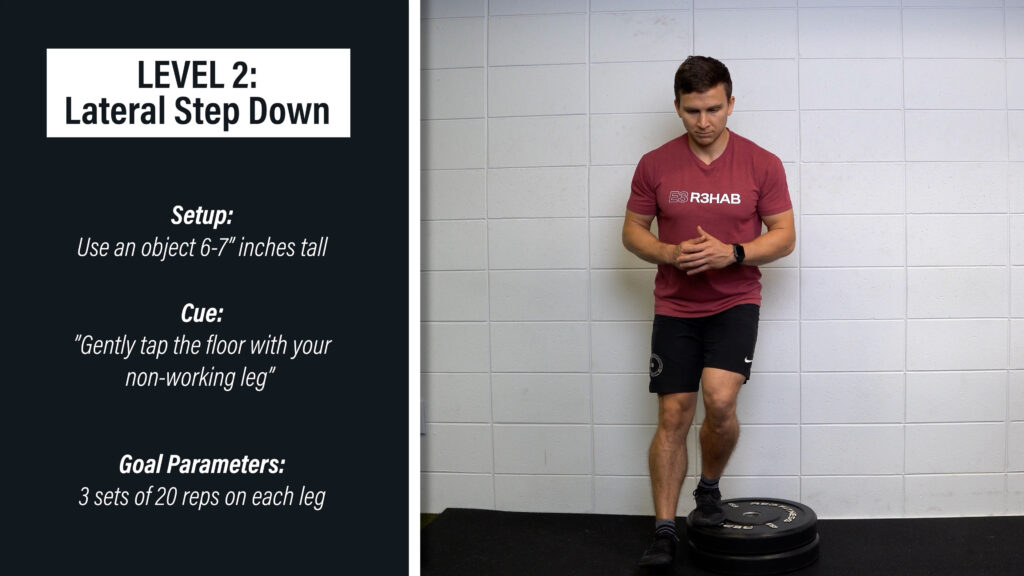
Level 2 – Lateral Step Down. Same exact cues except this movement will allow for a little more knee travel. Aim for 3 sets of 20 reps per leg.
Level 3 – Forward Step Down or Elevated Lateral Step Down. You can either step forward off the step or continue to perform the lateral step down while gradually increasing the height of the step. Aim for 3-4 sets of 8-15 slow and controlled reps per leg.
Exercise Progression #2: Hamstrings-Focused
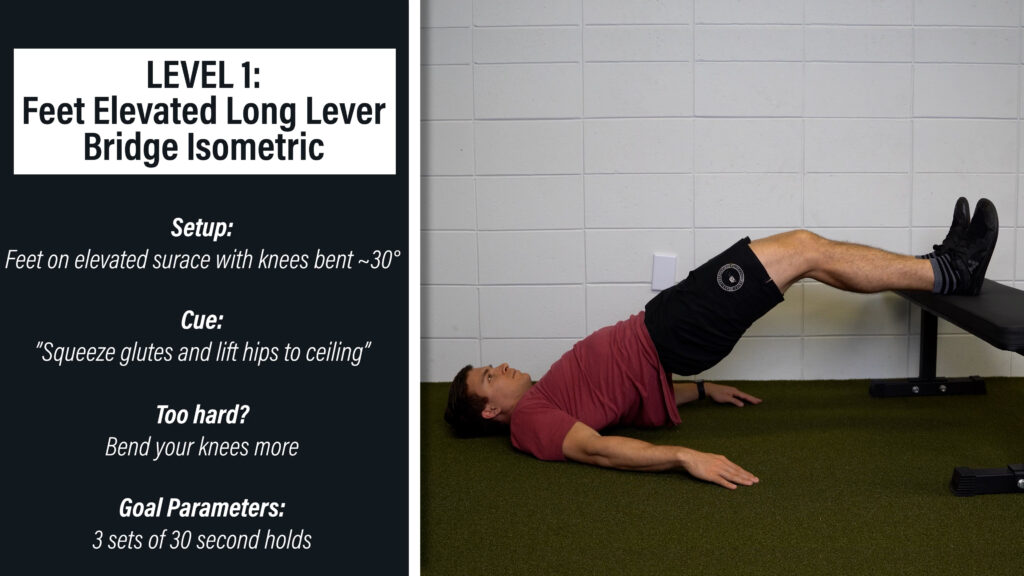
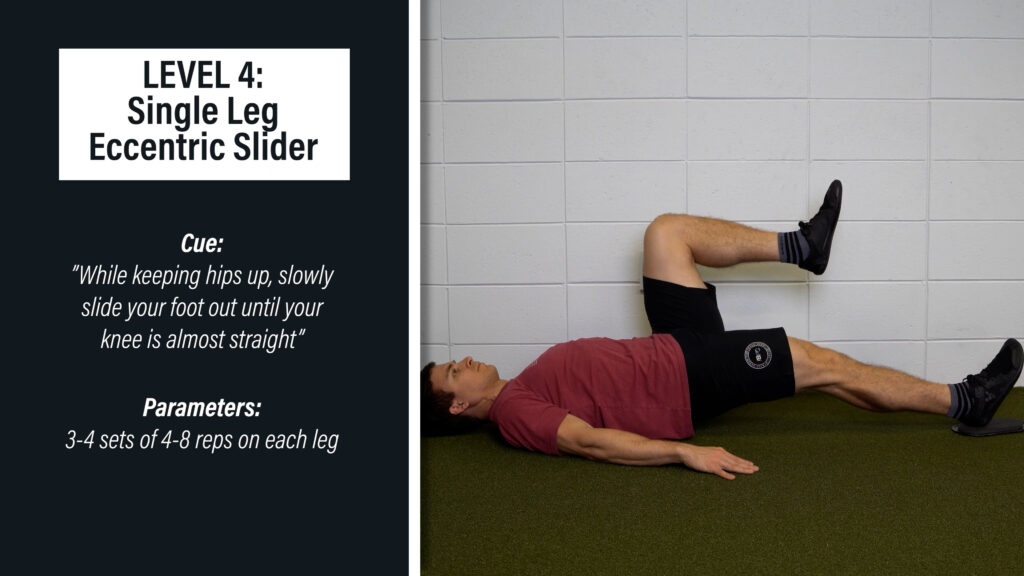
The first hamstrings-focused movement is a slider progression.
Level 1 – Feet Elevated Long Lever Bridge Isometric. With a slight bend in your knees (~30 degrees), bridge up, keep your glutes squeezed, and hold this position. Bend your knees more if it’s too difficult. Aim for 3 sets of 30 seconds.
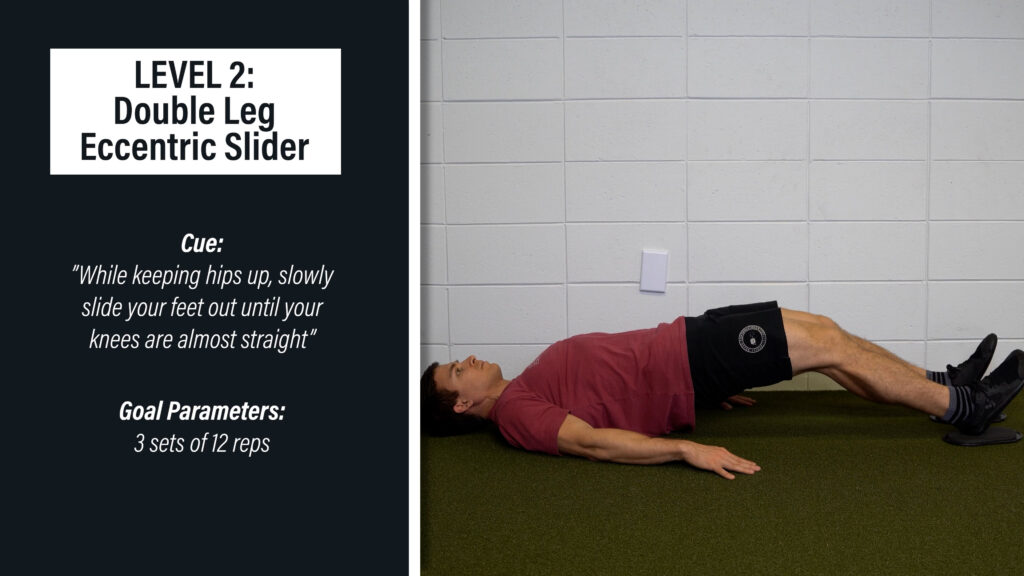
Level 2 – Double Leg Eccentric Slider. Bridge up, keep your glutes squeezed, slowly slide your legs out, drop down, bring your feet back to the starting position, and repeat. If you can work up to 3 sets of 12 reps, progress to the next level.
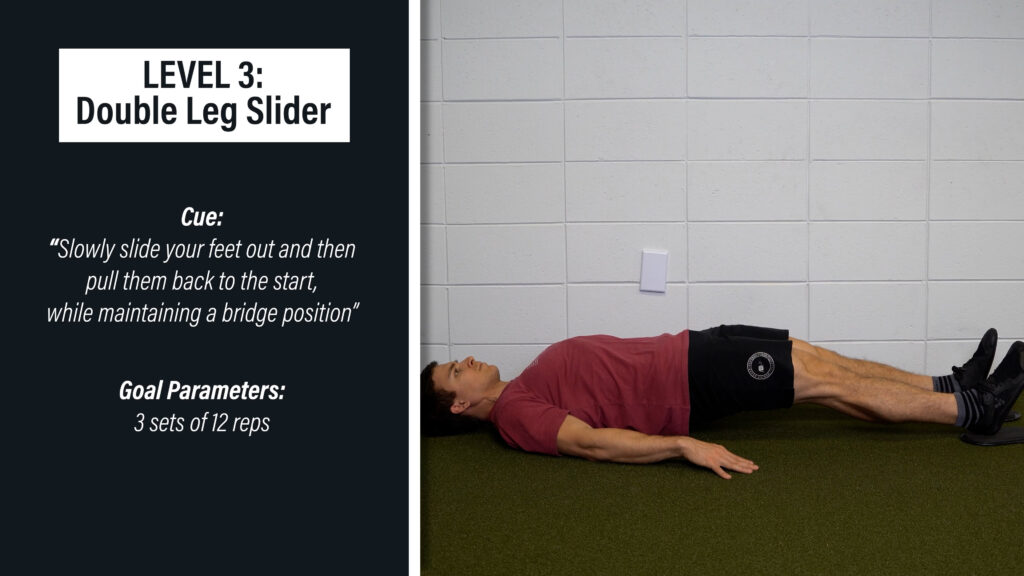
Level 3 – Double Leg Slider. Aim for 3 sets of 12 reps.
Level 4 – Single Leg Eccentric Slider. Aim for 3-4 sets of 4-8 repetitions.
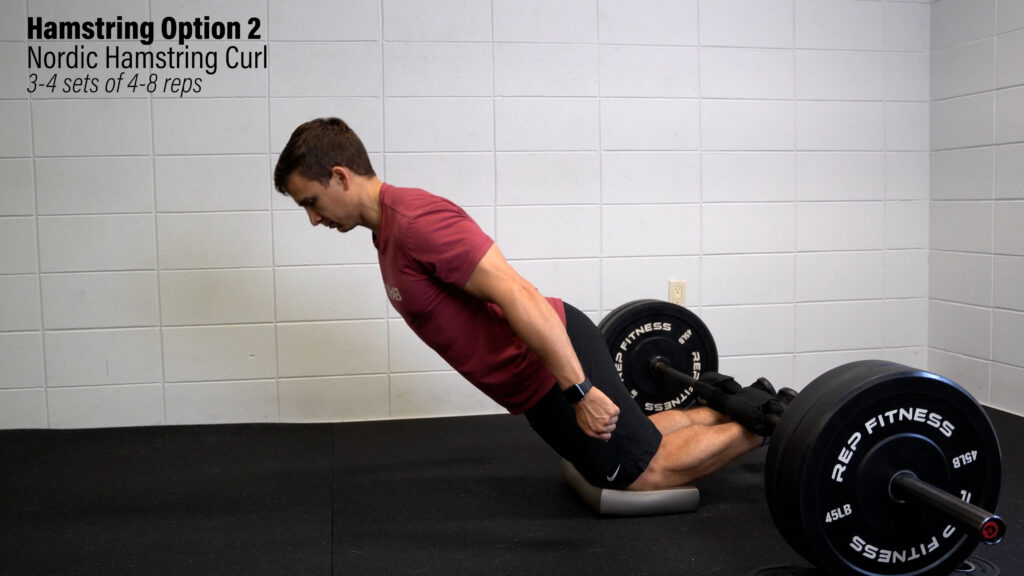
The other option is to do a Nordic Hamstring Curl for 3-4 sets of 4-8 reps. You can shorten the range of motion or use assistance if it’s too challenging or painful.
Exercise Progression #3: Glutes-Focused
Option 1 is a side plank progression.
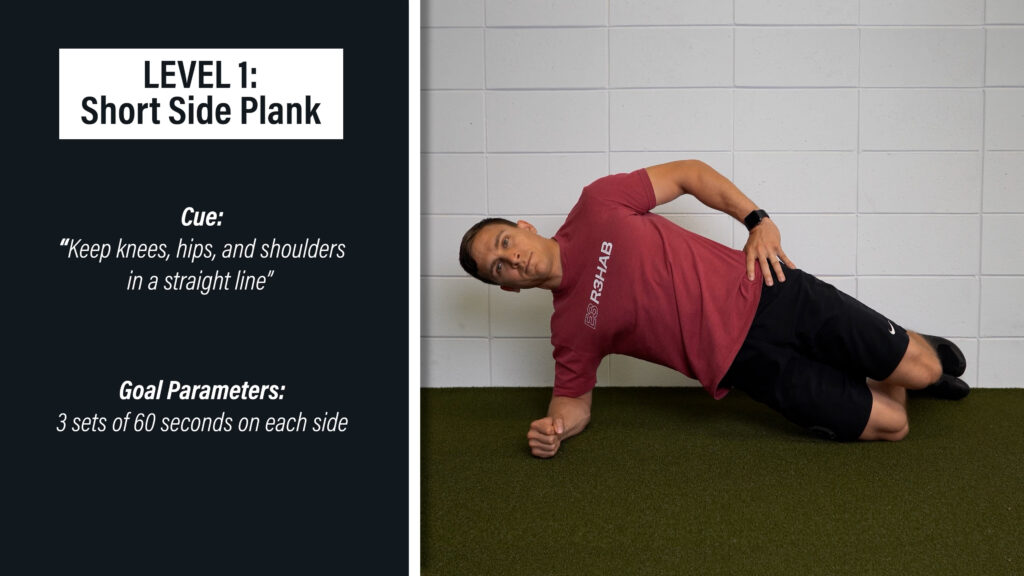
Level 1 – Short Side Plank. Start on your forearm and knees while keeping your trunk in a straight line. Hold this position.
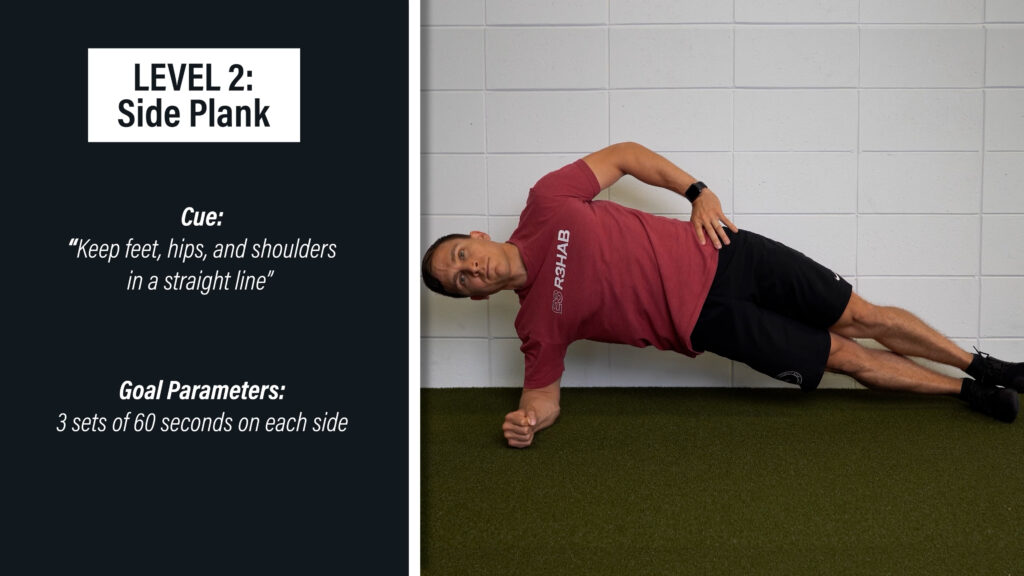
Level 2 – Side Plank. Straighten your legs, stack your feet, and keep yourself in a straight line.
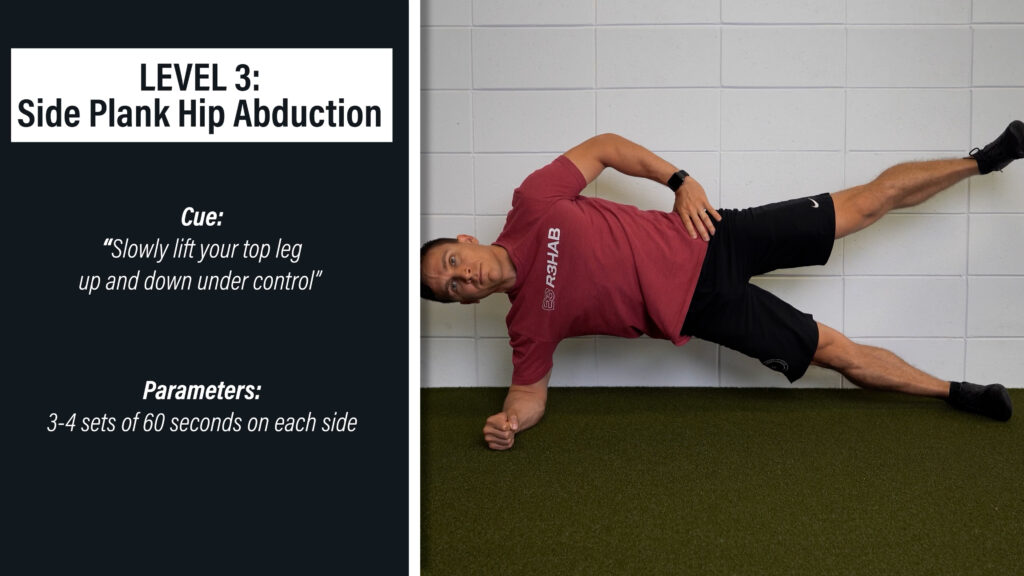
Level 3 – Side Plank Hip Abduction. Position yourself in the same way as the previous exercise, but slowly move that top leg up and down with good control.
Option 2 is a band progression.
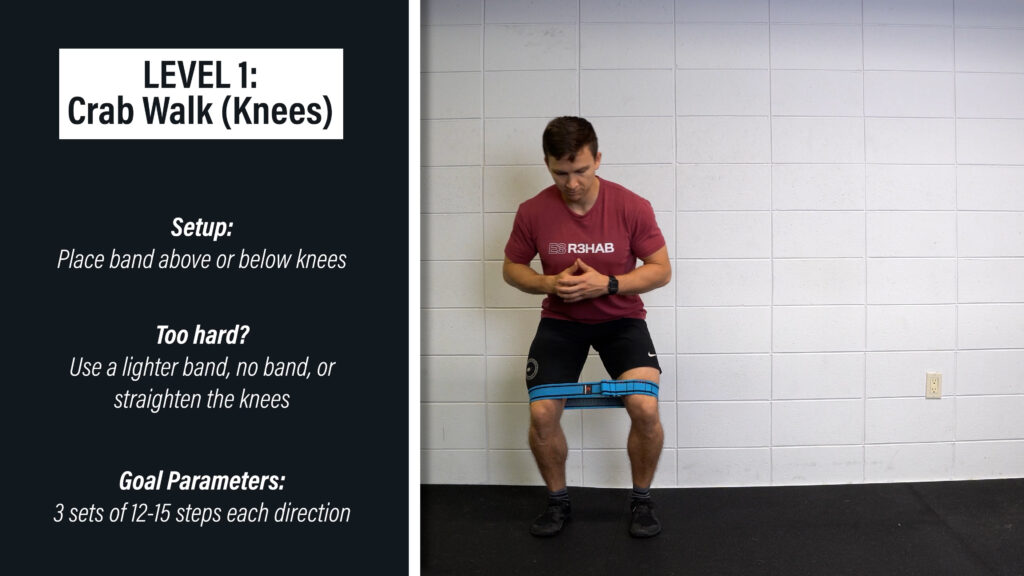
Level 1 – Crab Walk with a band around the knees. The band can be placed above or below your knees depending on what’s comfortable. If the exercise is too difficult or painful, use a lighter band, no band, or straighten your knees. Aim for 3 sets of 12-15 steps in each direction.
Level 2 – Crab Walk with a band around your ankles. Aim for 3 sets of 12-15 steps in each direction.
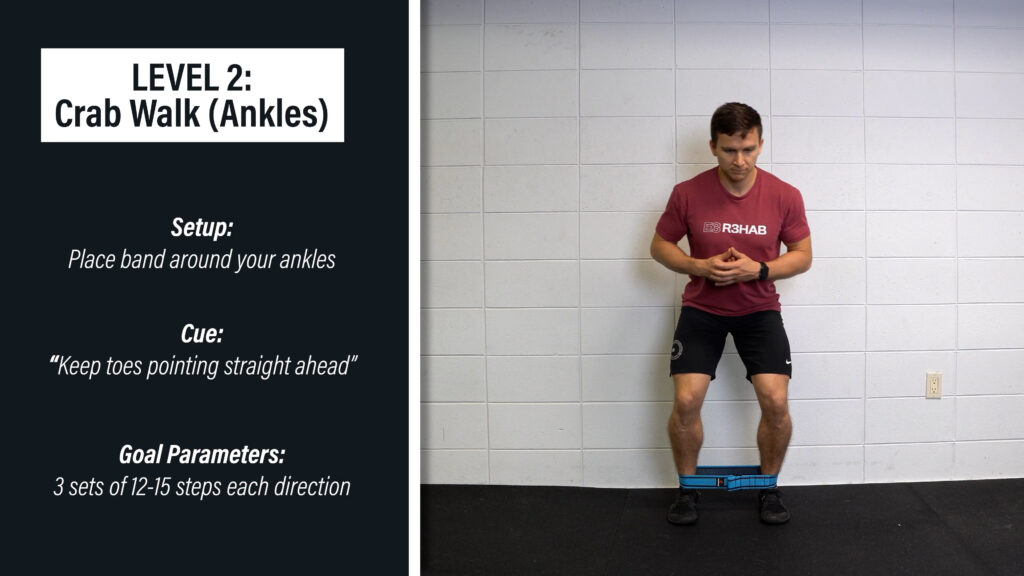
For levels 1 and 2, keep a slight bend in your hips and knees, your feet facing forward, and lead with your knees. Minimize leaning with your trunk or bobbing up and down.
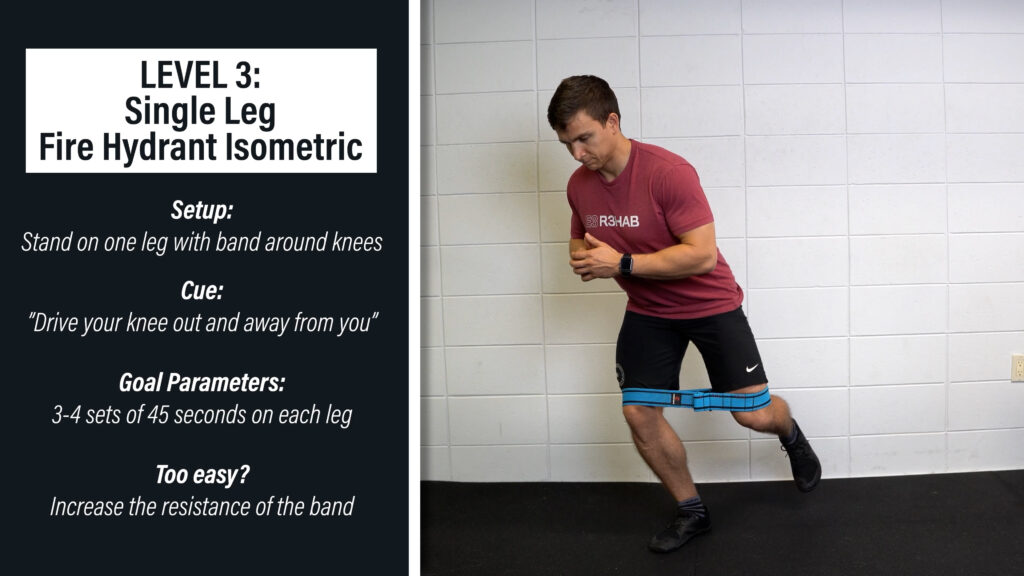
Level 3 – Single Leg Fire Hydrant Isometric. Stand on one leg with a band around your knees, spread the band by separating your knees, and remain as still as possible. Aim for 3-4 sets of 45 second holds per leg.
You can also just increase the resistance of the band over time to progress any level.
Exercise Progression #4: Calves-Focused
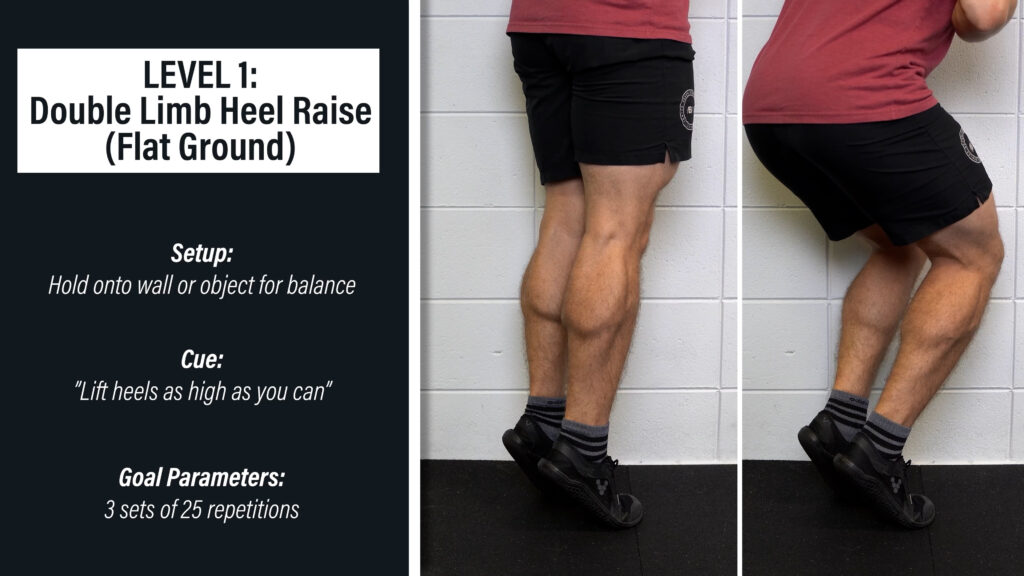
Option 1 is a heel raise with knees straight and option 2 is a heel raise with knees bent.
Level 1 – Double Limb Heel Raise on Flat Ground. Slowly rise up on the balls of your feet as high as you can and slowly lower yourself down. Aim for 3 sets of 25 repetitions.
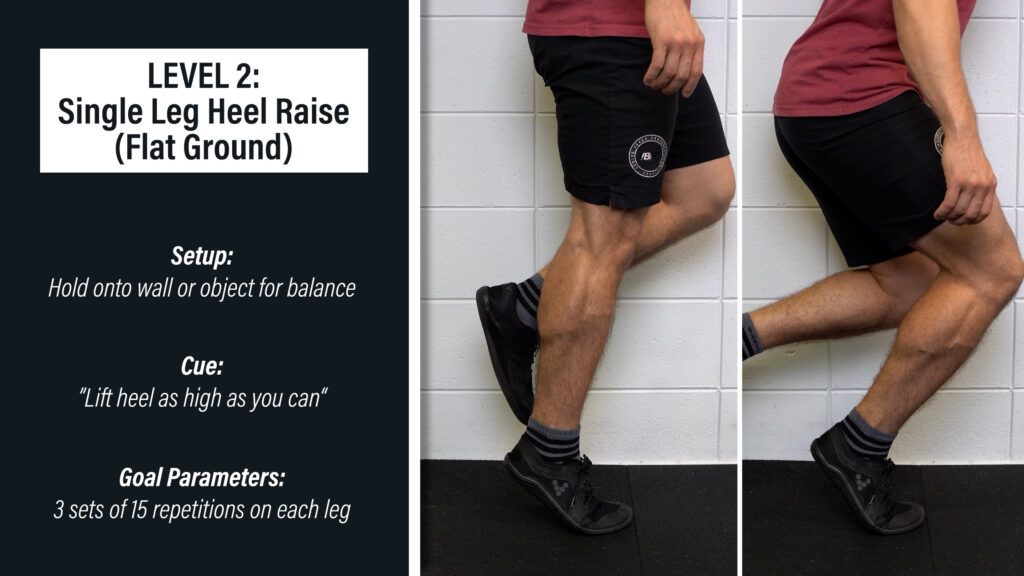
Level 2 – Single Limb Heel Raise on Flat Ground. Aim for 3 sets of 15 slow and controlled repetitions.
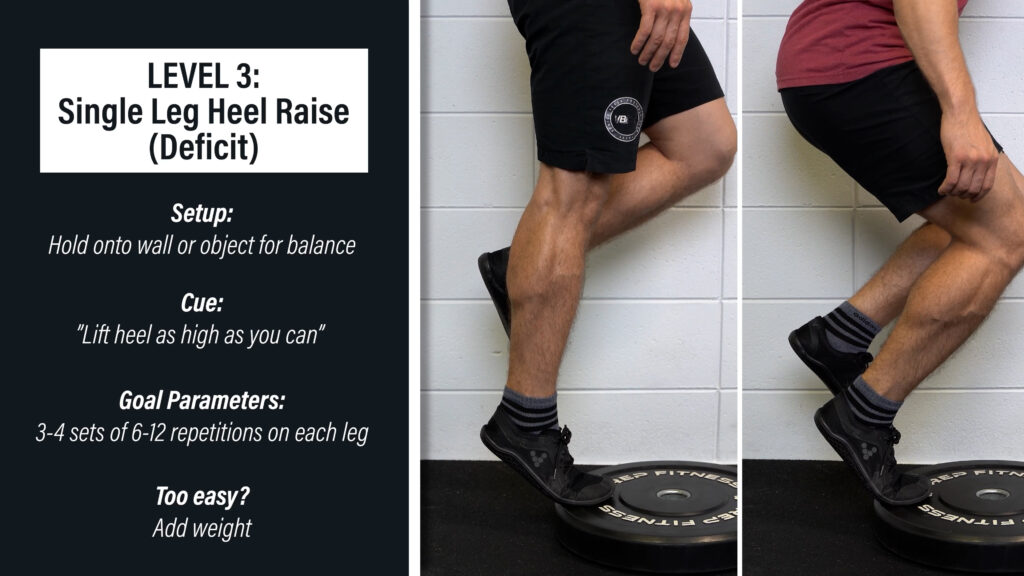
Level 3 – Single Leg Heel Raise on a Step. Aim for 3-4 sets of 6-12 repetitions. Add weight as needed.
IT Band Rehab Summary
IT band-related pain is not a friction syndrome due to tightness of the IT band that requires vigorous rolling or stretching.
Although the exact mechanism isn’t fully understood, it’s thought that an error in workload, such as a large spike in running mileage or intensity, is a primary contributing factor.
Therefore, the focus of rehab should be on load management and activity modifications to find a tolerable level of your preferred activity while maintaining your fitness through other means.
If applicable, you can trial an increase in your running cadence by 5-10% to decrease your stride length, increase your step width, and decrease the strain and strain rate on your IT band.
Lastly, you can incorporate resistance exercises 2 days per week on days that you aren’t running. The focus should be on progressing them over the course of 3-6 months. The exercises don’t necessarily have to be pain-free, but should be tolerable – somewhere around a 2/10 pain or less.