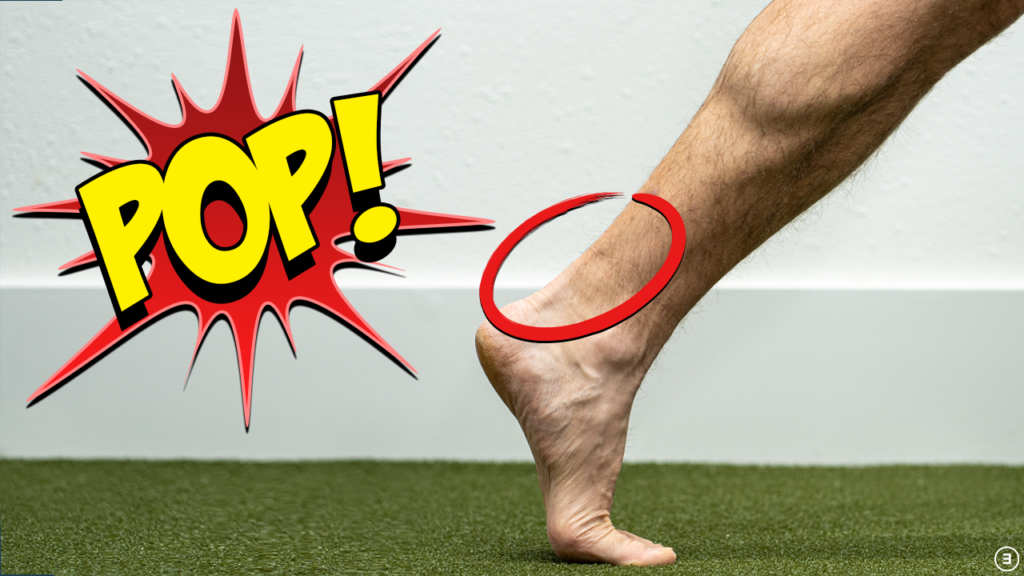
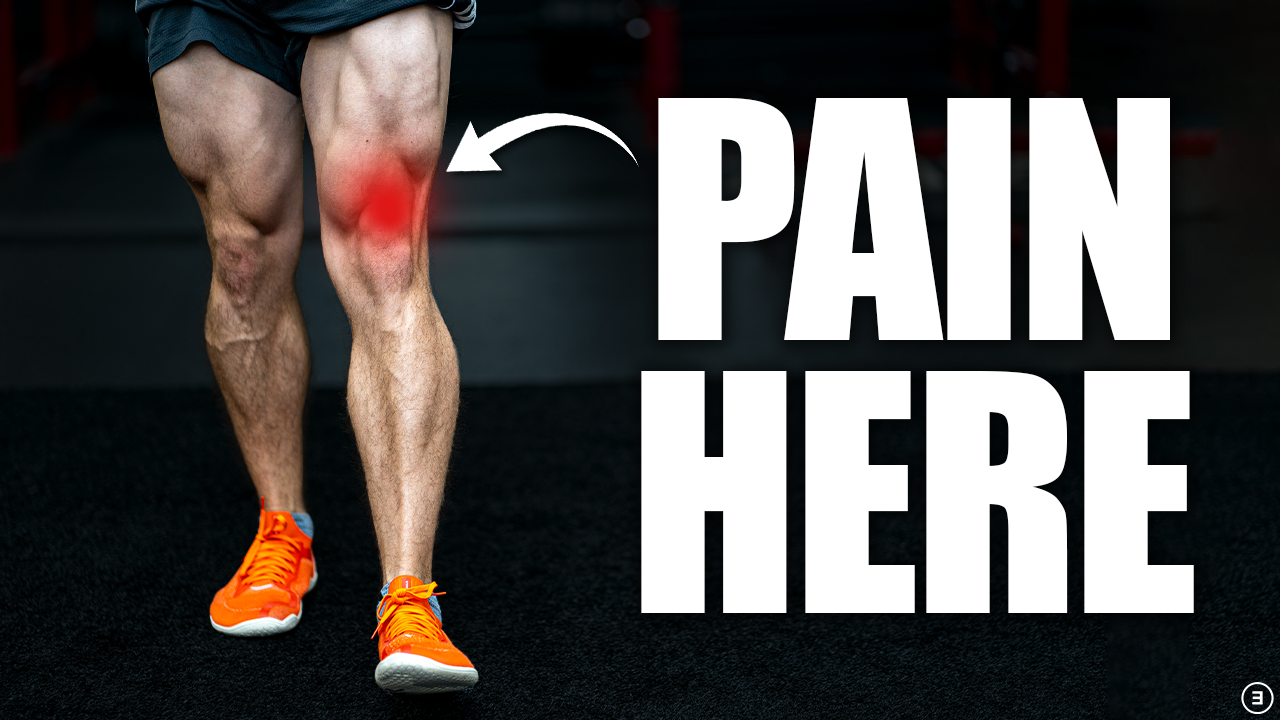
An Achilles tendon rupture most commonly occurs from a sudden and forceful contraction of the calf muscles while the ankle is dorsiflexed, such as during sport-specific movements like forward acceleration, cutting, and jumping.
It typically presents with swelling and bruising, and there may be a palpable gap, most frequently 2-6 cm above the heel bone.
In the physical therapy setting, specific clinical tests like the Thompson test, help confirm the diagnosis. While the patient is lying on their stomach, the calf muscles are squeezed. Normally, this results in ankle plantar flexion, but in cases of an Achilles rupture, no ankle movement will occur.
Imaging, like diagnostic ultrasound and MRIs, aren’t required for a diagnosis, but they may be used if another injury is expected or to help monitor tendon healing during the rehab process.
Do You NEED Surgery for an Achilles Tendon Rupture?
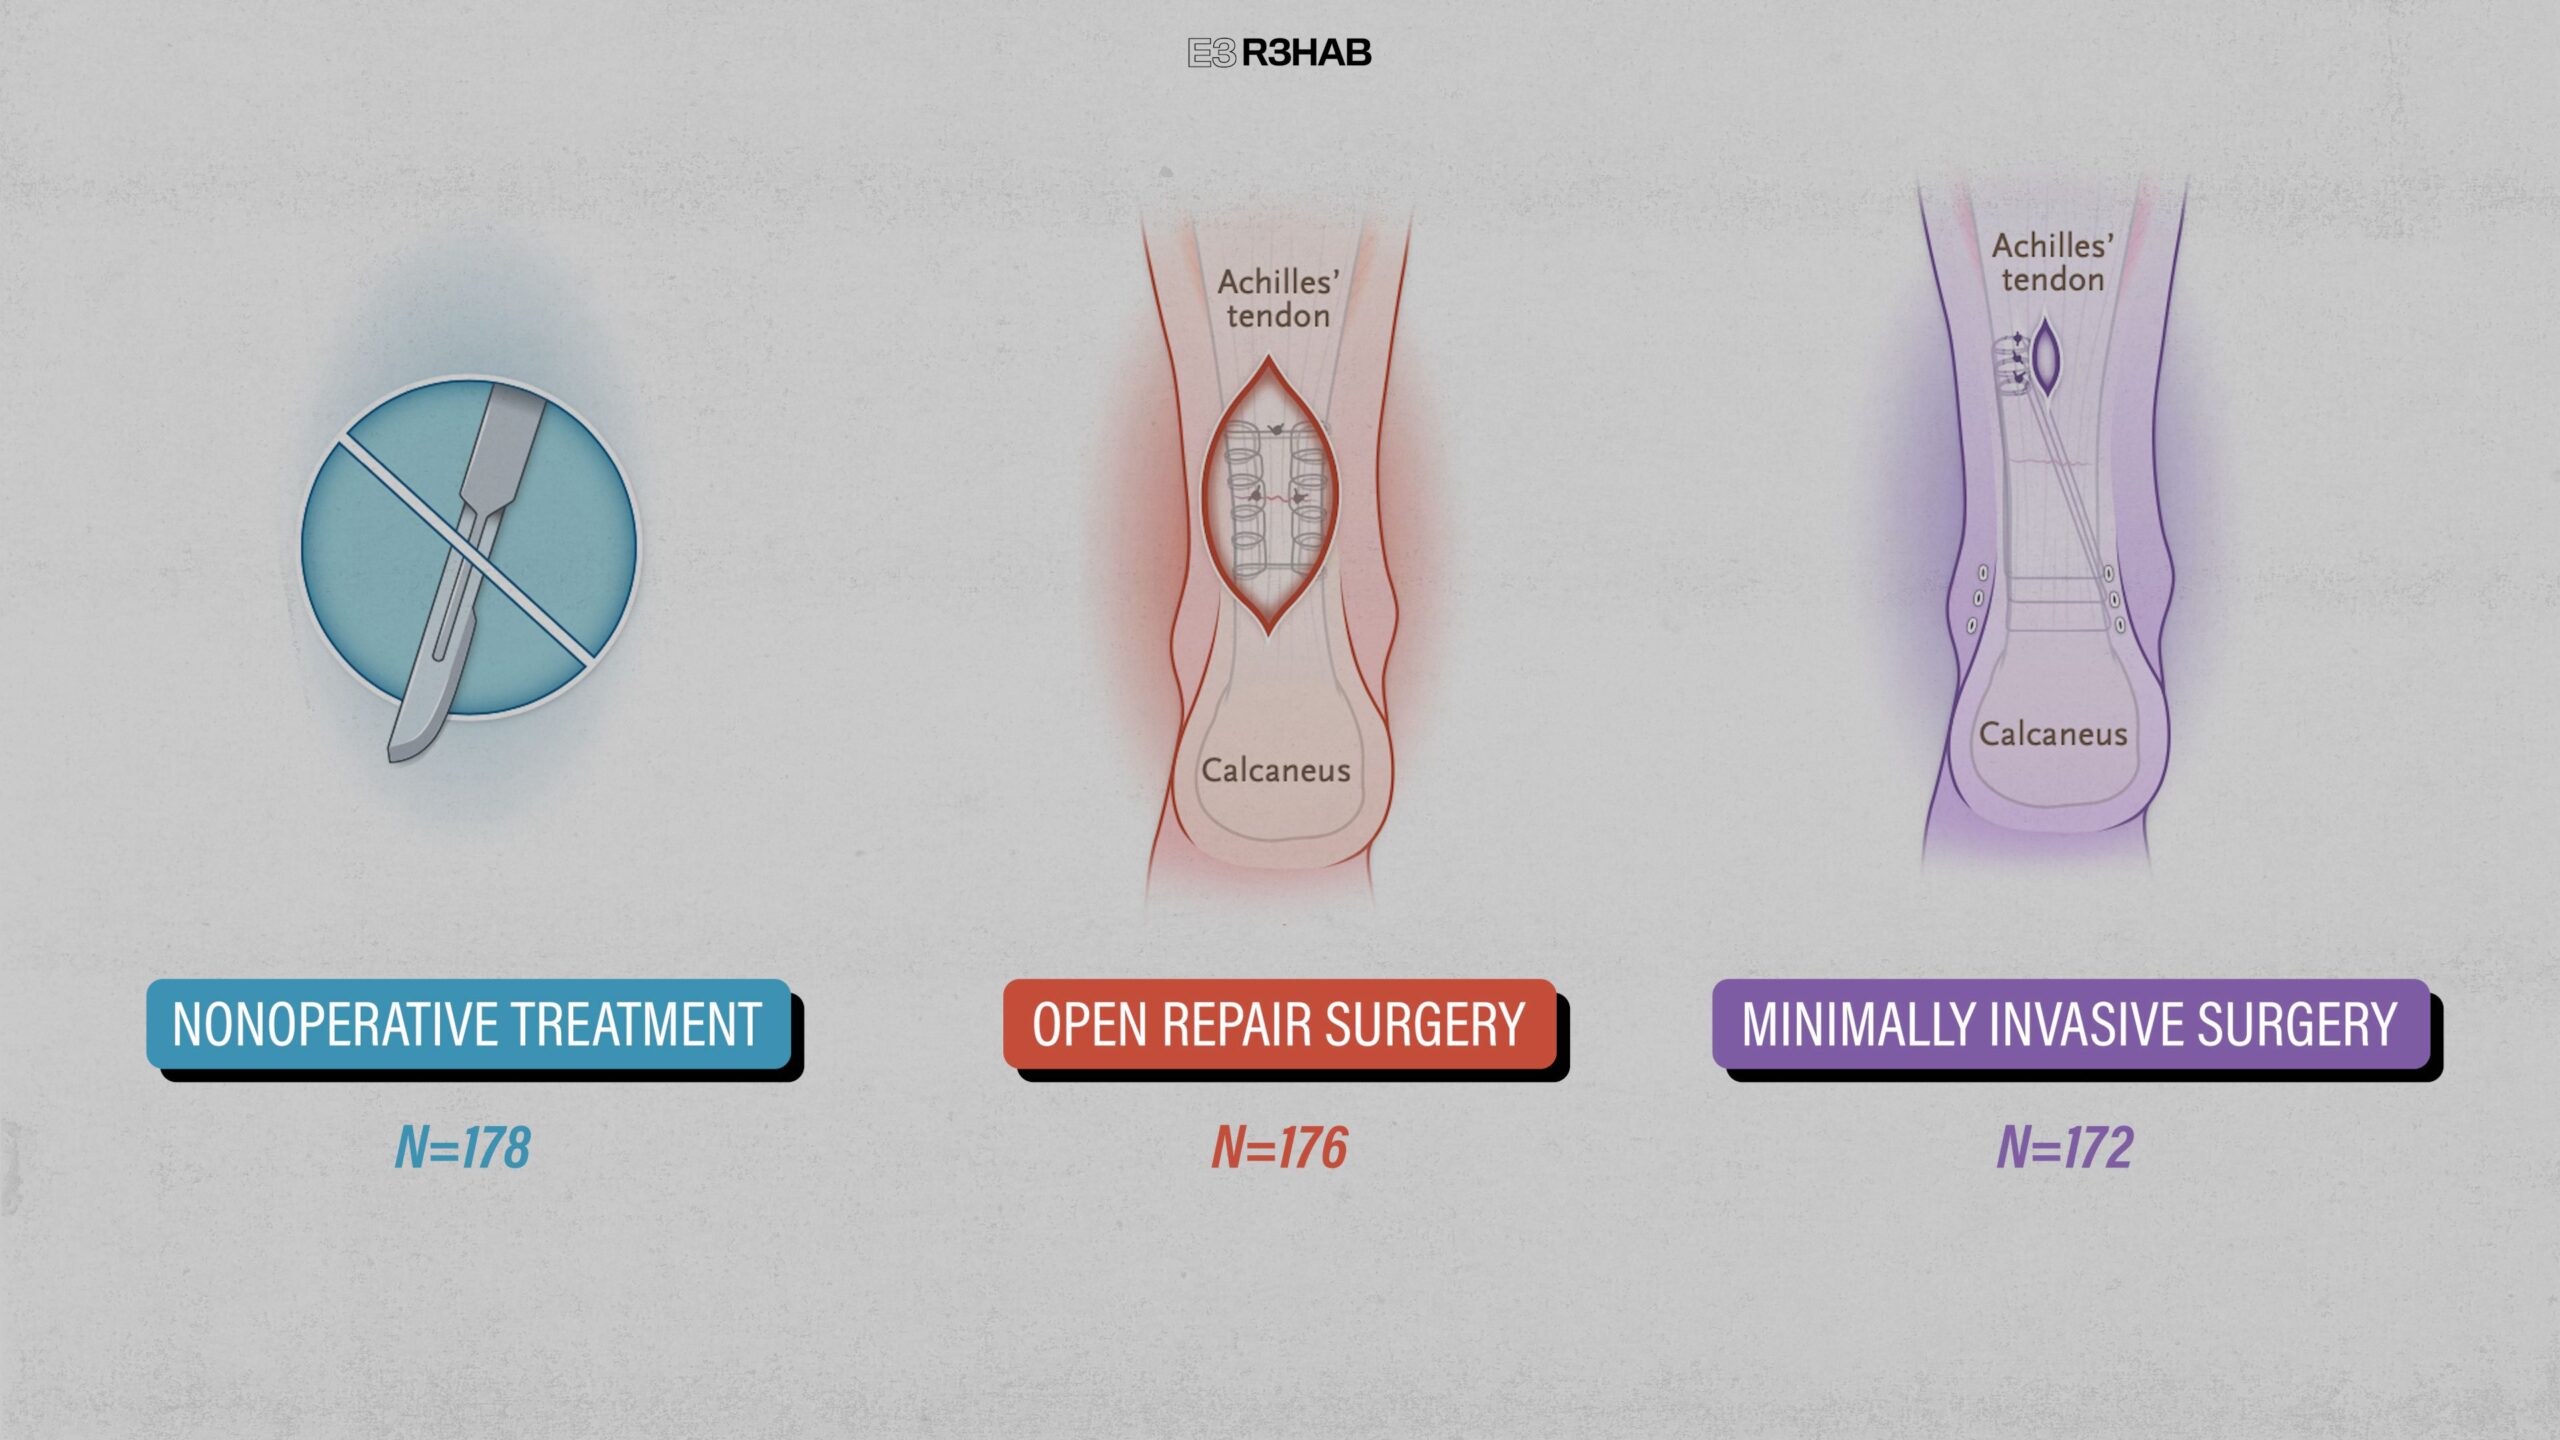
Surgery has long been considered the primary treatment option for Achilles tendon ruptures. However, current research now recognizes non-surgical management as a viable option as well.
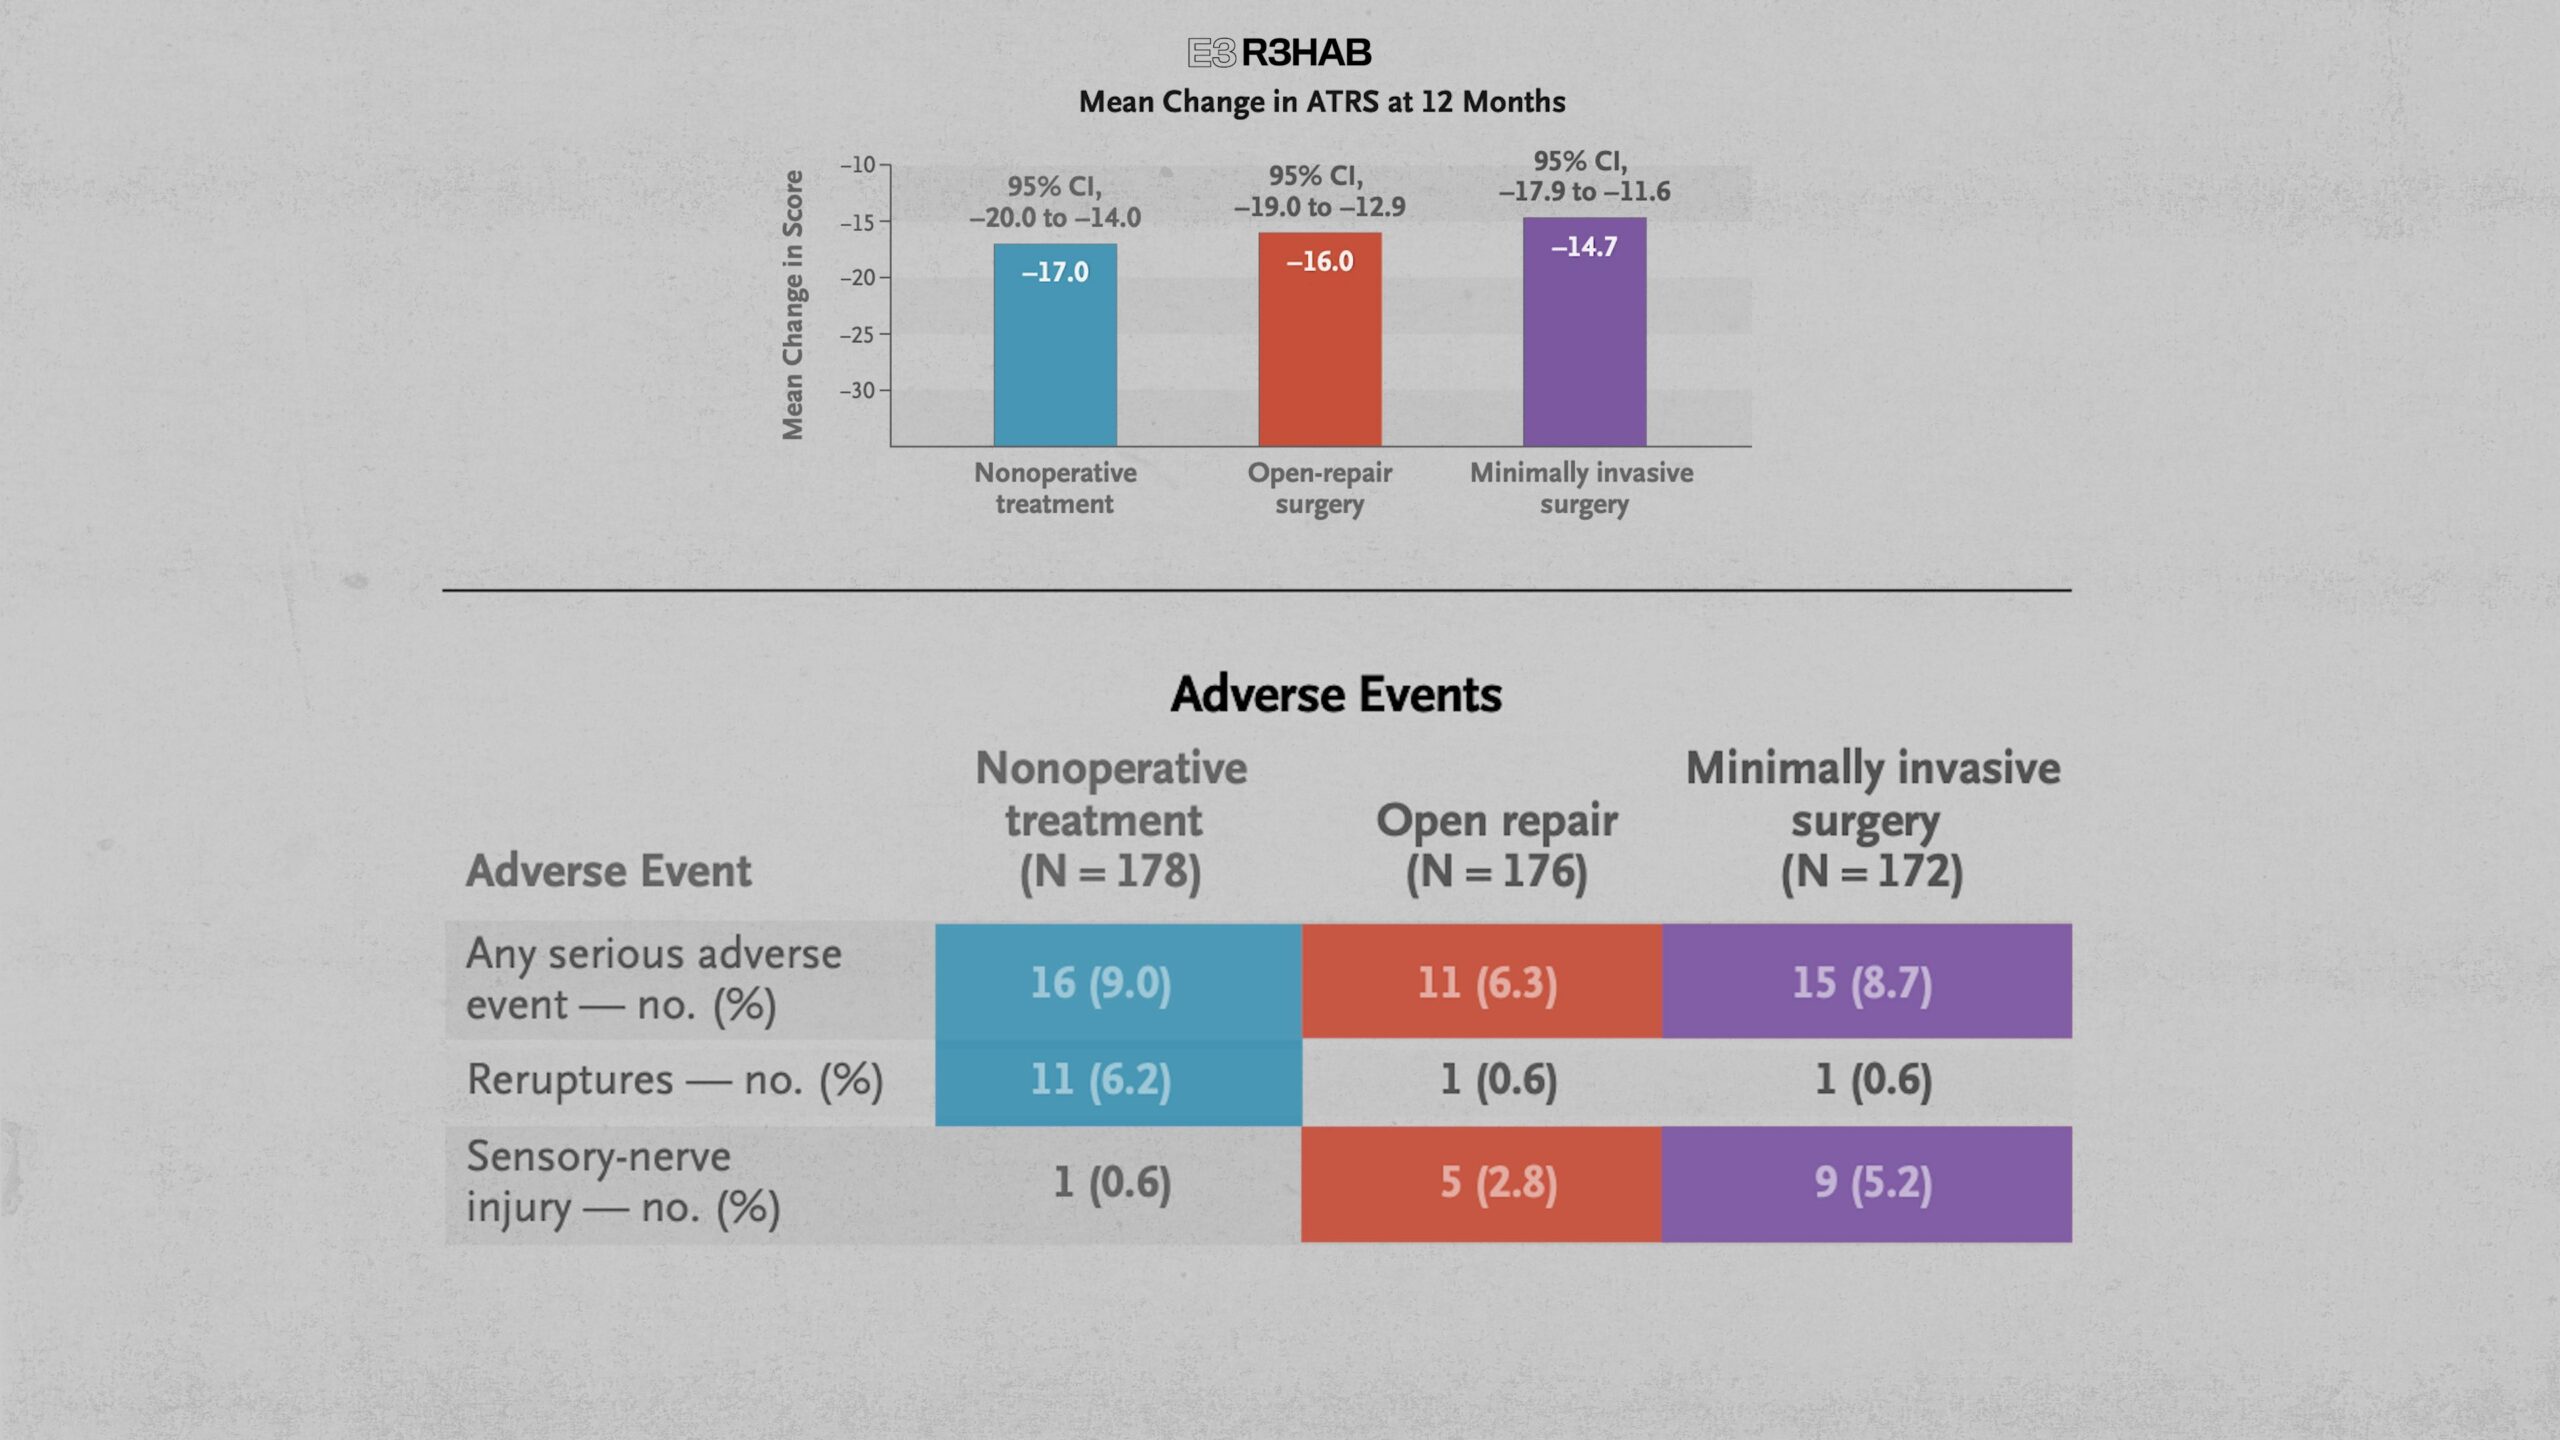
At 12 months, self-reported symptoms and functional limitations, as well as the overall incidence of serious adverse events were similar in all 3 groups.
Although uncommon overall, re-ruptures did occur more often with nonoperative treatment, whereas sensory nerve injuries were more common following surgery.
https://pubmed.ncbi.nlm.nih.gov/35417636/
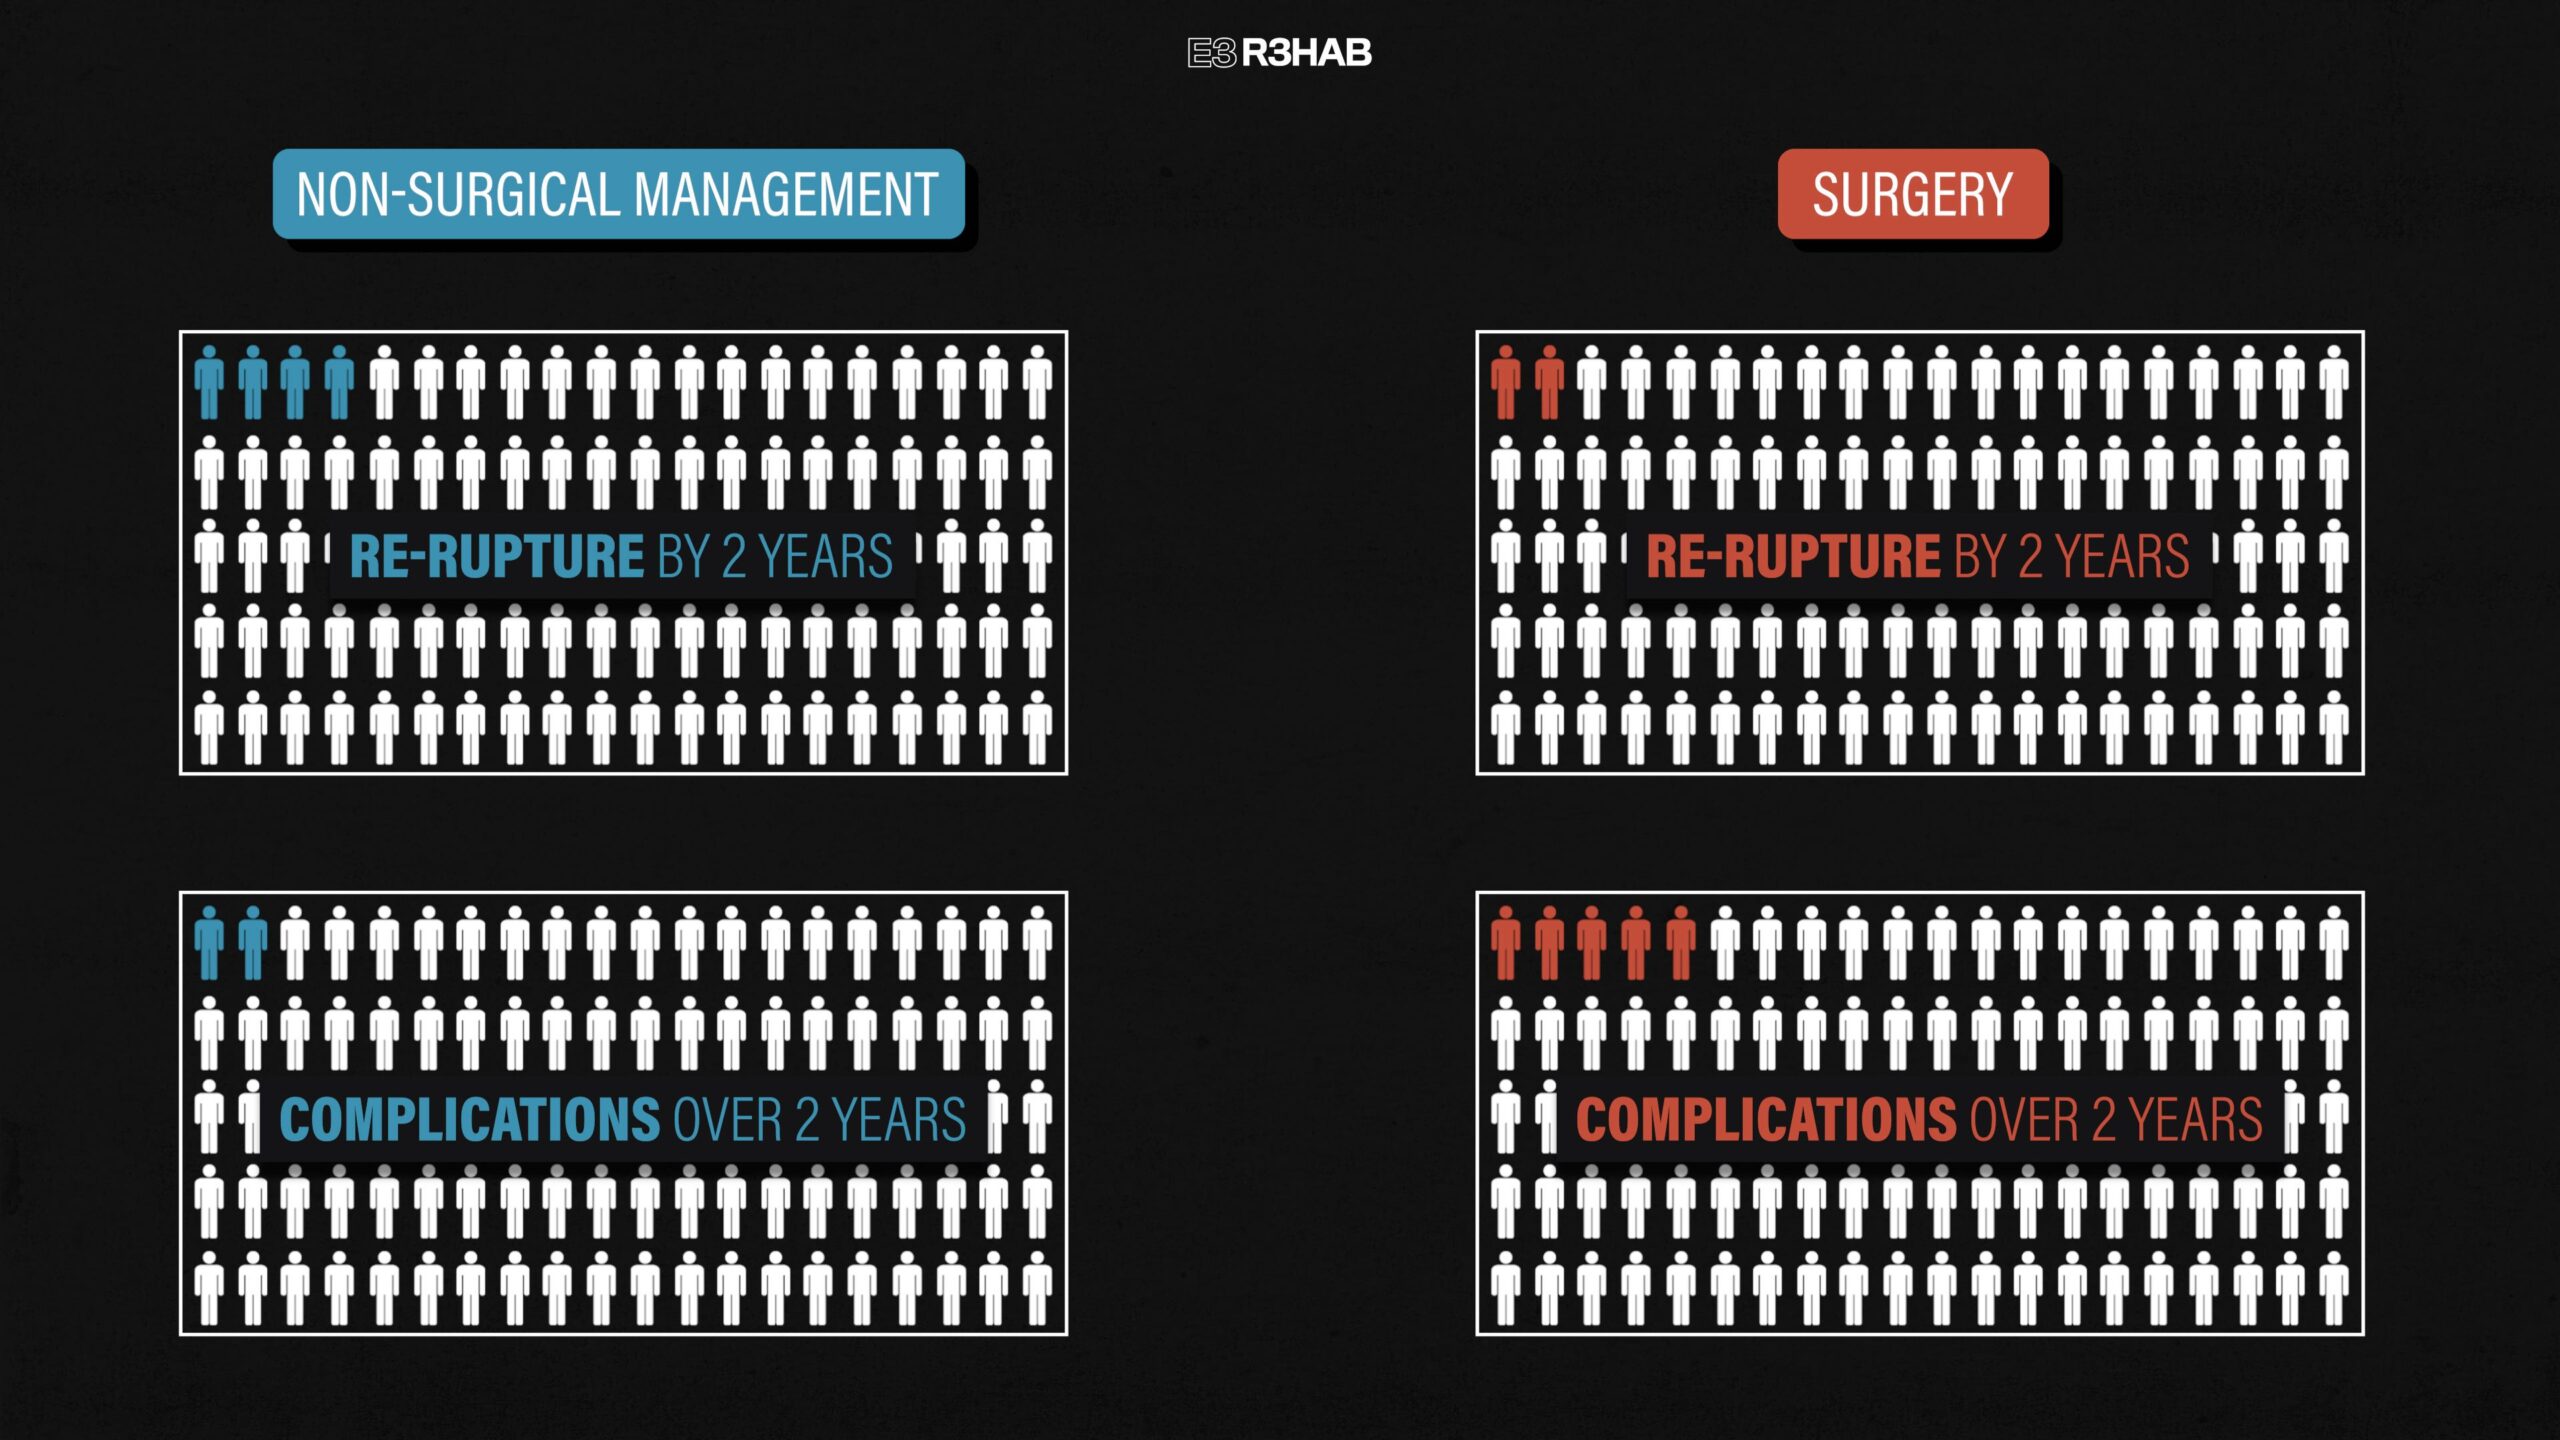
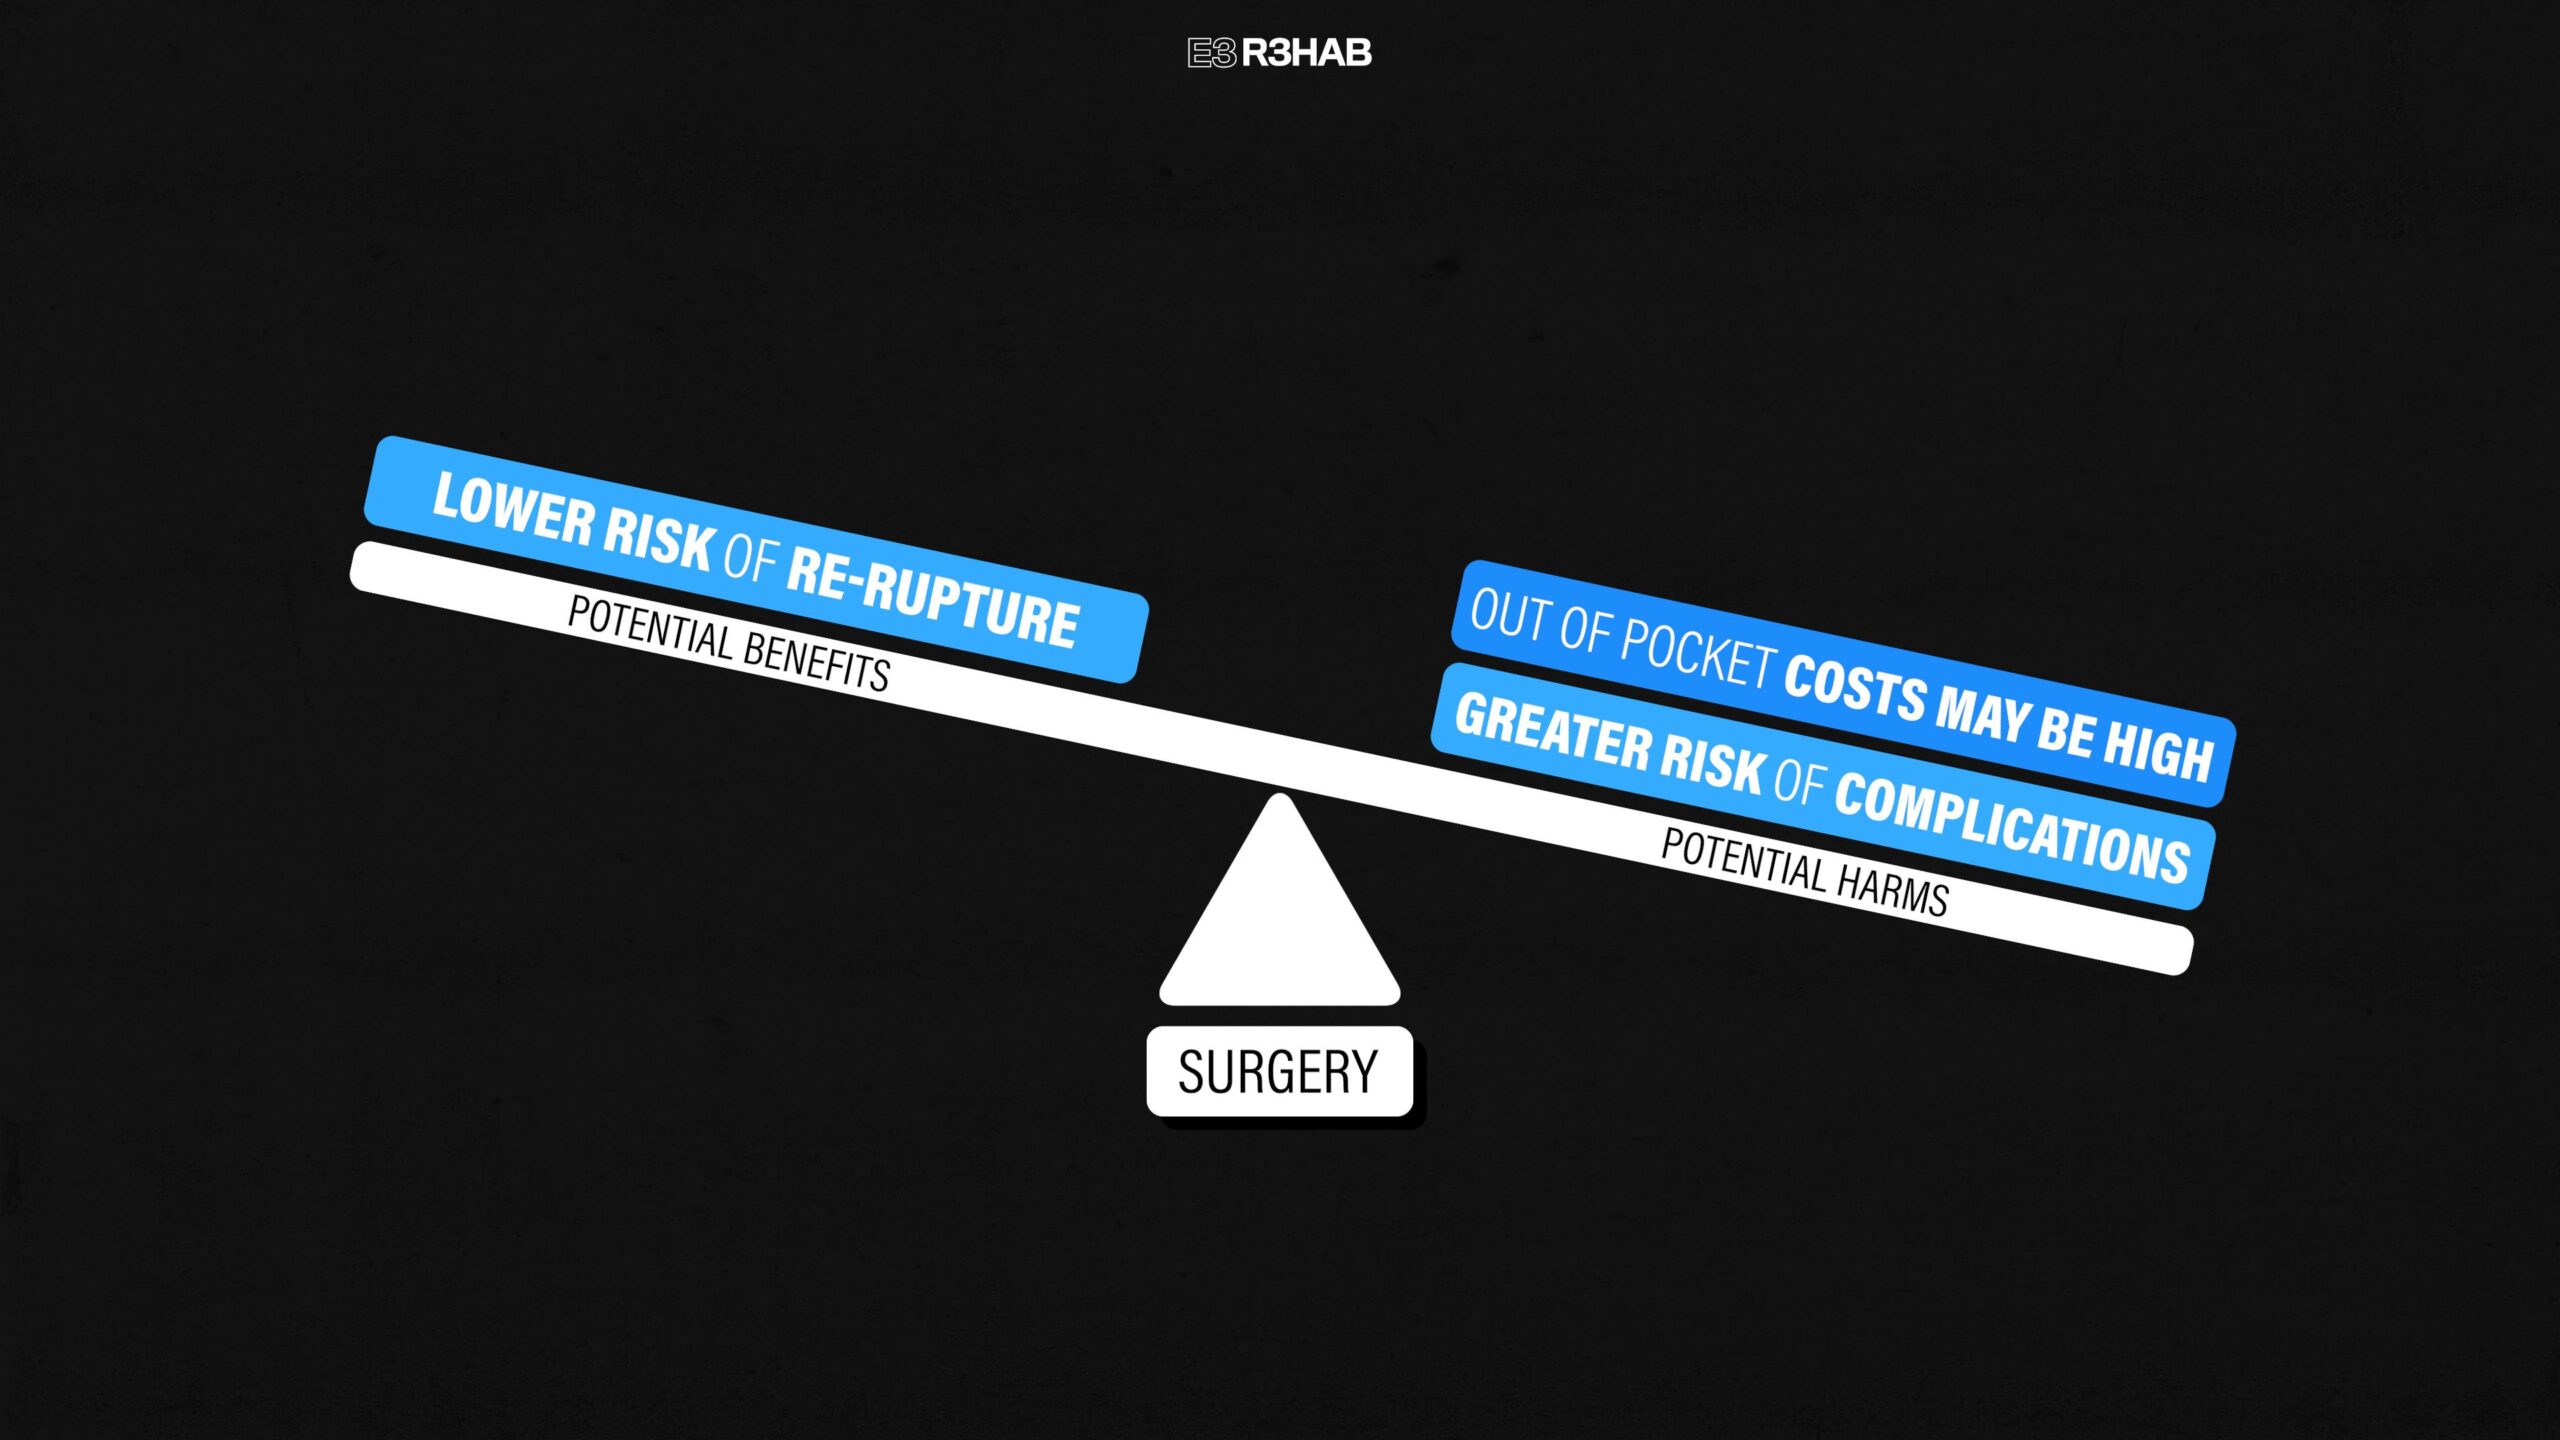
These findings are similar to a 2019 systematic review and meta-analysis that examined non-surgical management vs surgery in over 15,000 people across 29 different studies. Here is what they found:
For non-surgical management, about 4 people per 100 treated will re-rupture their Achilles tendon by 2 years, and about 2 people per 100 treated will have complications over 2 years, such as an infection or nerve injury.
With surgery, about 2 people per 100 treated will experience a re-rupture by 2 years and about 5 people per 100 treated will have complications over 2 years.
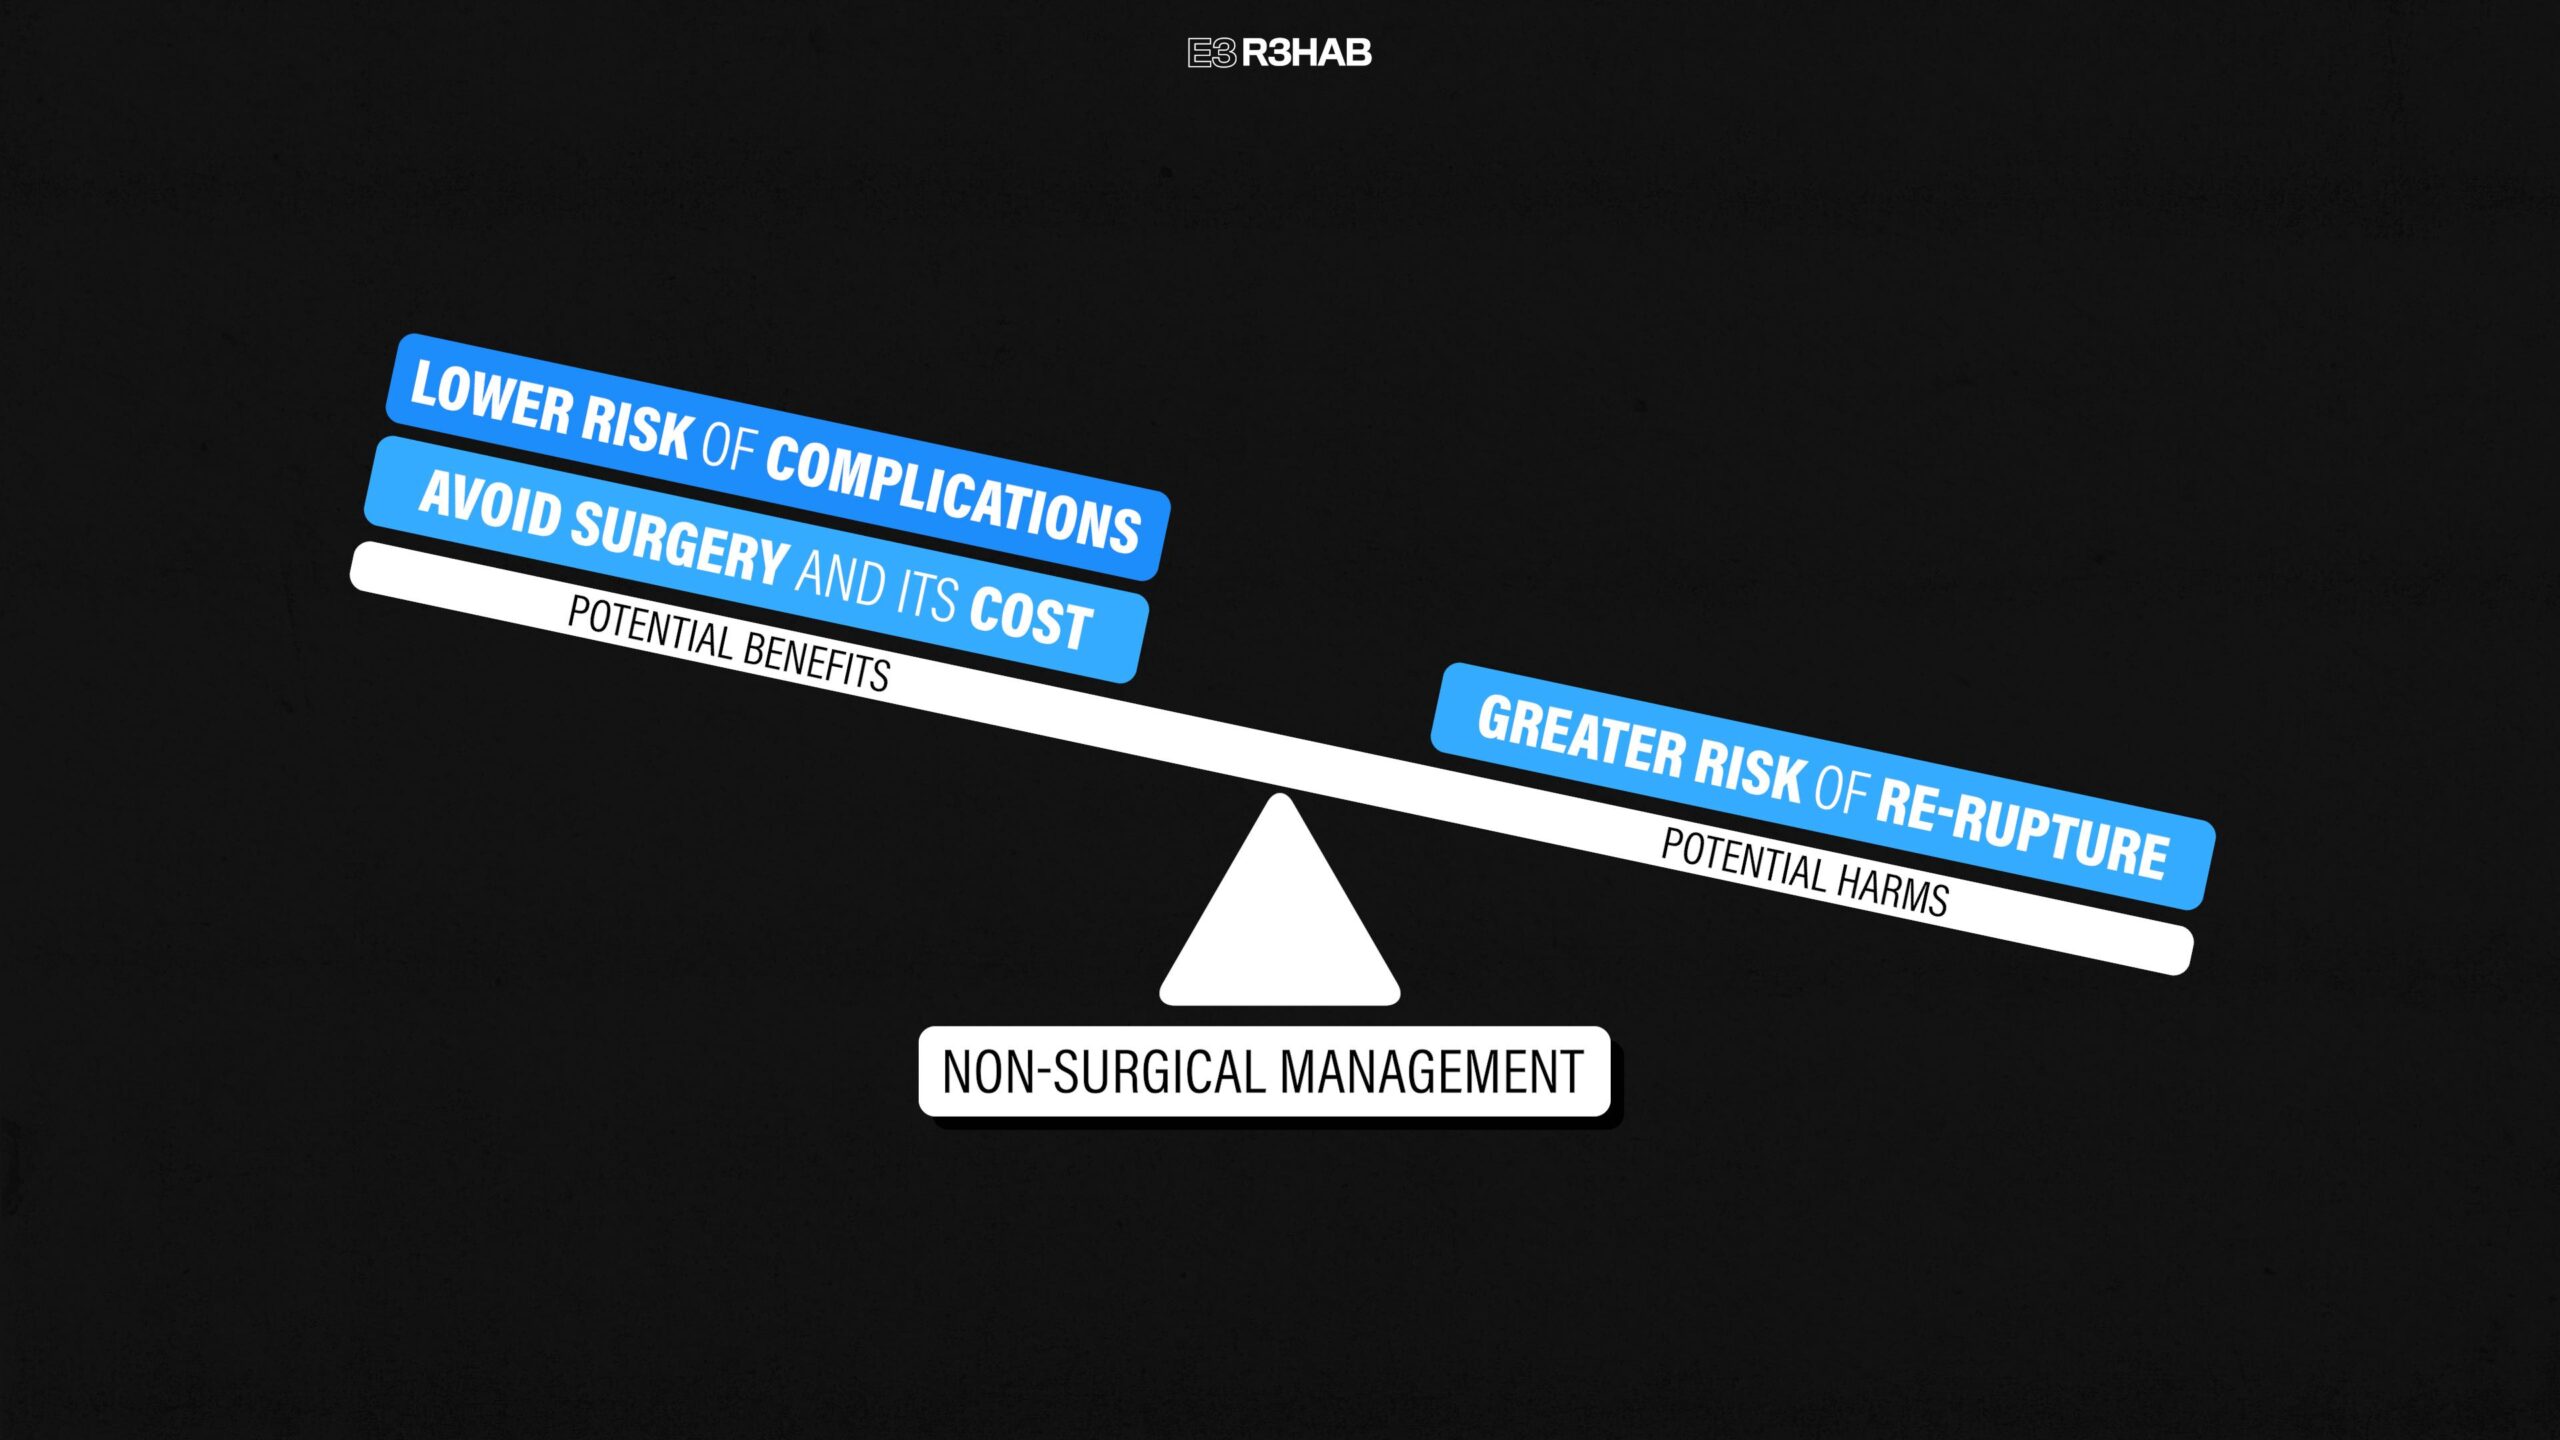
This means that both surgery and non-surgical management have been shown to lead to similar functional outcomes, so you’ll have to weigh the potential benefits and risks to determine which option is most appropriate for you and your goals.
With non-surgical management, the potential benefits include avoiding surgery and its costs, and a lower risk of complications, while the downside is that it has been shown to have a slightly greater risk of re-rupture.
On the flip side, surgery has a slightly lower risk of re-rupture but has a greater risk of complications, and out-of-pocket costs might be high, depending on your insurance circumstances.
As an example,if you are an elite athlete looking to return to sport as soon as possible, the higher chance of re-rupture might not be a risk you are willing to take. In contrast, if you don’t play a sport and only need to resume daily activities, non-surgical management may be an appropriate option.
Ultimately, the decision should involve a collaborative approach with your doctor, physical therapist, and any other relevant healthcare providers.
Achilles Rupture Rehab Overview
Whether you choose surgery or not, the rehabilitation process looks very similar.
This will be accomplished by following a stepwise progression of exercises and activities that gradually load the Achilles tendon more over time. For example, one of the first exercises you will perform will be an unweighted seated heel raise since these have been shown to load the Achilles tendon very little. Then during the later stages of rehab, you will progress toward faster and quicker movements, like single-leg multi-directional hopping which highly loads the Achilles tendon.
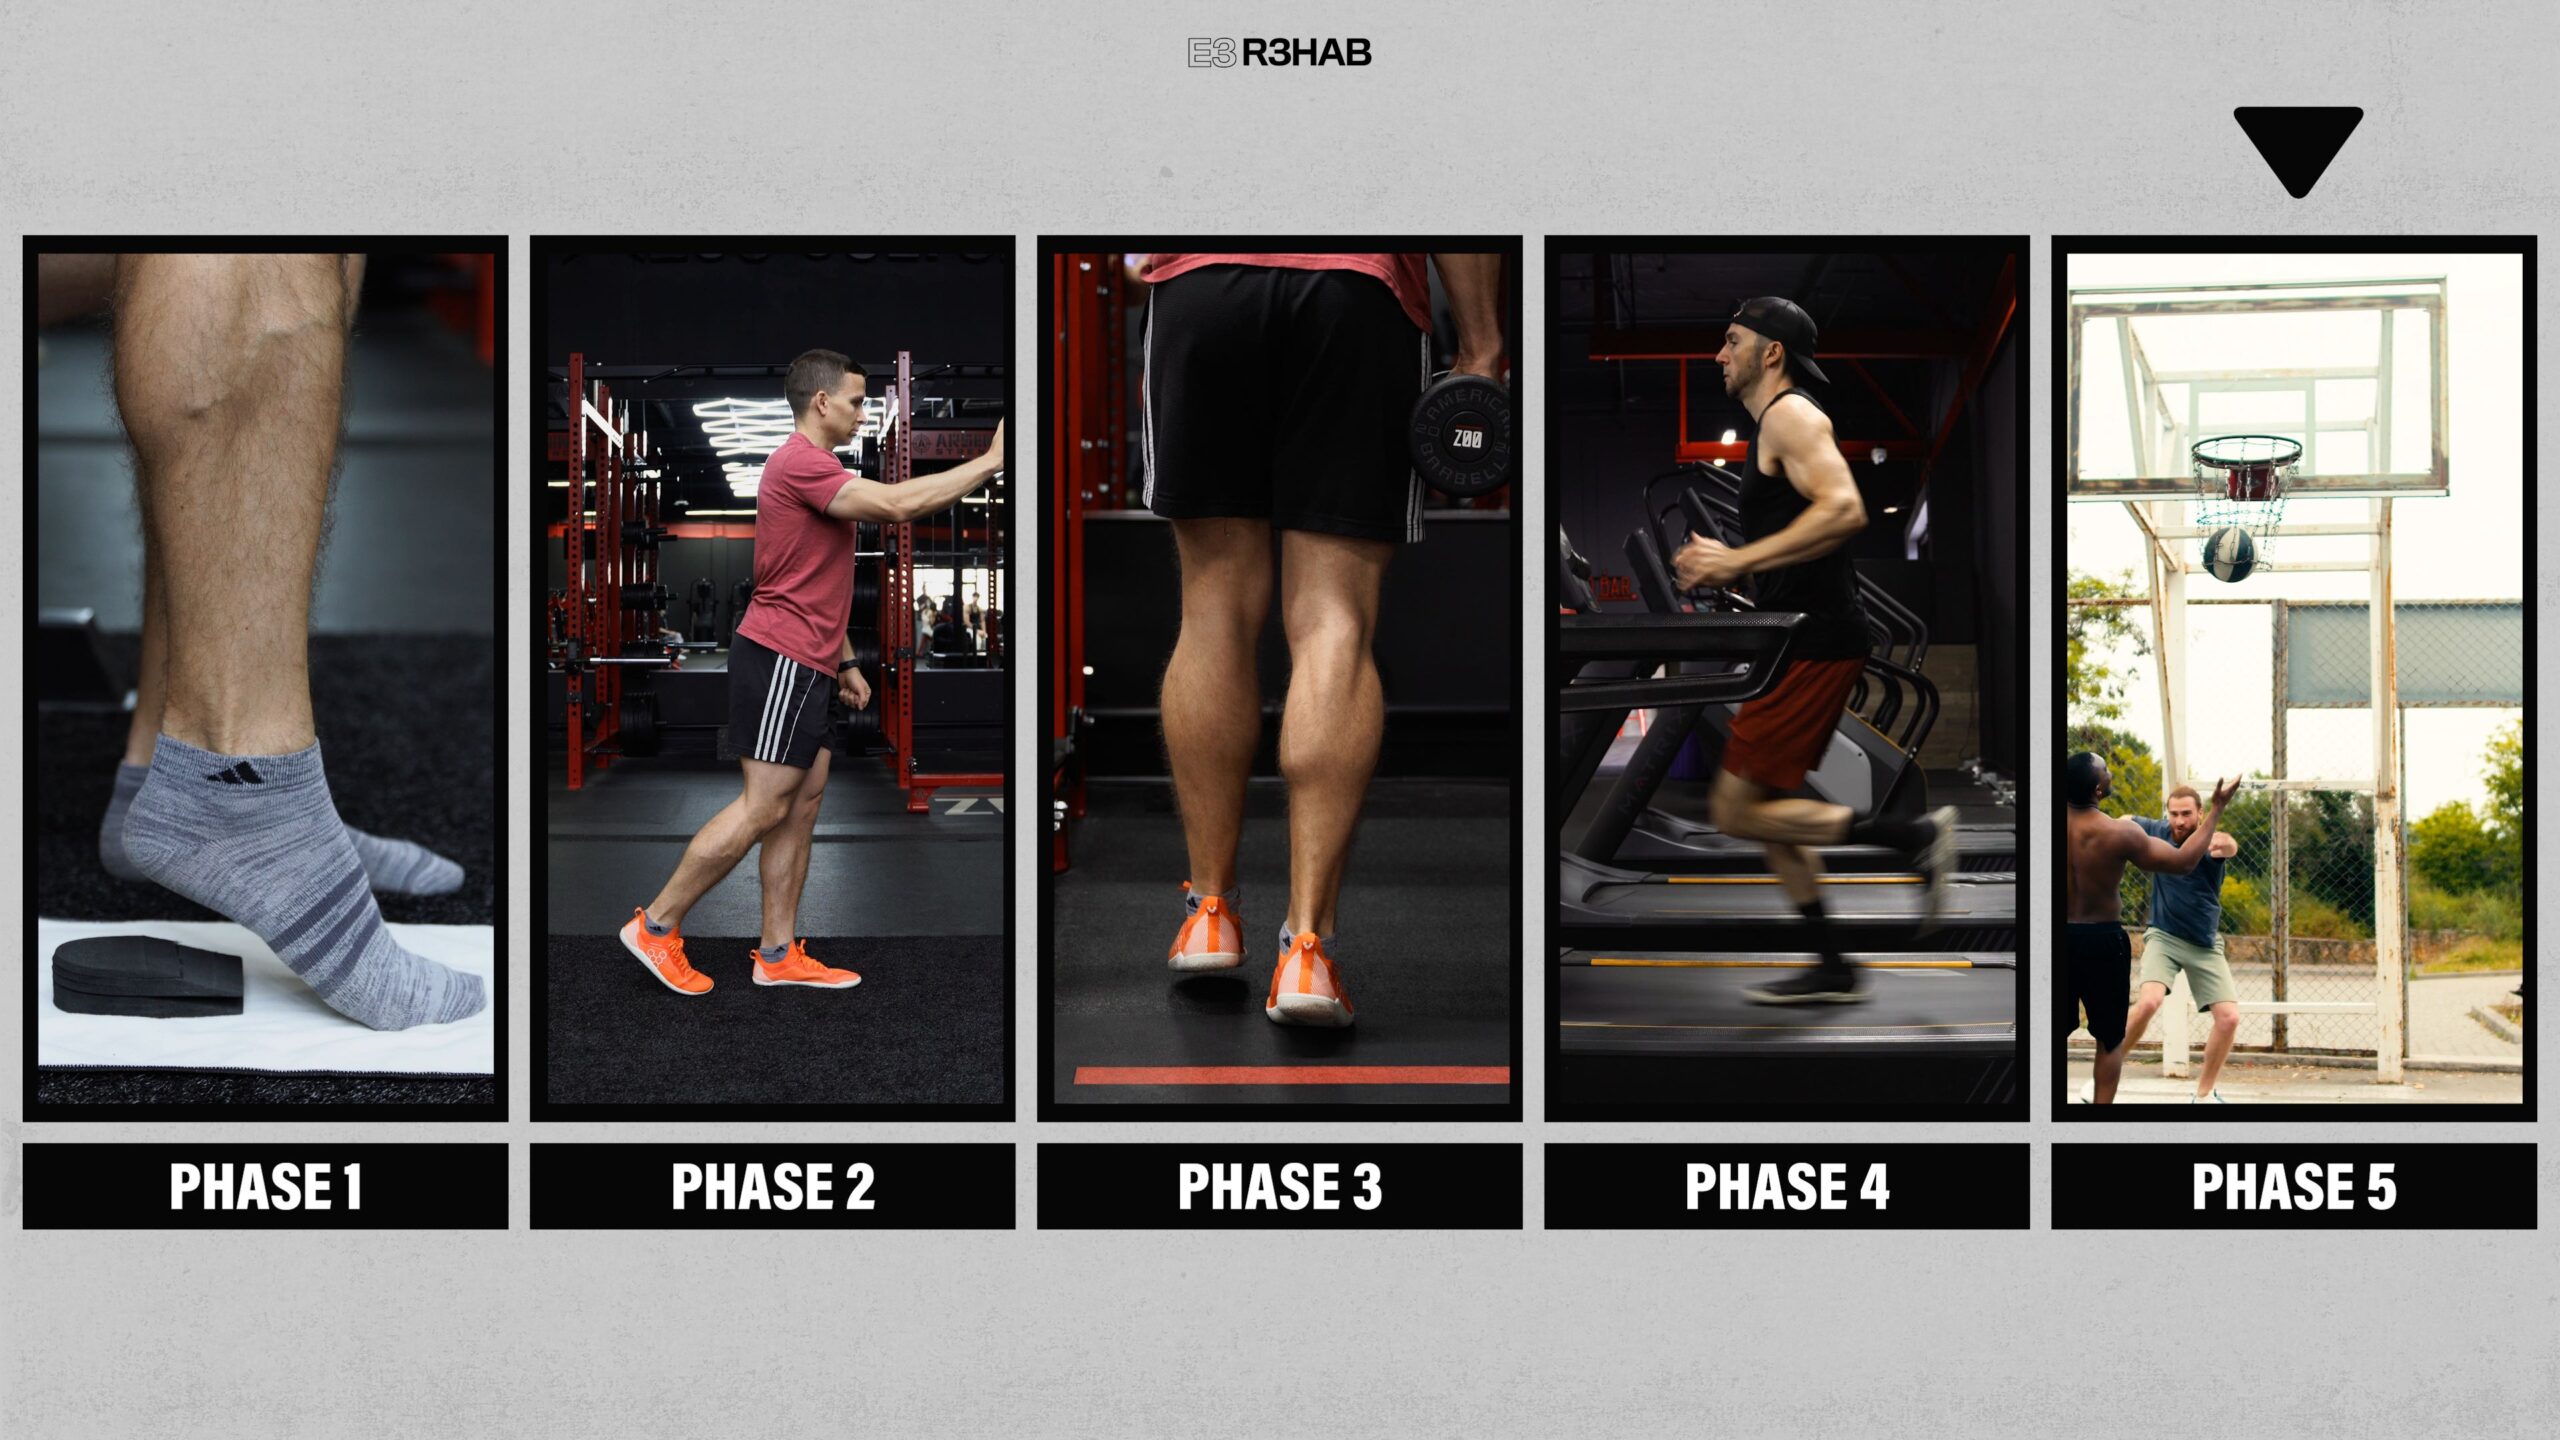
I’m going to present a rehab plan that consists of 5 overlapping phases, starting with a period of controlled mobilization and ending with recommendations for returning to sport, assuming that aligns with your goals.
I will provide some guidelines for when you can start and progress certain exercises or begin a particular phase, but it is important to understand that surgical precautions, symptoms, function, etc. will influence these factors. Therefore, you should speak to your surgeon or physical therapist before beginning any new exercises.
Phase 1: Controlled Mobilization
Immediately following the injury, you will wear what is called a CAM (Controlled Ankle Movement) walker boot, and, depending on your doctor’s recommendations, crutches or another assistive device might be necessary early on.
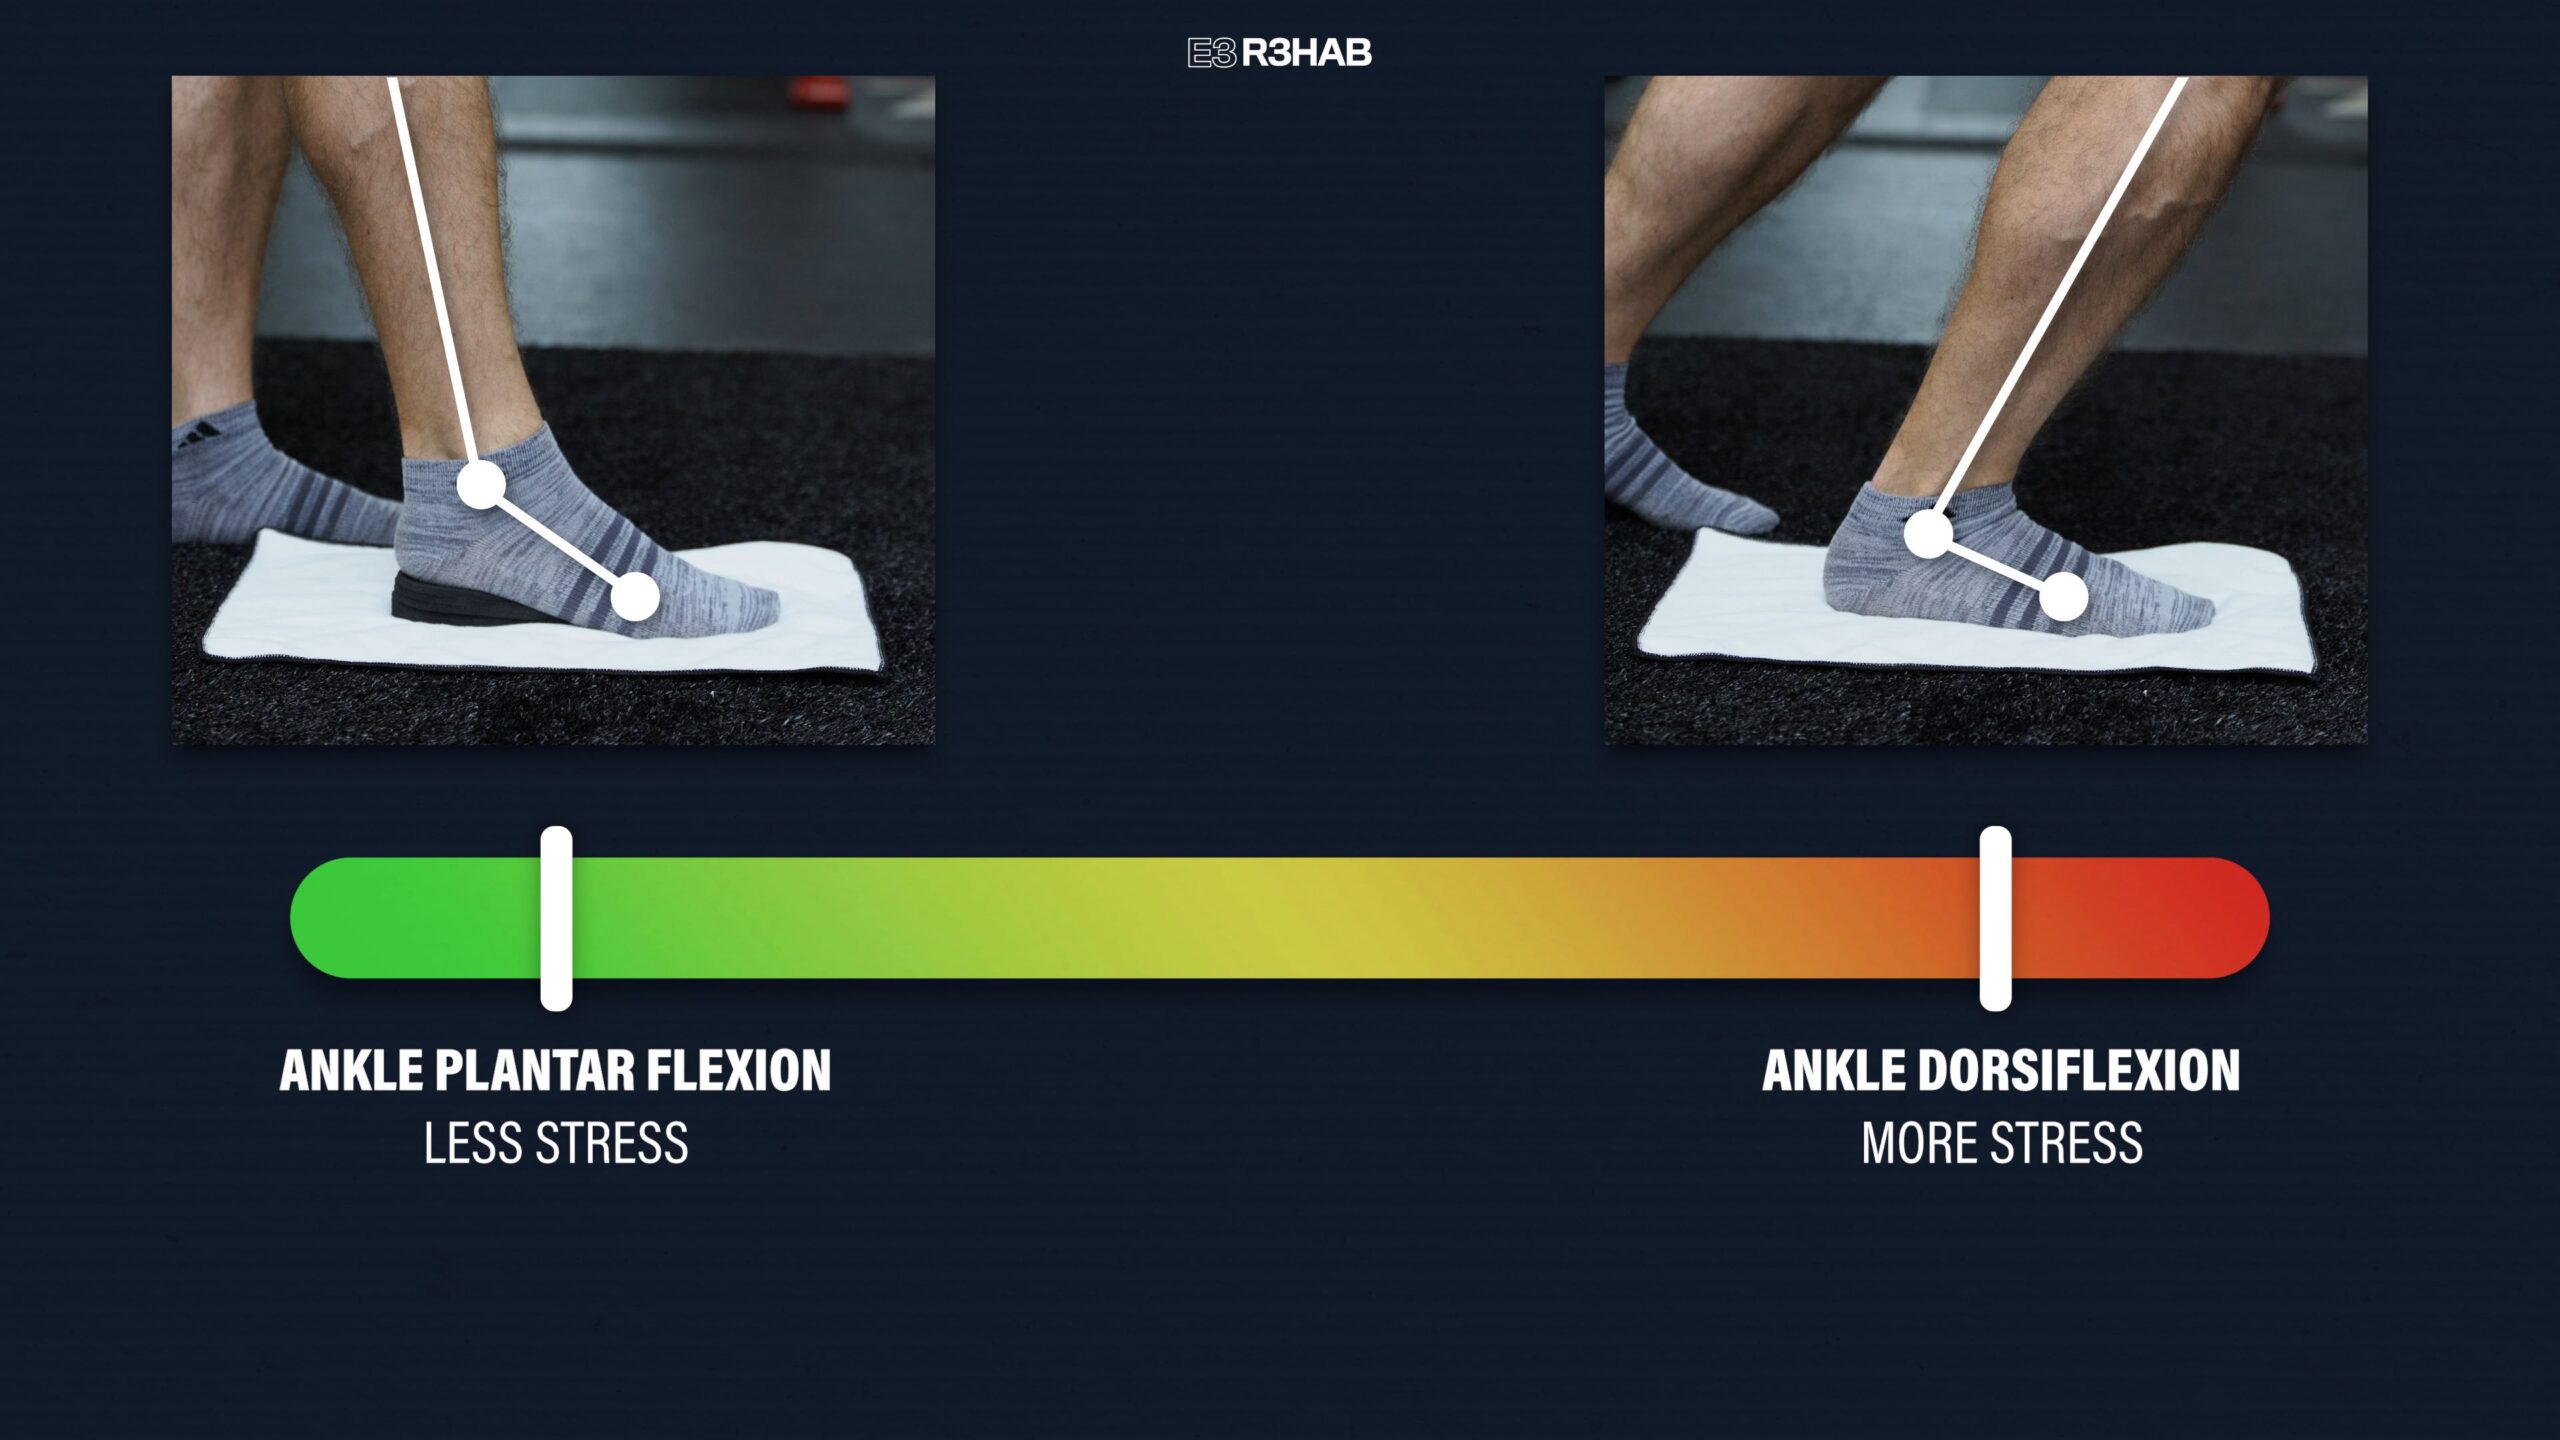
Inside the boot, you will have heel lifts or wedges that allow for progressive adjustment of ankle dorsiflexion. Similar to the stepwise progression I mentioned earlier, exercises, activities, or positions that involve more plantar flexion will place less stress on the Achilles tendon, while dorsiflexion, a movement where the angle between your foot and shin decreases, will generally place more stress on the Achilles tendon.
Therefore, limiting the amount of dorsiflexion is crucial during the early stages of rehab as it helps promote tendon healing and minimize tendon elongation, which has the potential to leadto worse outcomes.
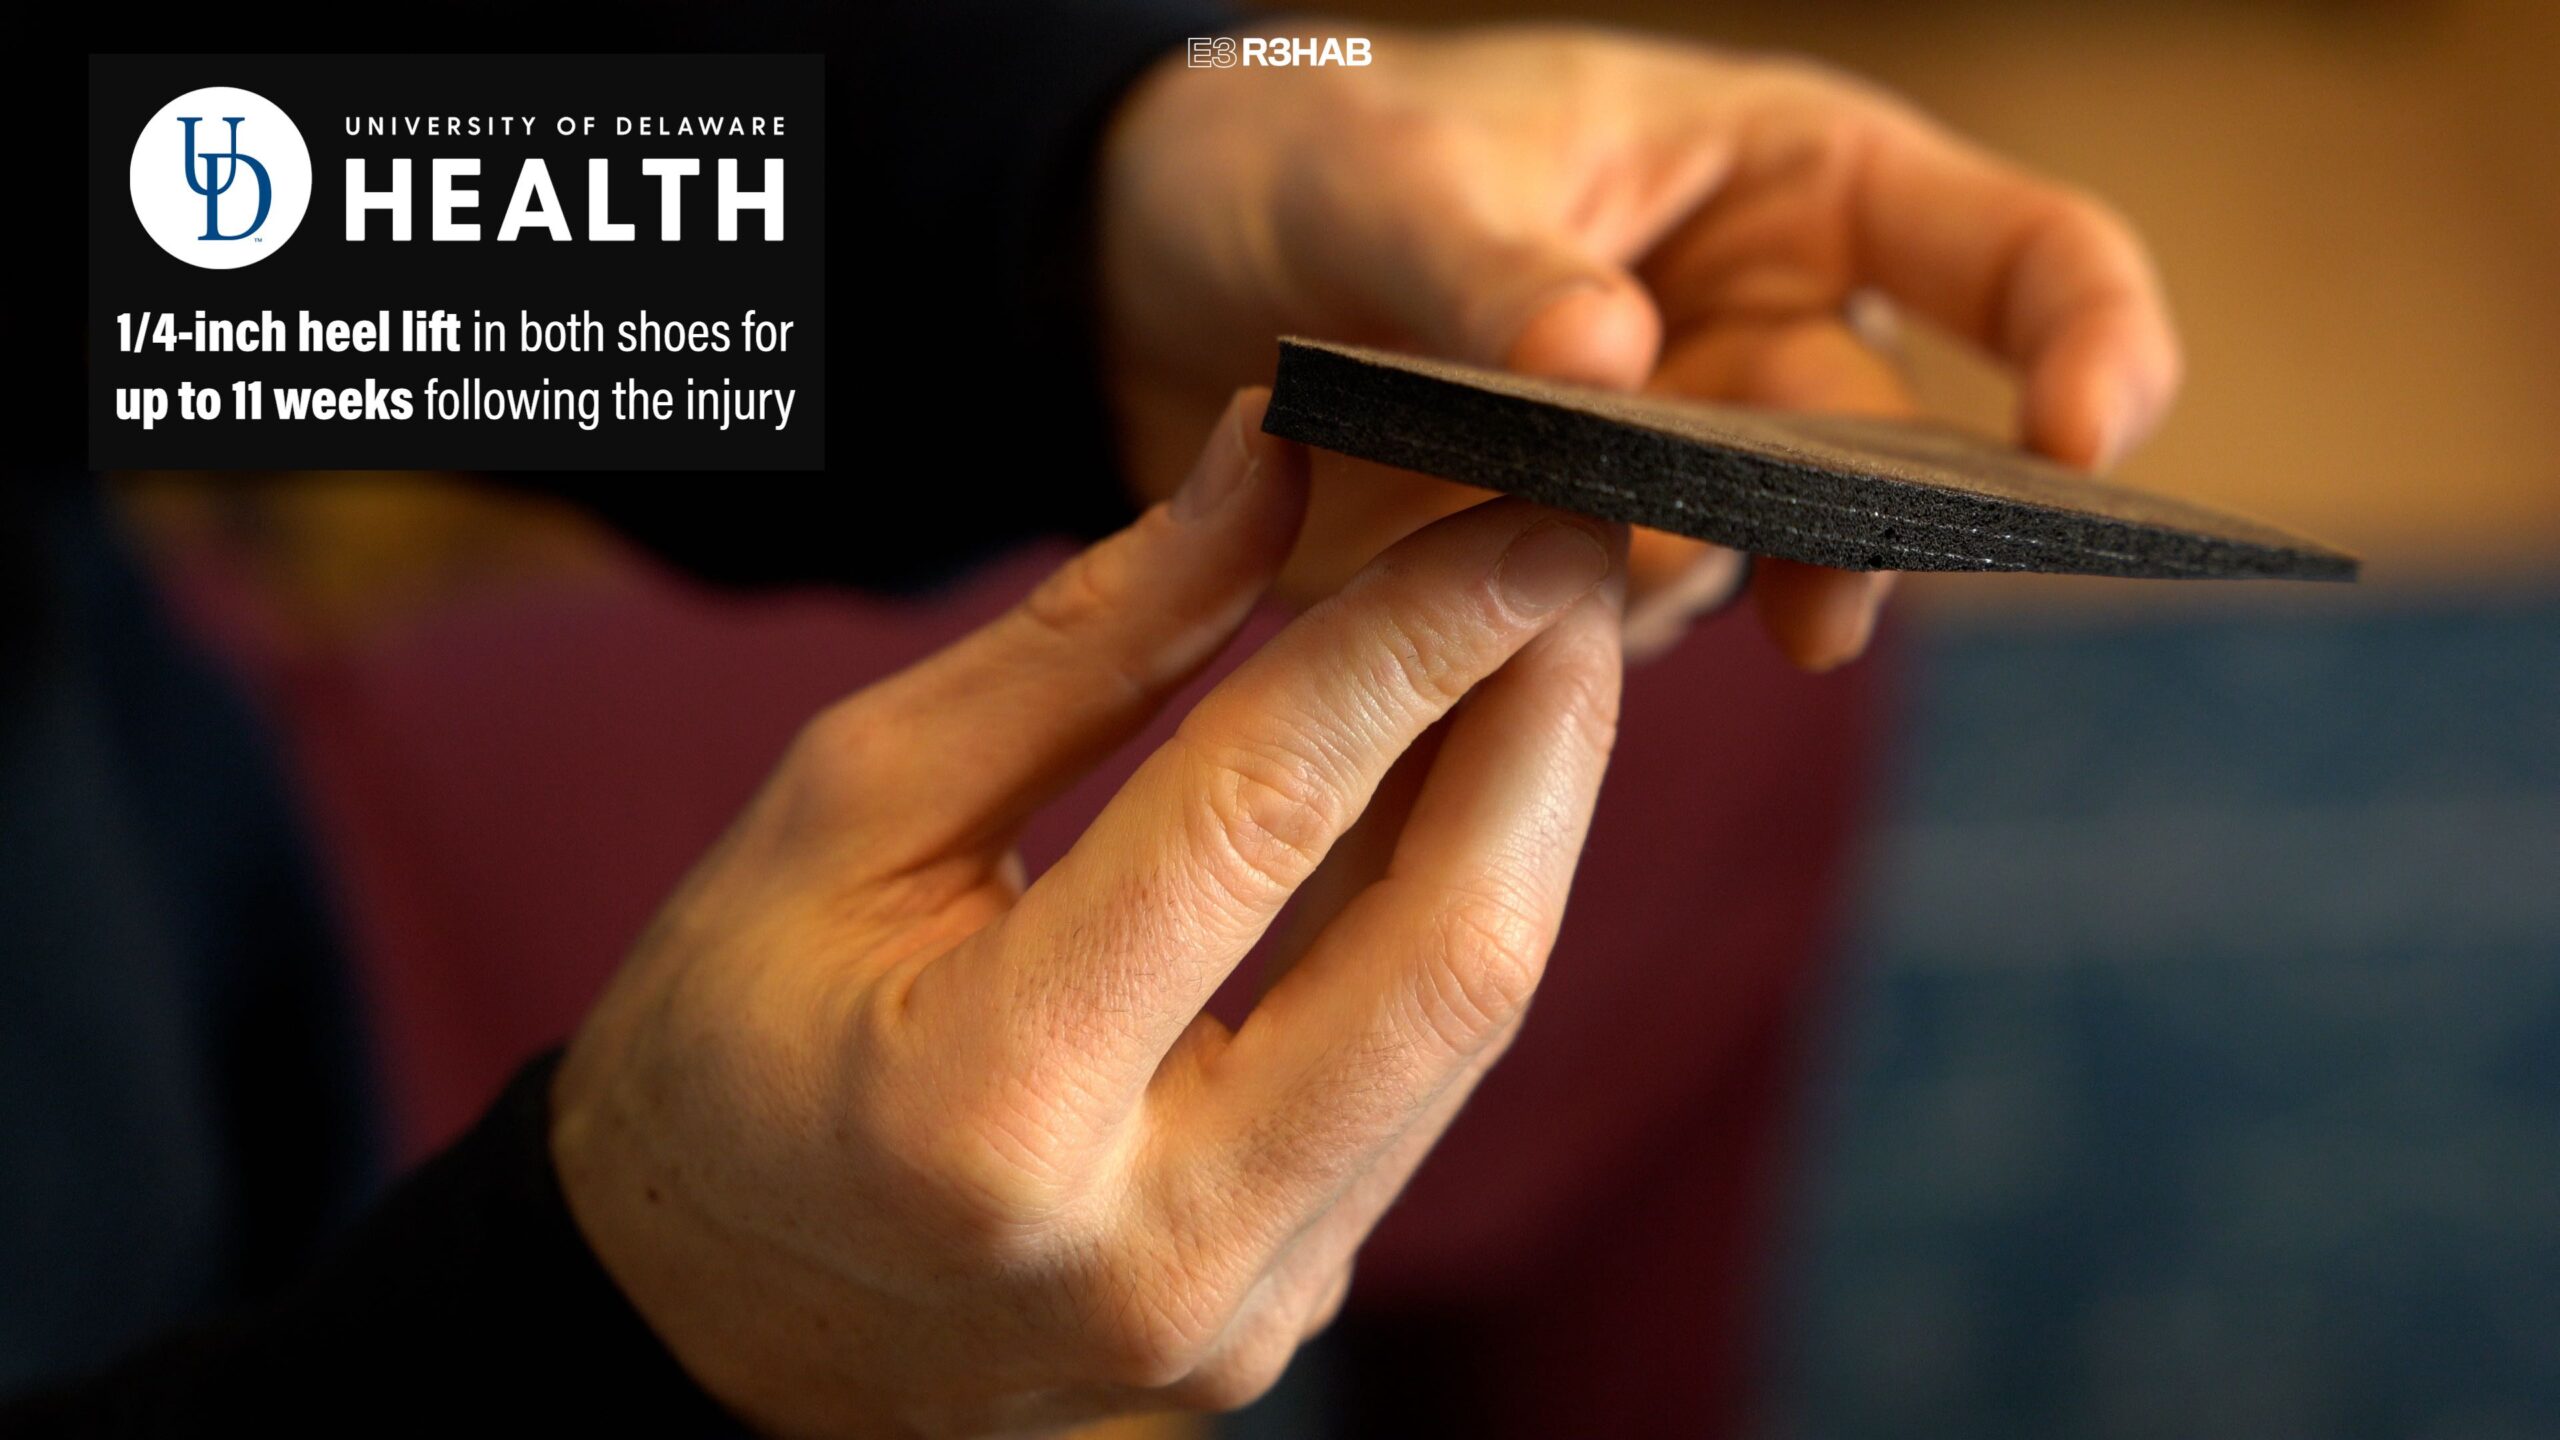
Most protocols typically start in about 30° of plantar flexion and gradually reduce this amount until the boot is removed, which can be around weeks 6-8 or longer. Even after you transition back to regular shoes, you will likely continue to use a heel lift. For example, the University of Delaware recommends using a 1/4-inch heel lift in both shoes for up to 11 weeks following the injury.
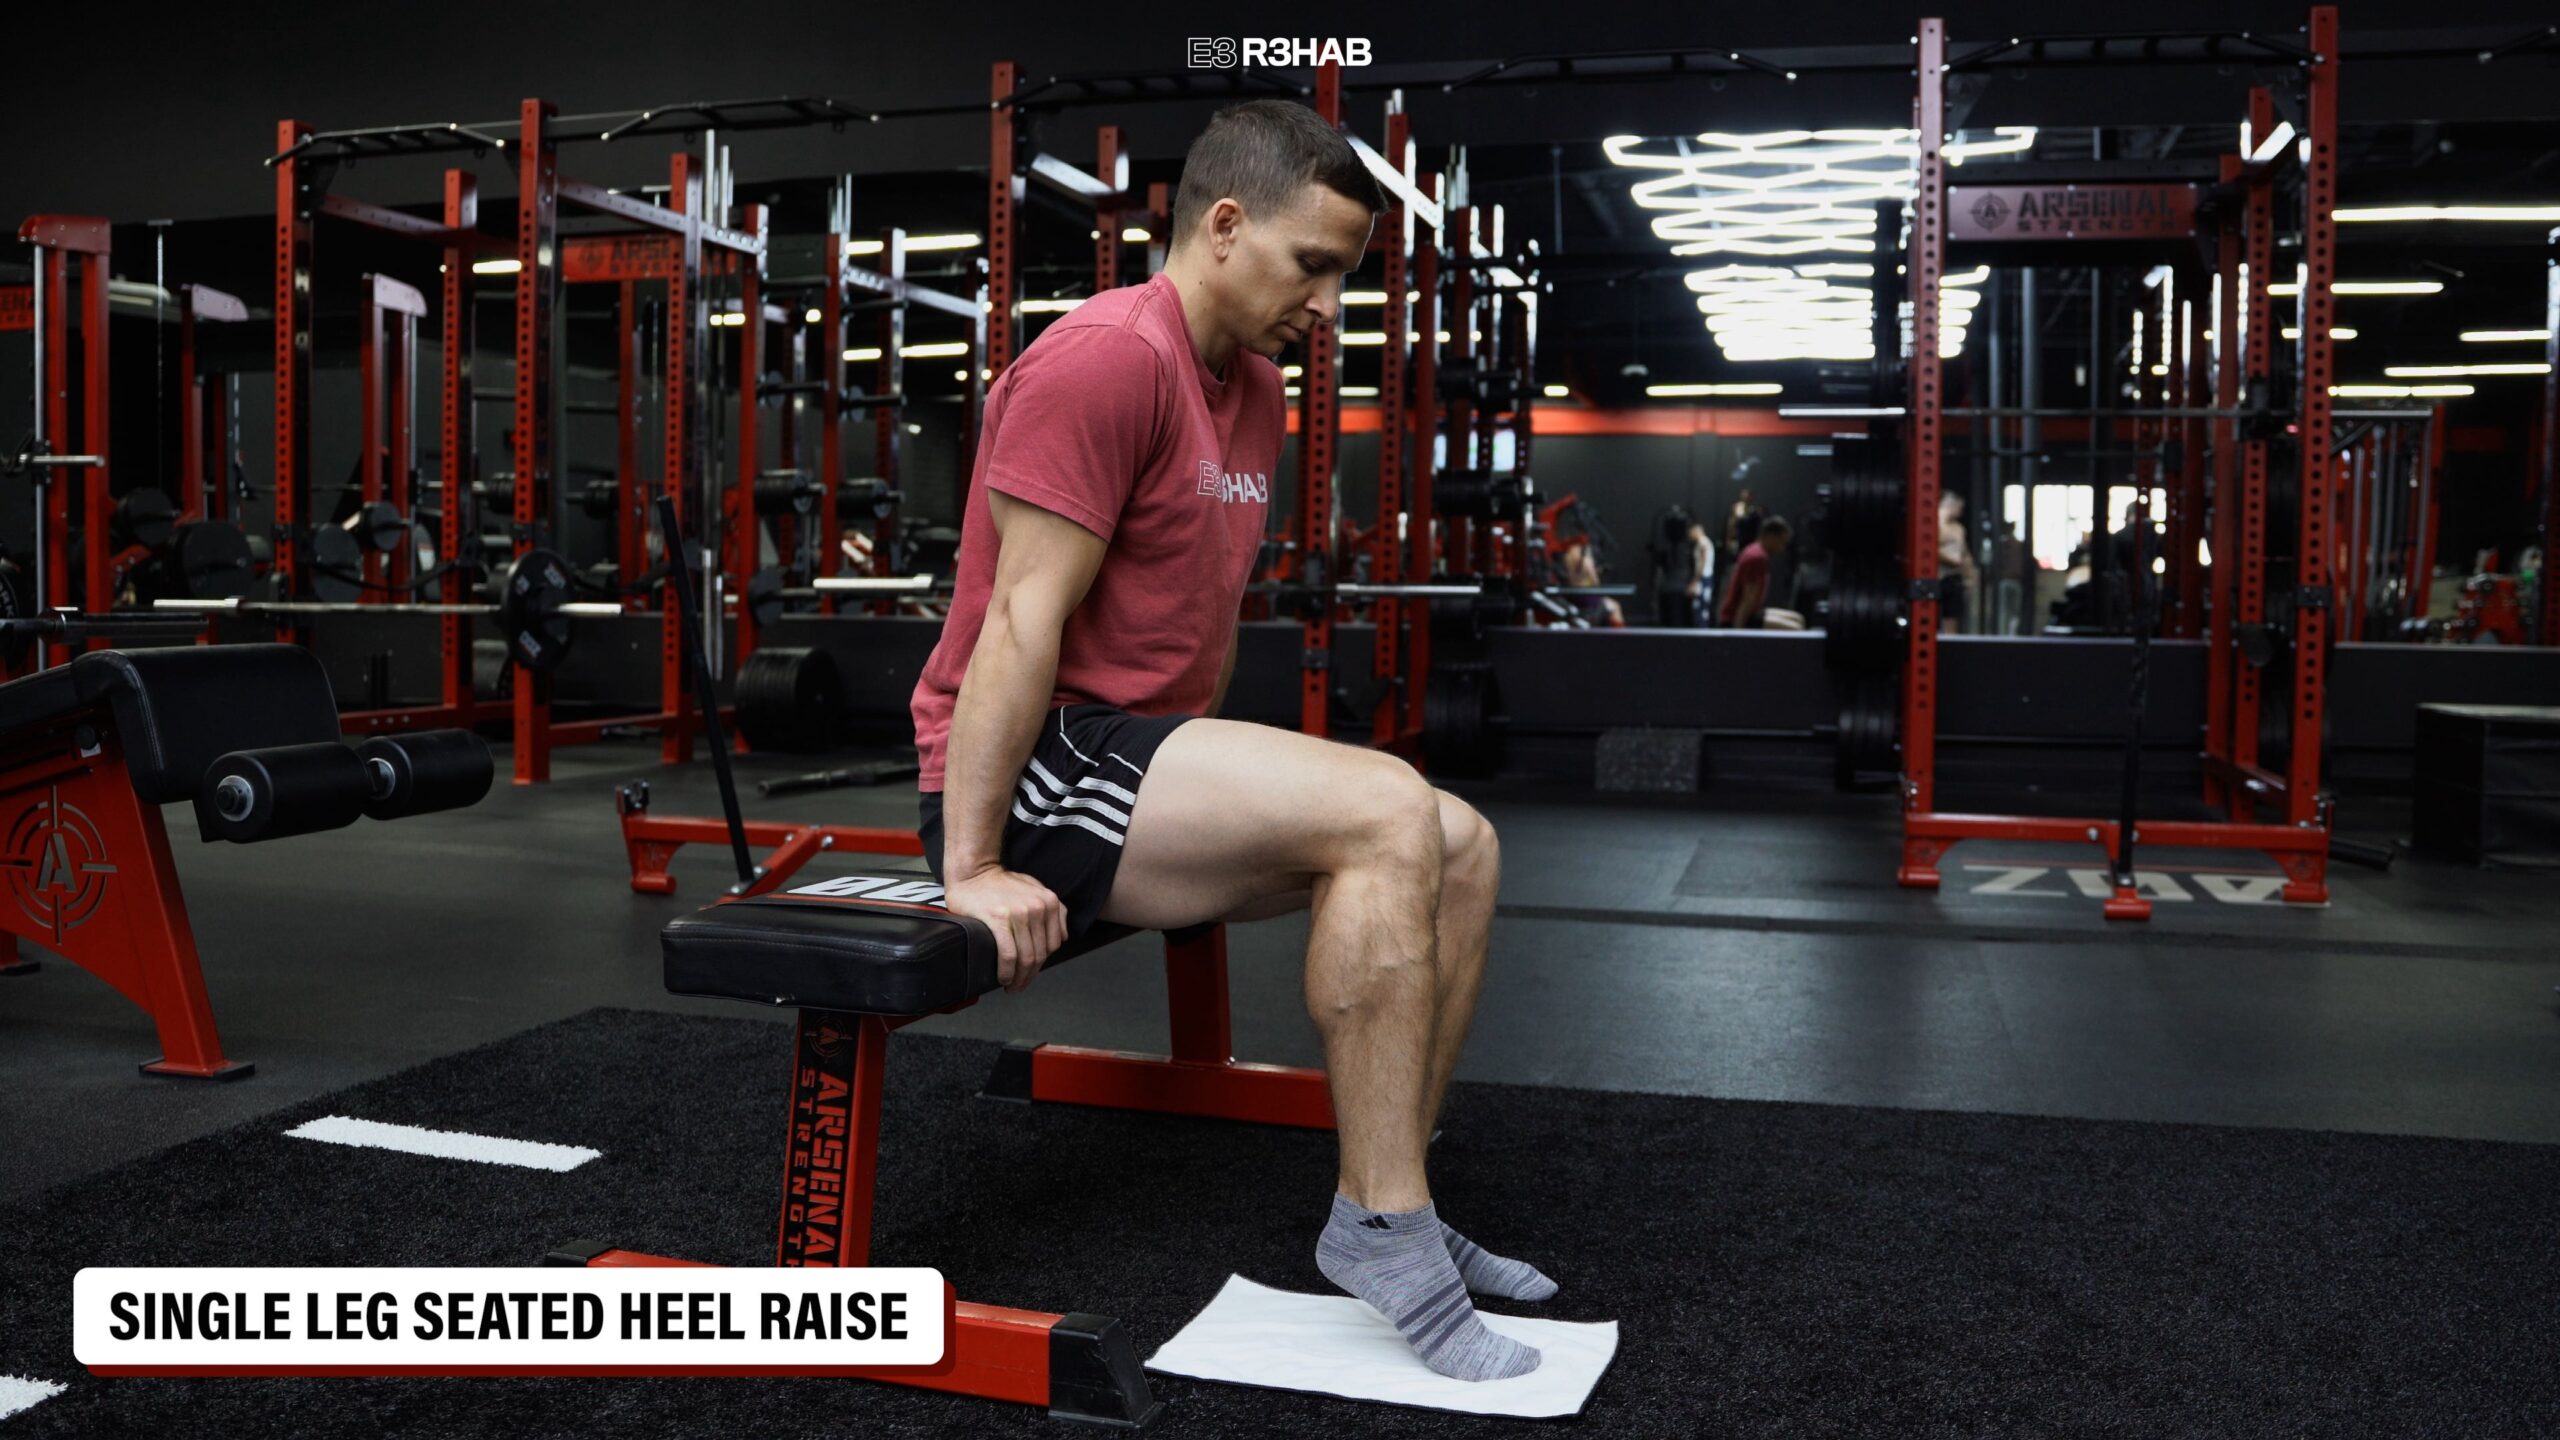
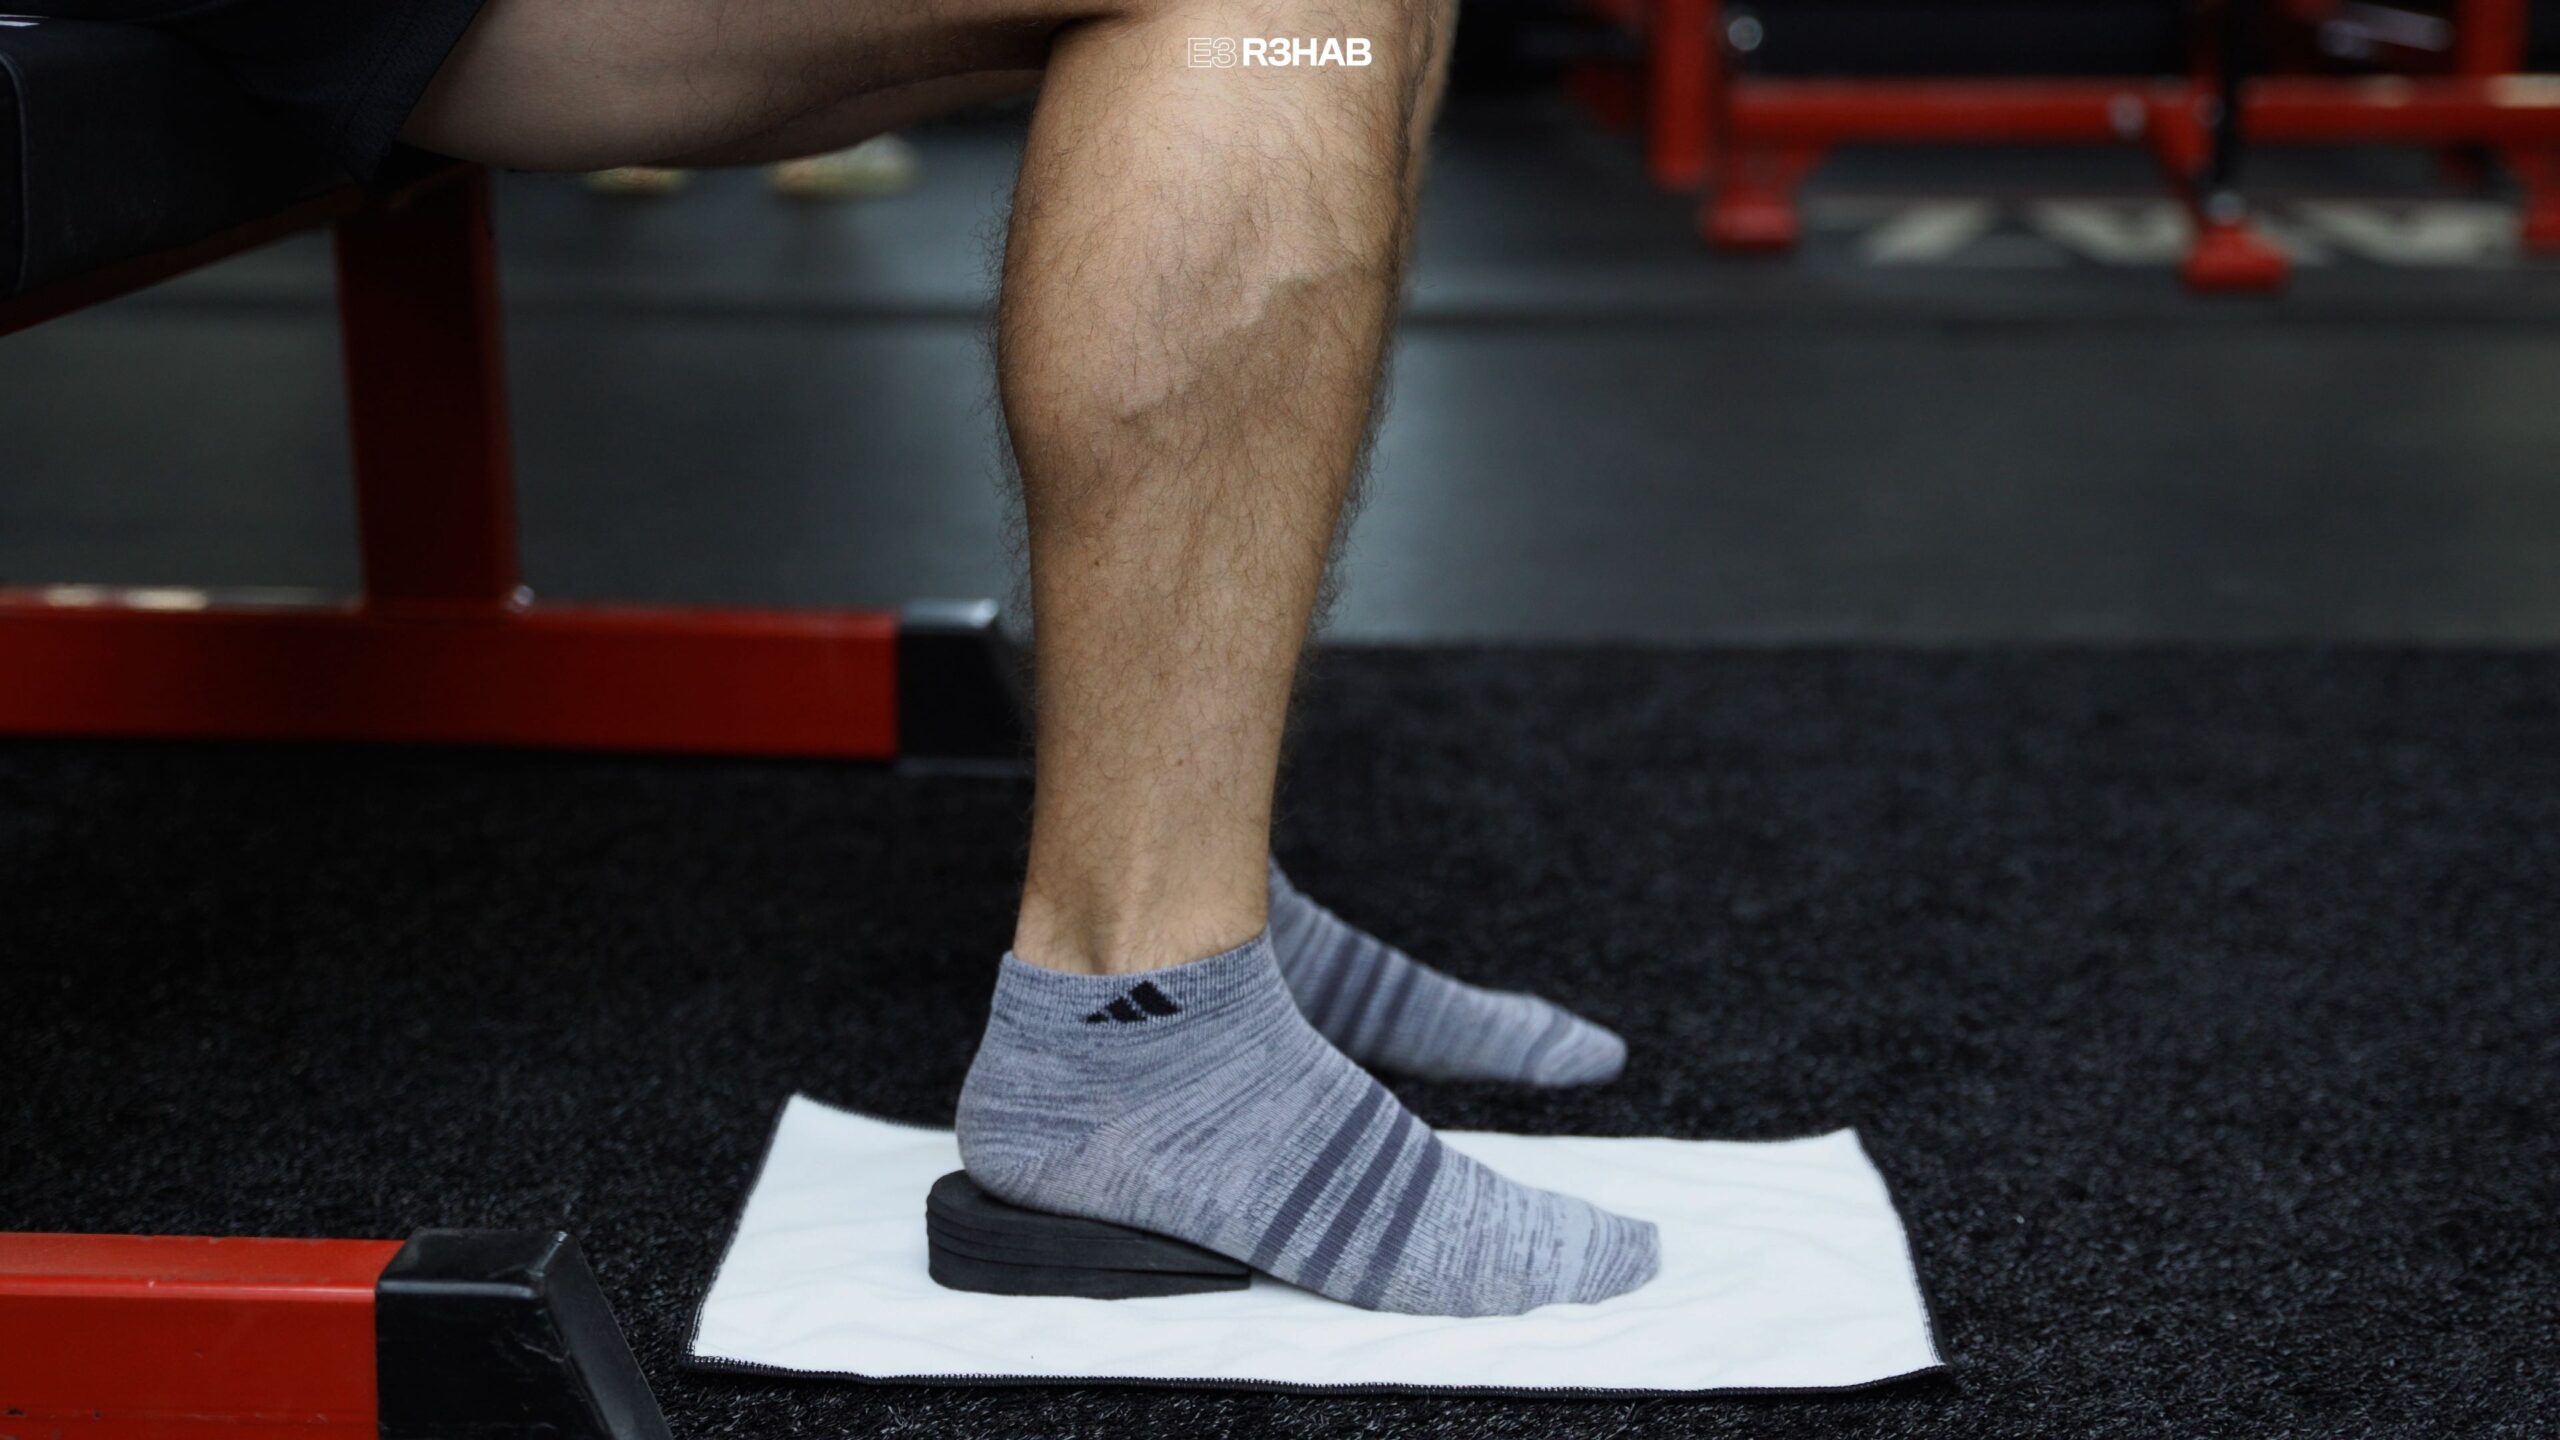
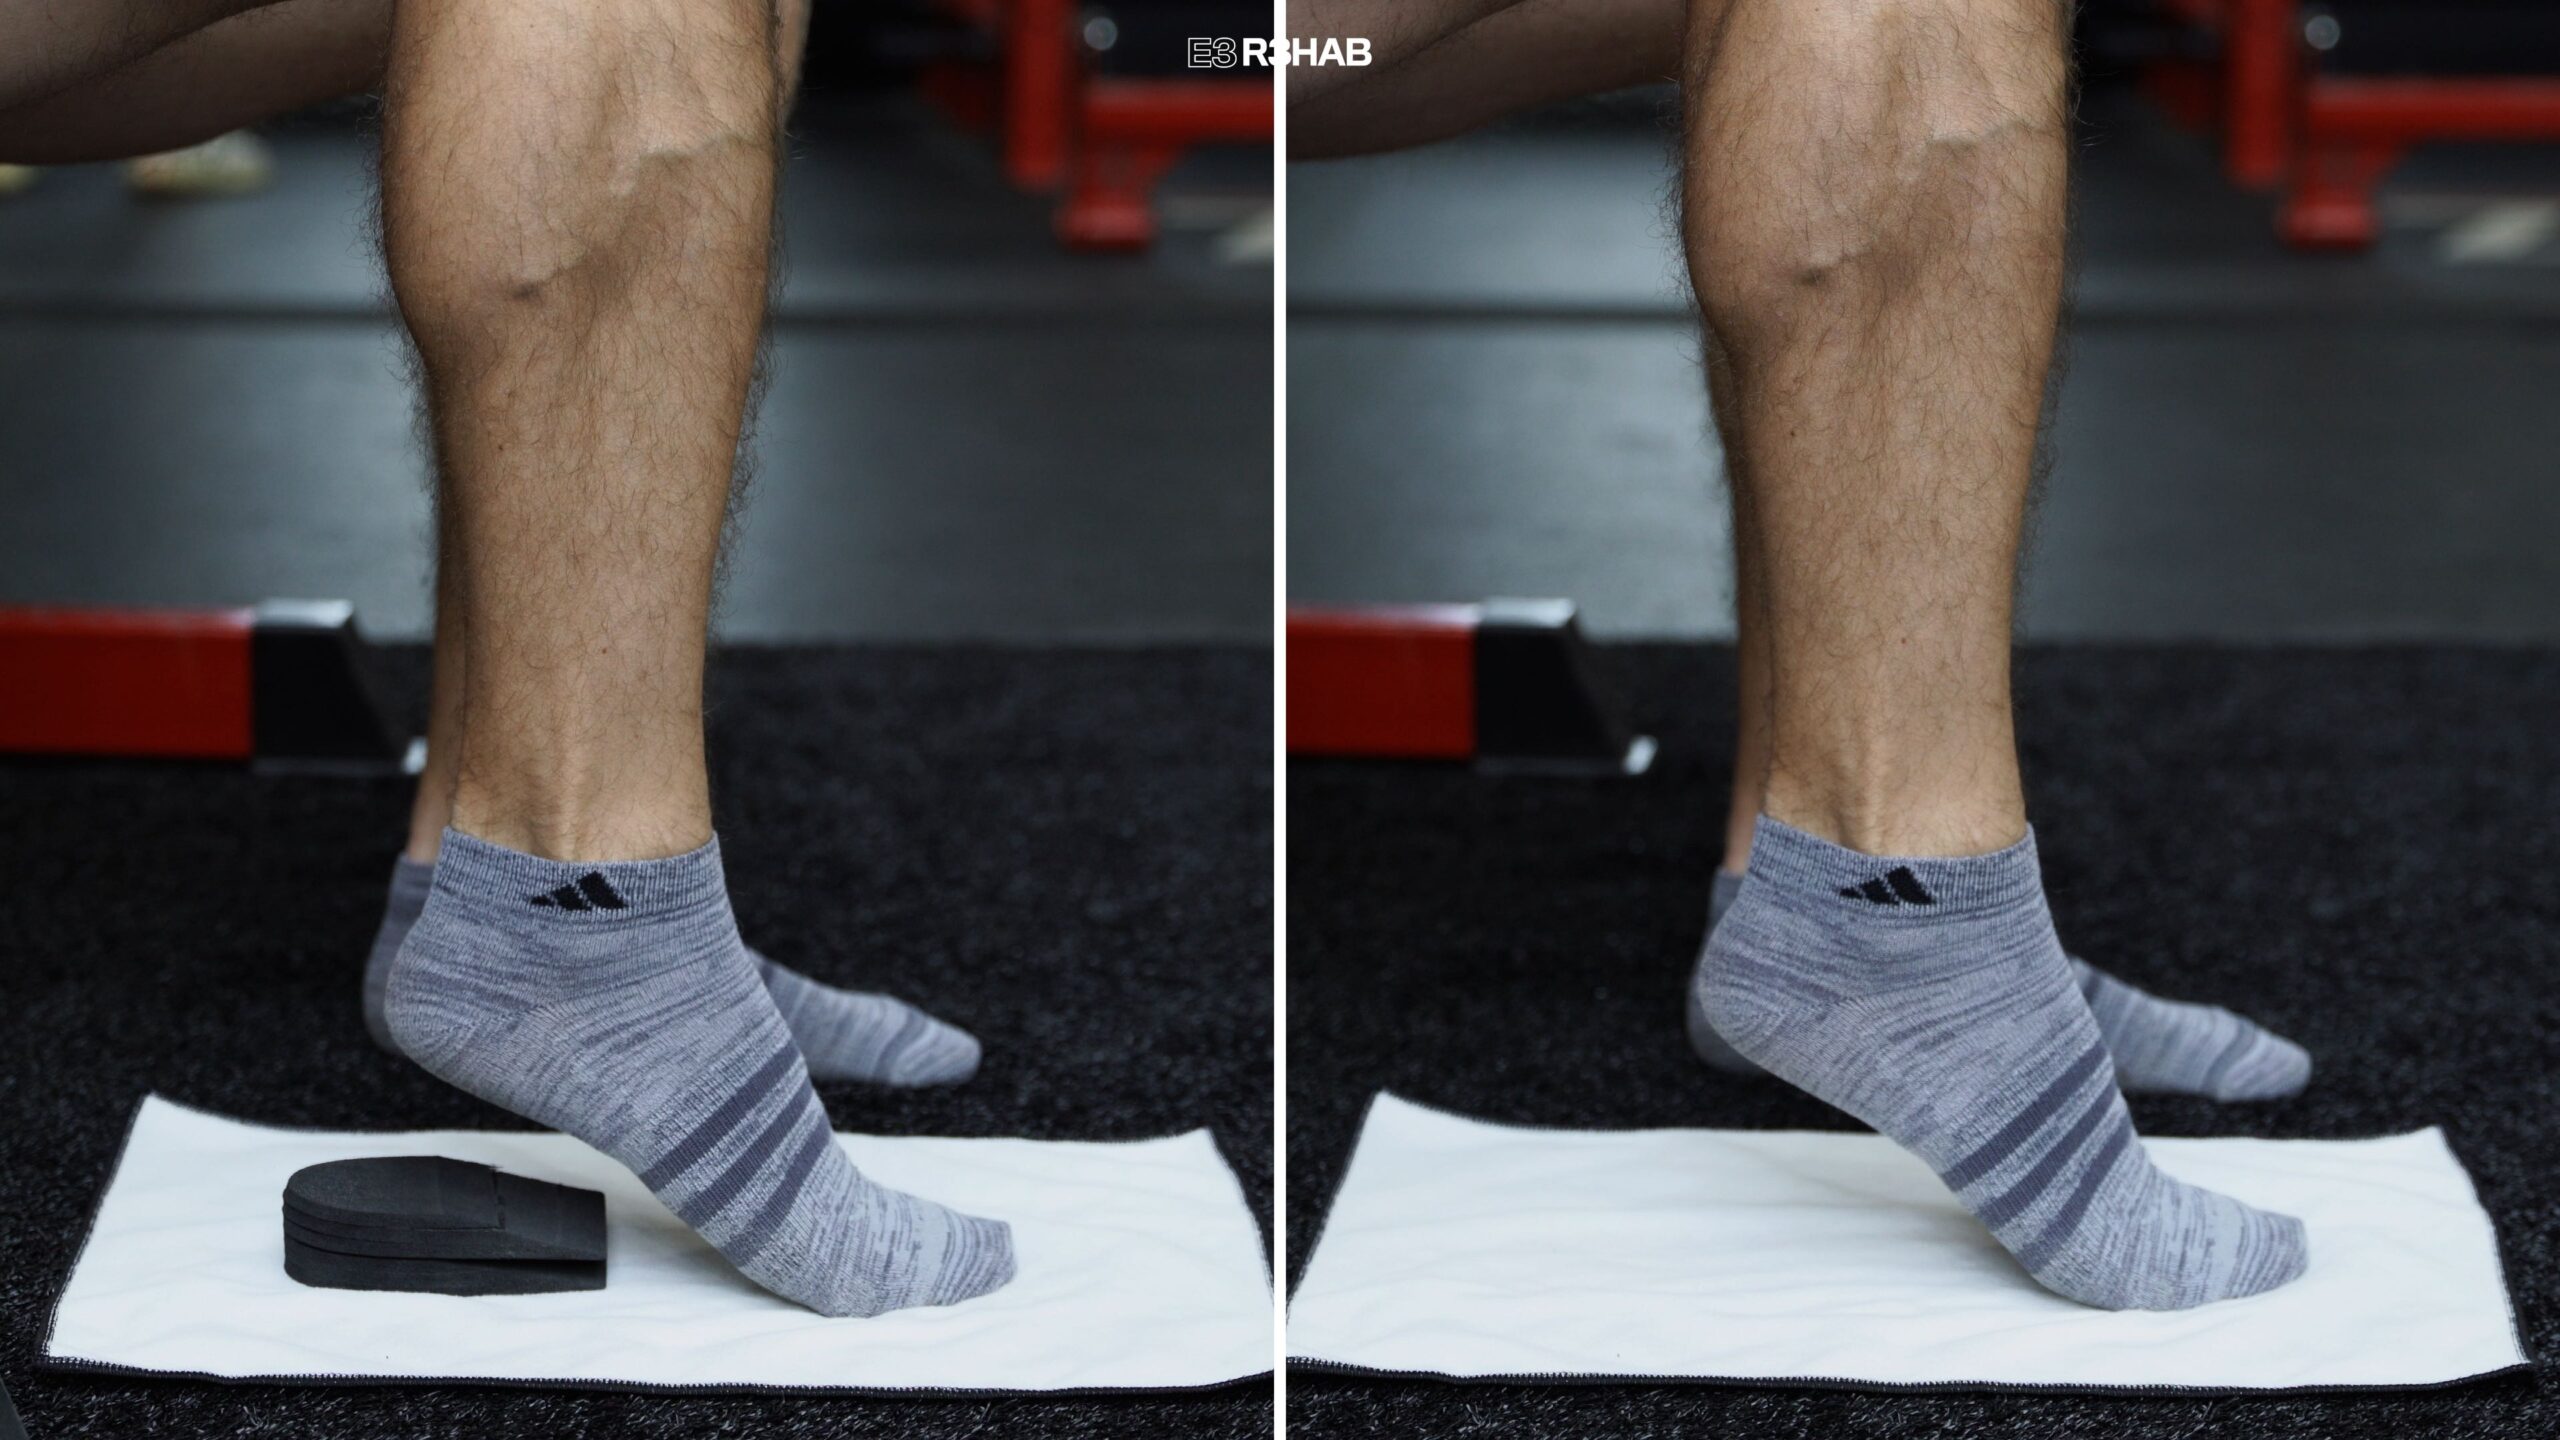
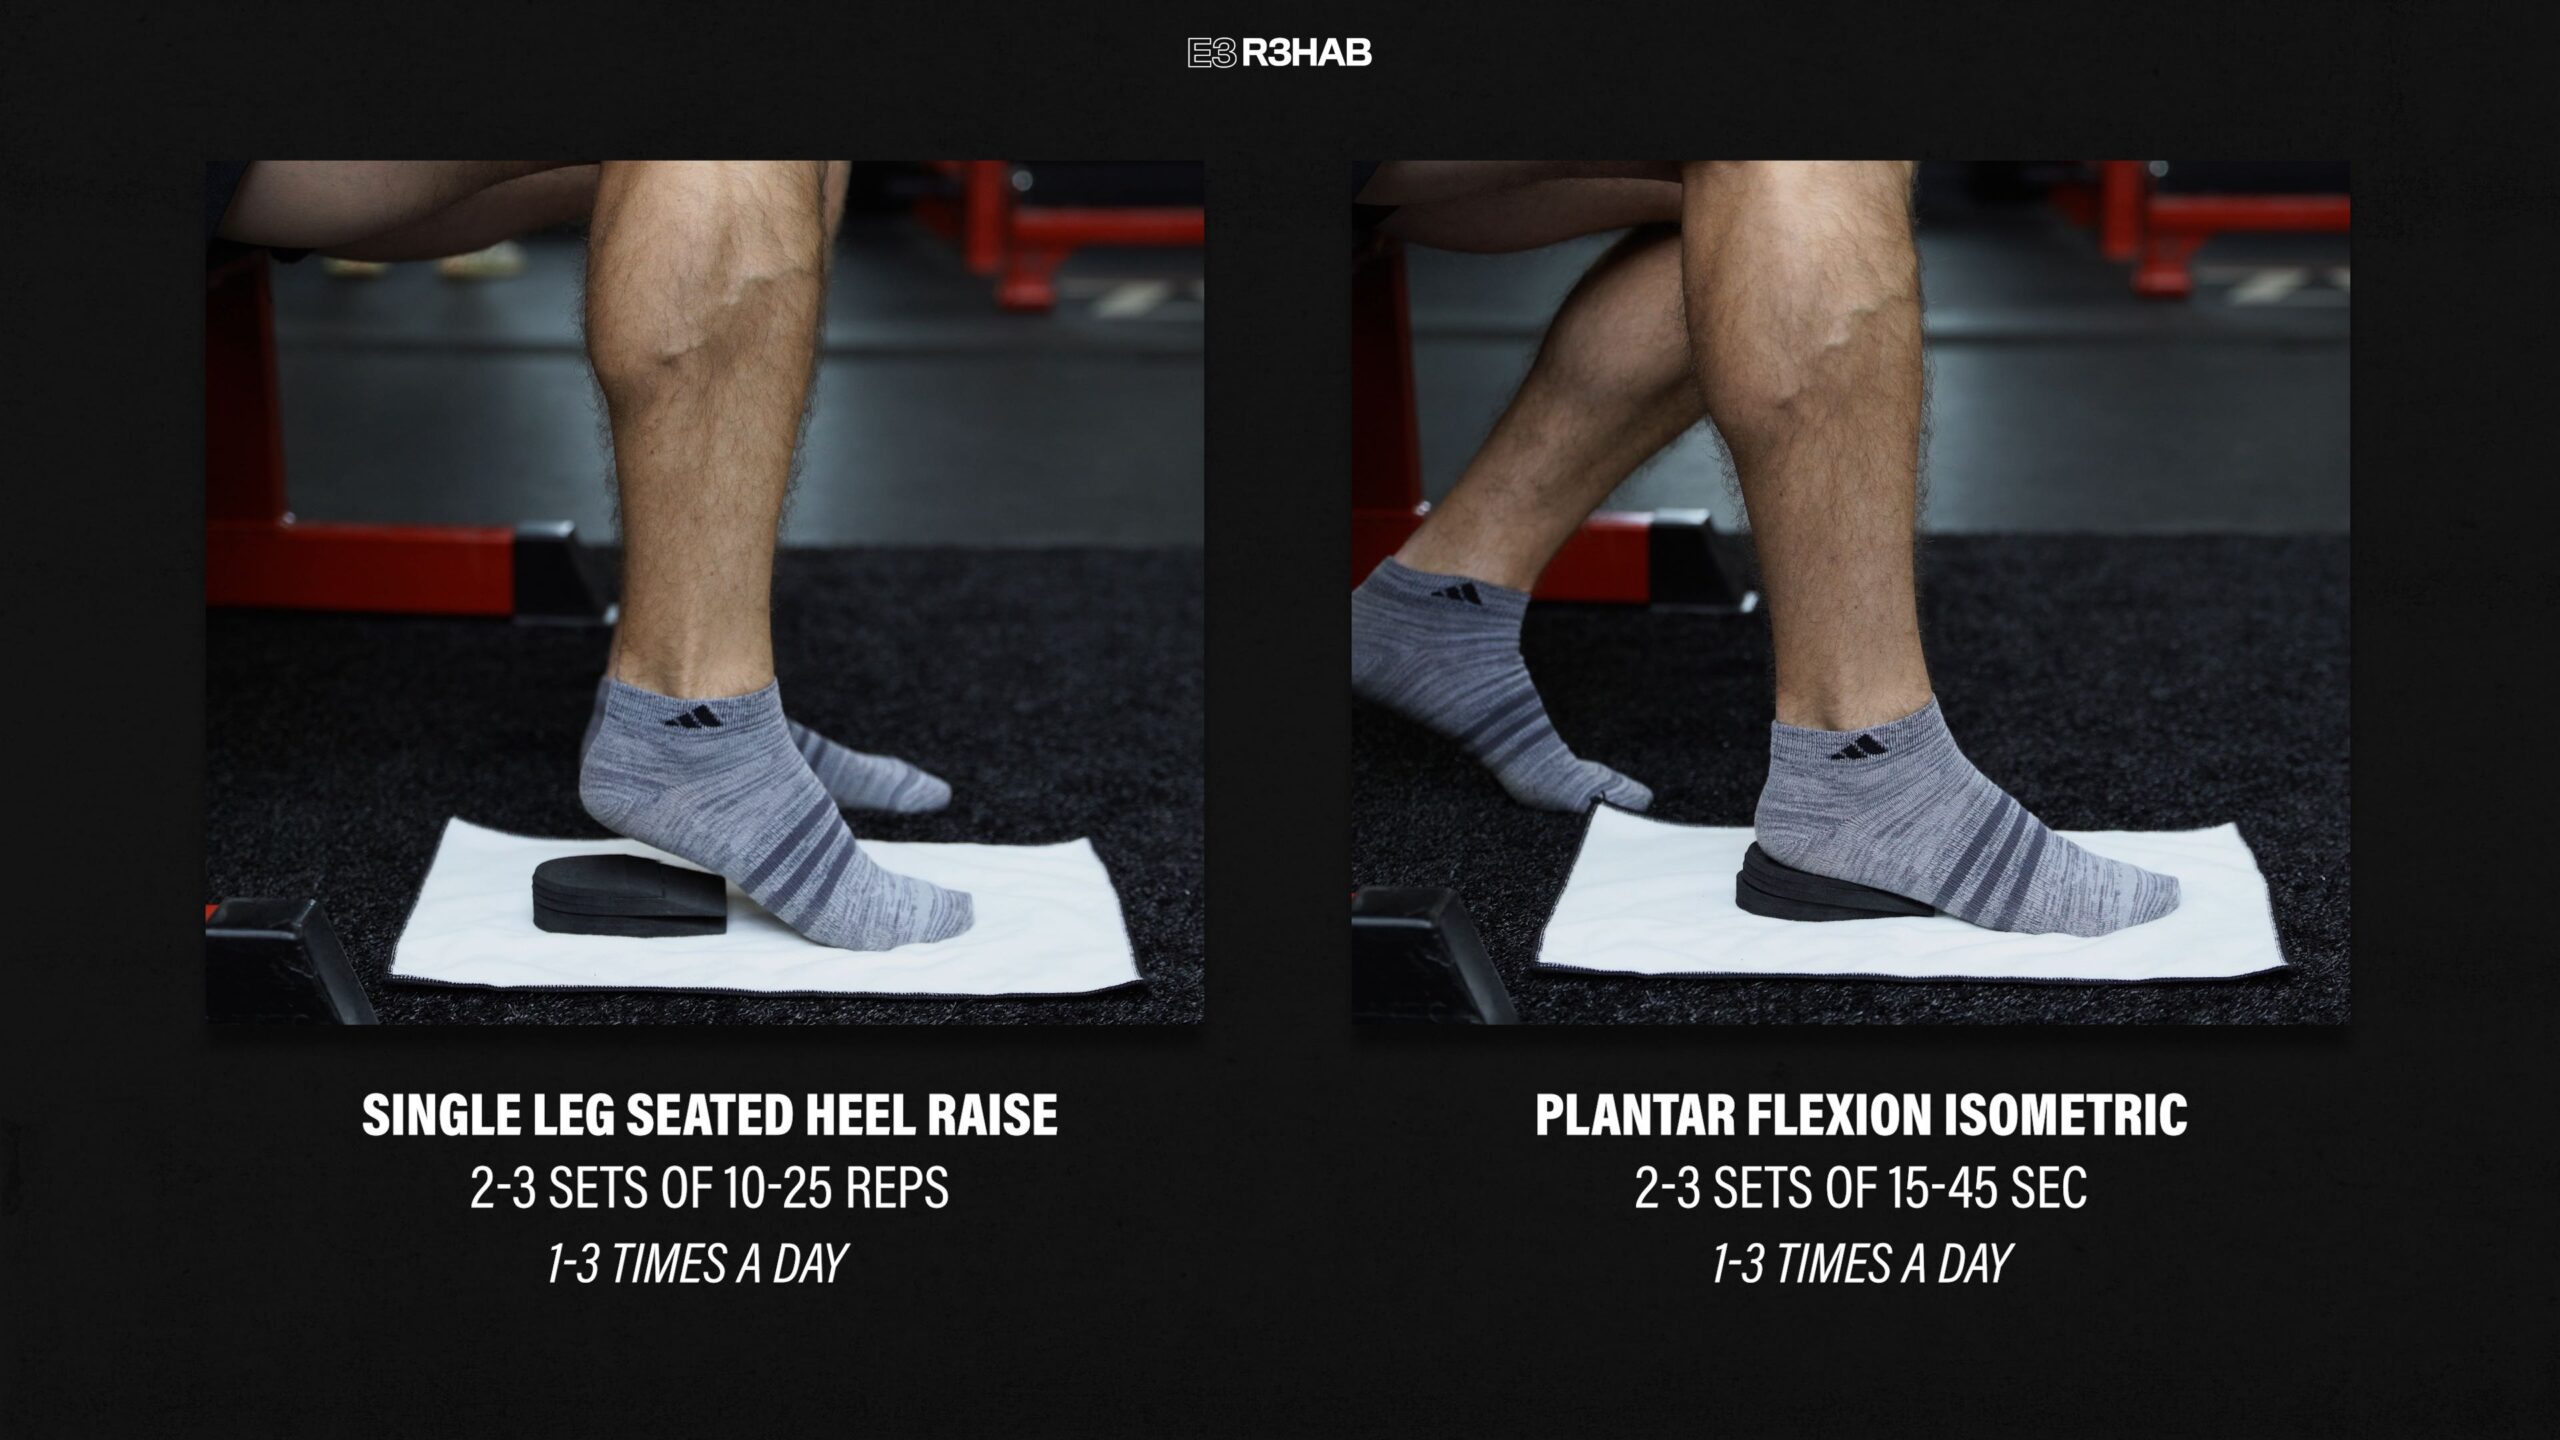
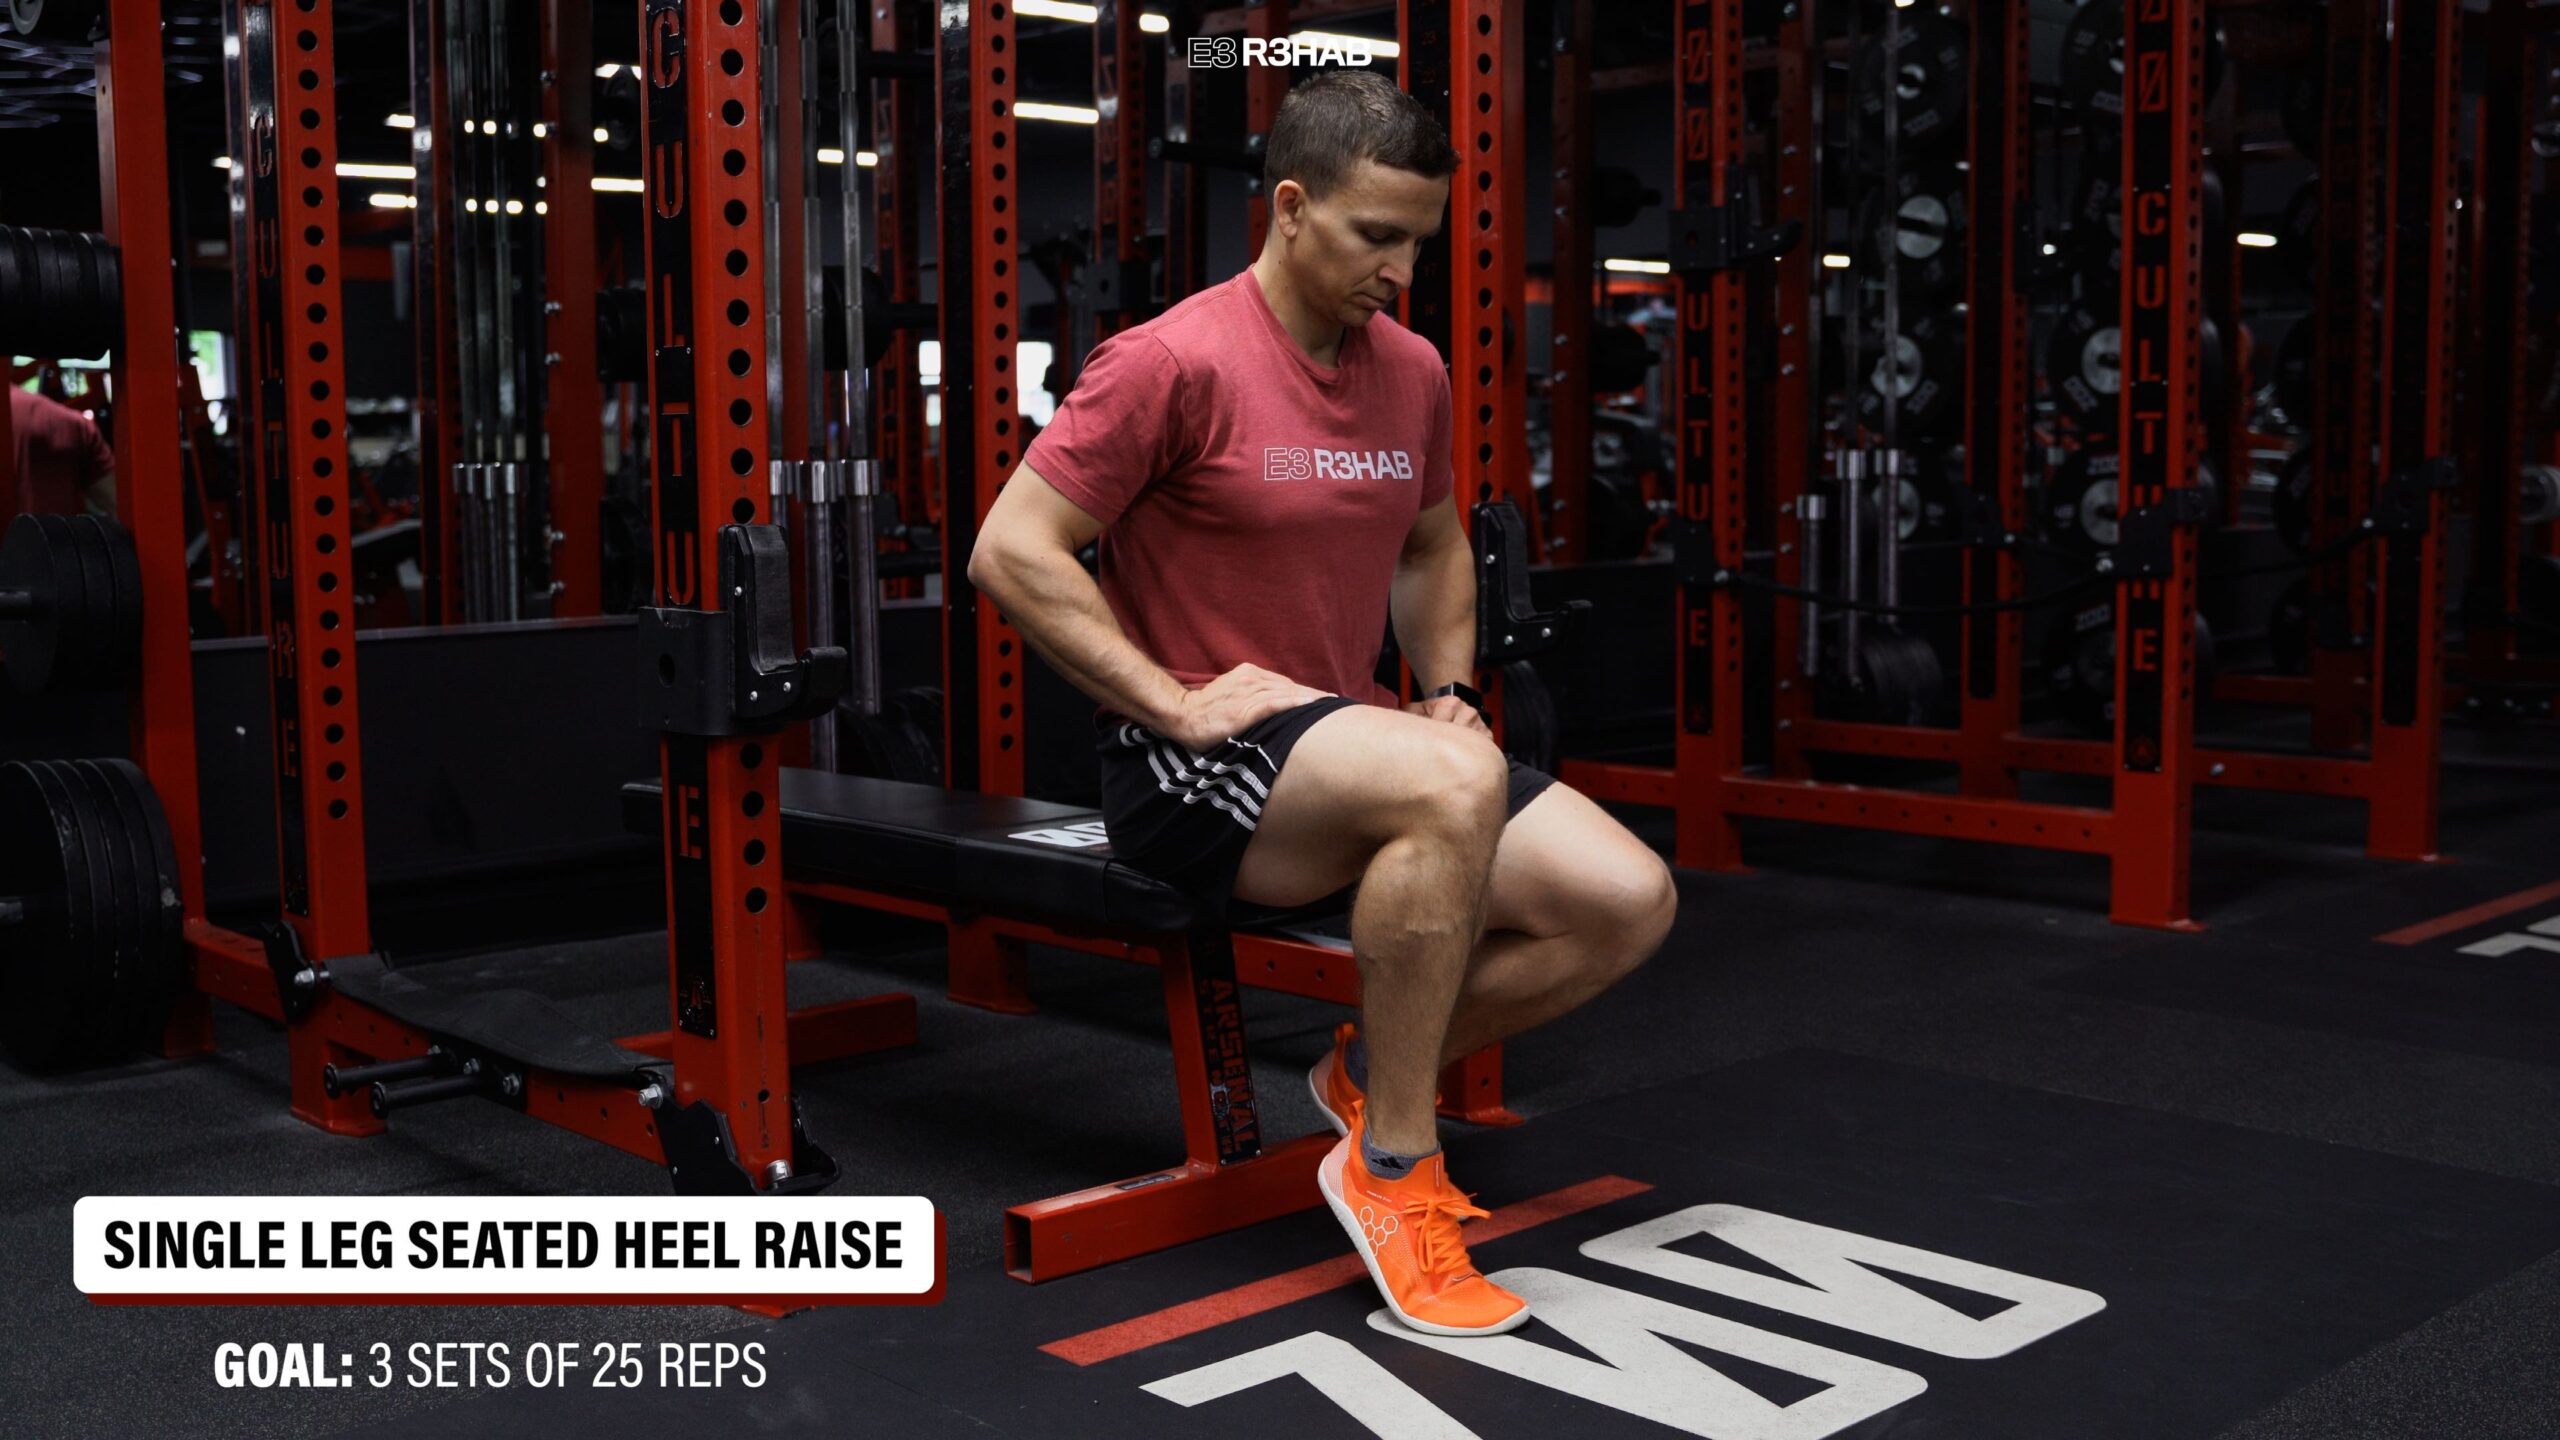
1. Plantar Flexion Strength. The primary option here is a single-leg seated heel raise without weight. Lift your heel as high as possible, with an emphasis on squeezing your calf muscles at the top.
Earlier on, these are performed with the heel elevated on a wedge to limit the amount of dorsiflexion you move through.
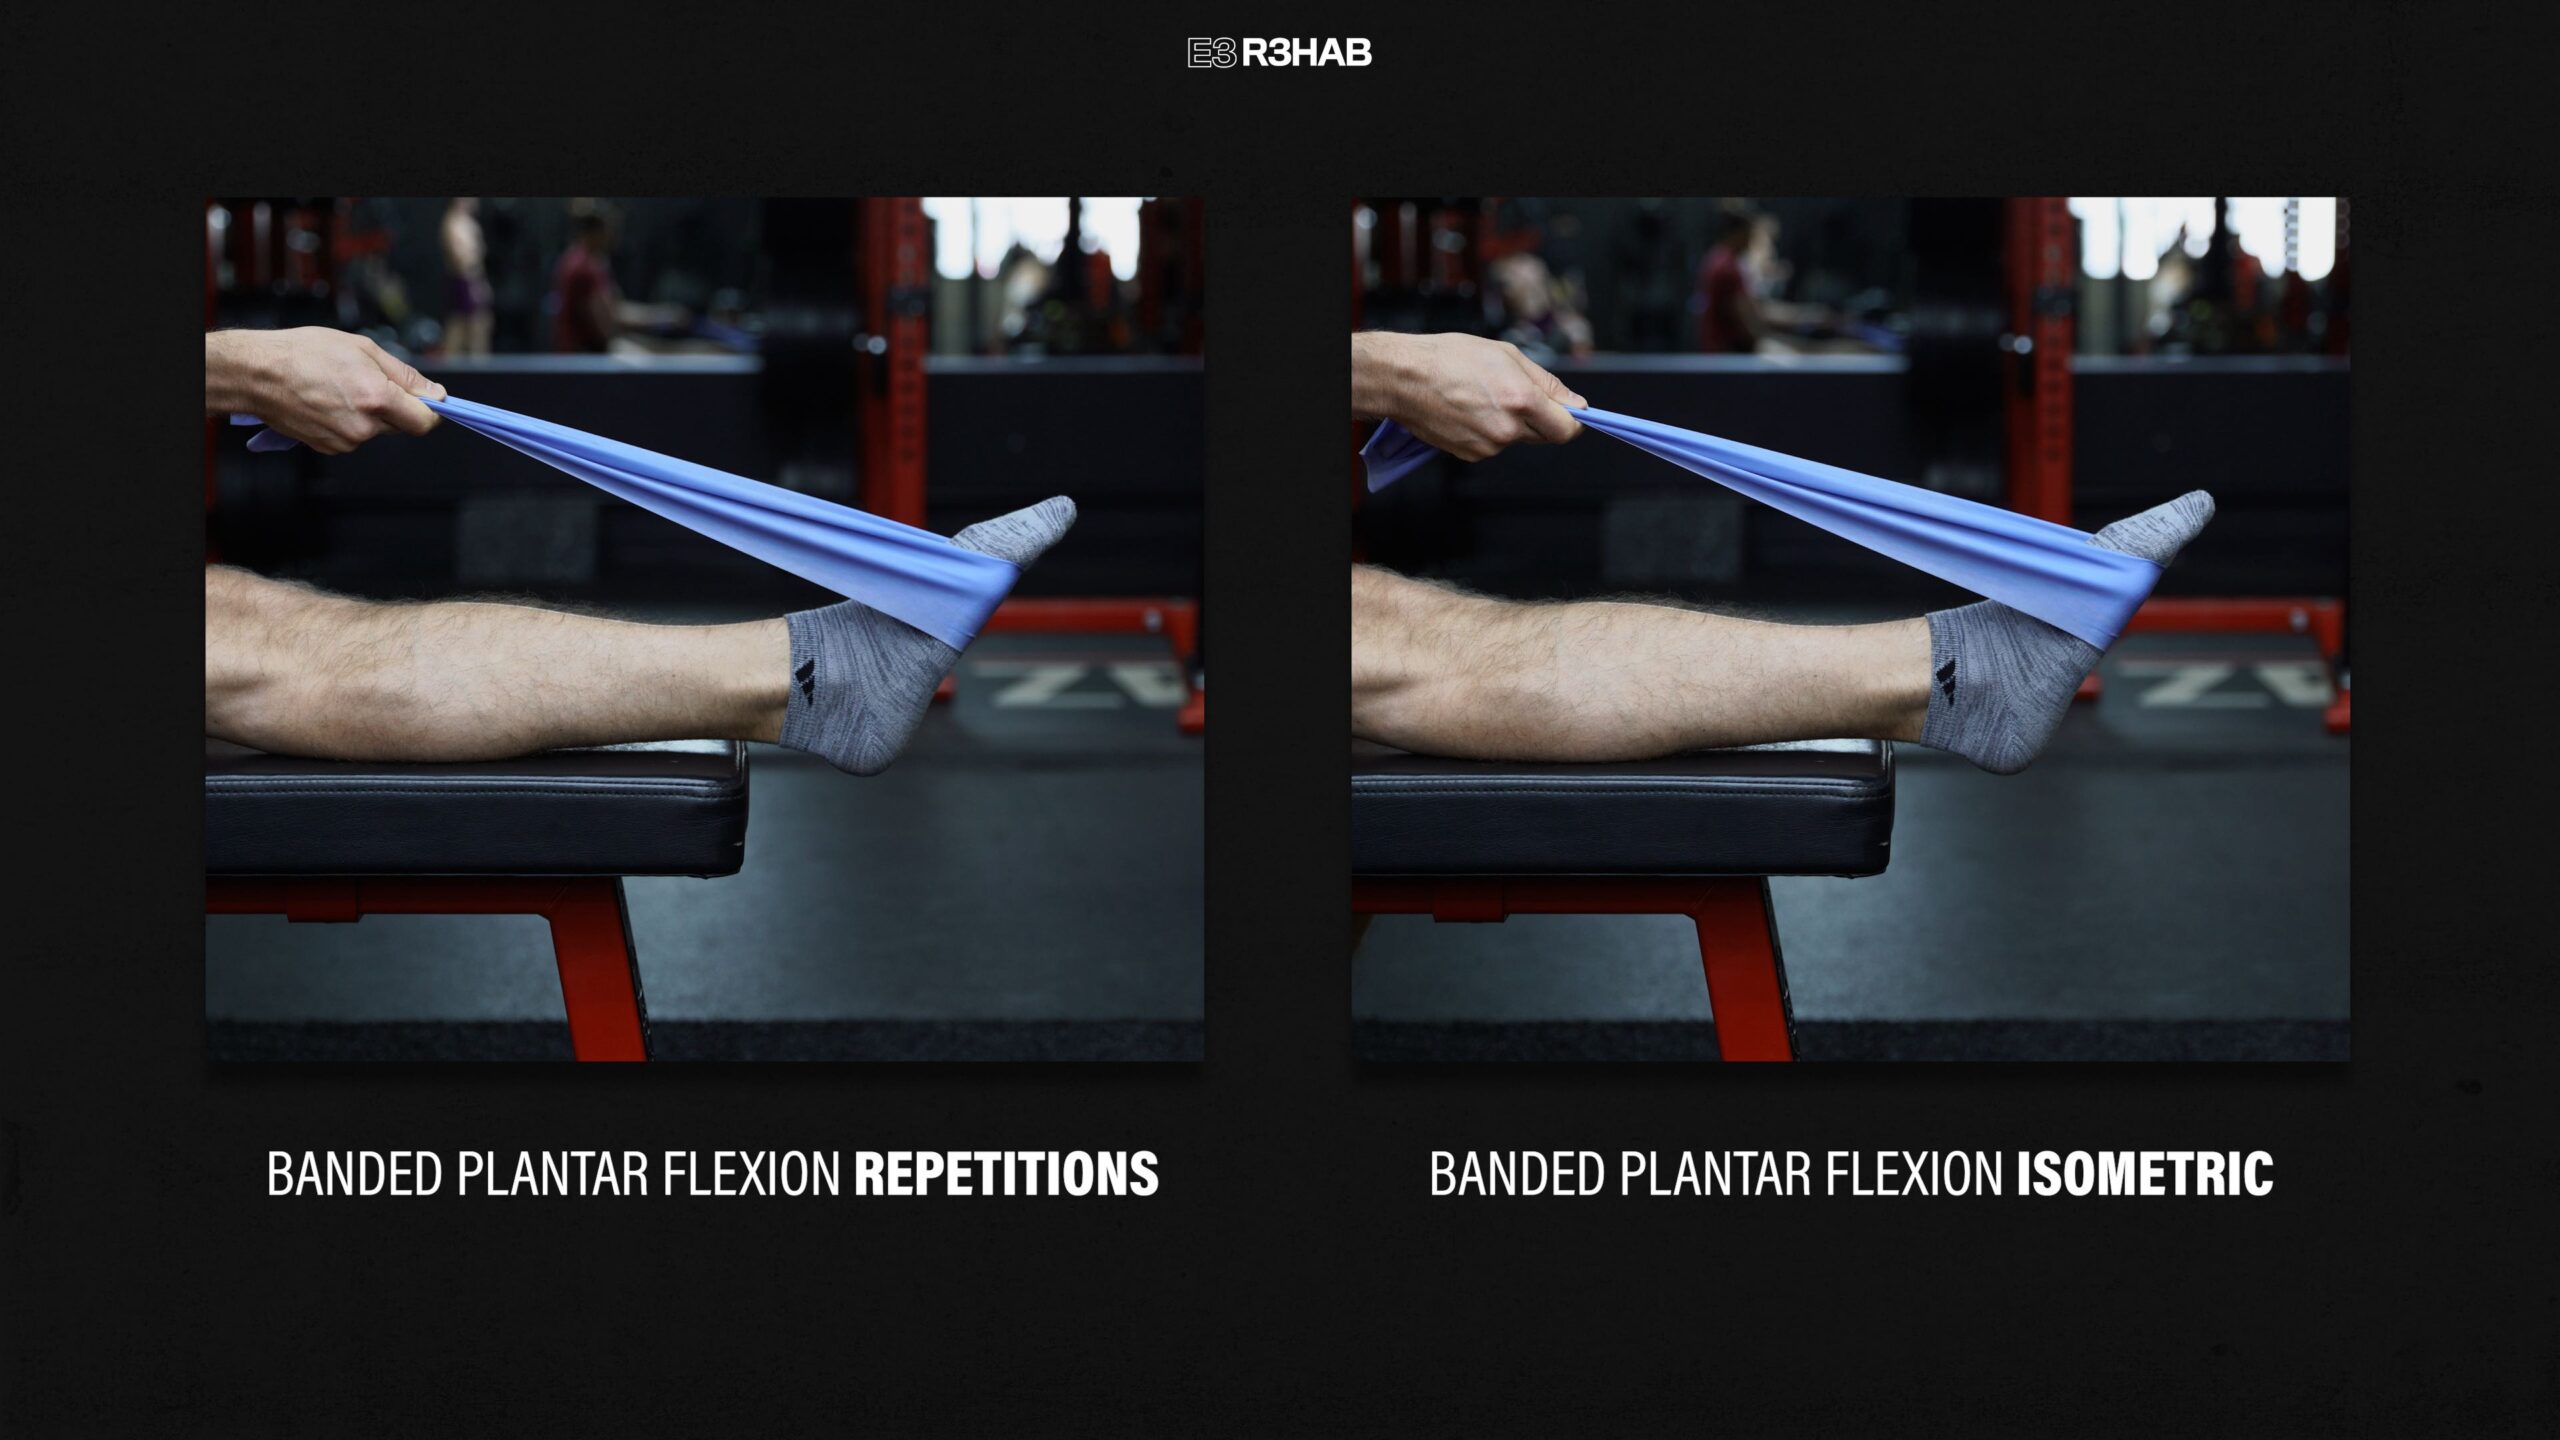
You can also wrap a light resistance band around the ball of your foot and perform ankle plantar flexion for reps or hold for time.If performing repetitions, you’ll want to limit how much dorsiflexion you move into.
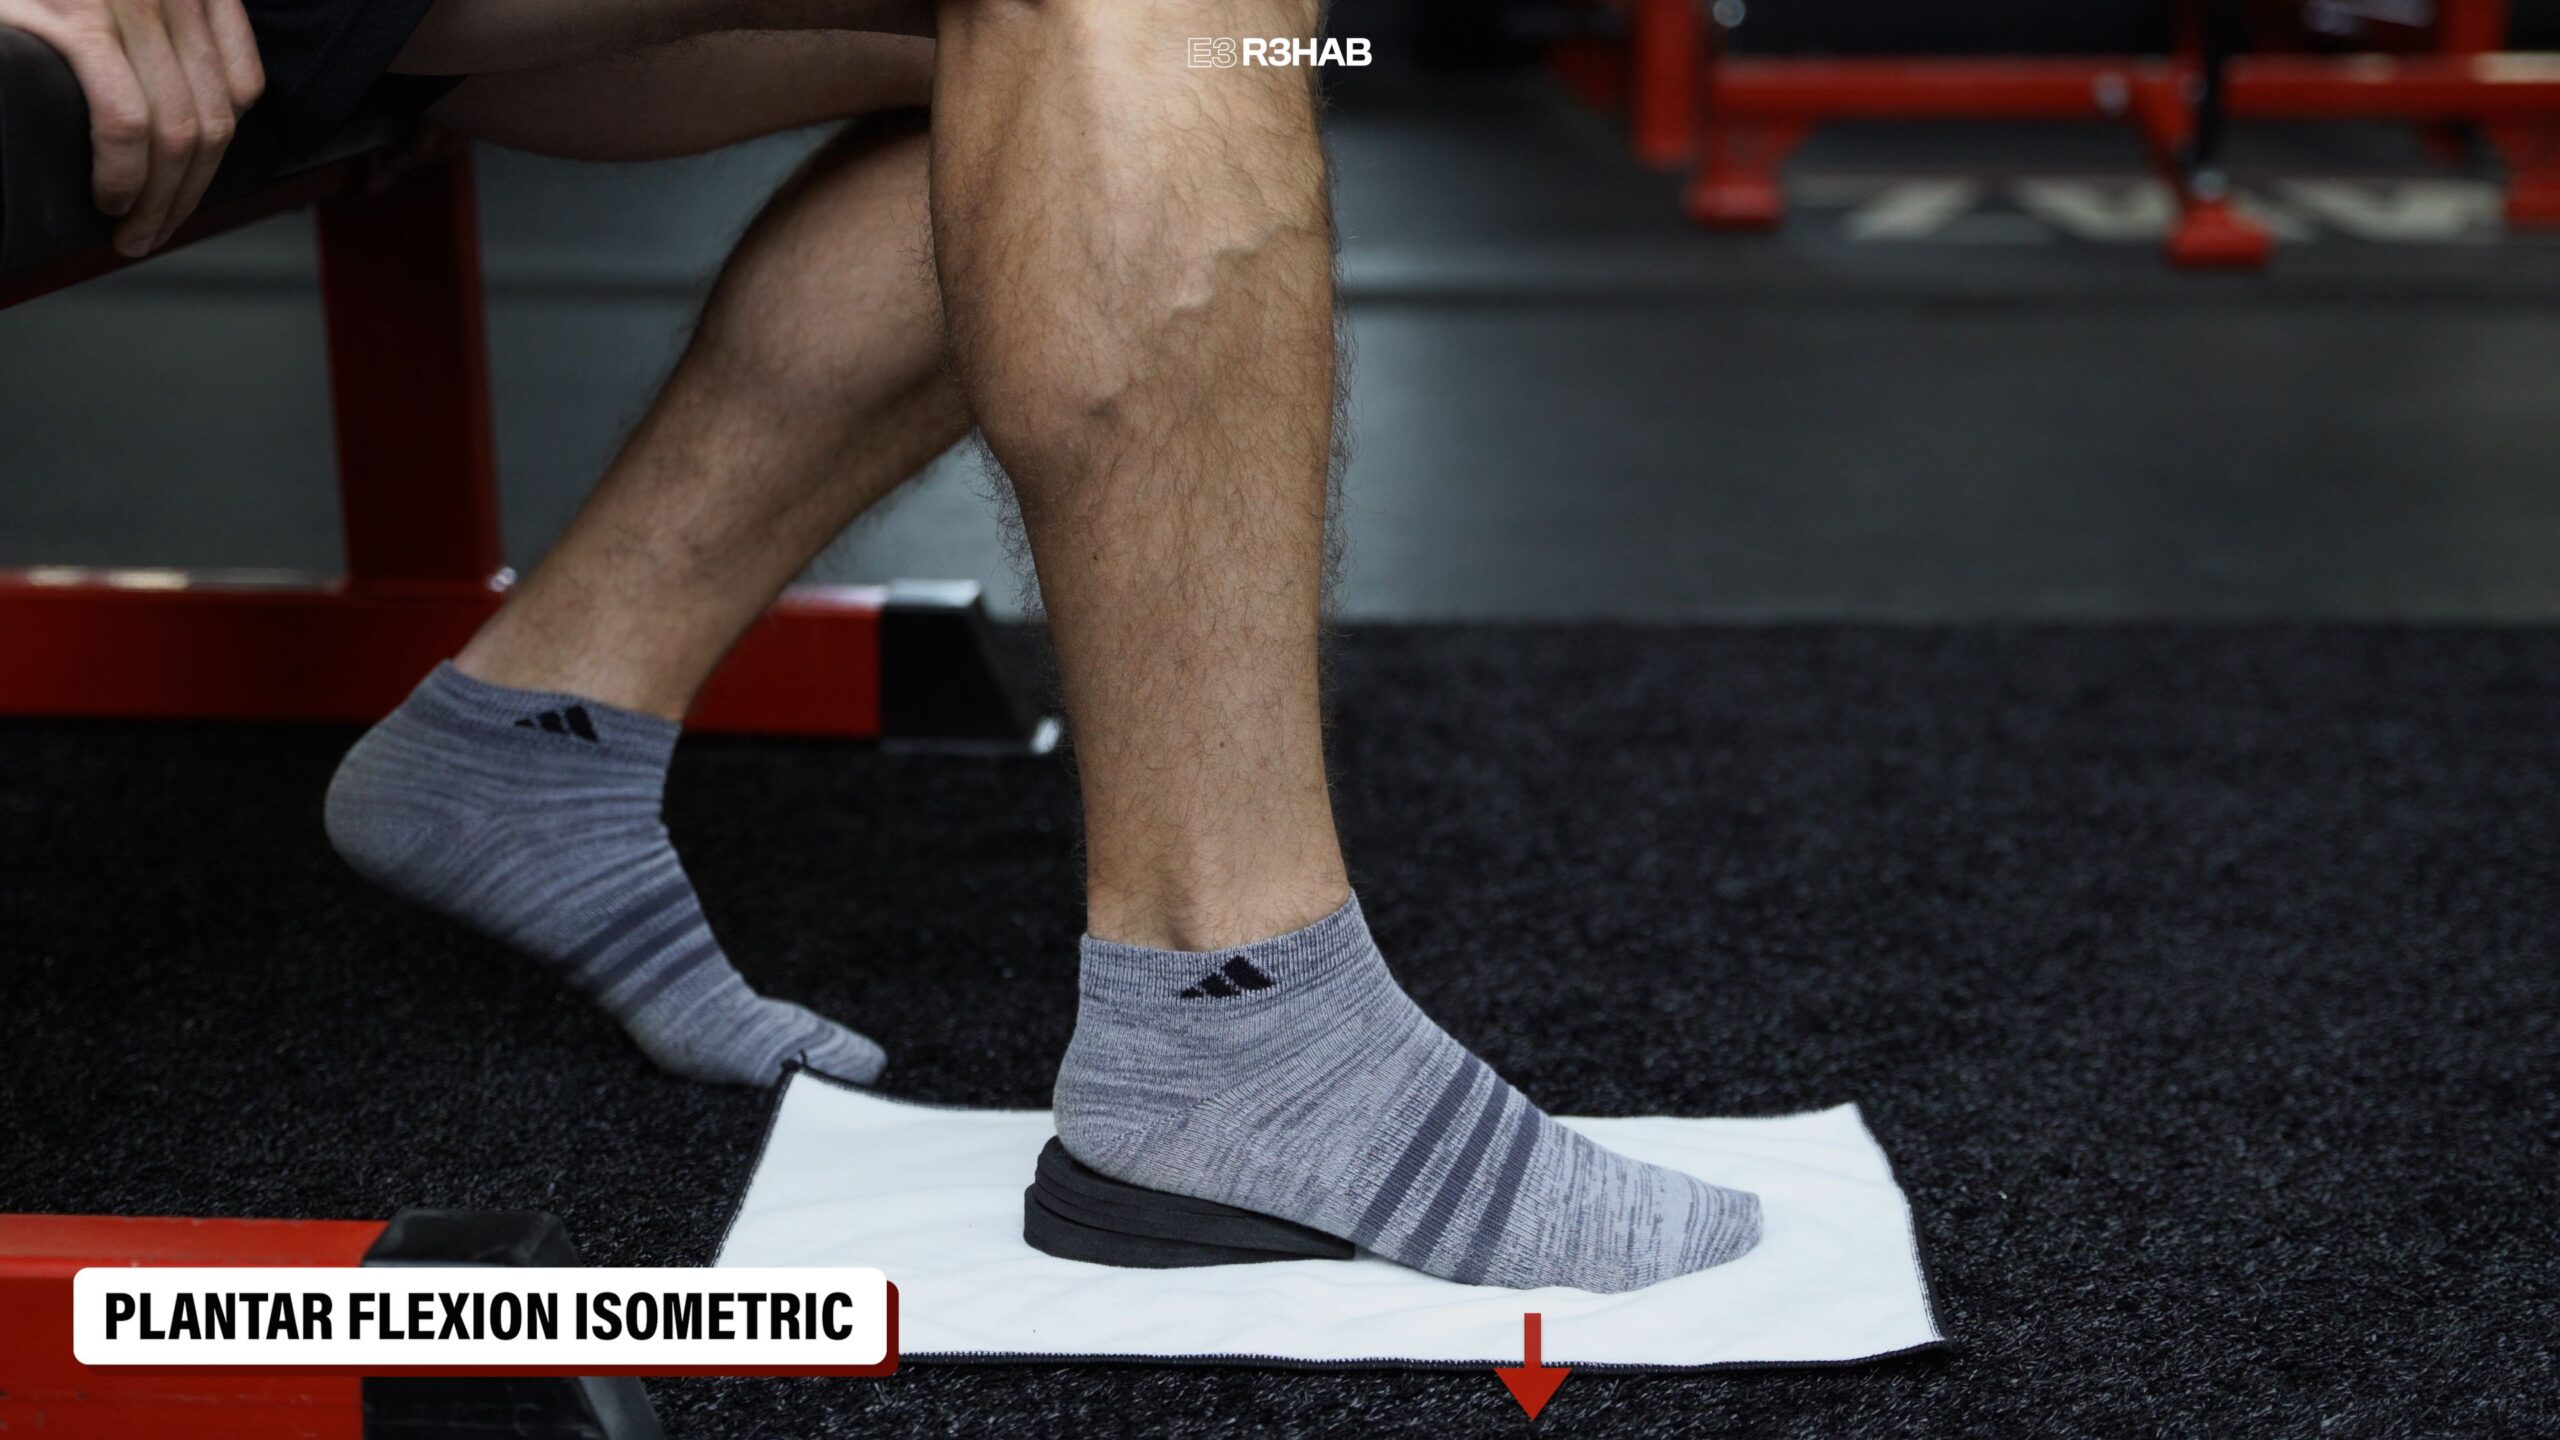
Finally, another option is to perform calf isometrics throughout the day, where you gently push the ball of your foot into the ground at a tolerable effort level. This can also be done while wearing the boot.
For these exercises, aim for 2-3 sets of 10-25 repetitions or 15-45 second holds for the isometrics. Depending on your tolerance, you may perform these 1-3 times per day.
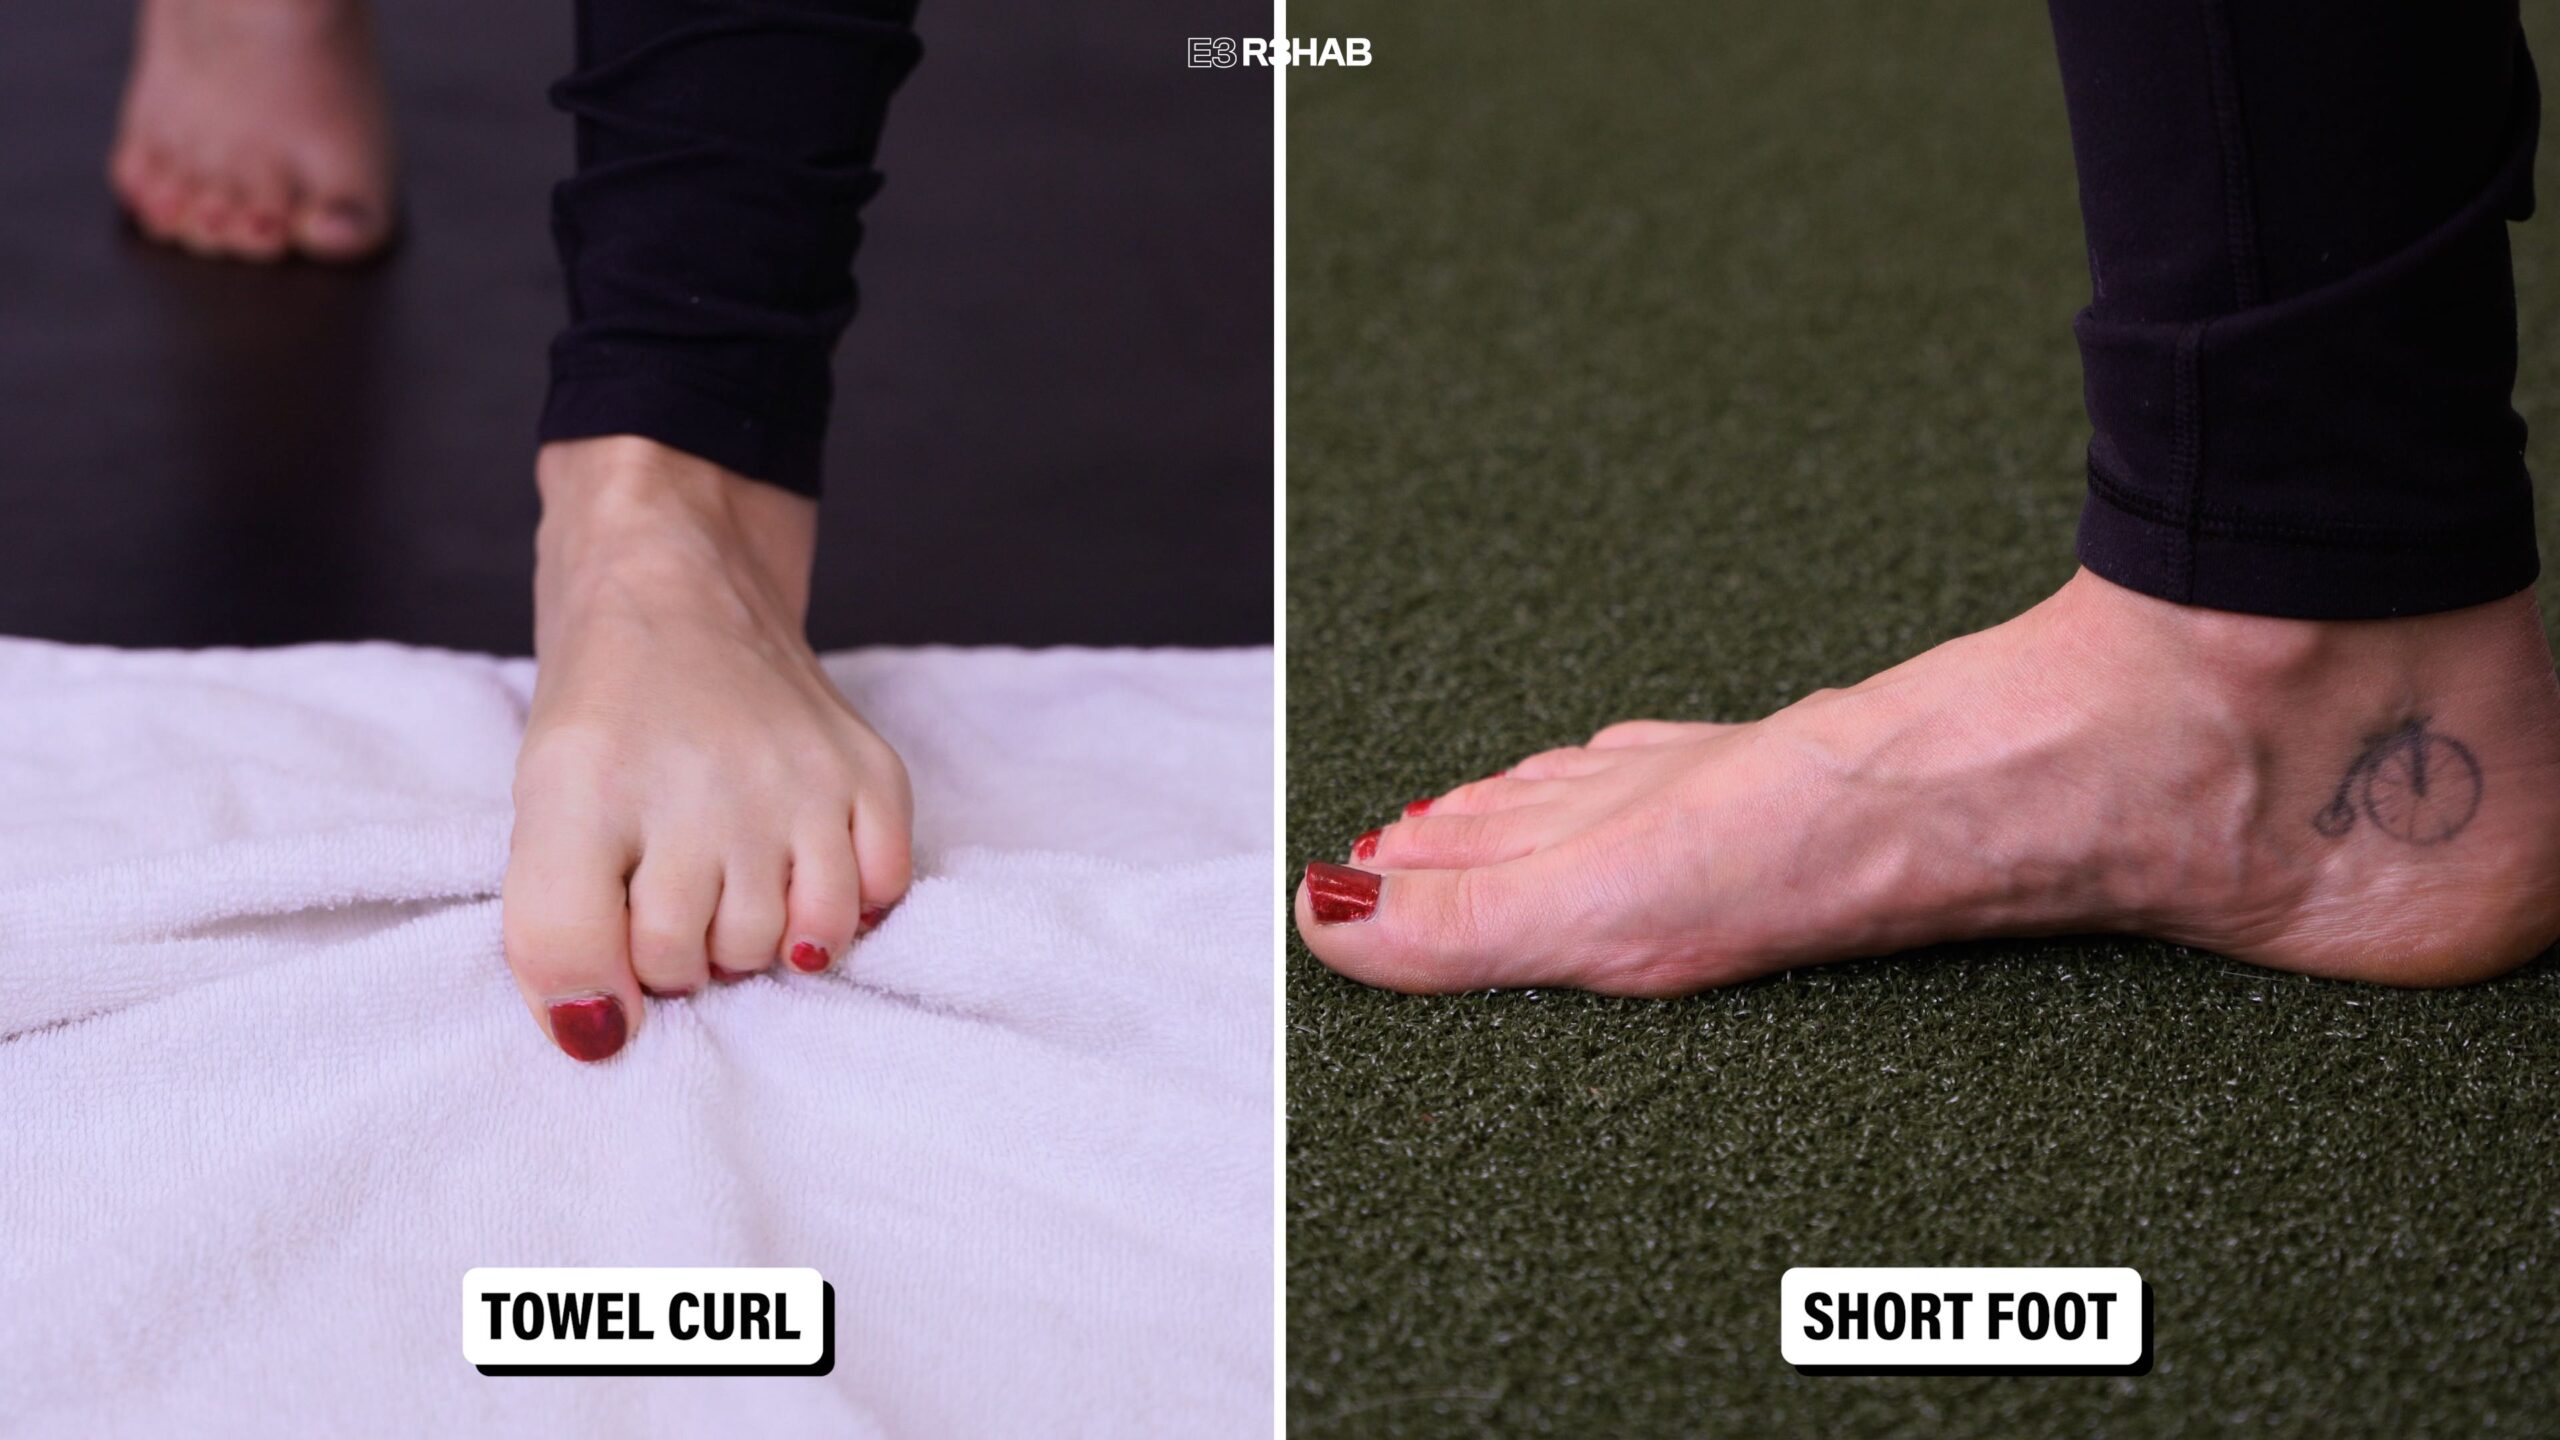
2.Other Foot & Ankle Exercises.Towel curls, the short foot exercise, or other foot and ankle movements can be performed to help minimize muscle atrophy and disuse of surrounding muscles.
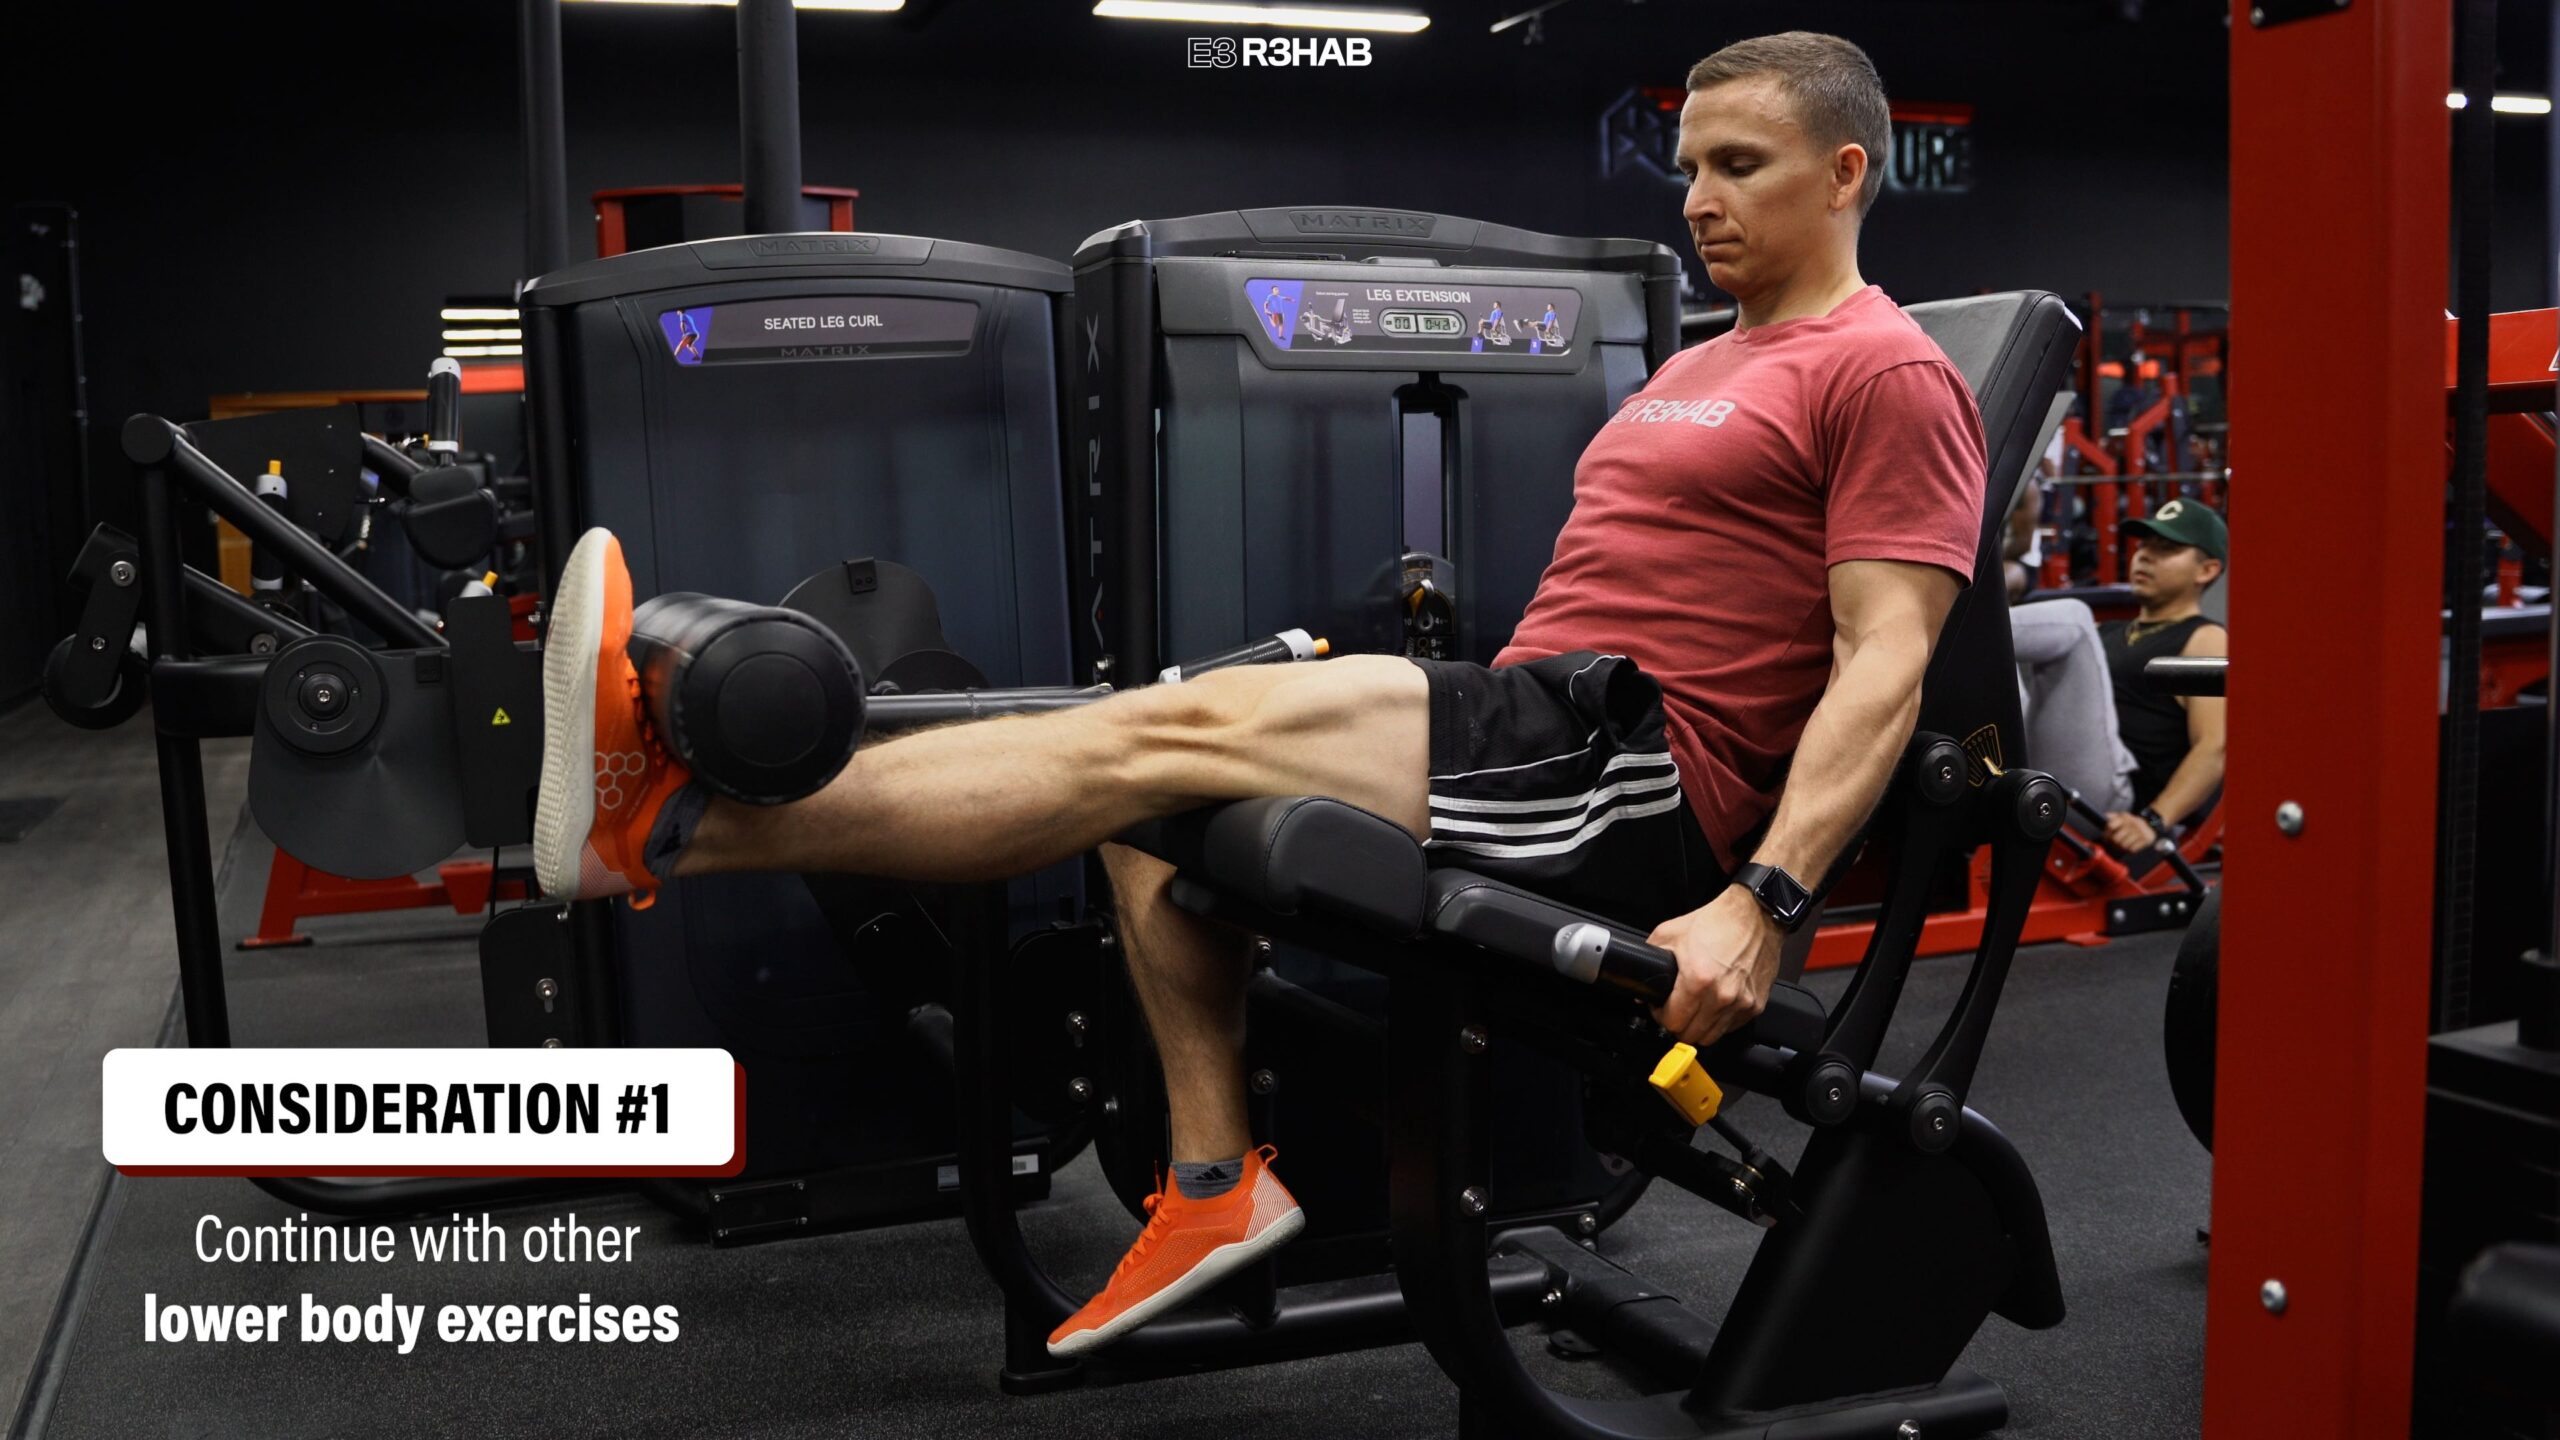
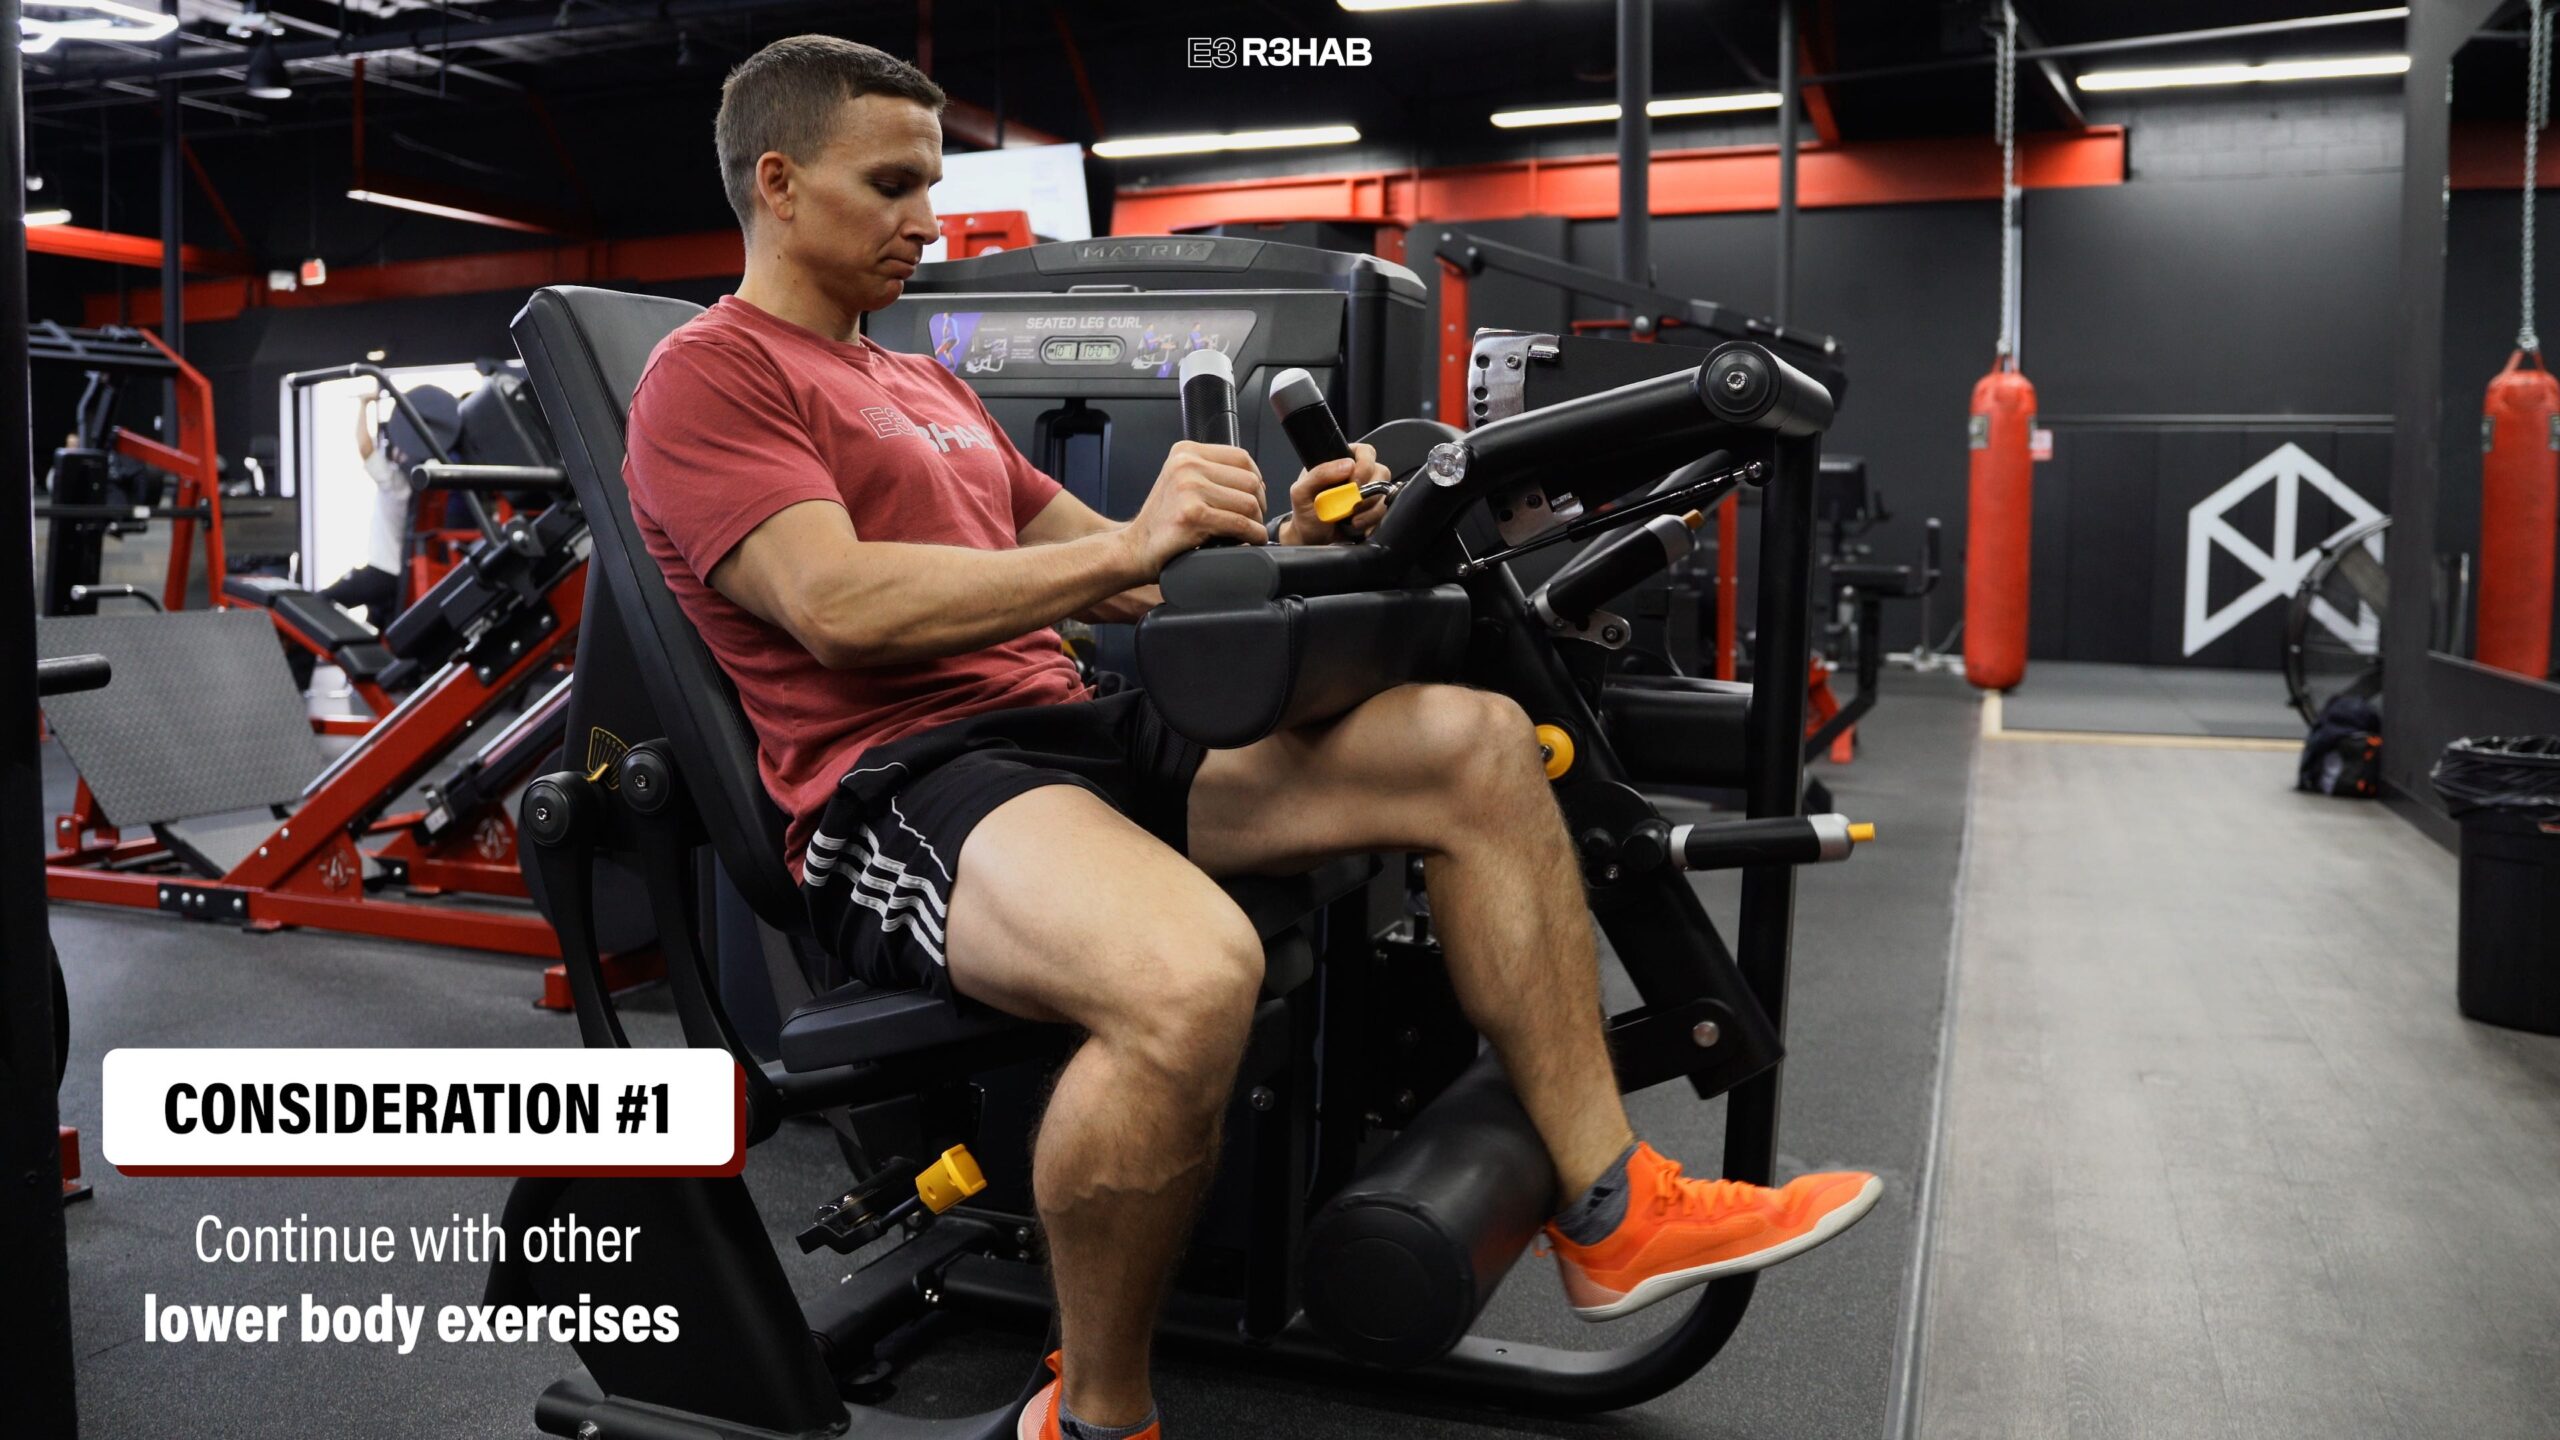
3. Lower Body Strength. While wearing the boot, you can also perform other lower-body exercises such as leg extensions and hamstring curls. Assuming you are cleared for full weight bearing, you may also implement squatting variations like a squat to a box.
Before moving on to the next phase, understand that decisions about when to stop wearing the boot, removing heel lifts, or what exercises you perform will vary from case to case, so it is important that you follow the recommendations provided by your surgeon or healthcare provider.
Phase 2: Normalize Walking
As you transition out of the boot, one of the first goals is to be able to walk unassisted without a limp.
Here are 2 exercises that can help:
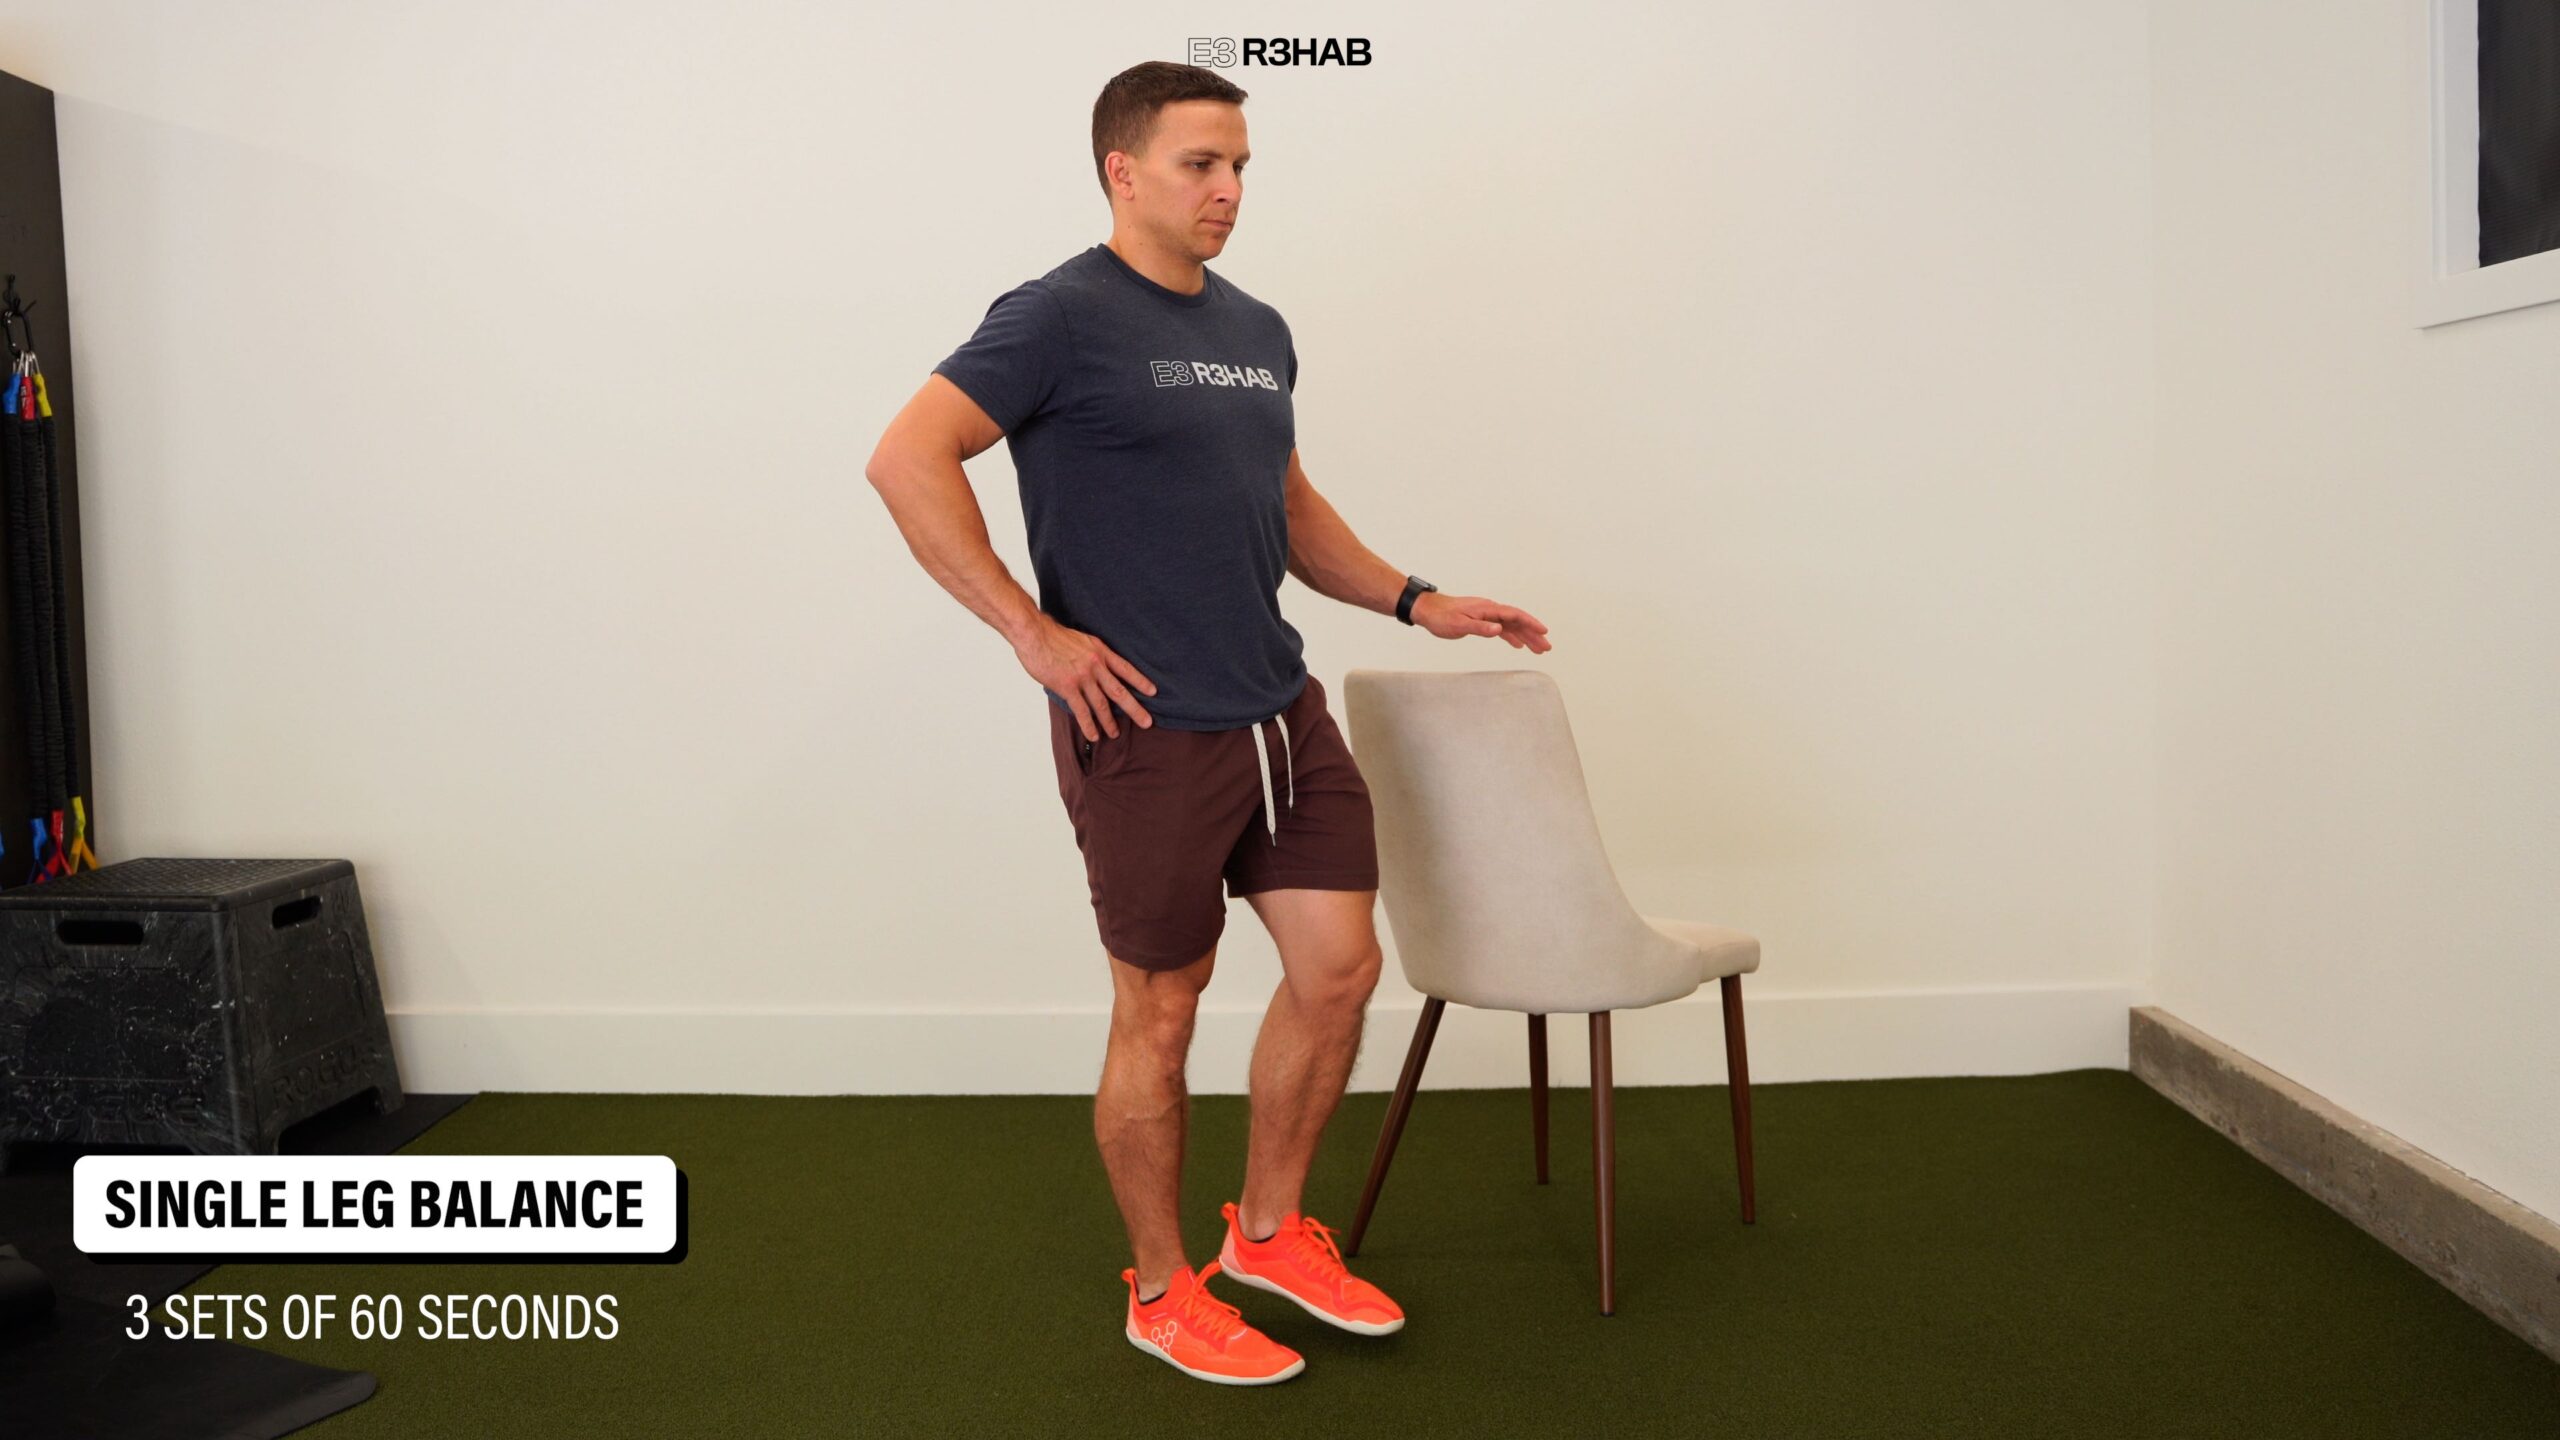
1. Single Leg Balance. Stand on one leg on flat ground and try not to let your other leg touch the ground. If you need to make it easier, use your hands for assistance. Work up to 3 sets of 60 seconds.
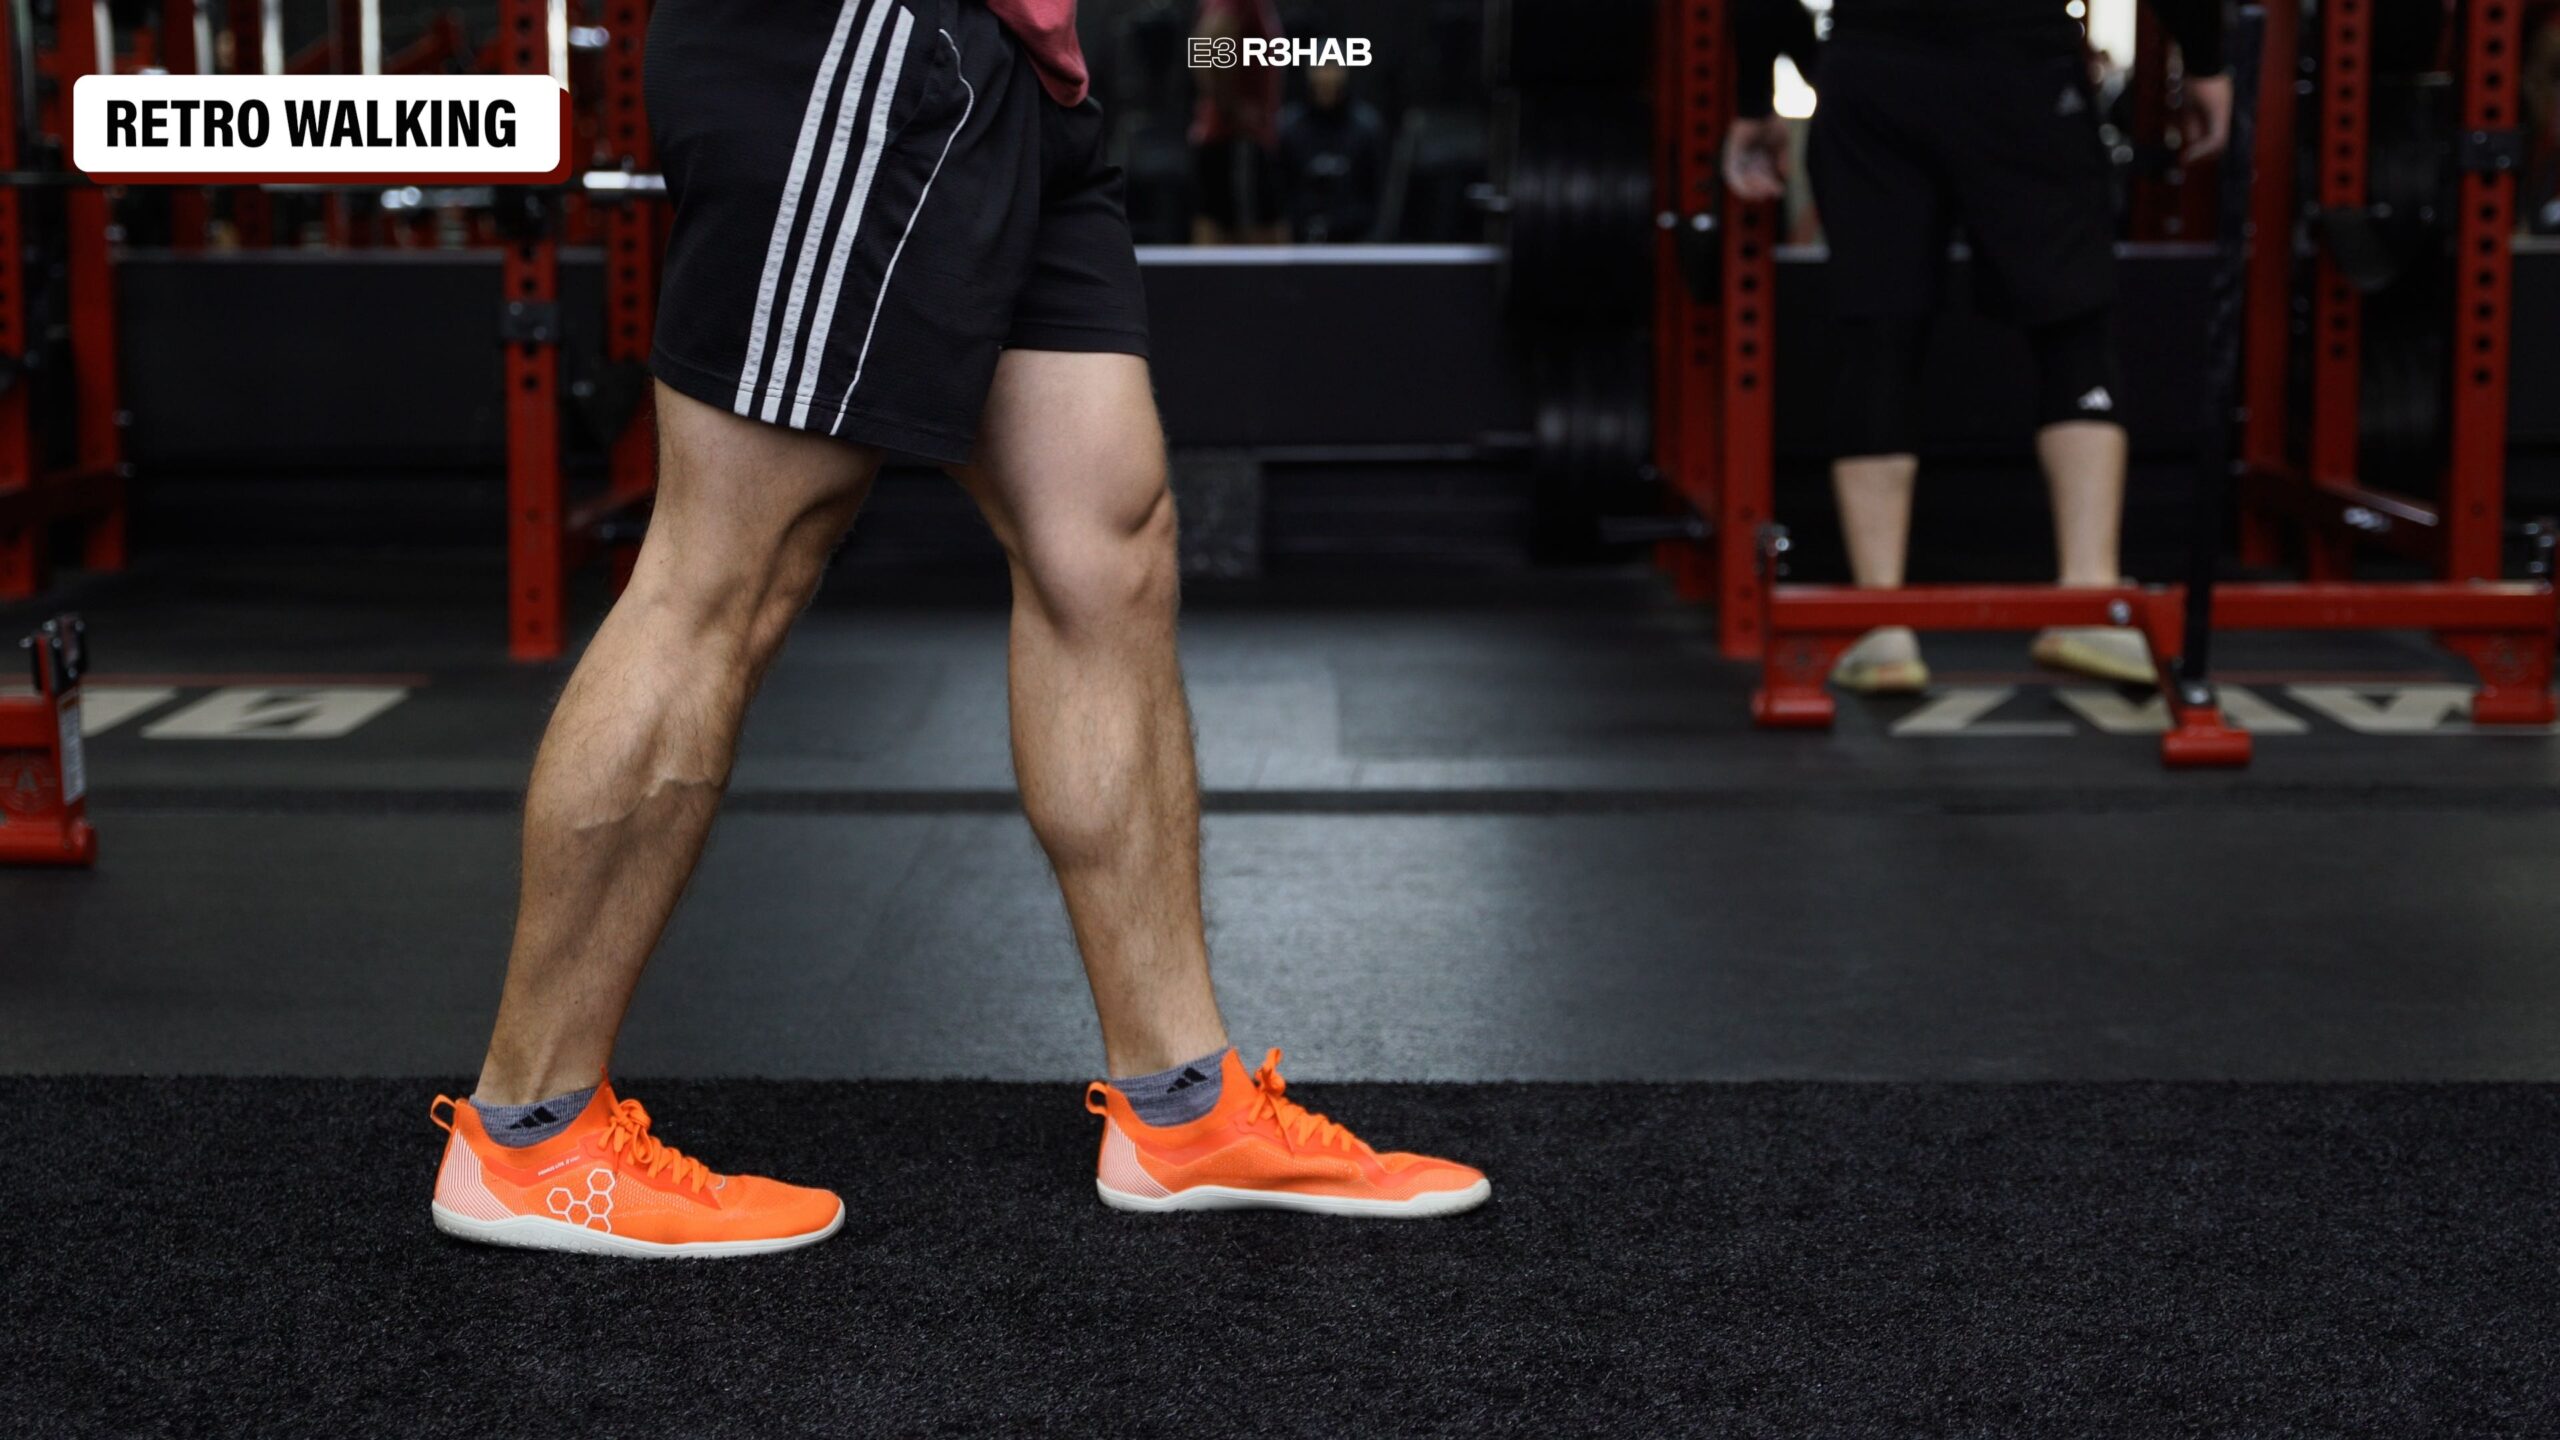
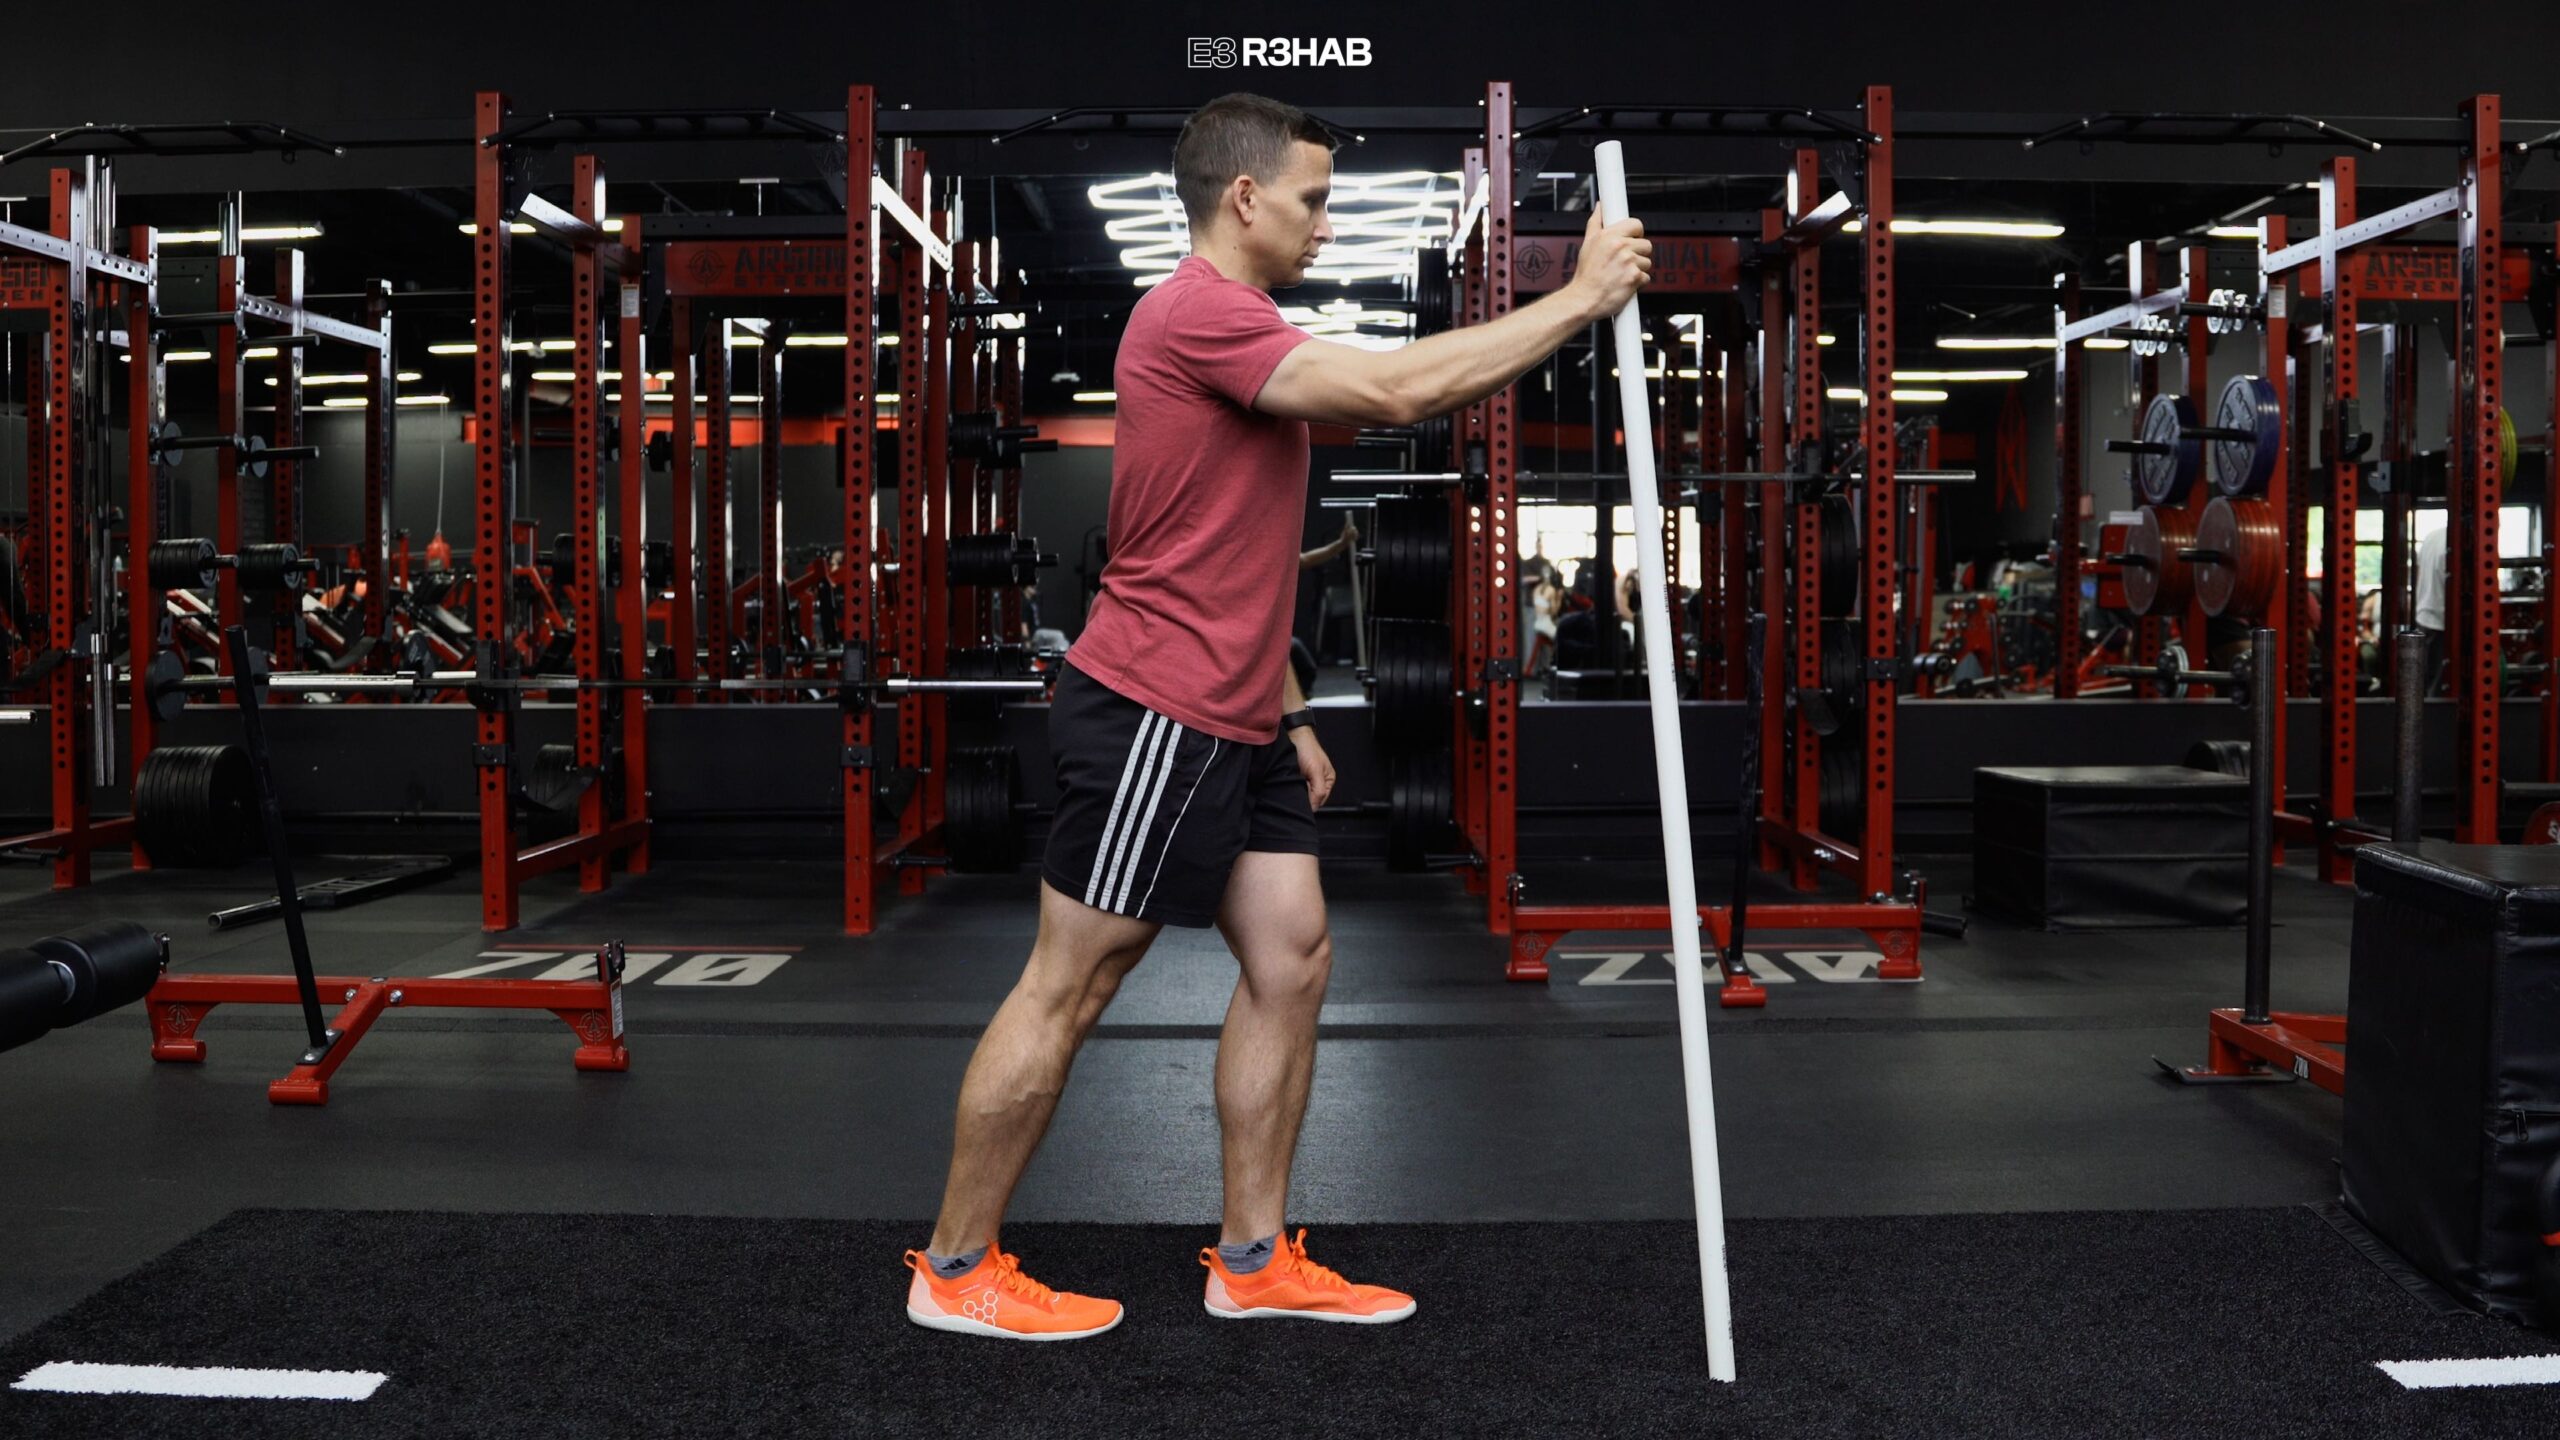
2. Retro Walking. This is just a fancy name for walking backward, and it can be a helpful drill for loading the Achilles tendon and working on eccentric calf strength.
You can make this easier by holding onto an object, stepping backward, slowly lowering your heel to the ground, and then returning to the starting position.
These exercises and other activities should be performed while wearing shoes and a heel lift unless instructed otherwise by your surgeon or physical therapist.
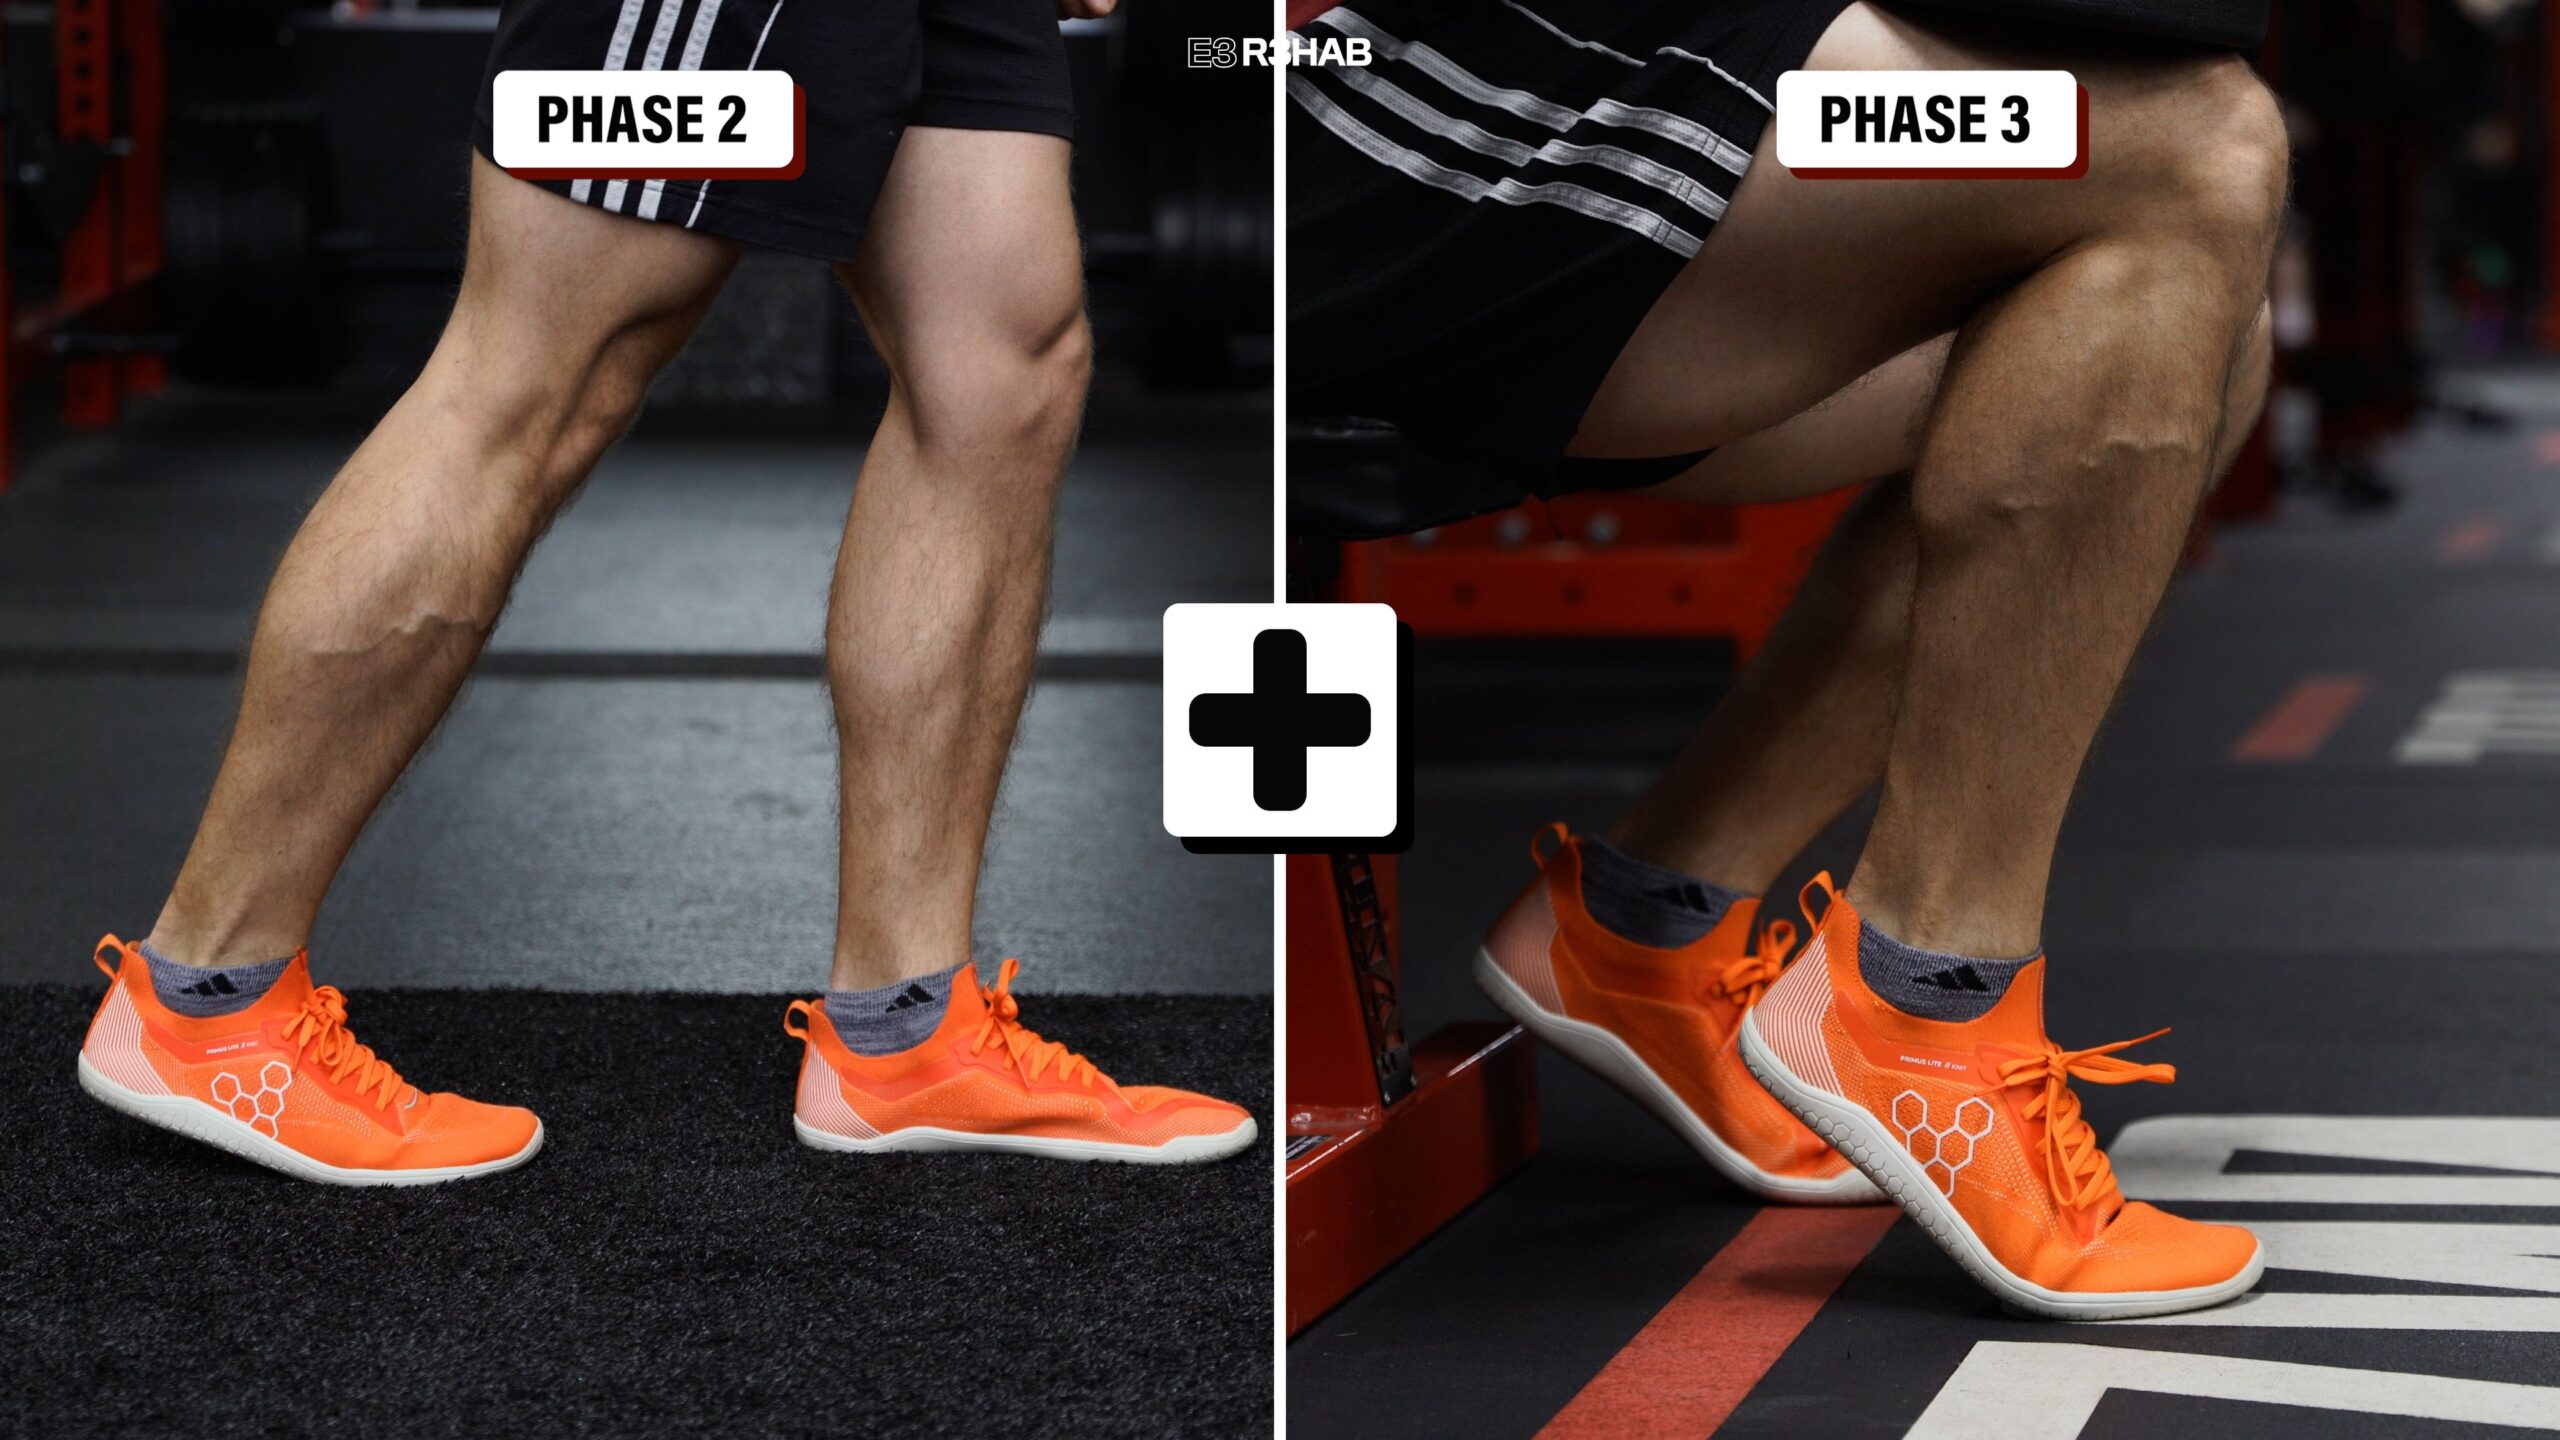
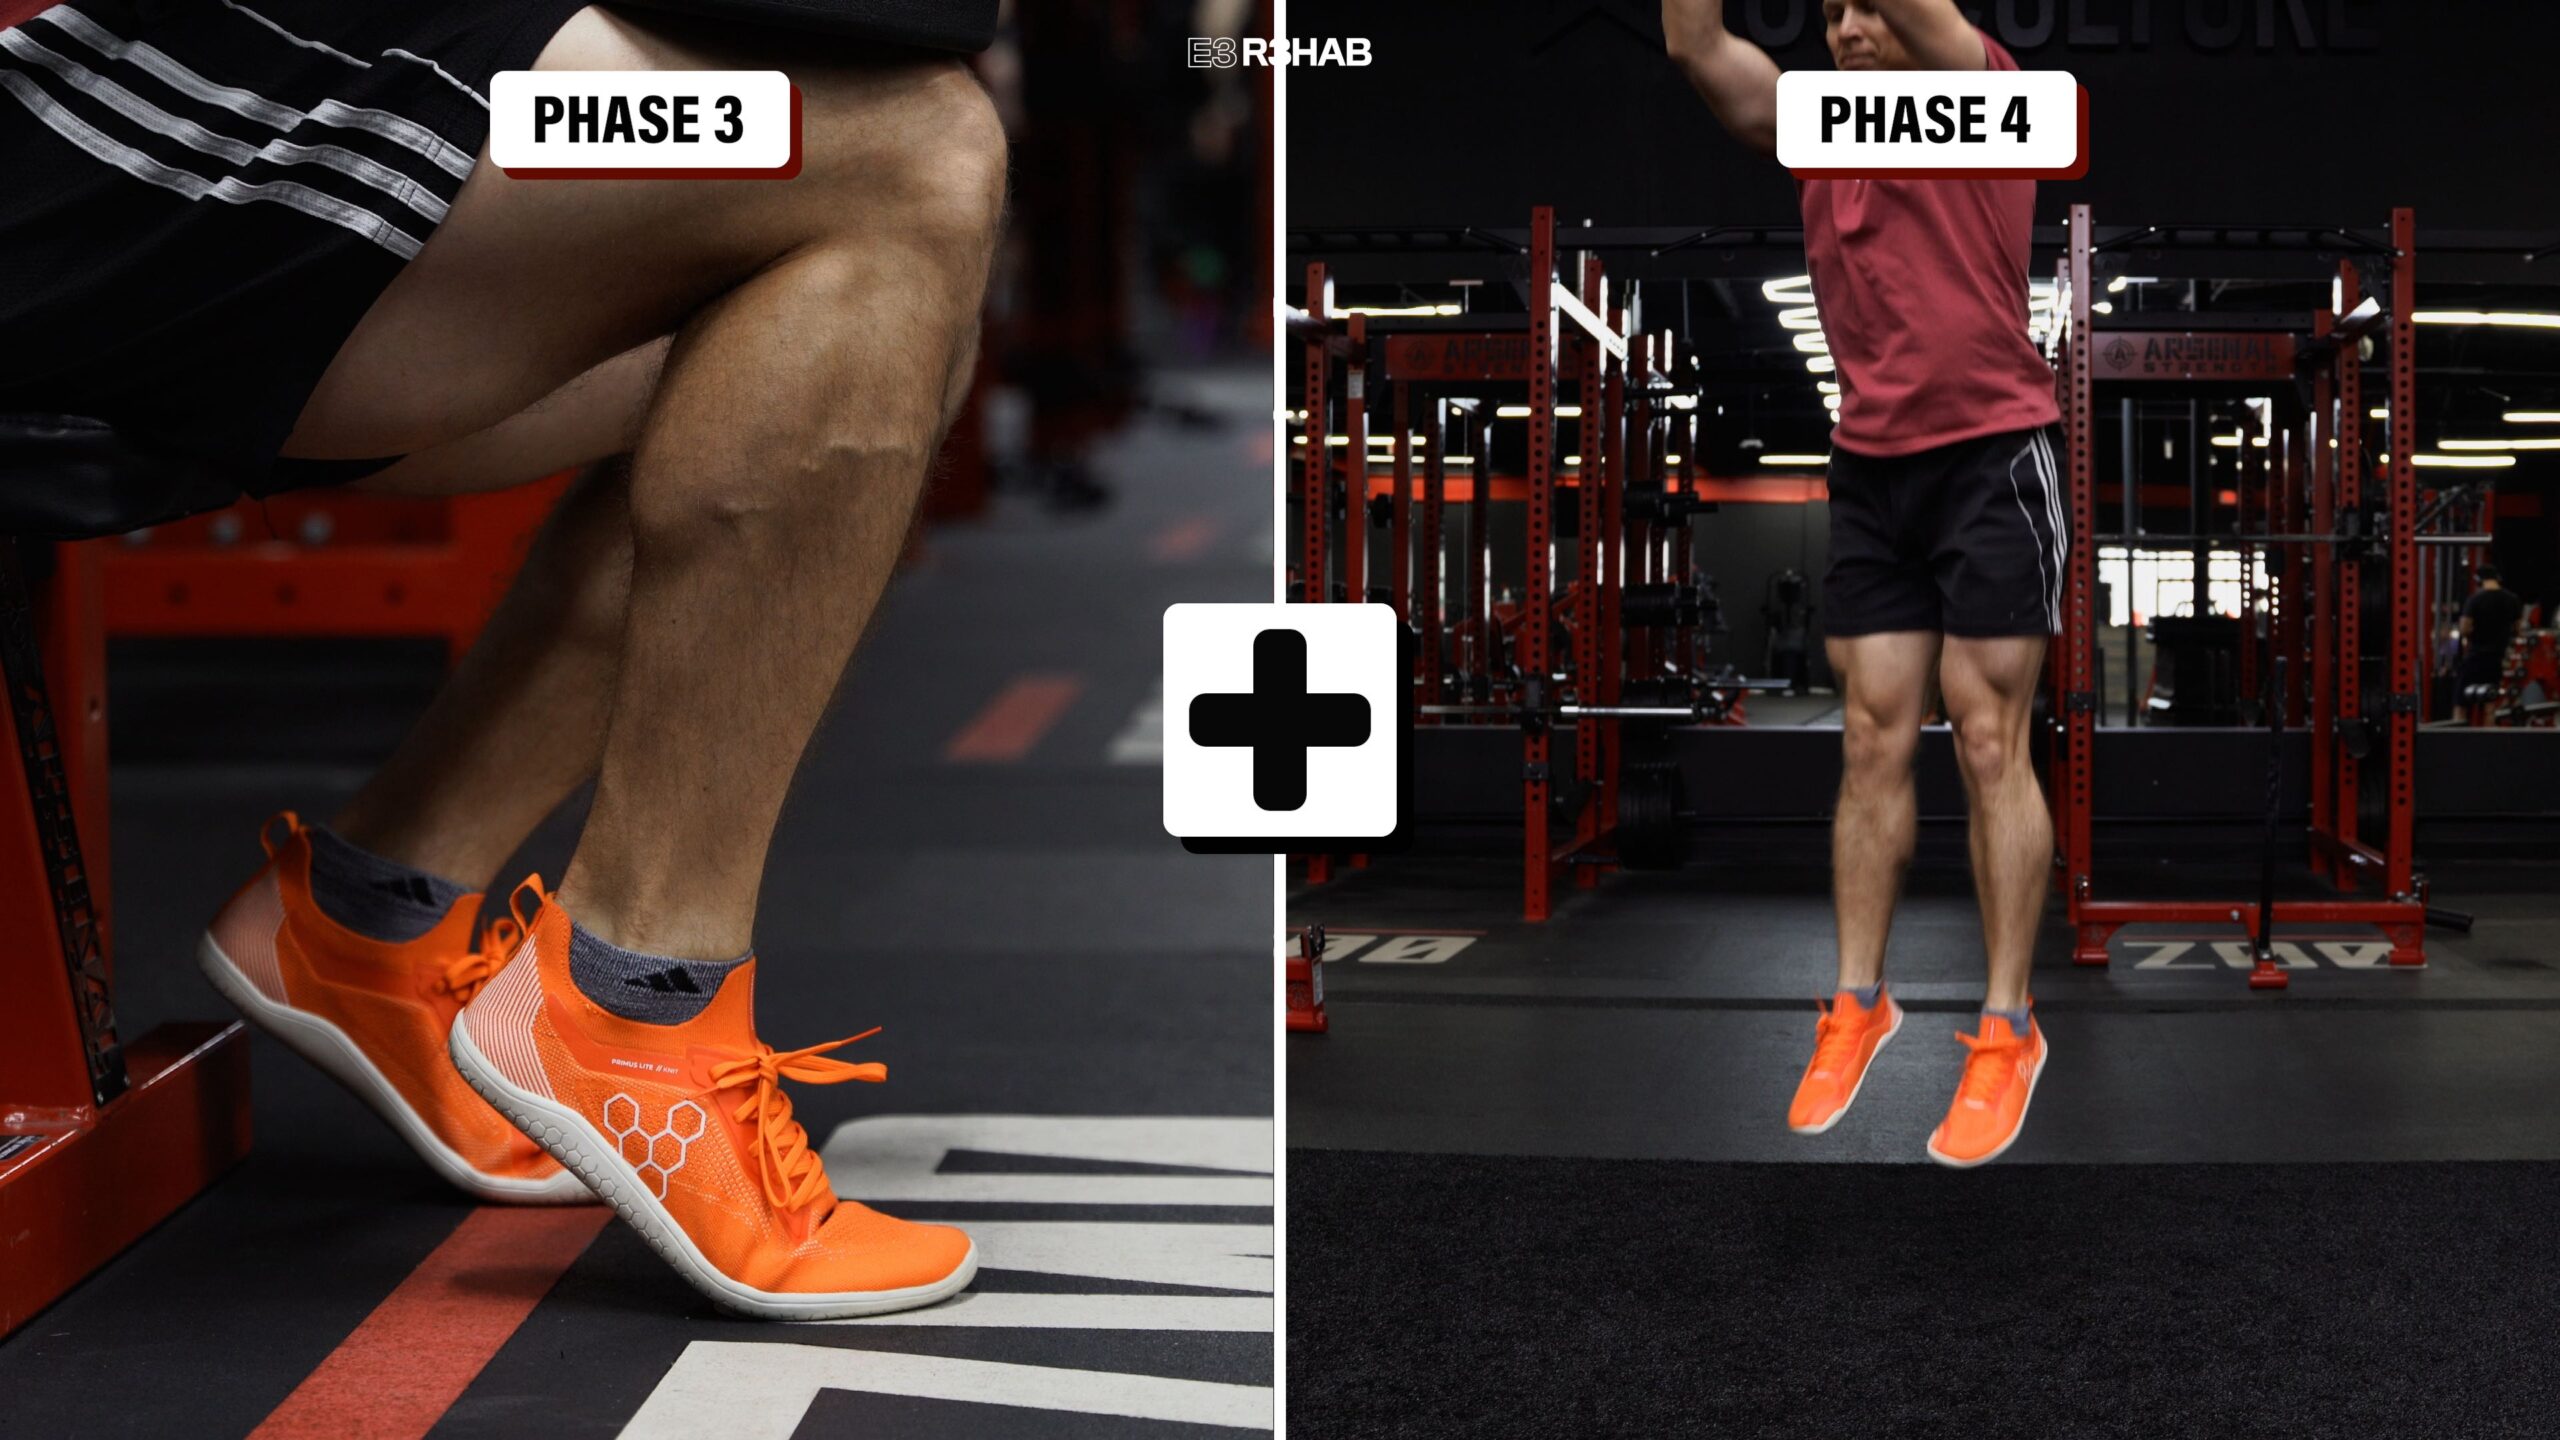
Phase 3: Advanced Strength Exercises
The goal of this phase is to continue gradually loading the Achilles tendon and further strengthen your calves and surrounding muscles.
As a quick note, the greatest risk of re-rupture is typically during the transition out of the boot and up to about the 3-month mark. Therefore it’s important to avoid faster and quicker movements during this period, since as I said earlier, these place higher loads through the Achilles tendon.
The most important exercise in your recovery will be a heel raise.
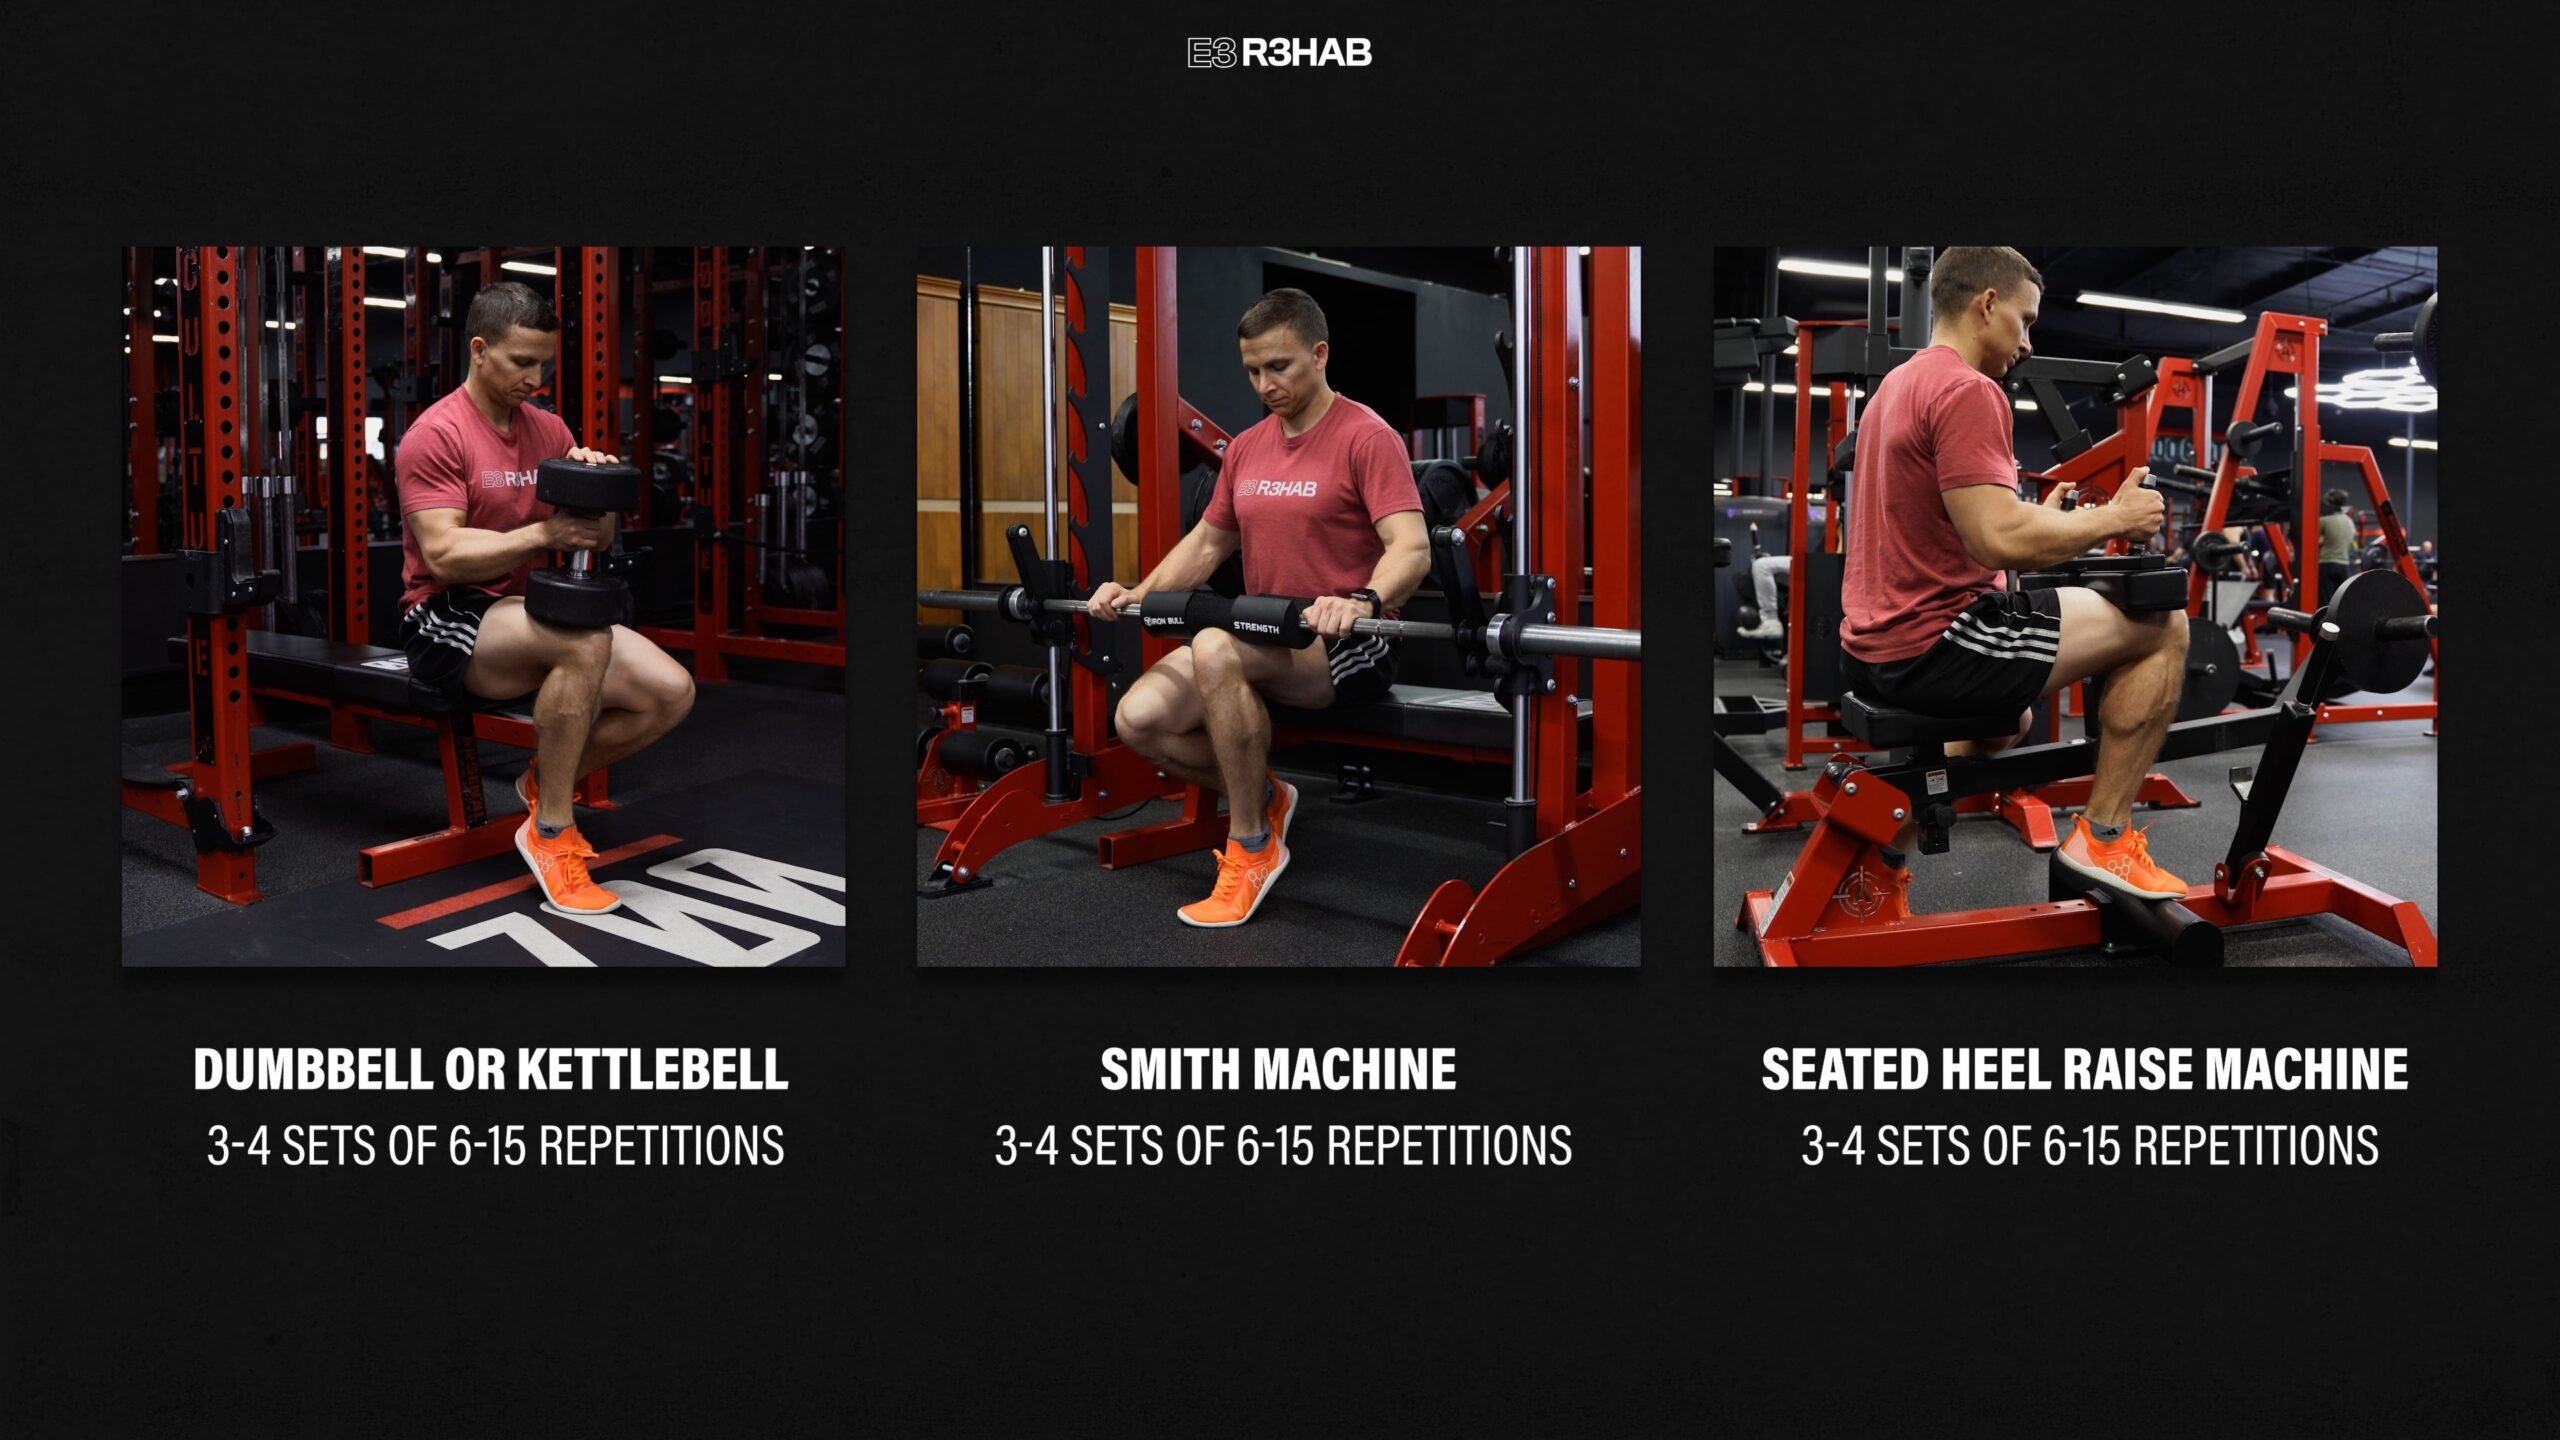
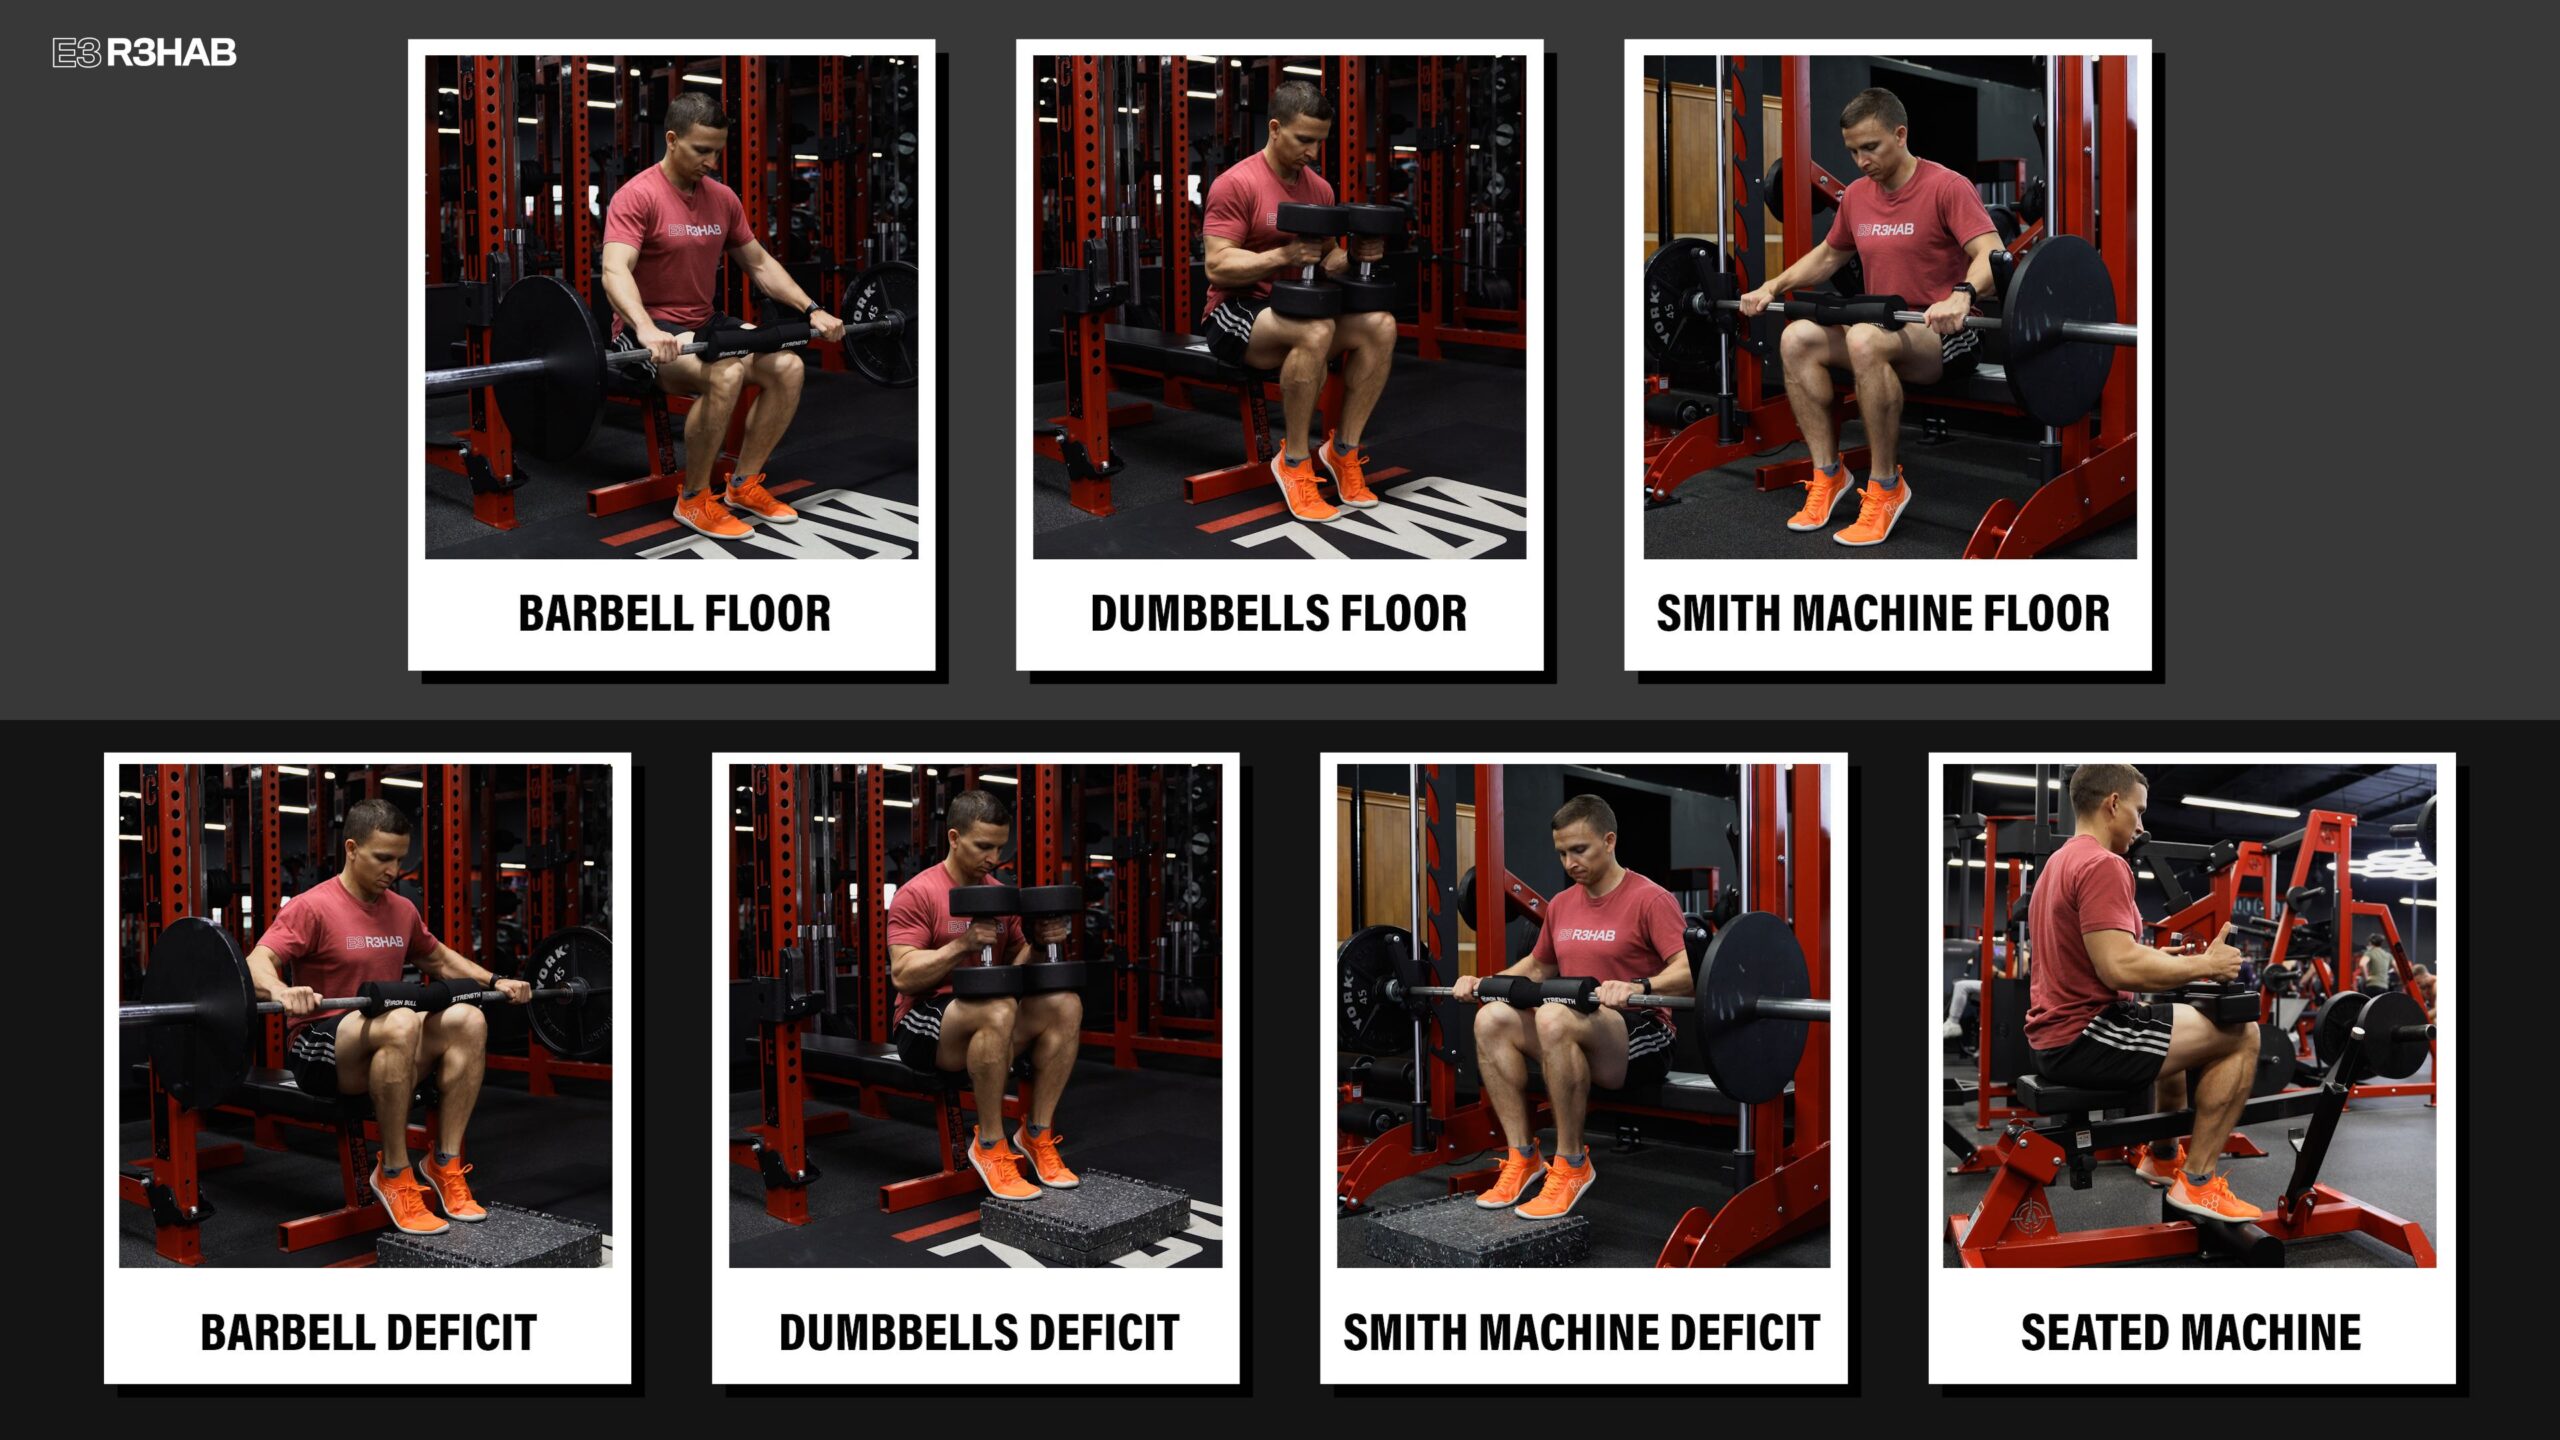
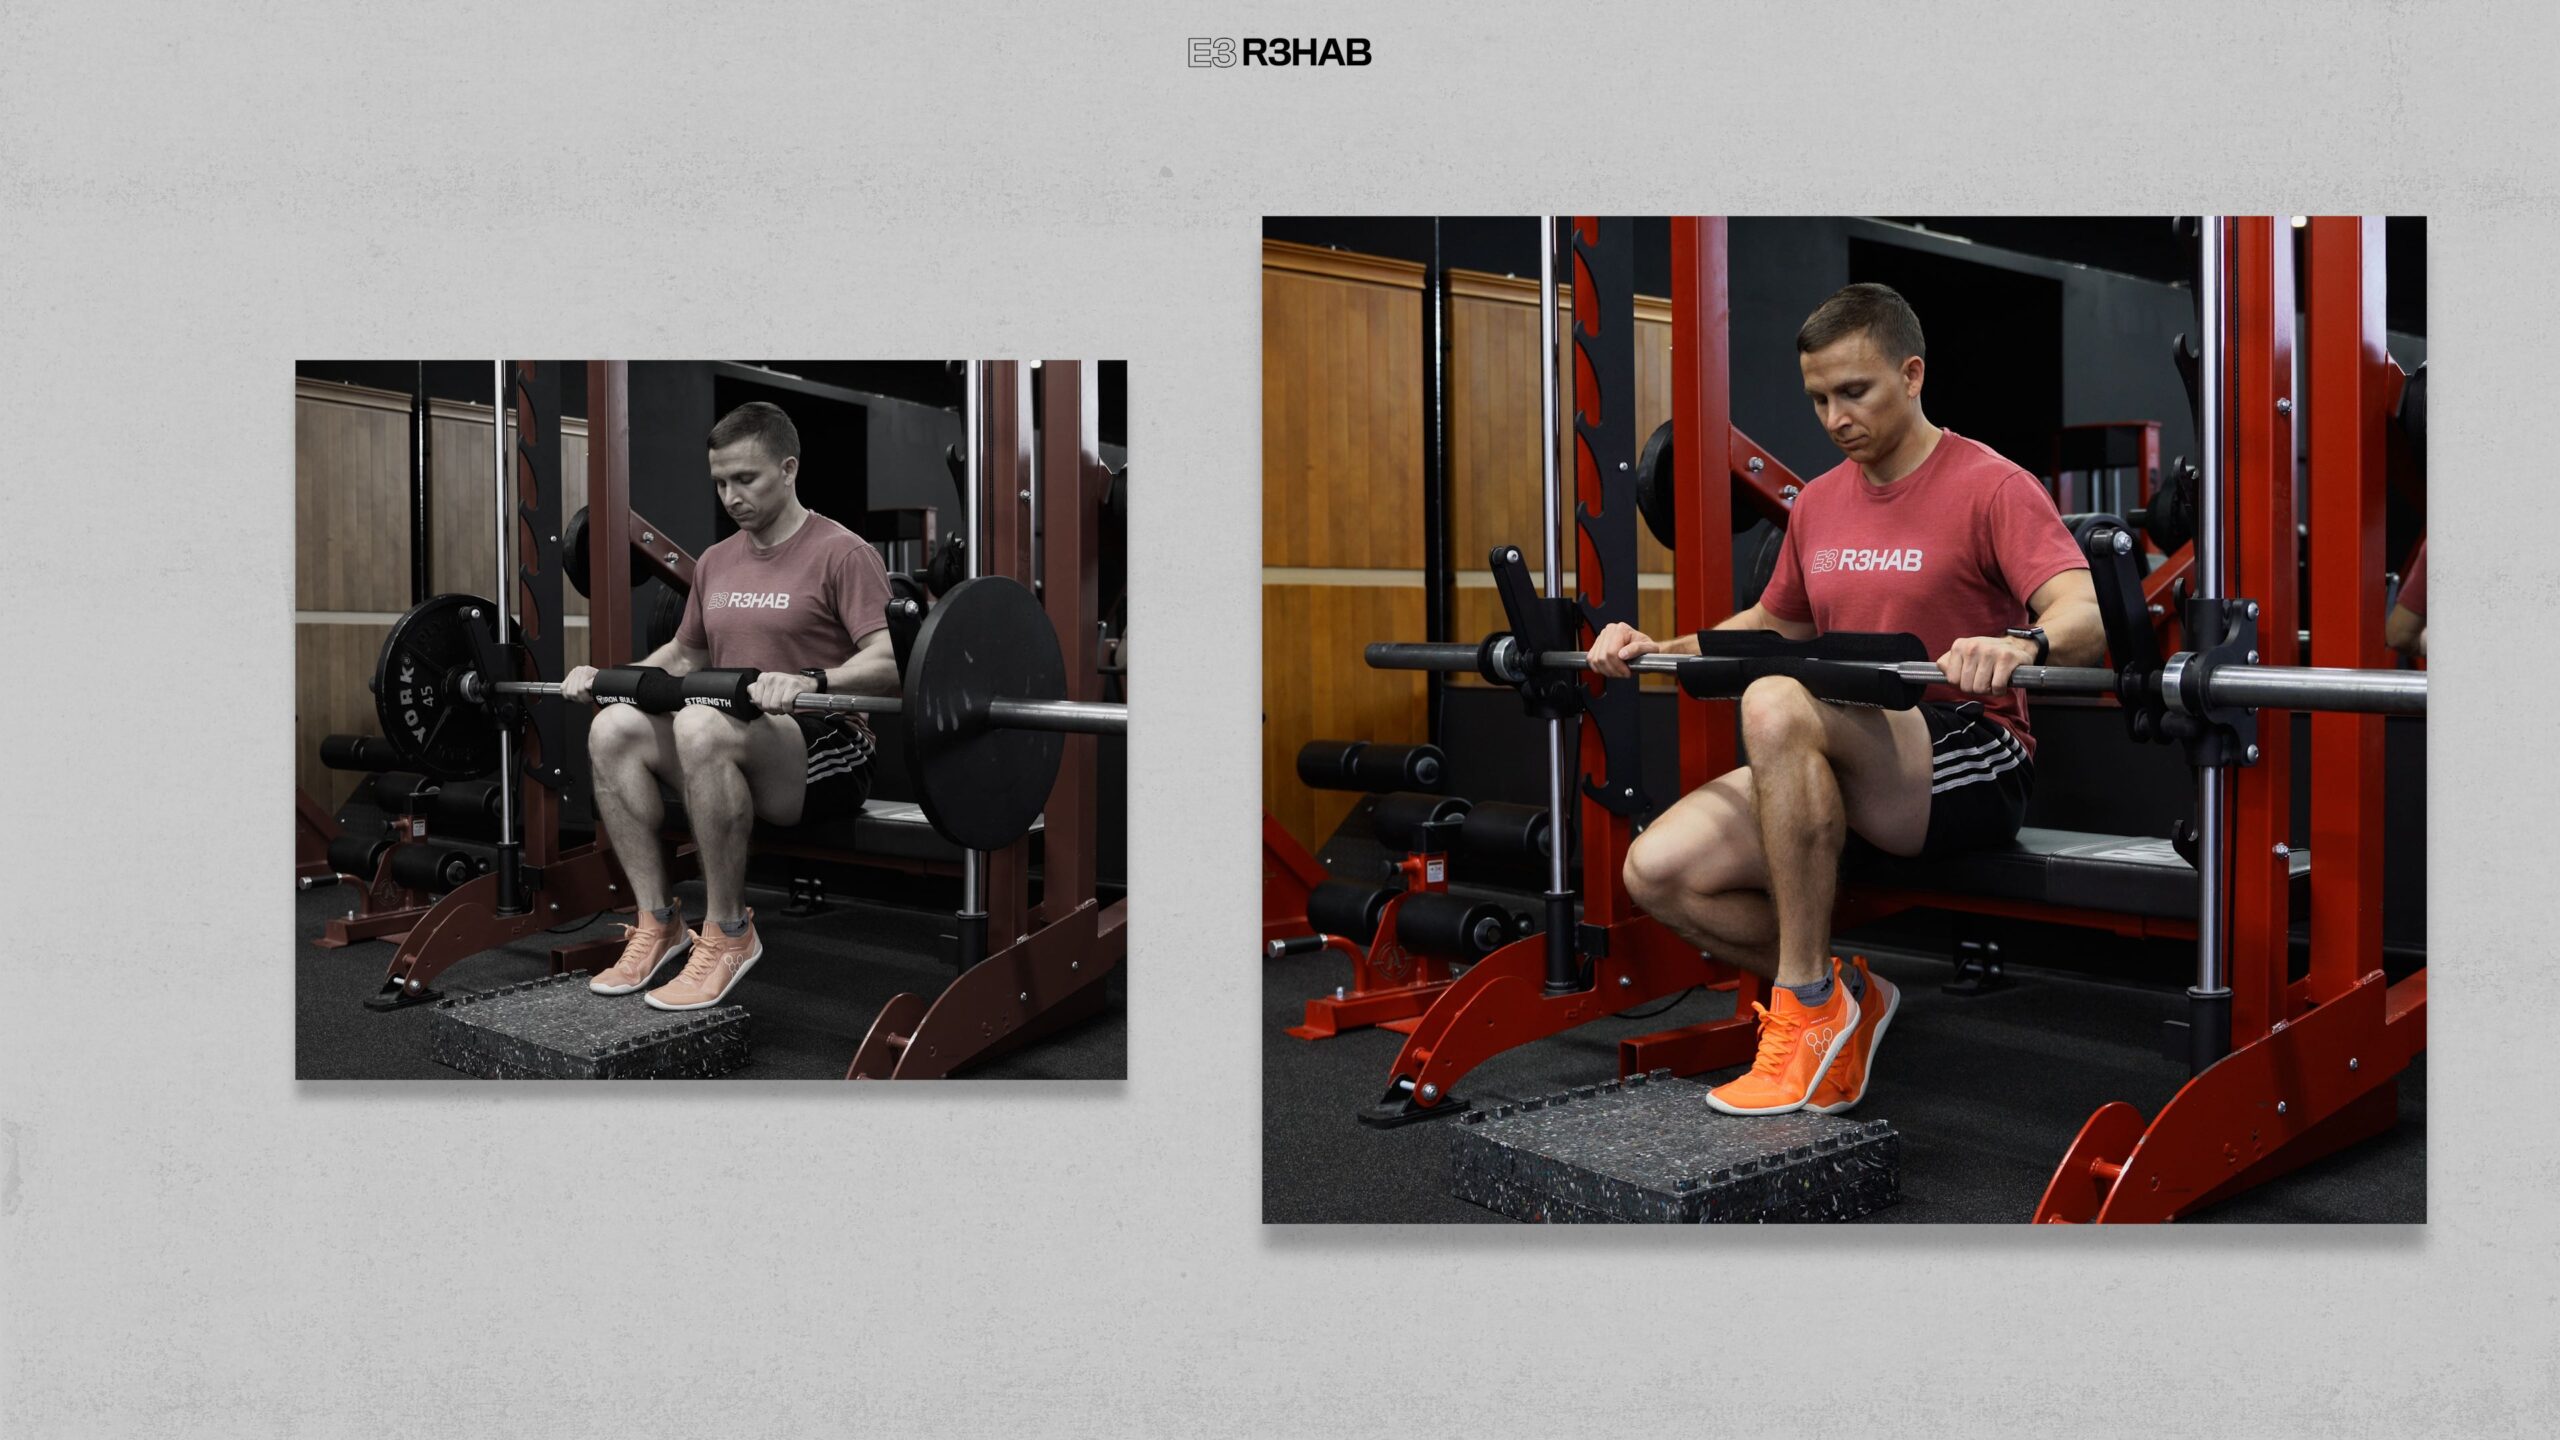
For seated heel raises, once you can perform 3 sets of 25 slow and controlled reps on a single leg on flat ground, you should add external load either with a dumbbell, kettlebell, Smith machine, or even a seated calf raise machine. These can be performed for 3-4 sets of 6-15 repetitions.
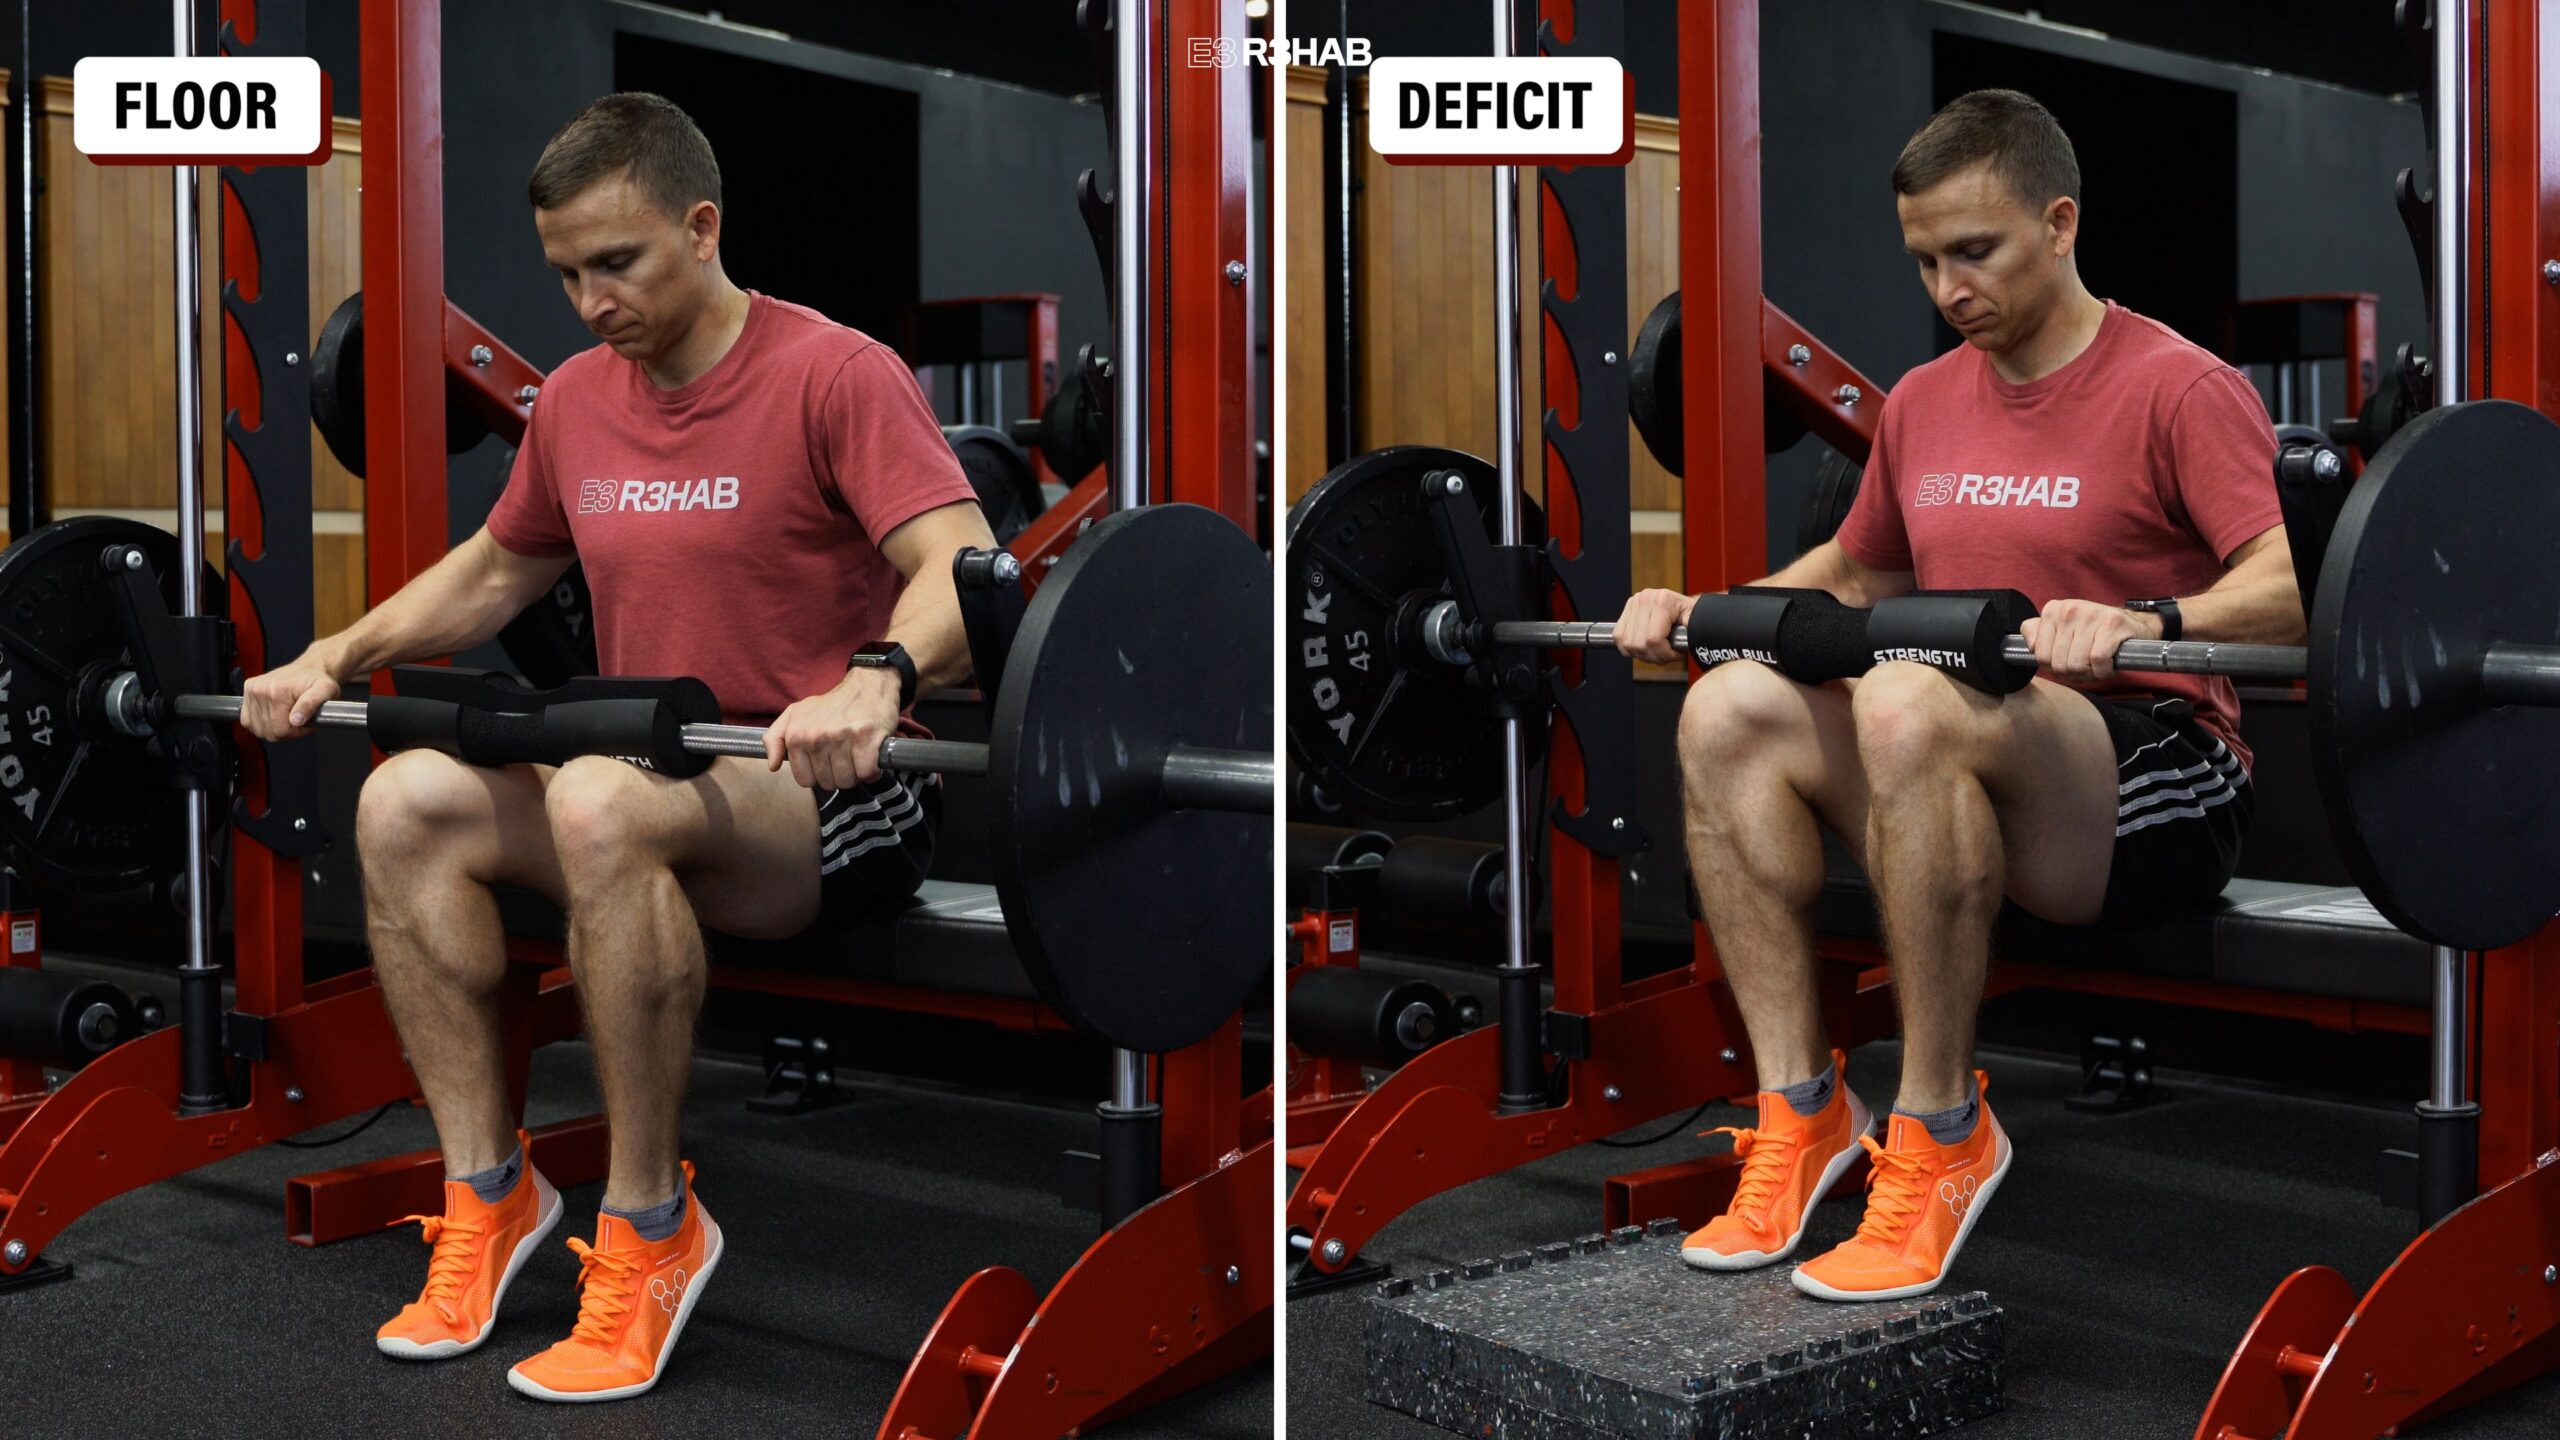
Other advanced options include performing weighted double-leg seated heel raises on the floor or from a deficit.
You can use a barbell, dumbbells, kettlebells, a Smith machine, or a seated calf raise machine.
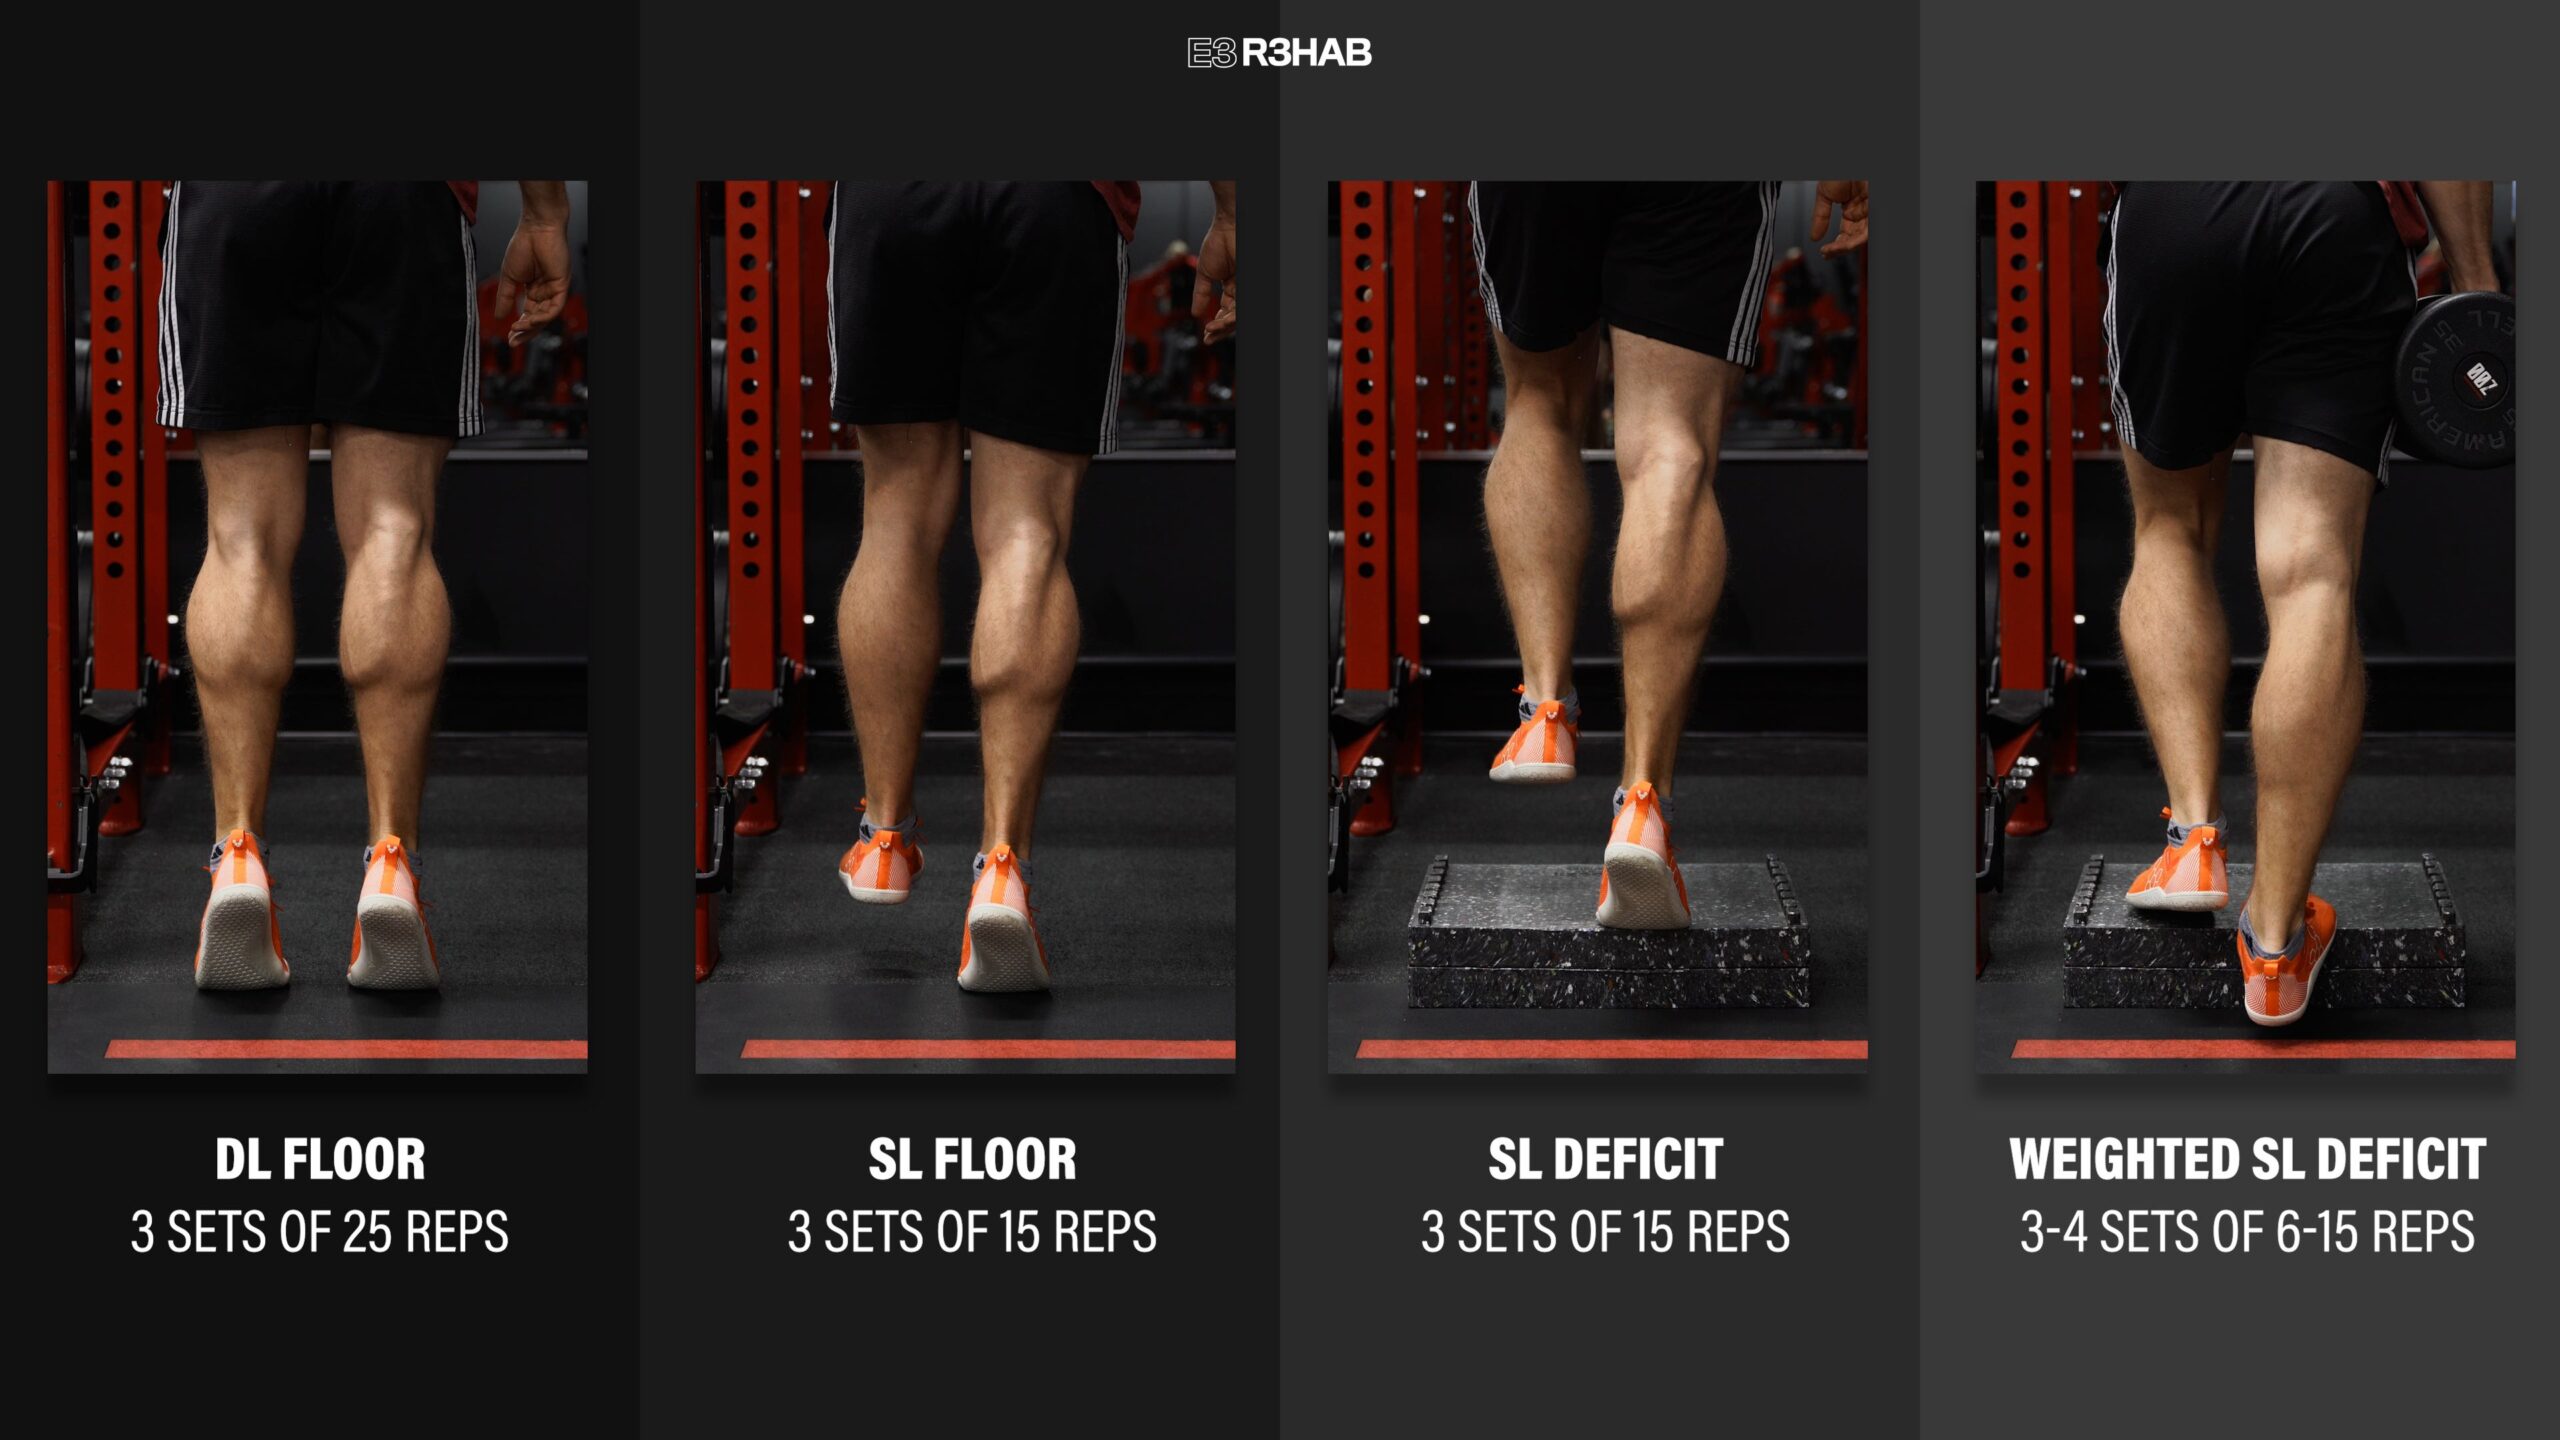
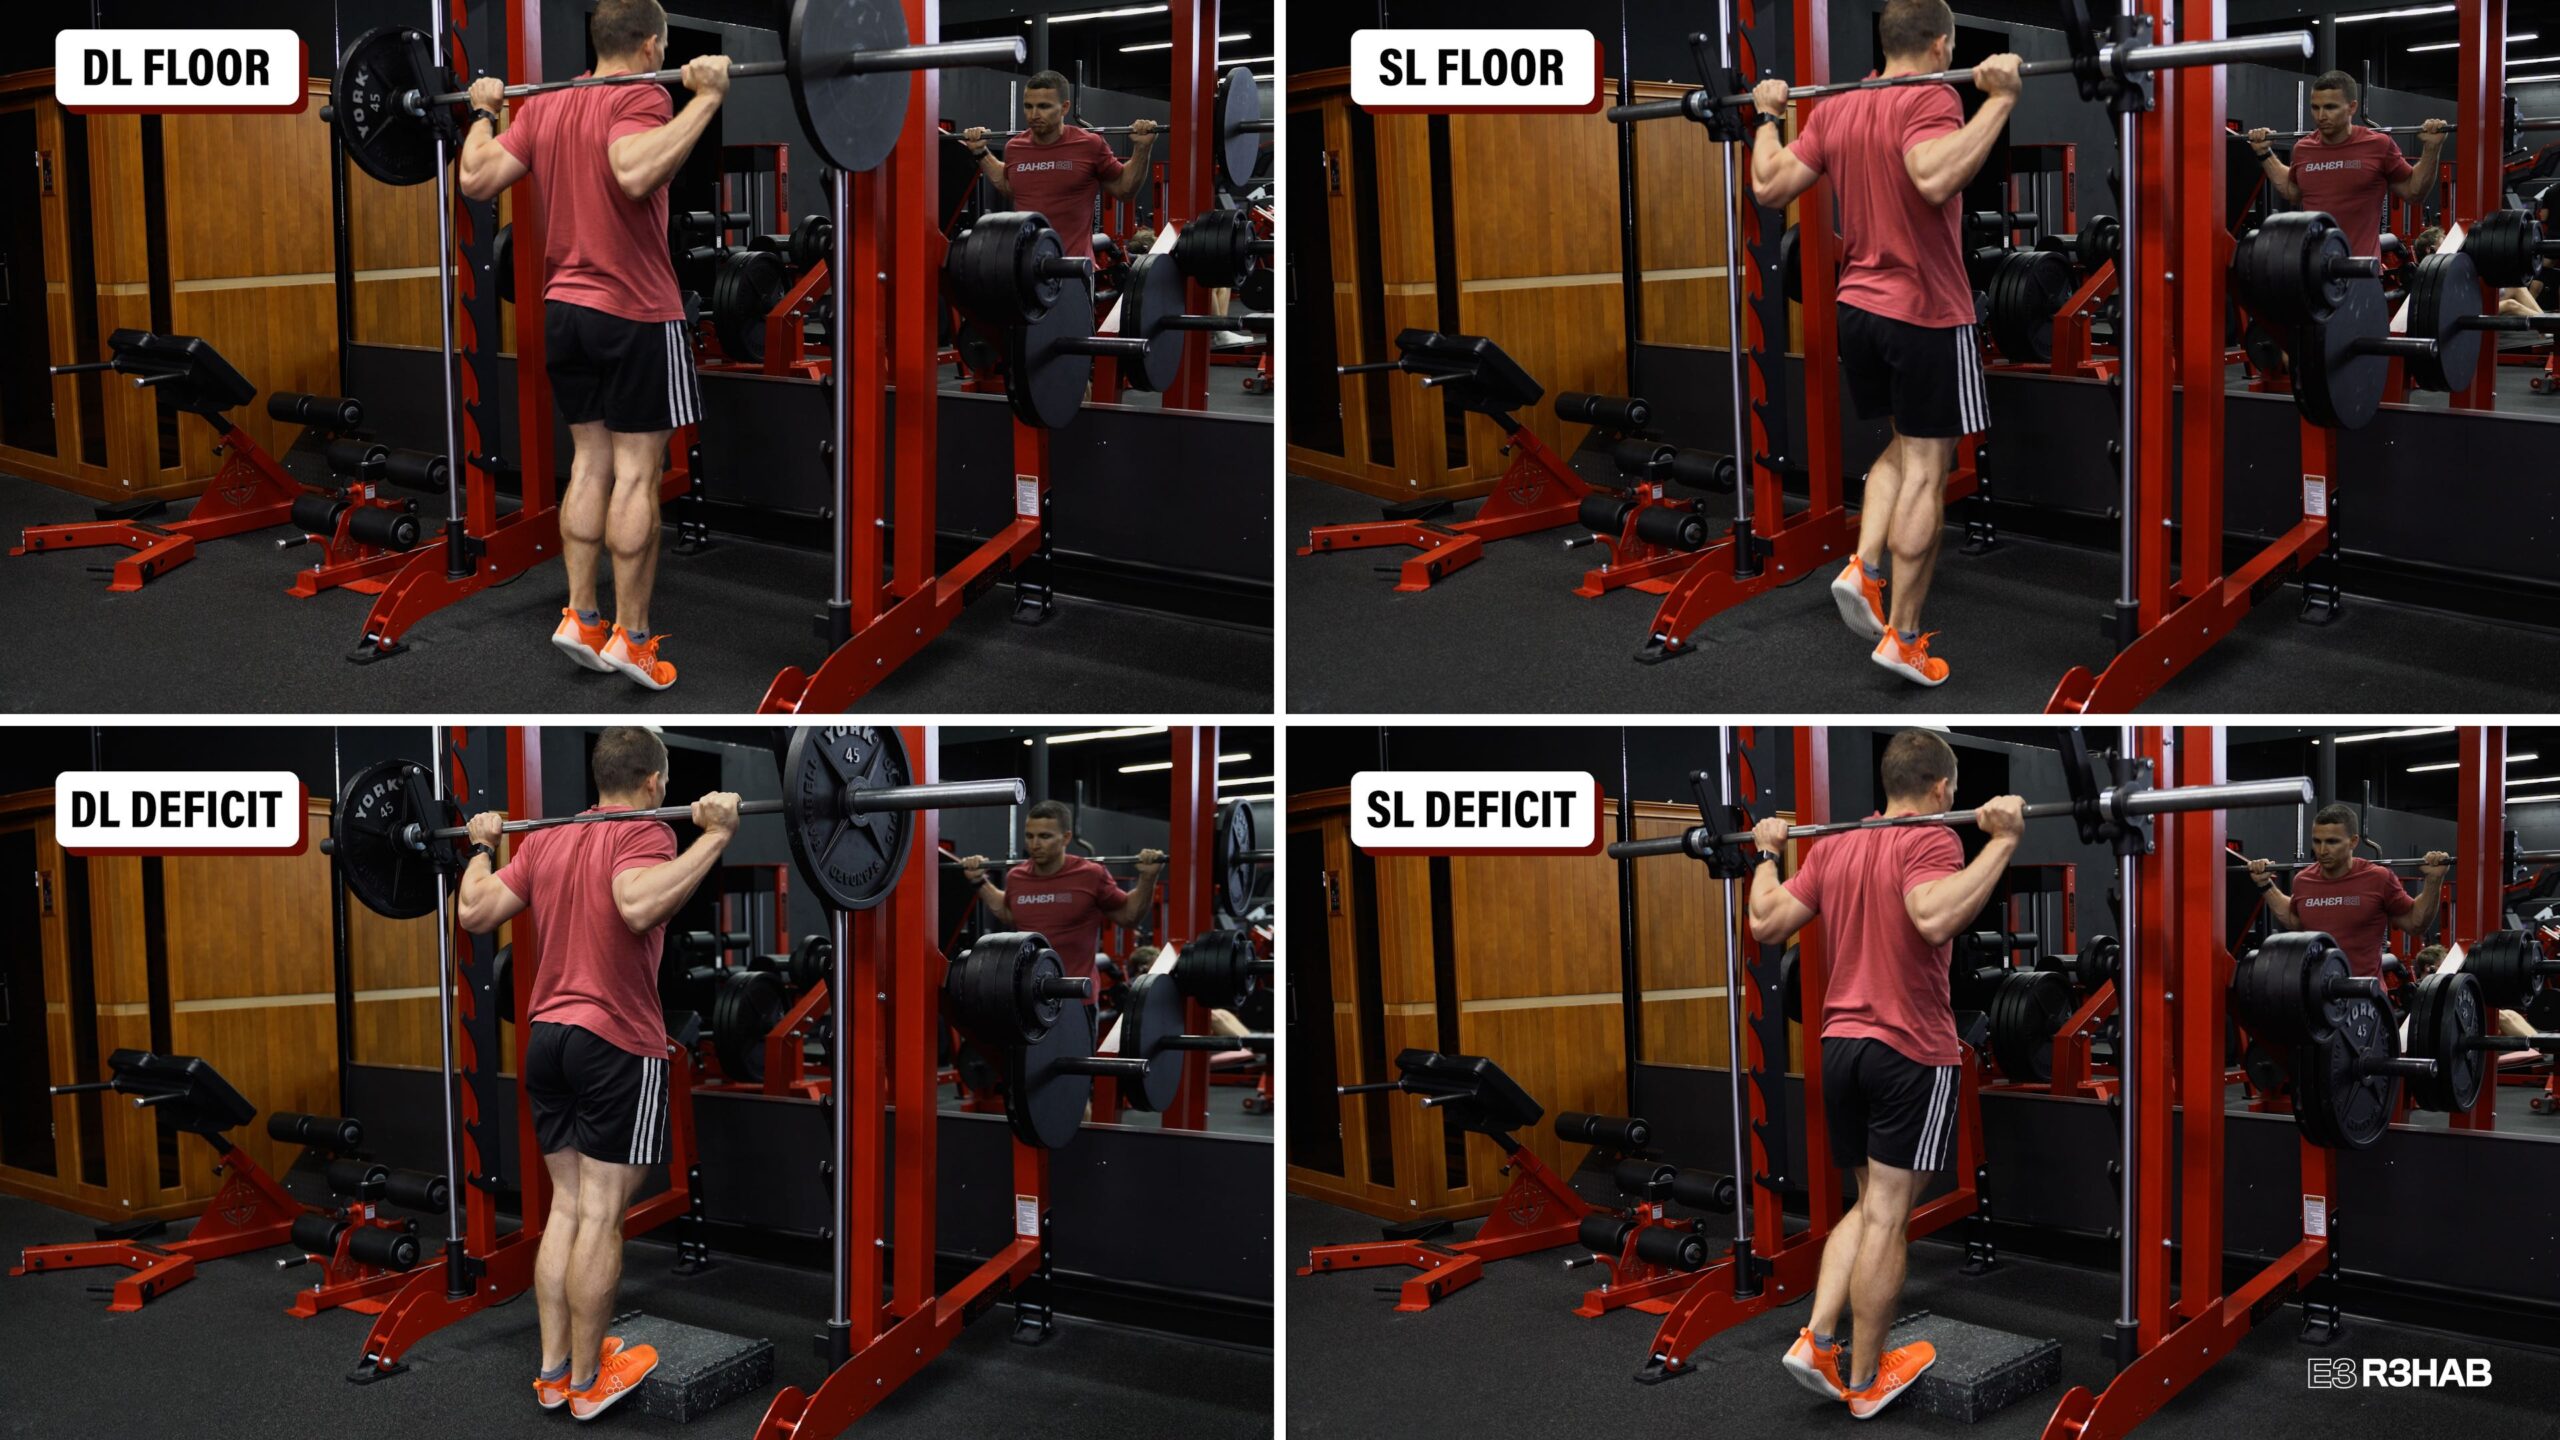
Since the rehab phases overlap, standing heel raises can usually be initiated once you can walk without an assistive device, based on the demands placed on the Achilles tendon. Here is a simple progression:
Start with two legs on flat ground. Once you can perform 3 sets of 25 repetitions, progress to a single leg, working your way up to 3 sets of 15 repetitions through your full range of motion. If you can achieve these criteria, progress by performing single leg heel raises off the edge of a step or object. Again, your goal is 3 sets of 15 repetitions. Once you reach the final level, you can start to add external load, aiming for 3-4 sets of 6-15 repetitions.
Other knee straight options include using a smith machine, standing heel raise machine, or leg press. These can also be performed double leg or single leg and either with or without a deficit.
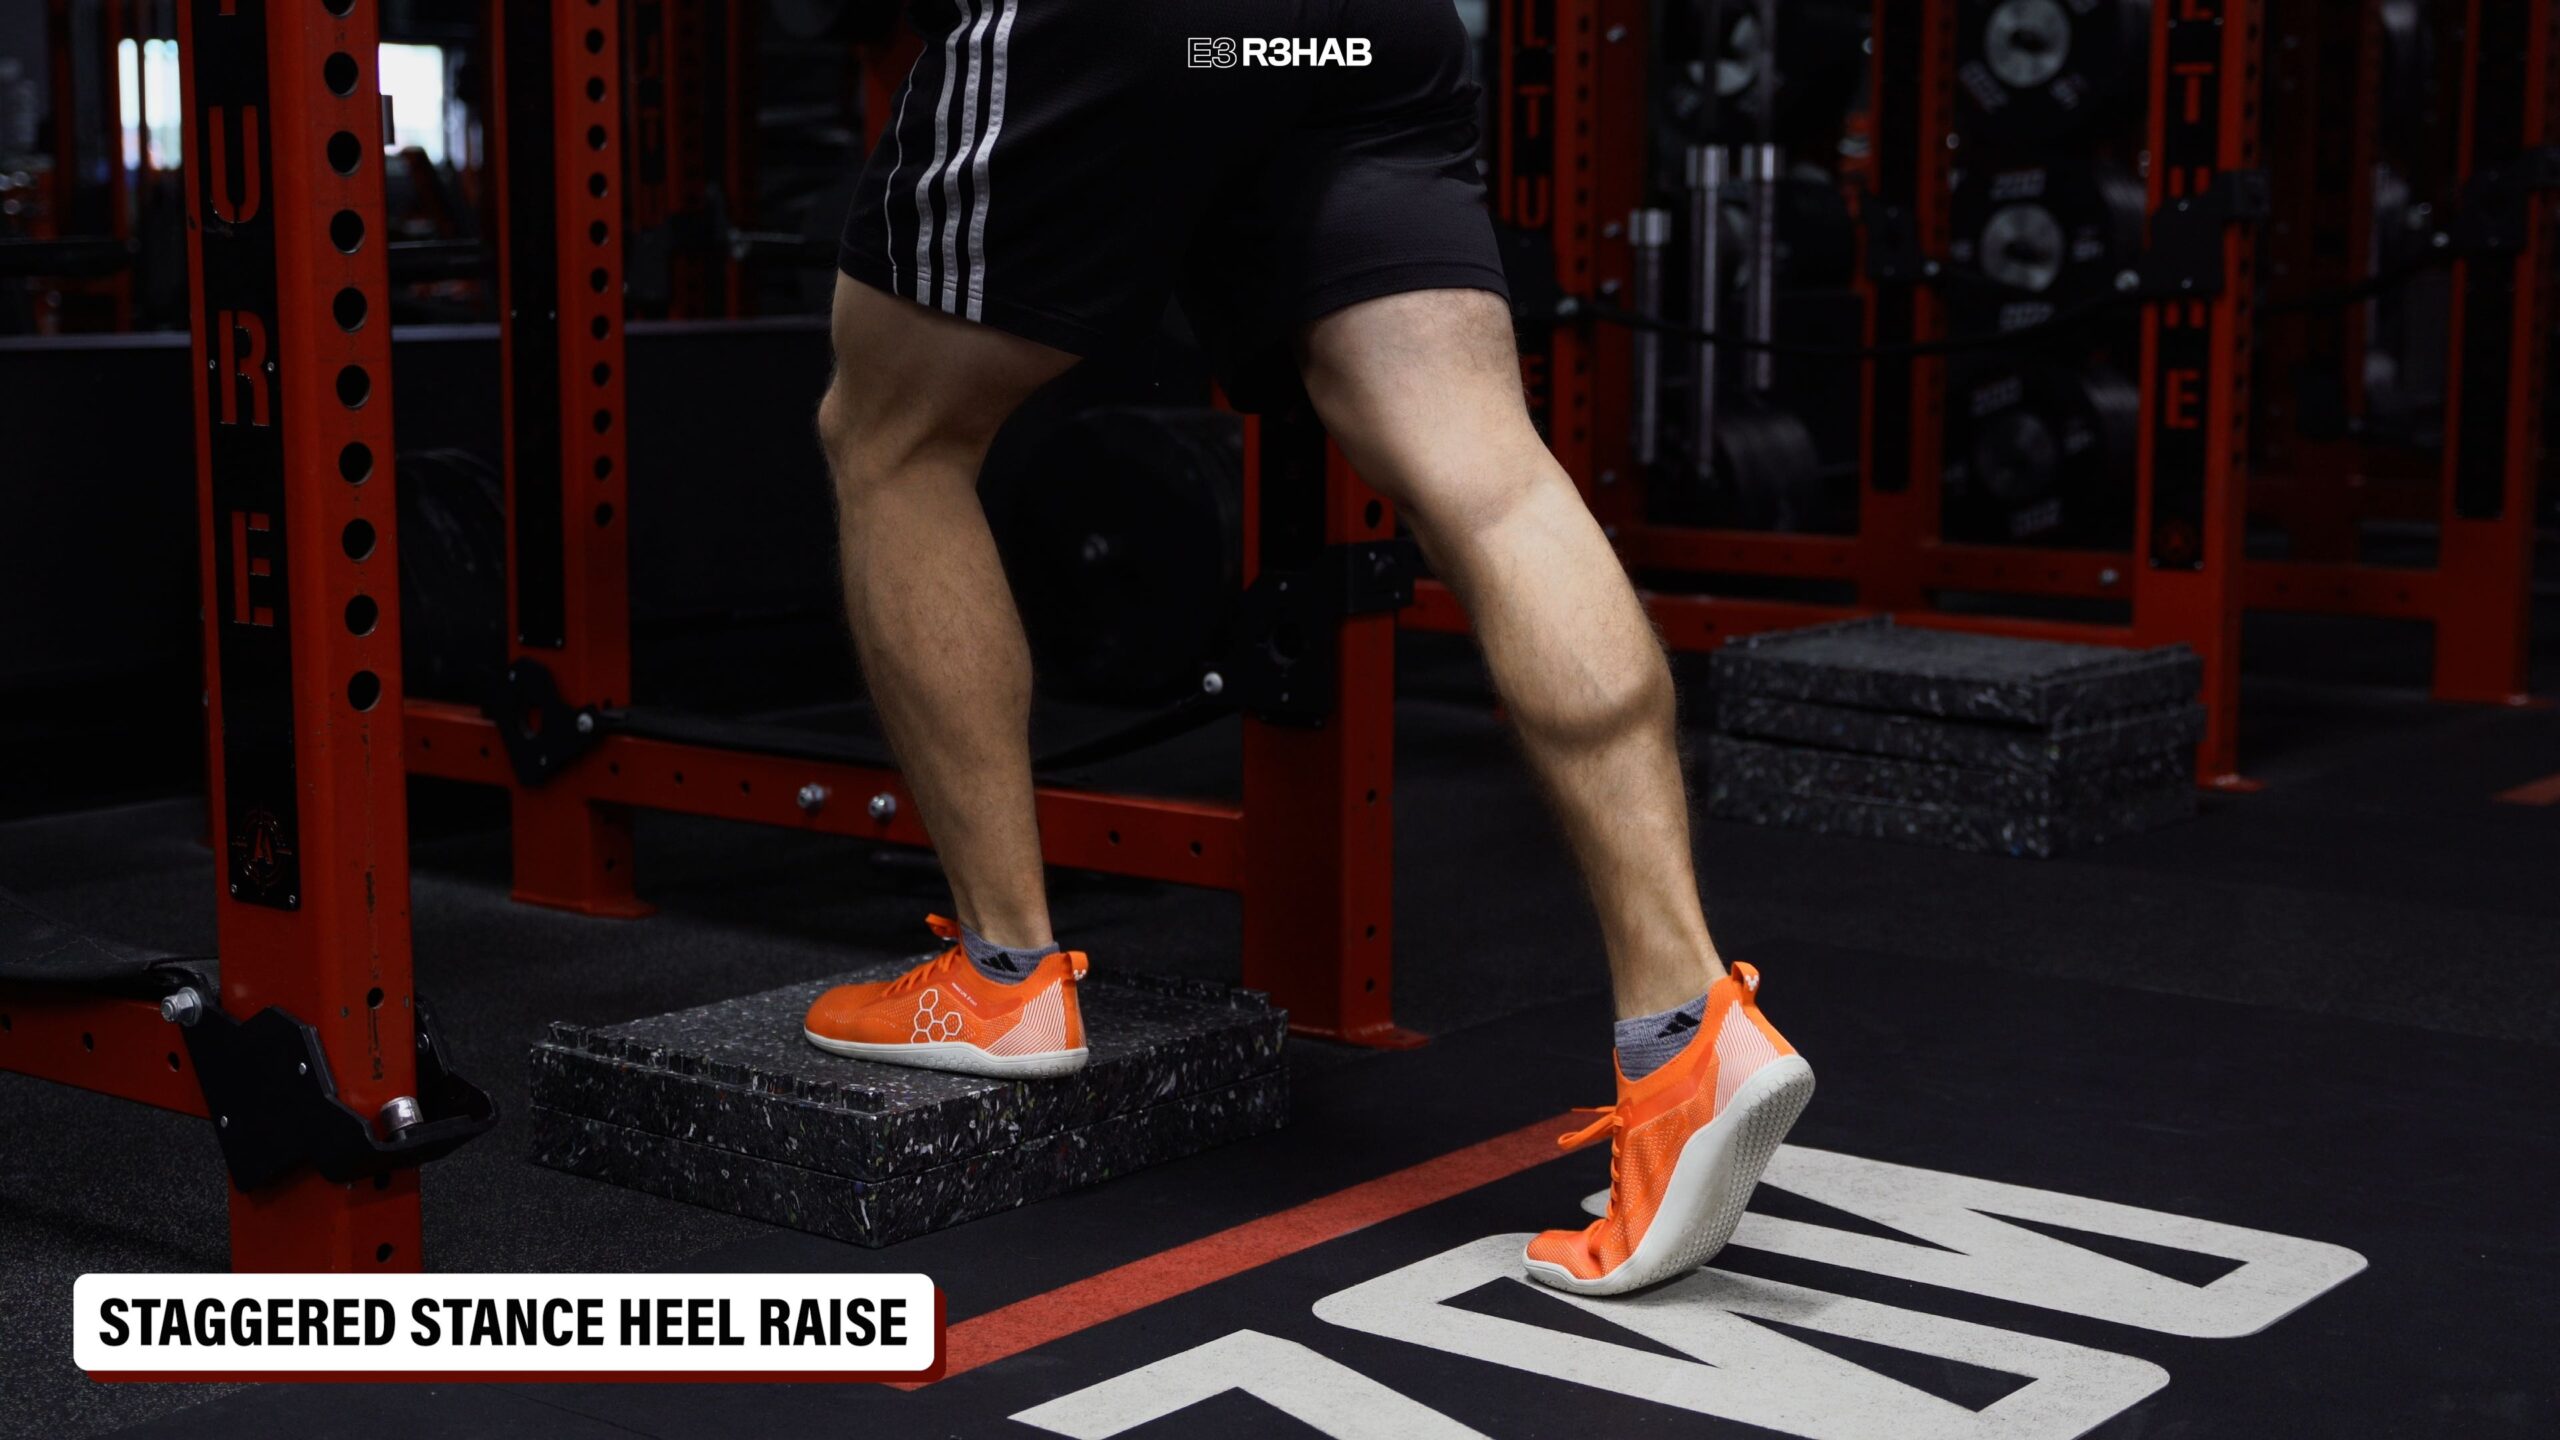
If progressing from two legs to one leg is too challenging, try performing a heel raise in a staggered stance position.
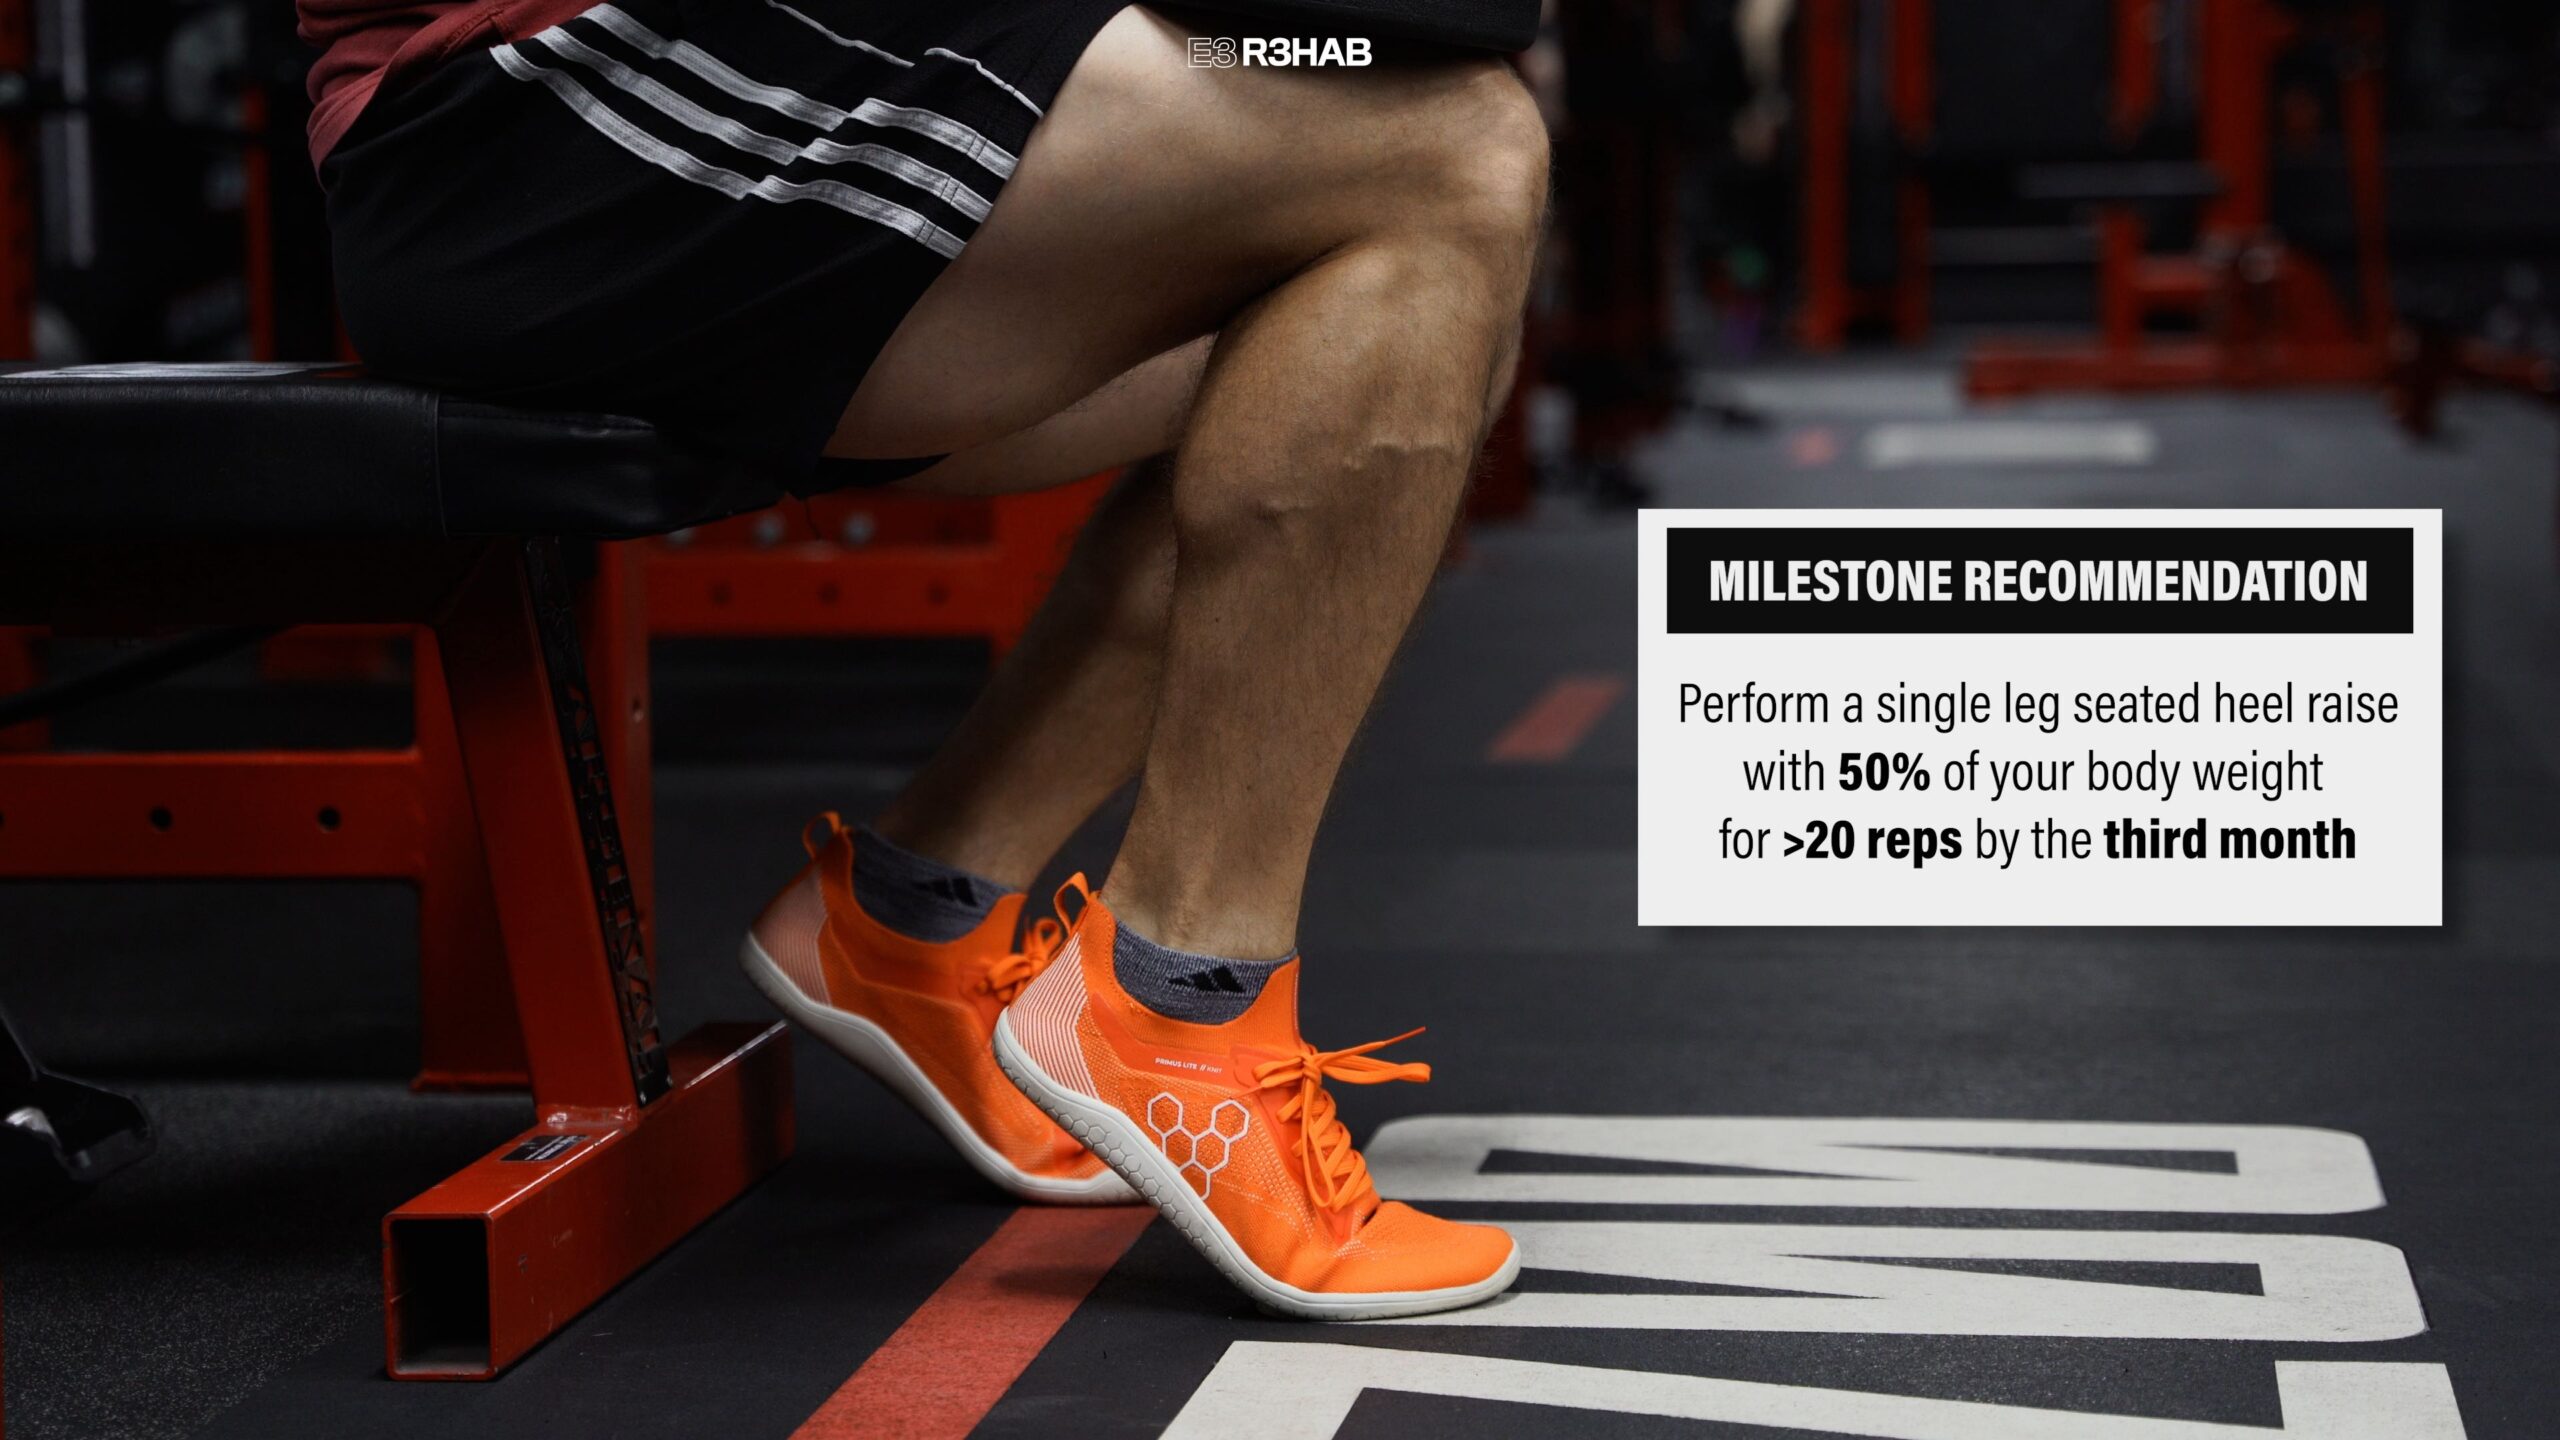
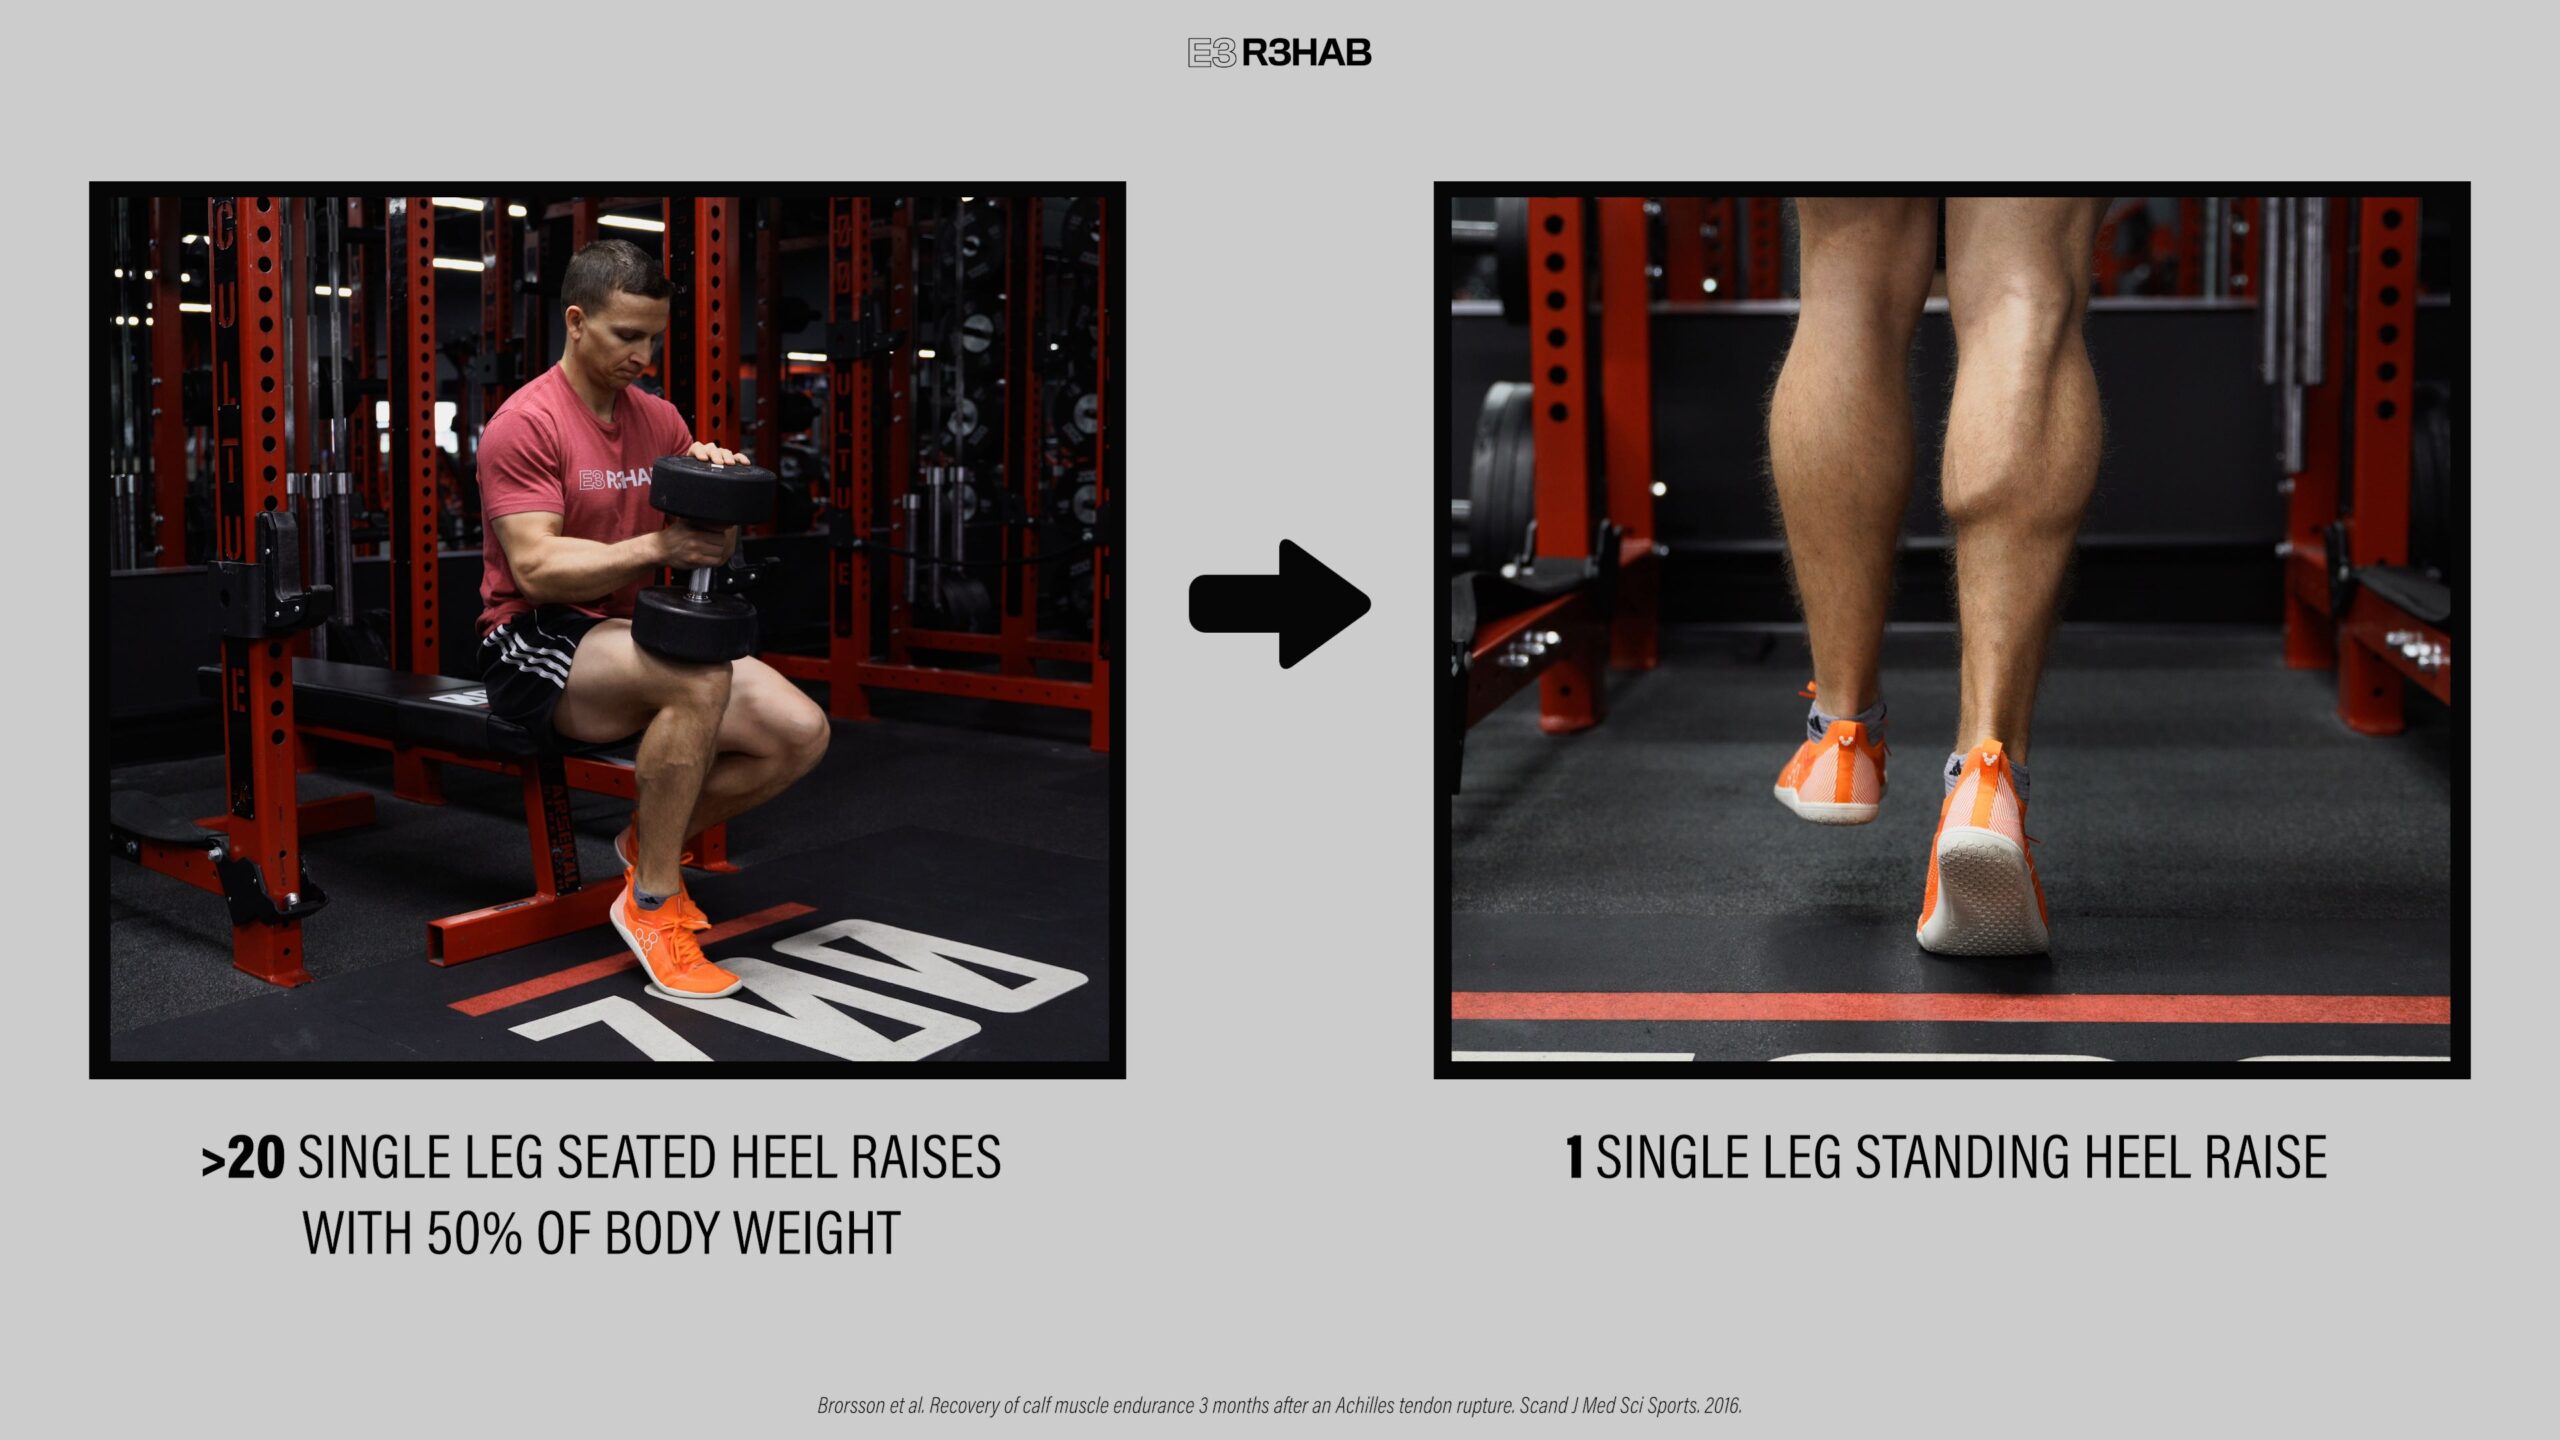
One milestone recommendation is that you can perform a single-leg seated heel raise with 50% of your body weight for greater than 20 repetitions by the third month.
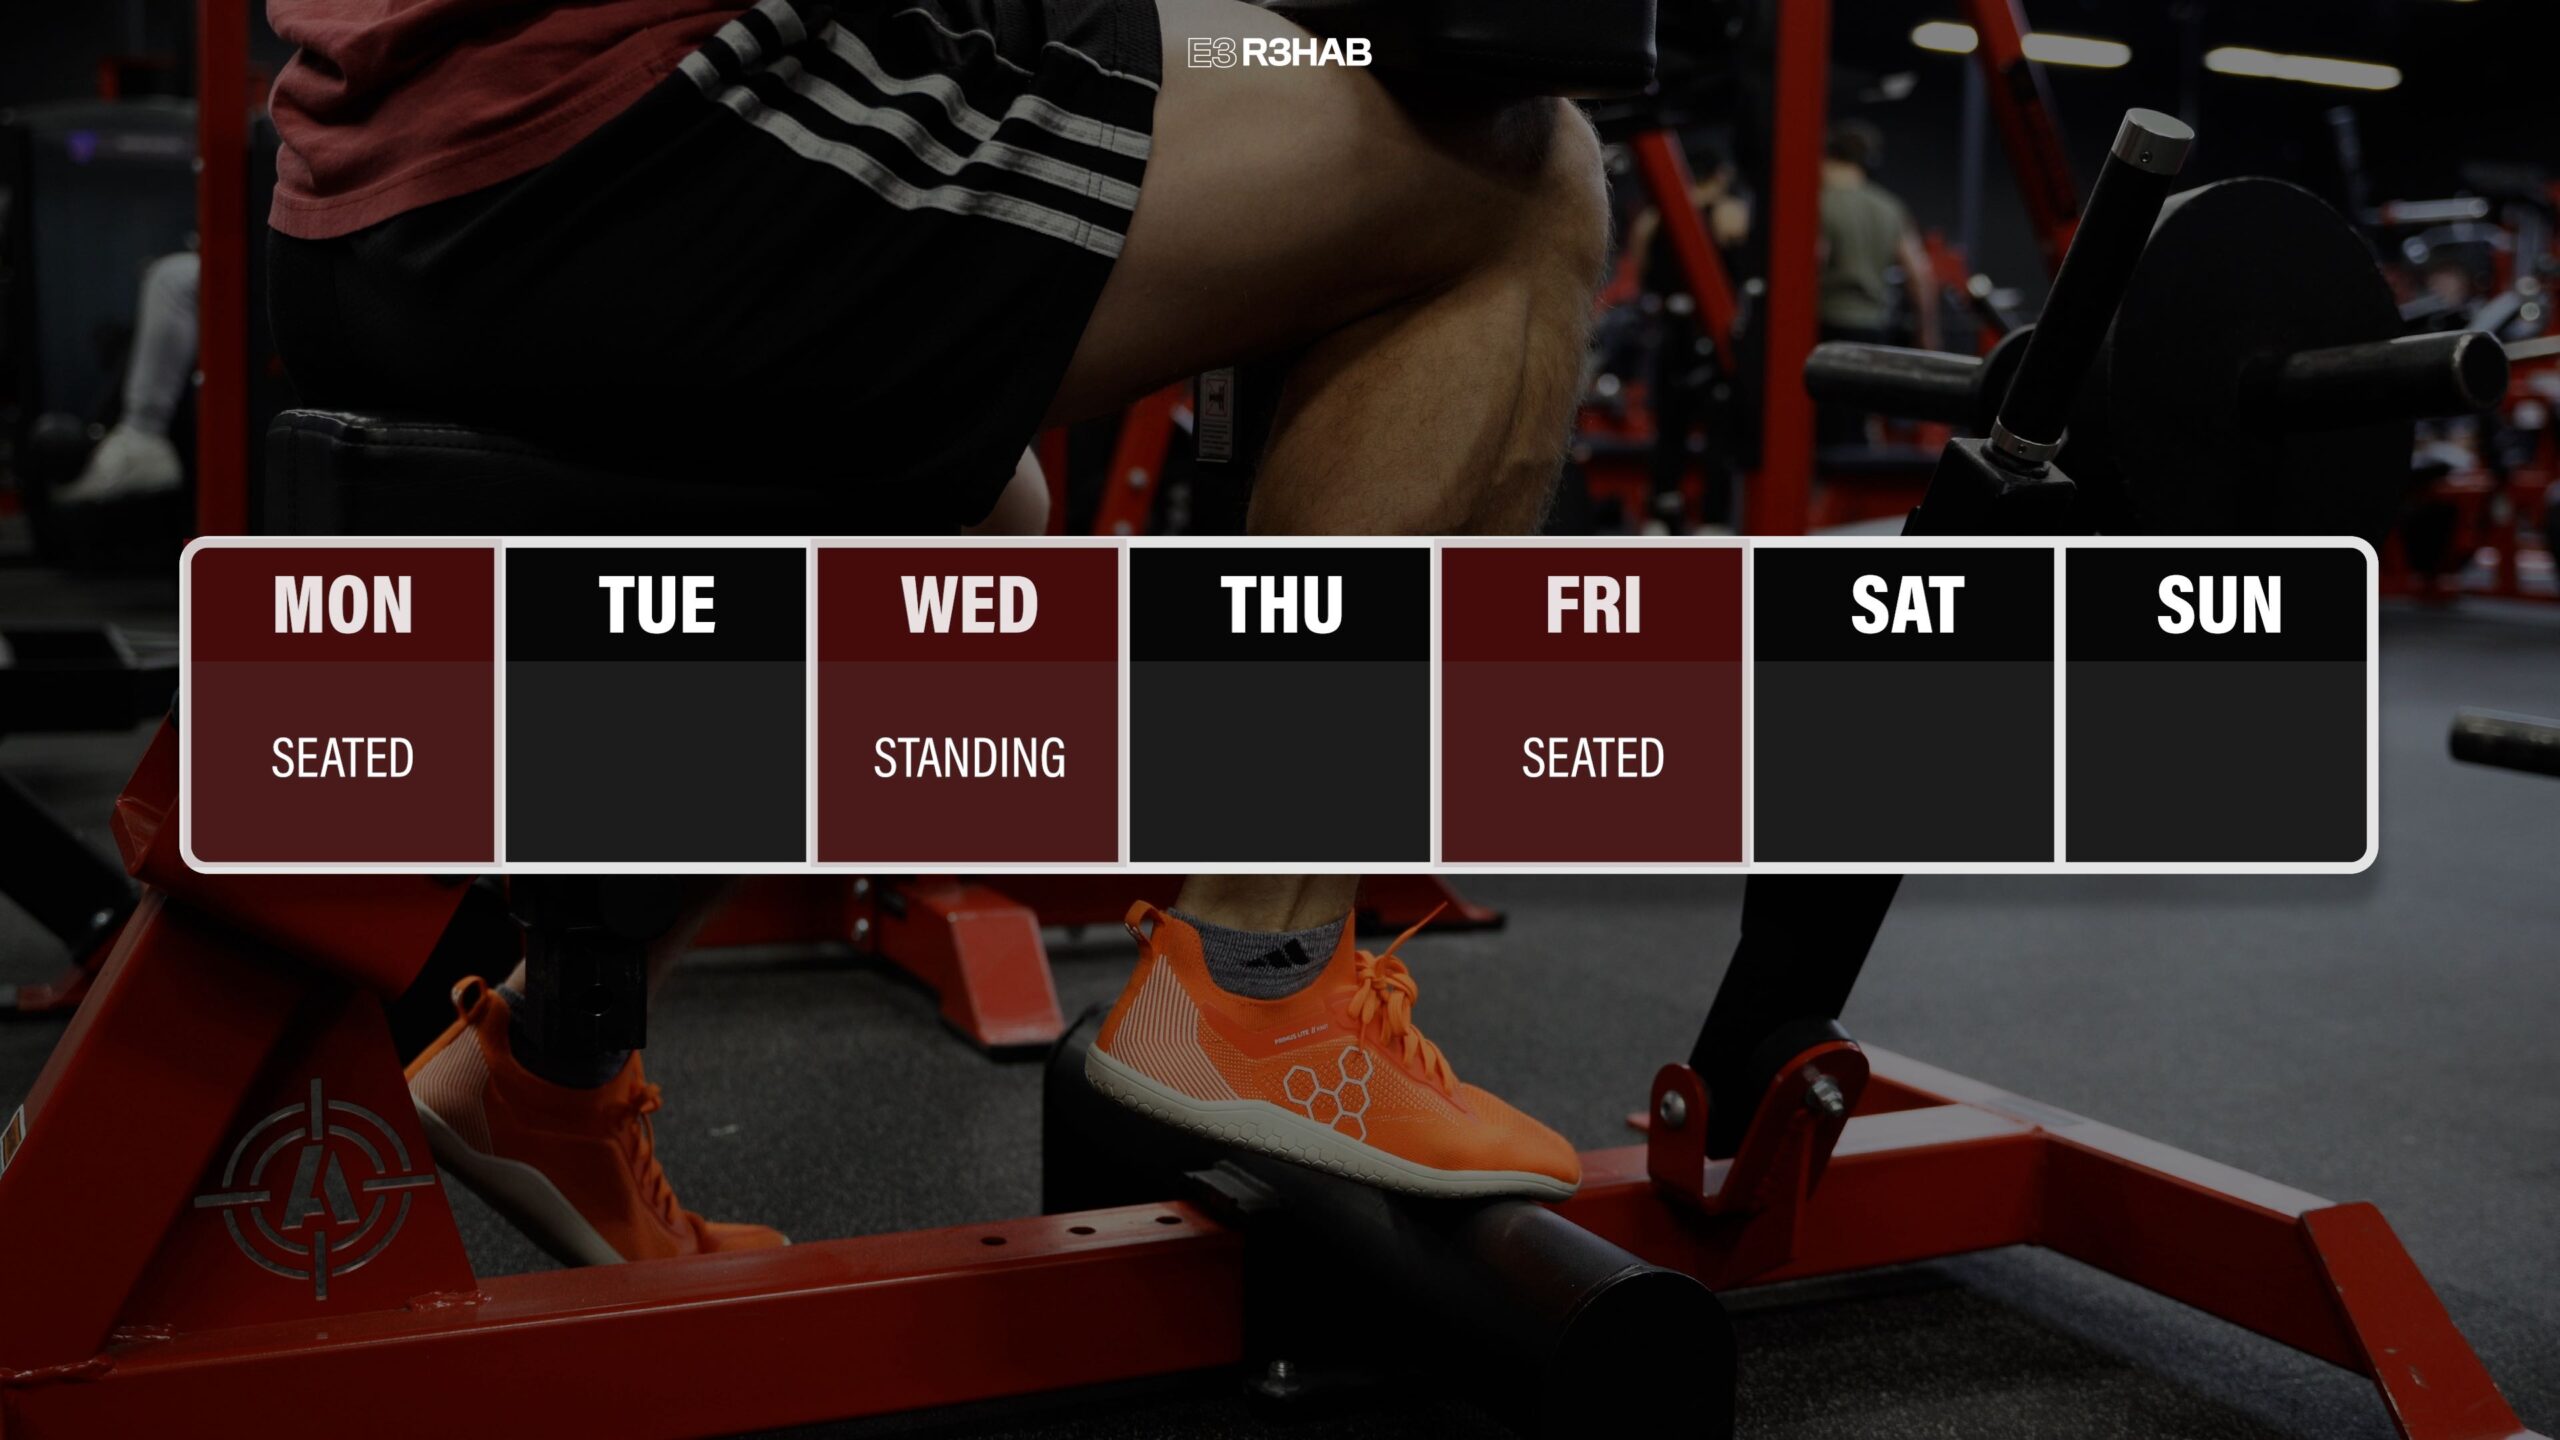
In terms of programming, you should aim to perform a minimum of 1-2 heel raise exercises, 2 to 3 days per week. For example, you could perform the seated heel raises on Monday and Friday, and the standing progression on Wednesday.
Therefore, in addition to progressing the volume and intensity of heel raises, you should also emphasize a slow and controlled tempo, trying to lift your heel as high as possible with each repetition.
Alongside the heel raises, there are 3 other considerations for this phase.
1. You should continue to perform and progress exercises like the leg extension and hamstring curl mentioned earlier.
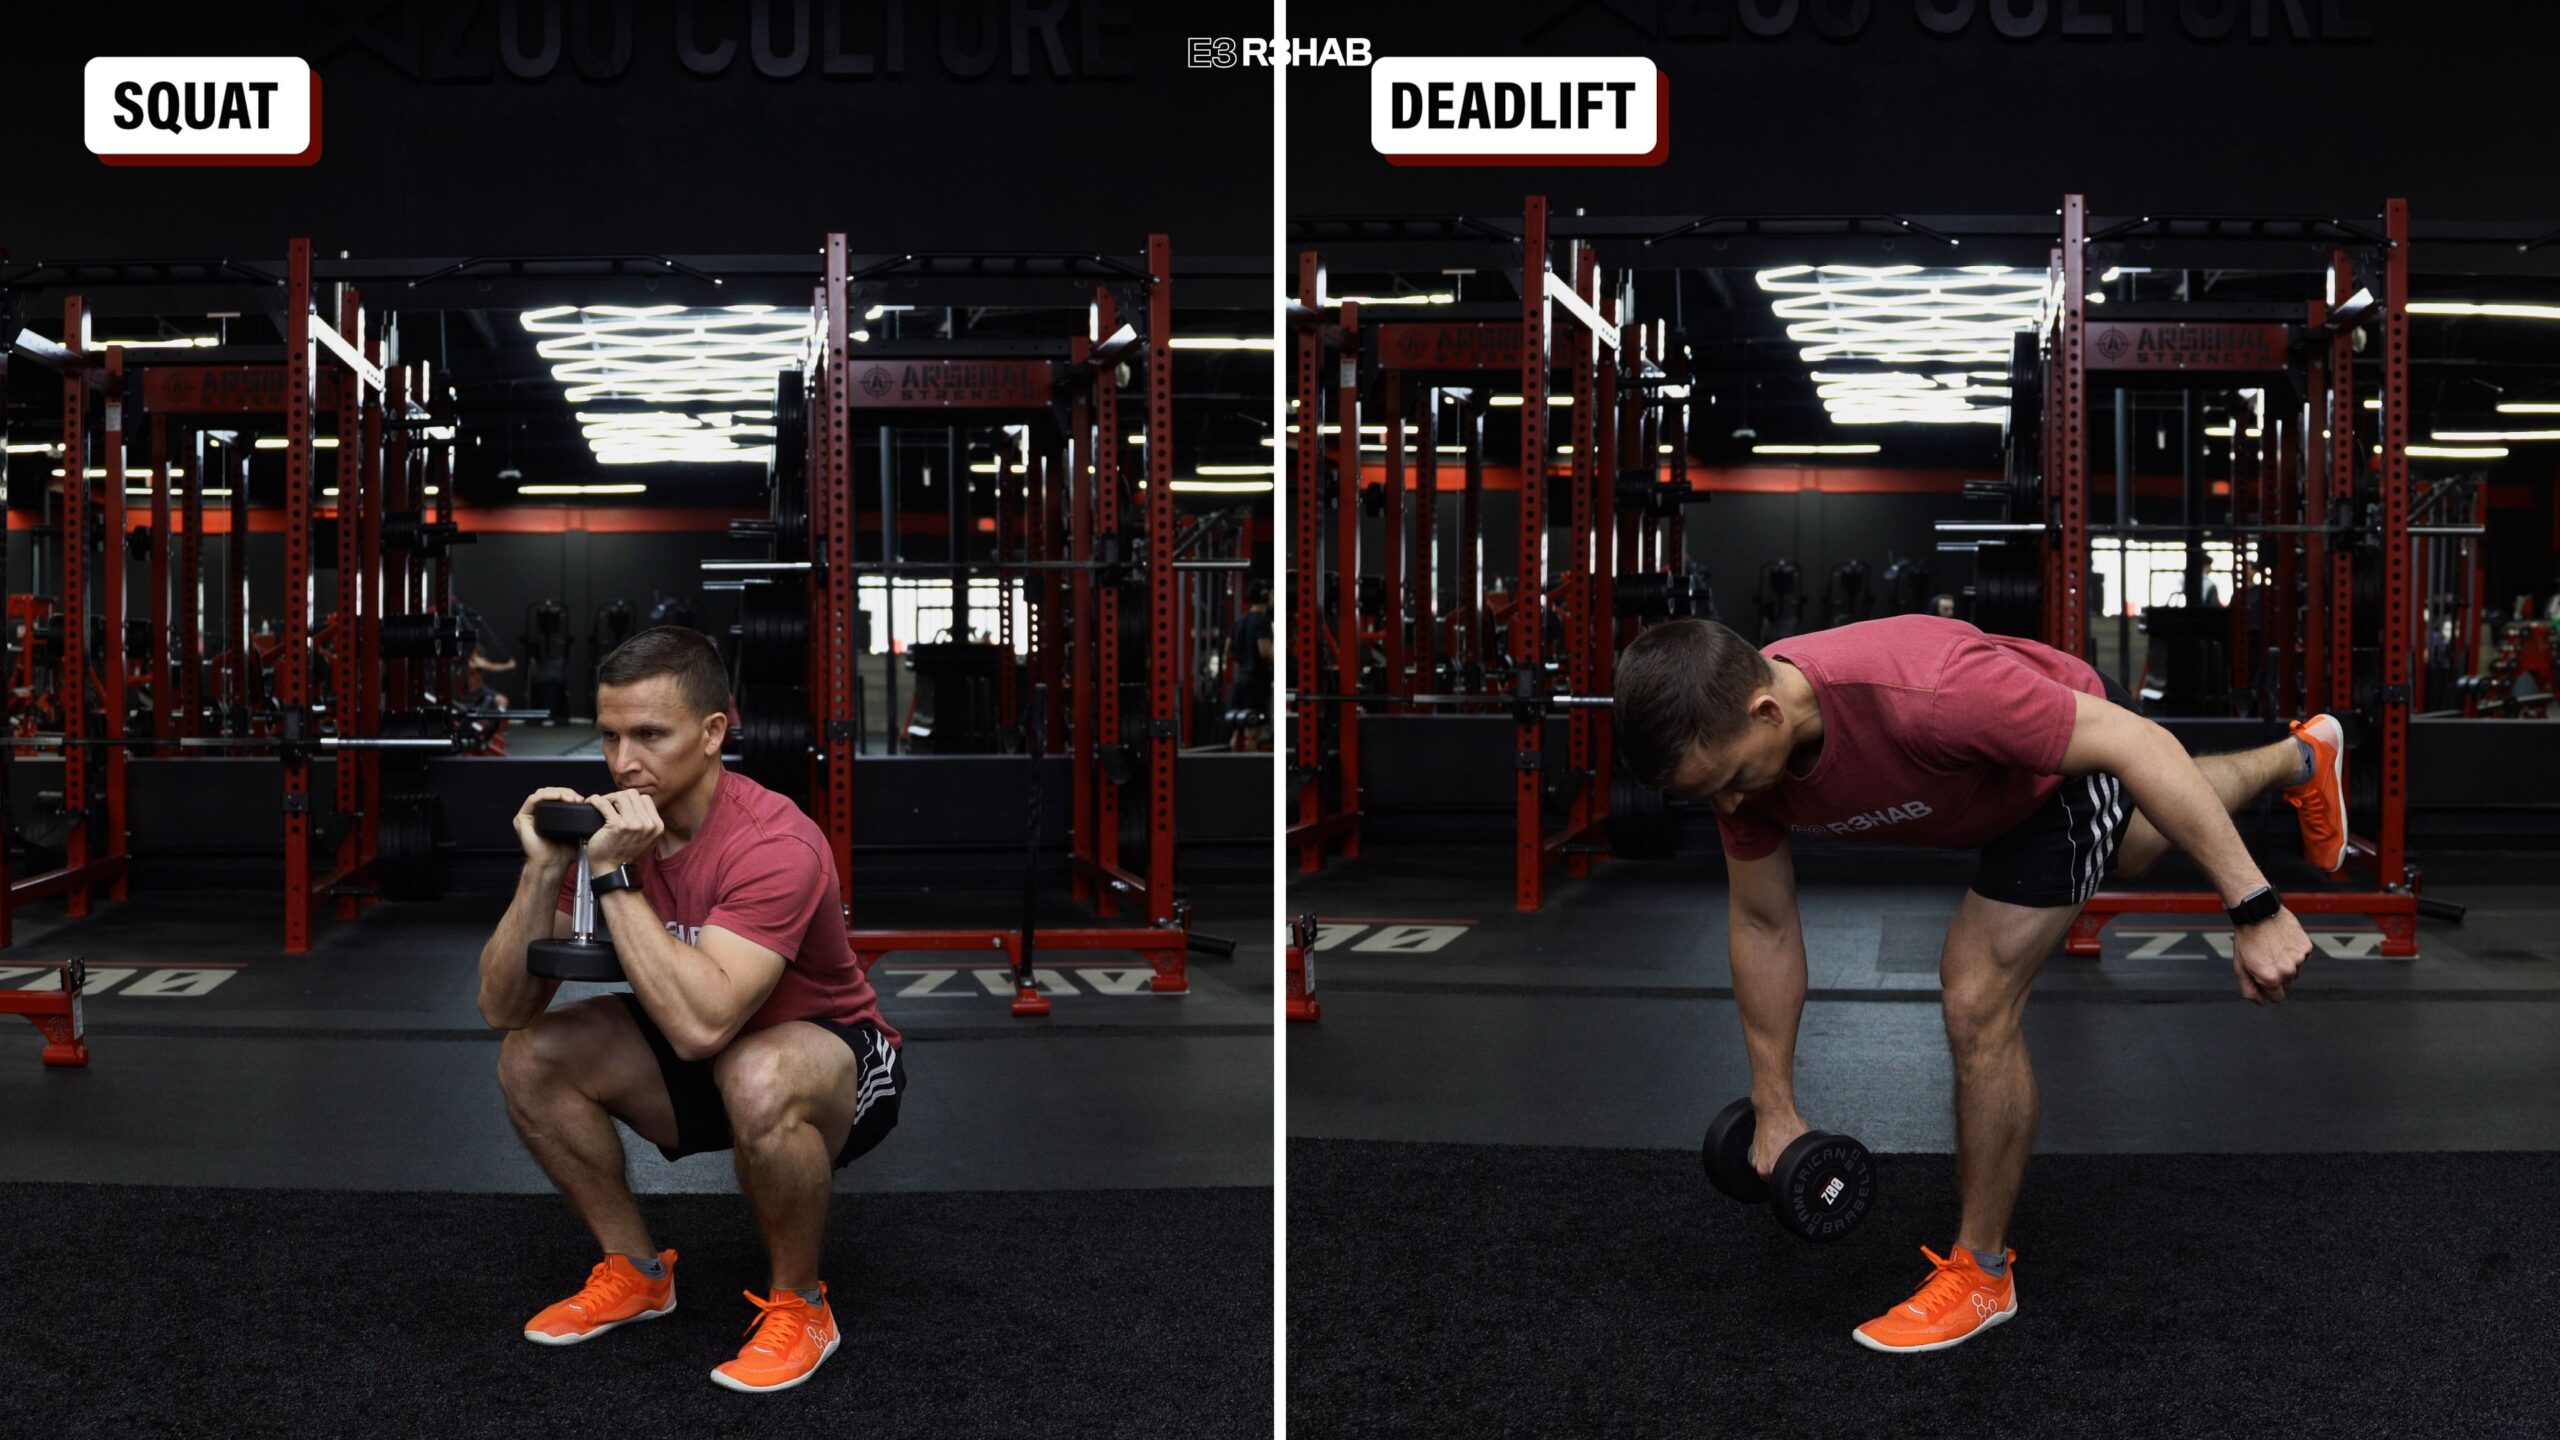
This is a good time to start incorporating other lower-body movements as well, like squat and deadlift variations.
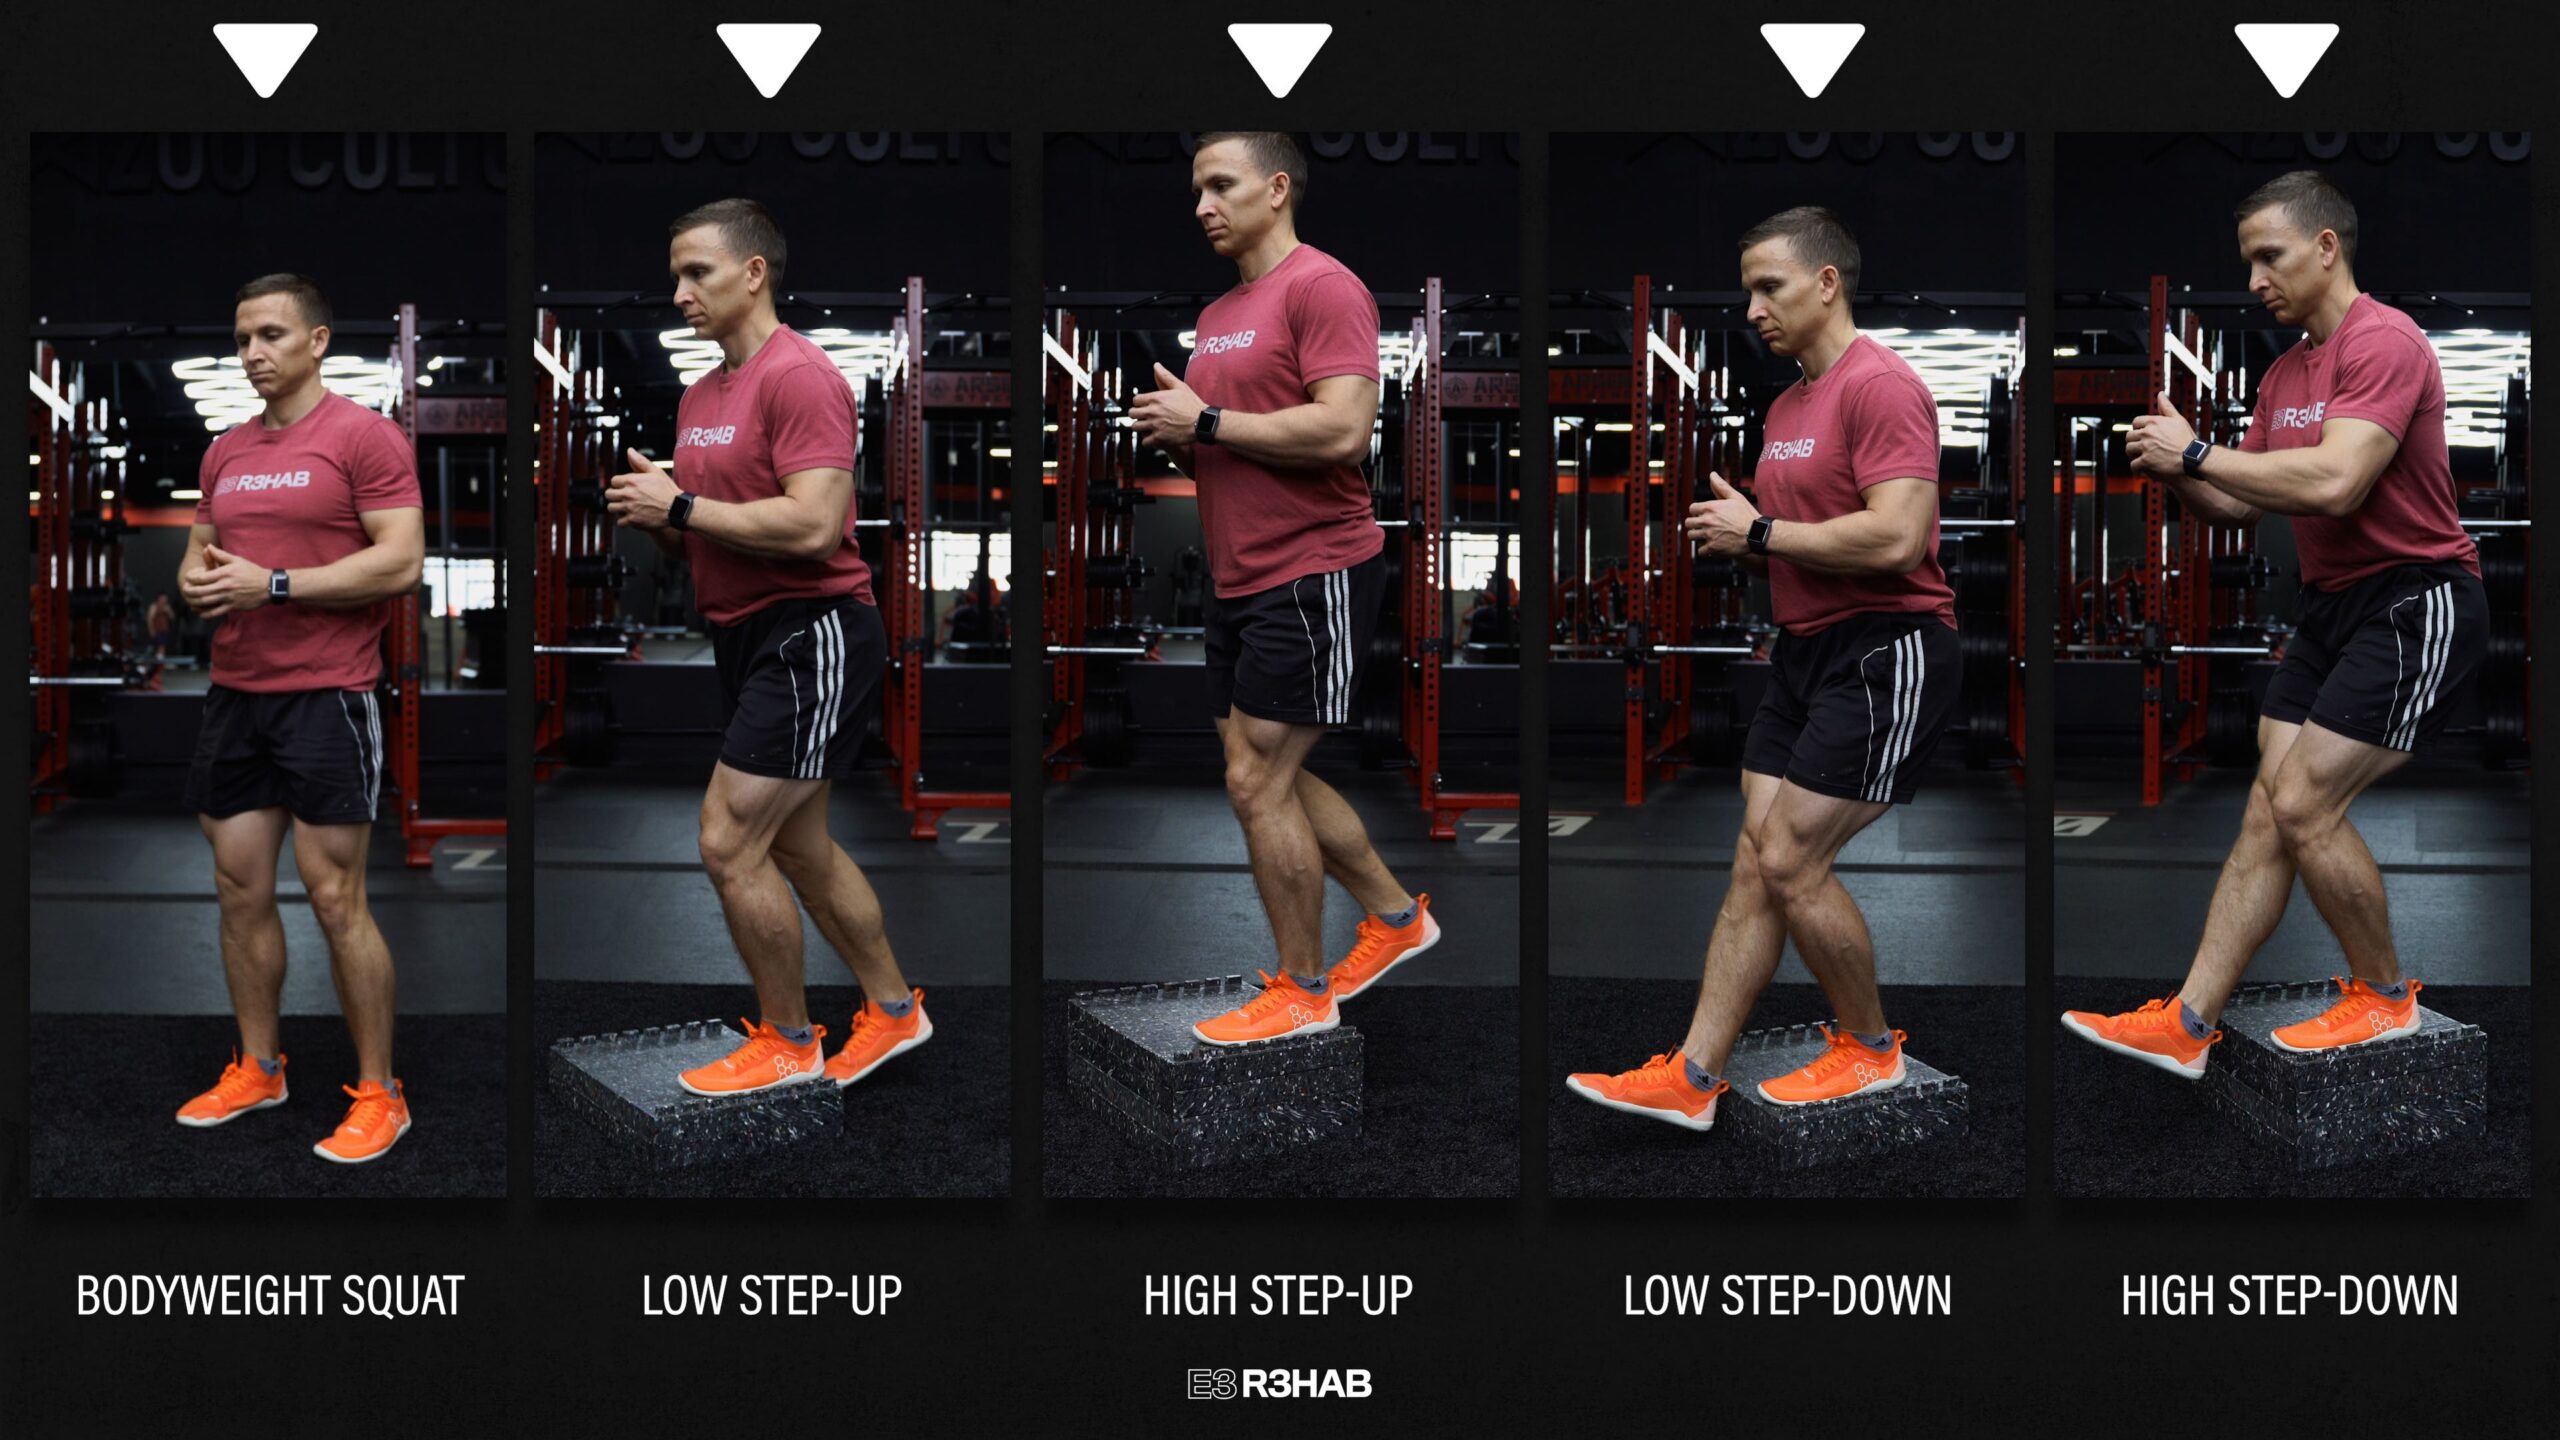
For instance, when considering the loads placed through the Achilles tendon, an example of a lower body strength progression might start with a bodyweight squat, advance to a low step-up, then to a high step-up, followed by a low step-down, and finally a high step-down.
2. This is also a good time to incorporate aerobic exercises, like riding a stationary bike, to help maintain or improve your cardiorespiratory fitness.
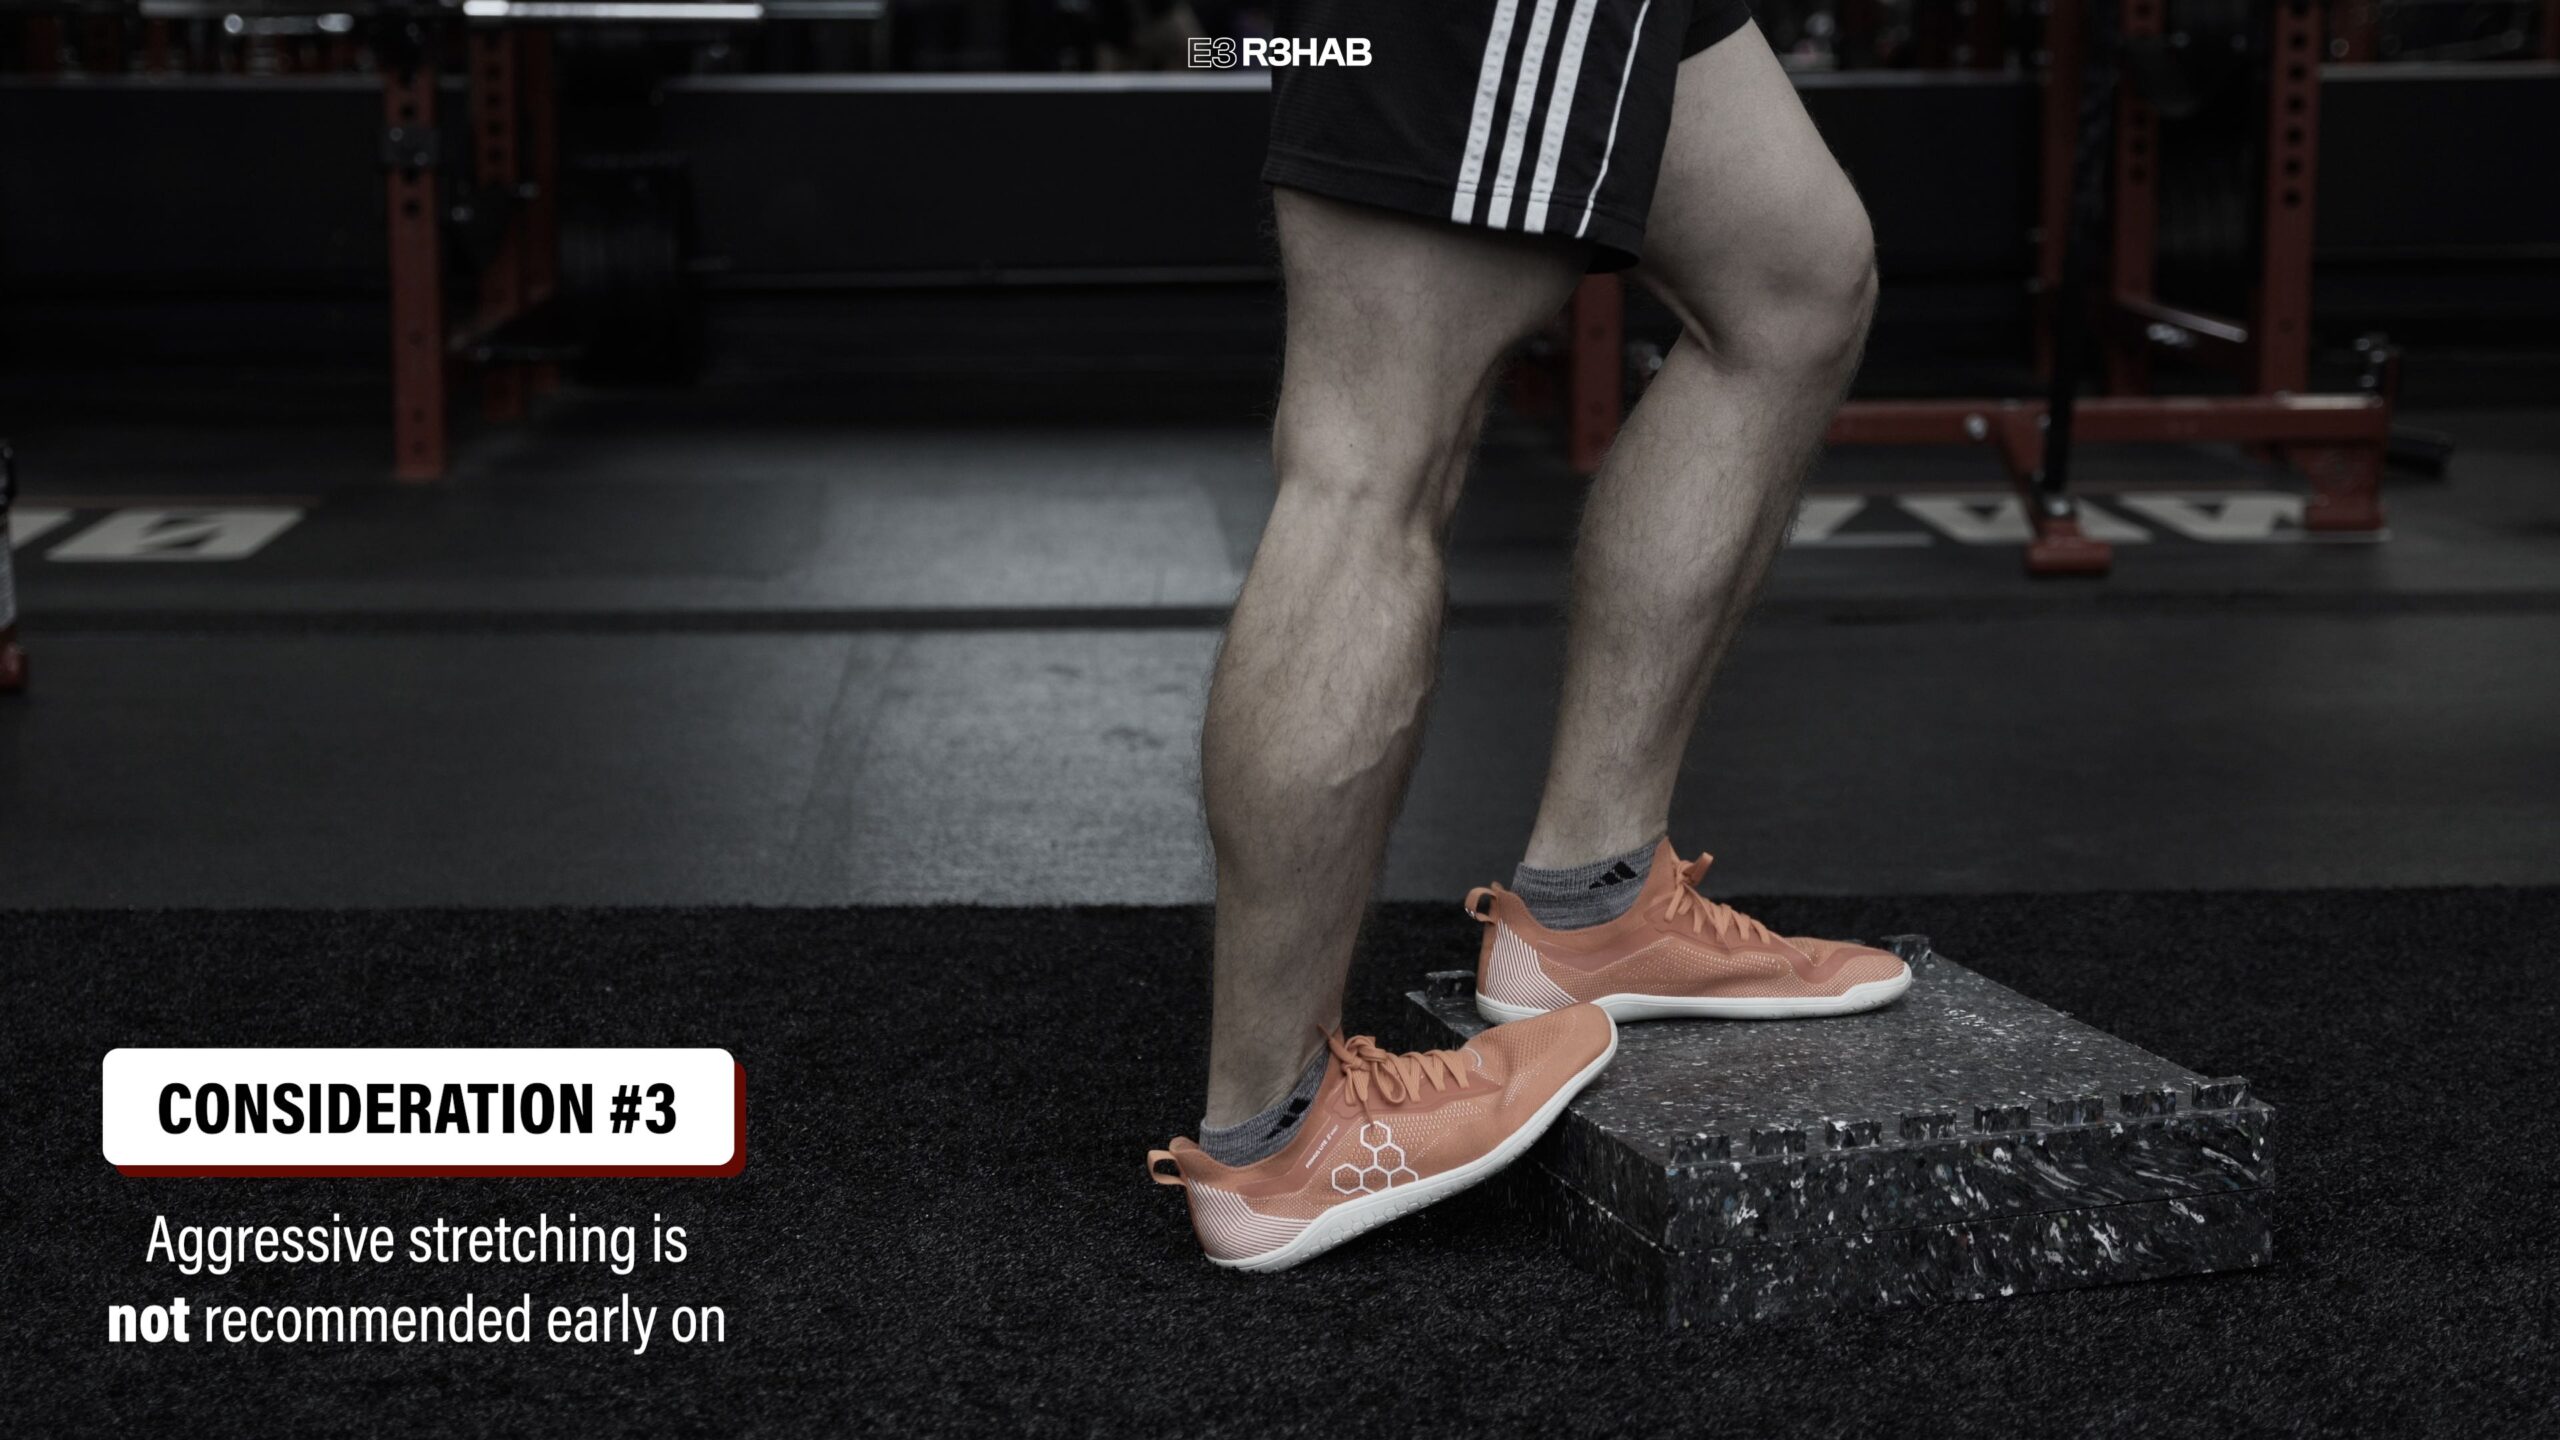
3. You can eventually perform calf stretches, but aggressive stretching is not recommended, especially early on.
Plus exercises like step-downs and deficit heel raises will help restore your dorsiflexion range of motion.
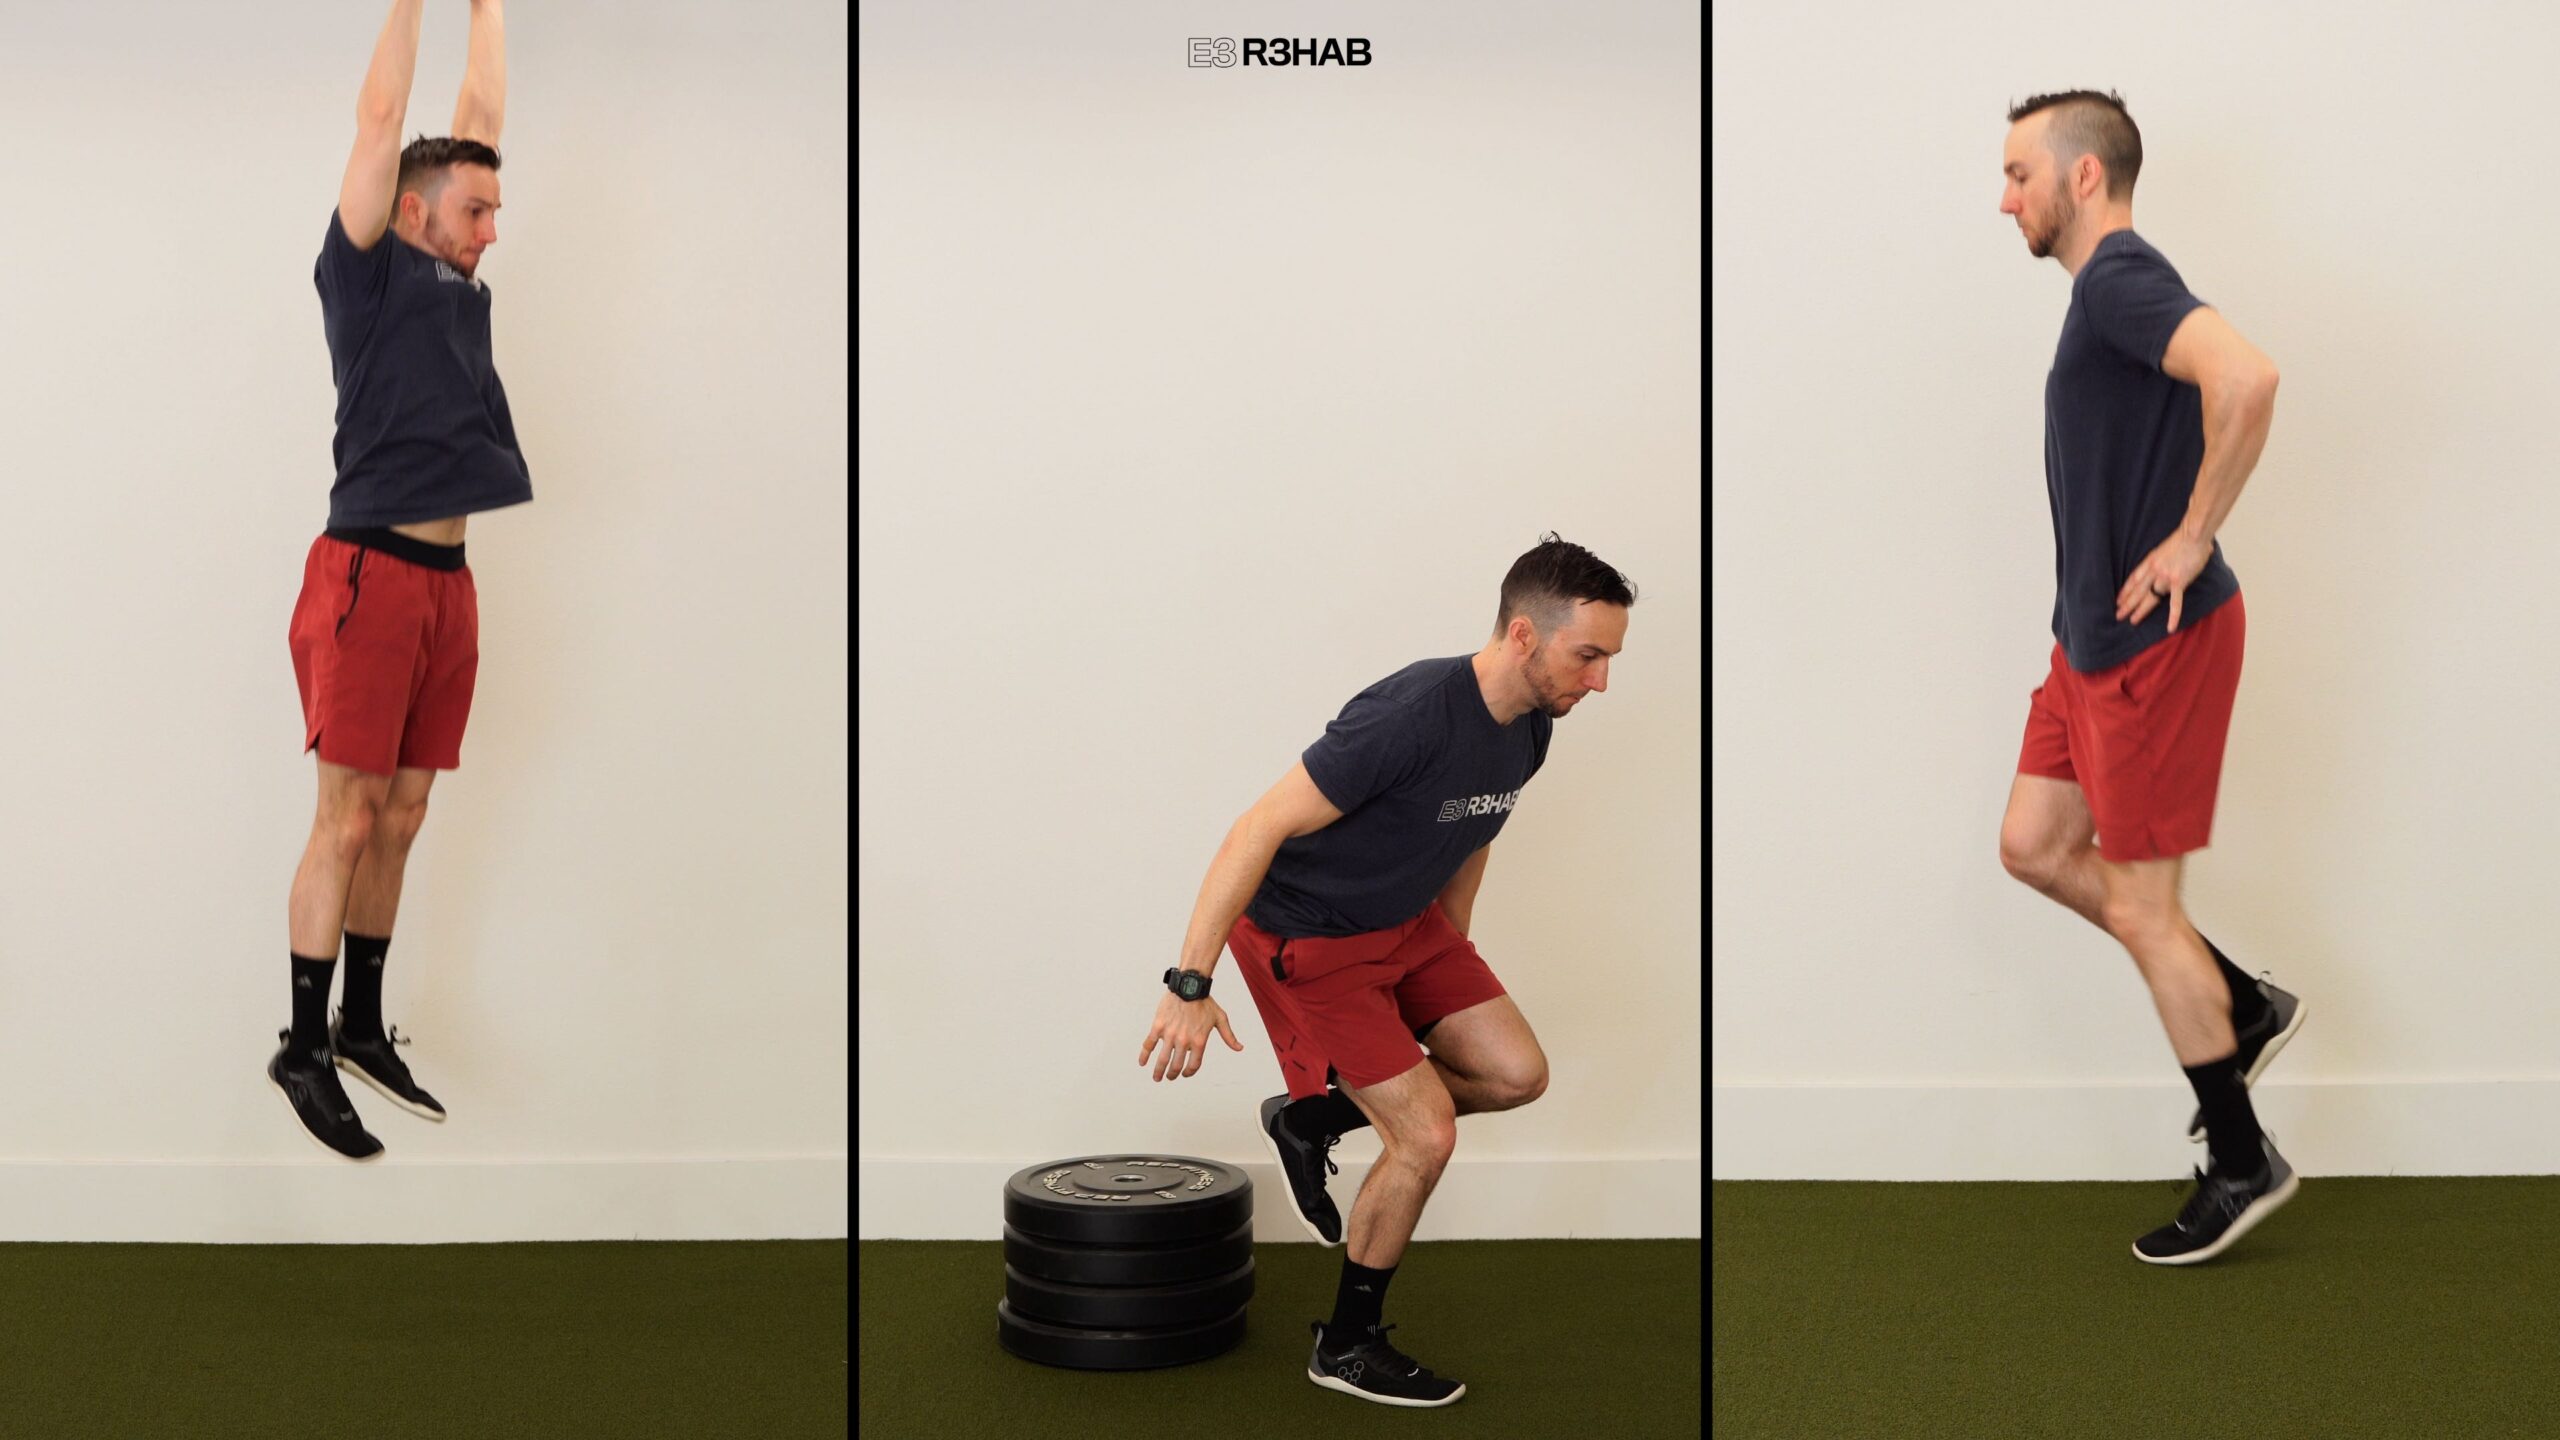
Phase 4: Energy Storage & Release
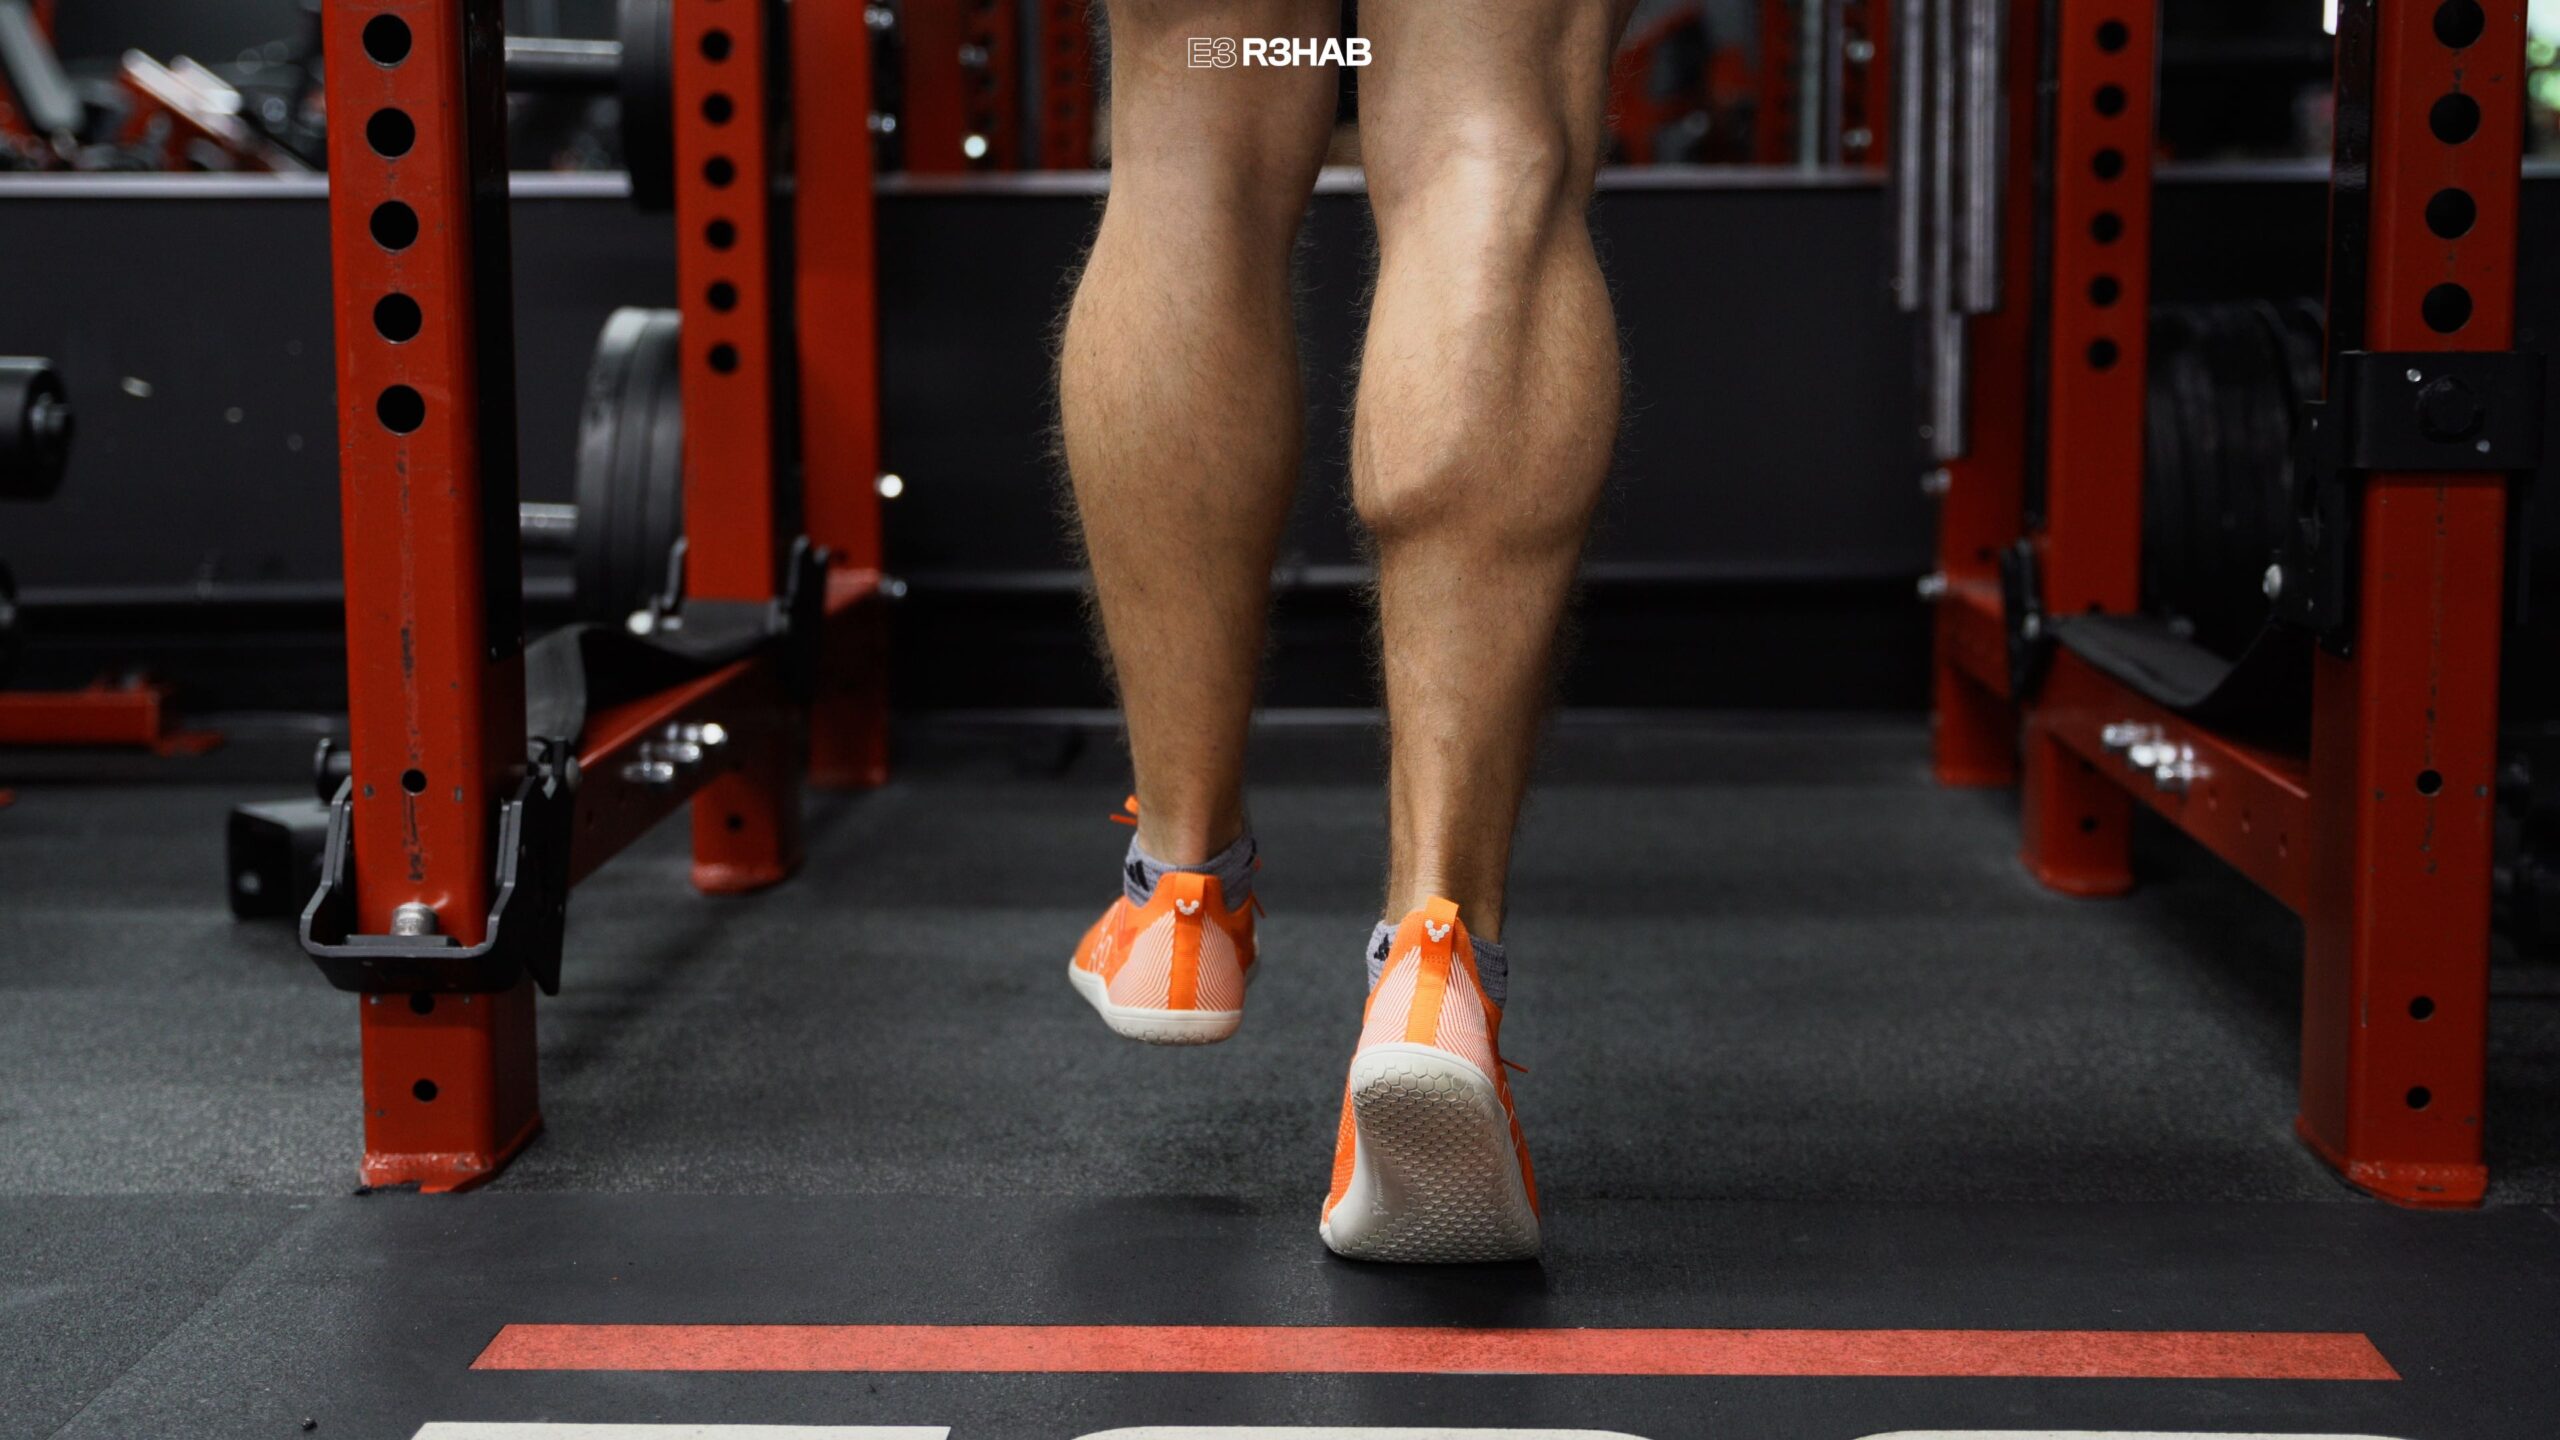
This includes jumping, landing, plyometrics, and exercises that prioritize a faster rate of loading. You will also start running during this phase.
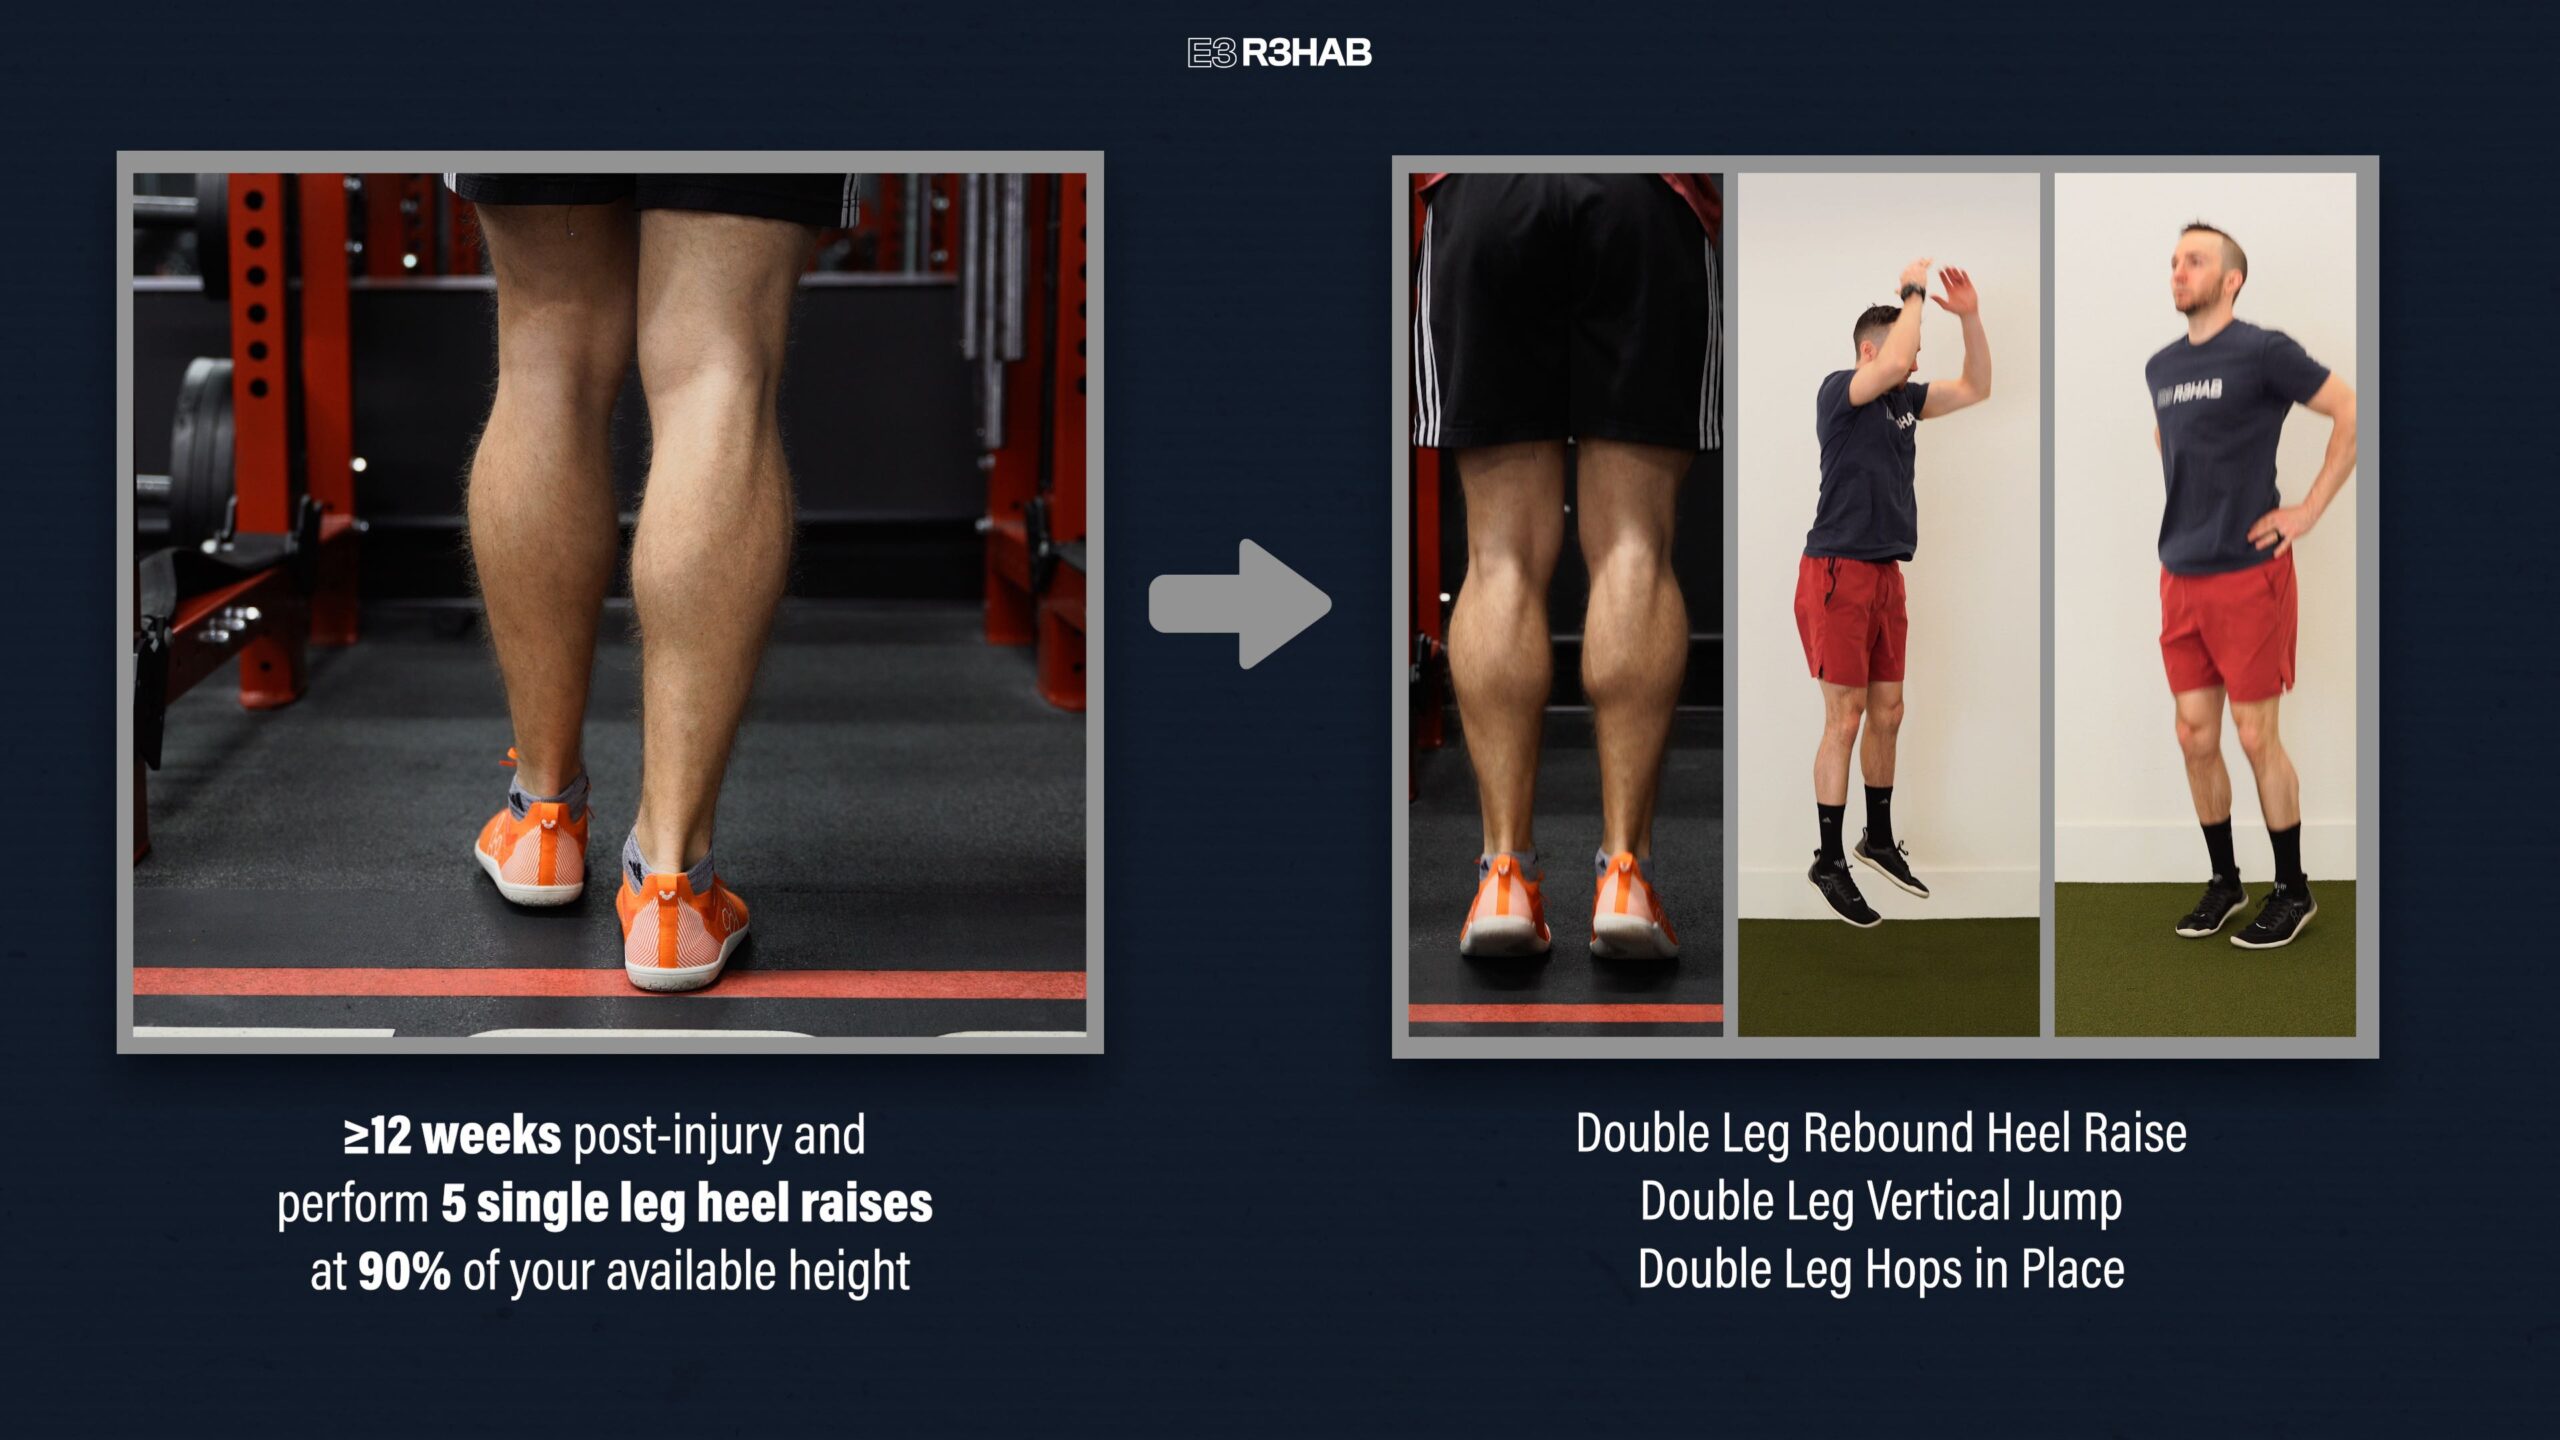
You should be at least 12 weeks post-injury and be able to perform 5 single leg heel raises at 90% of your available height, which is based on your injured side.
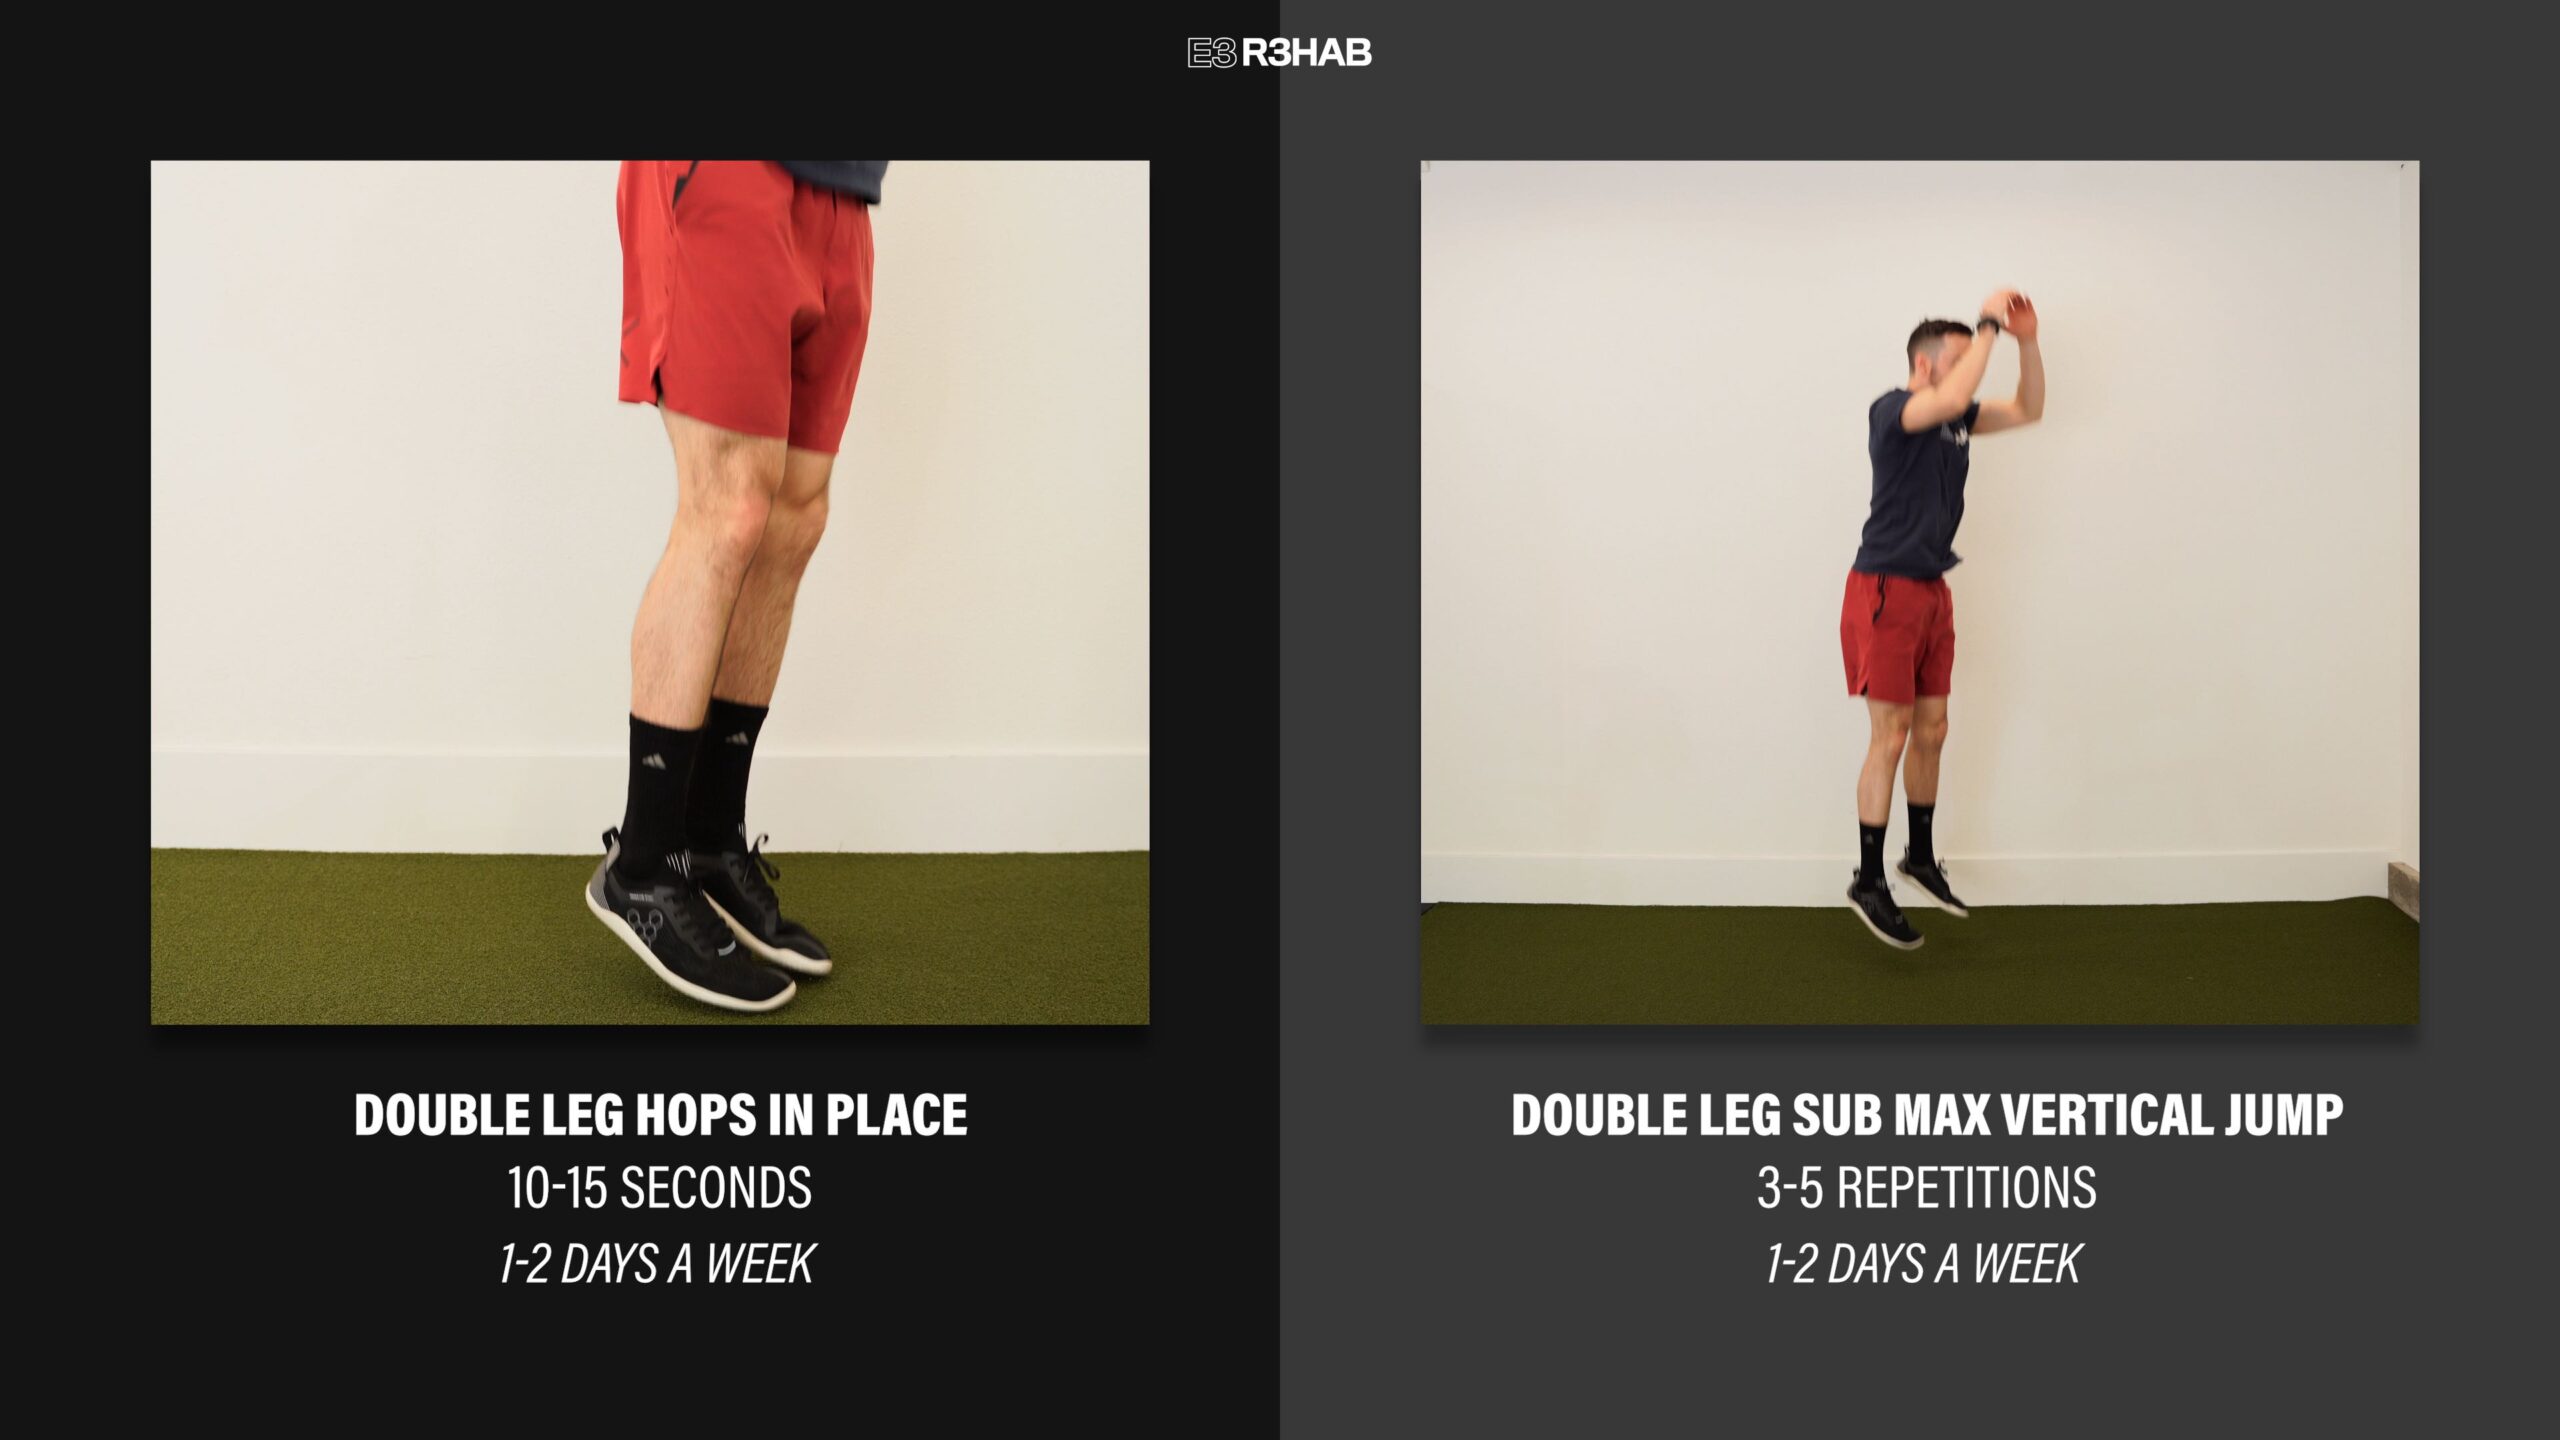
If you can achieve these criteria, you can begin exercises like double-leg rebound heel raises, double-leg vertical jumps, and double-leg hops in place.
There are limitless ways to progress plyometrics, but here are 3 options based on Achilles tendon loading.
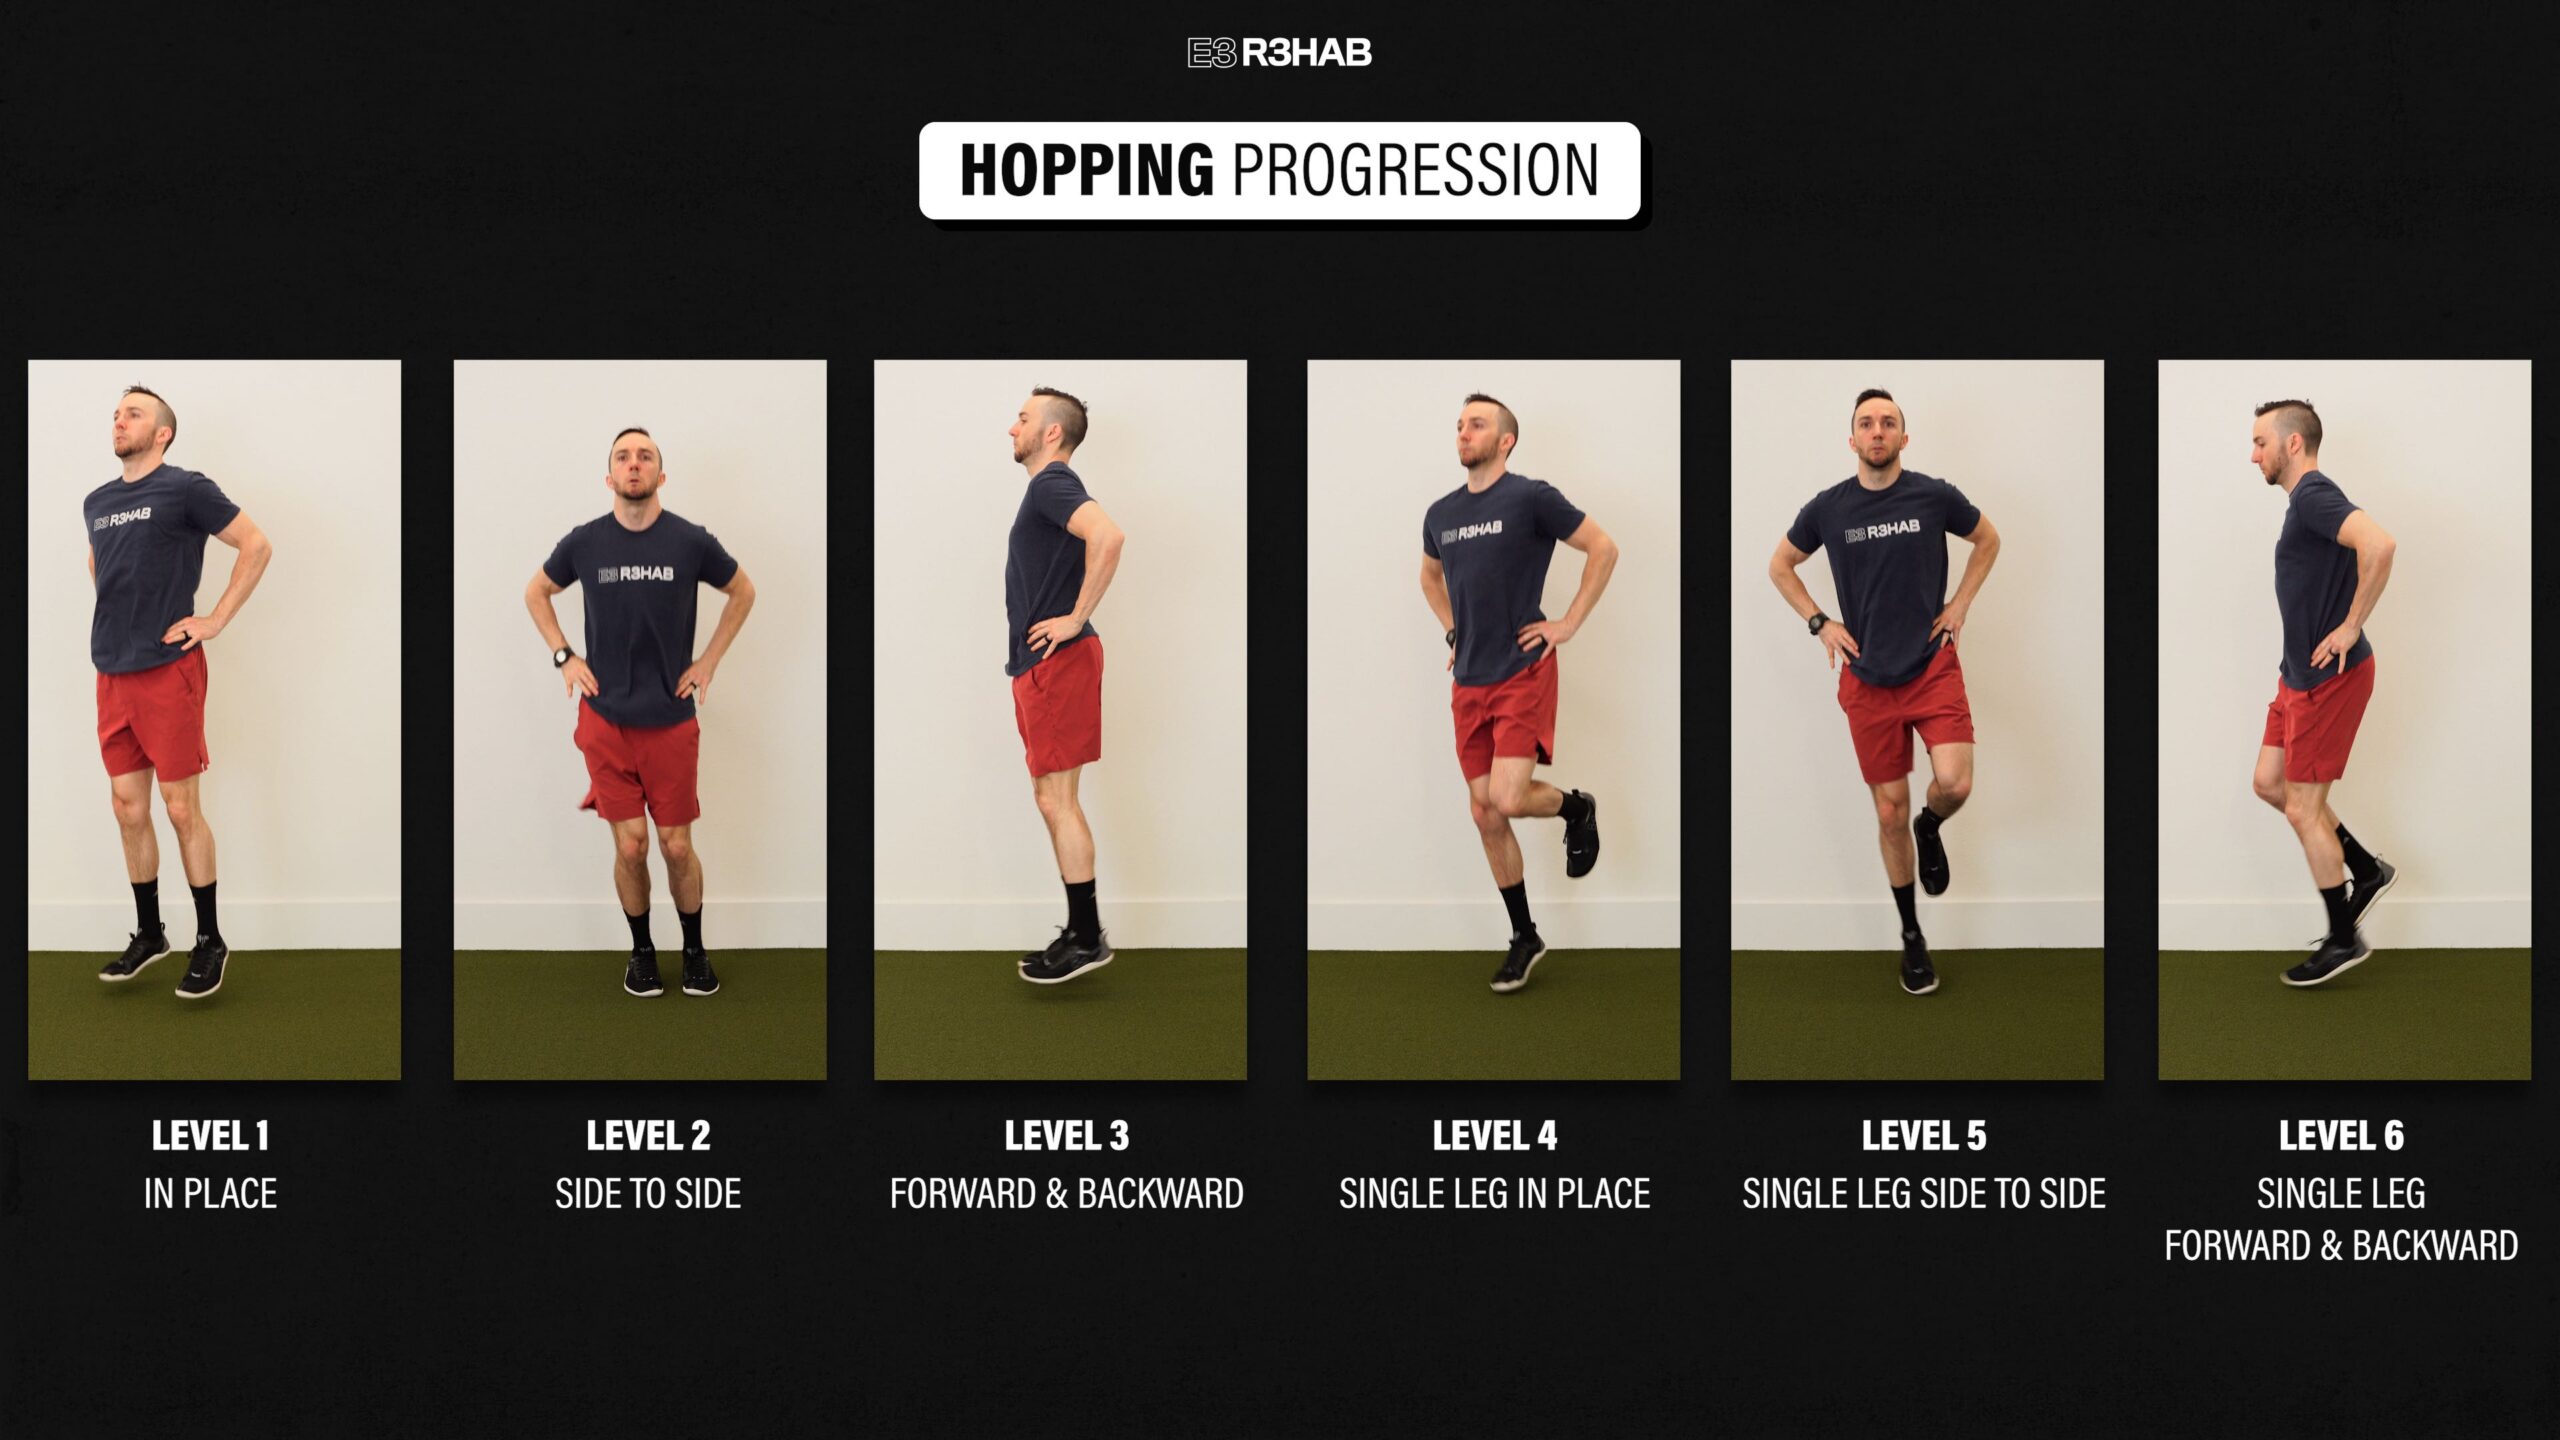
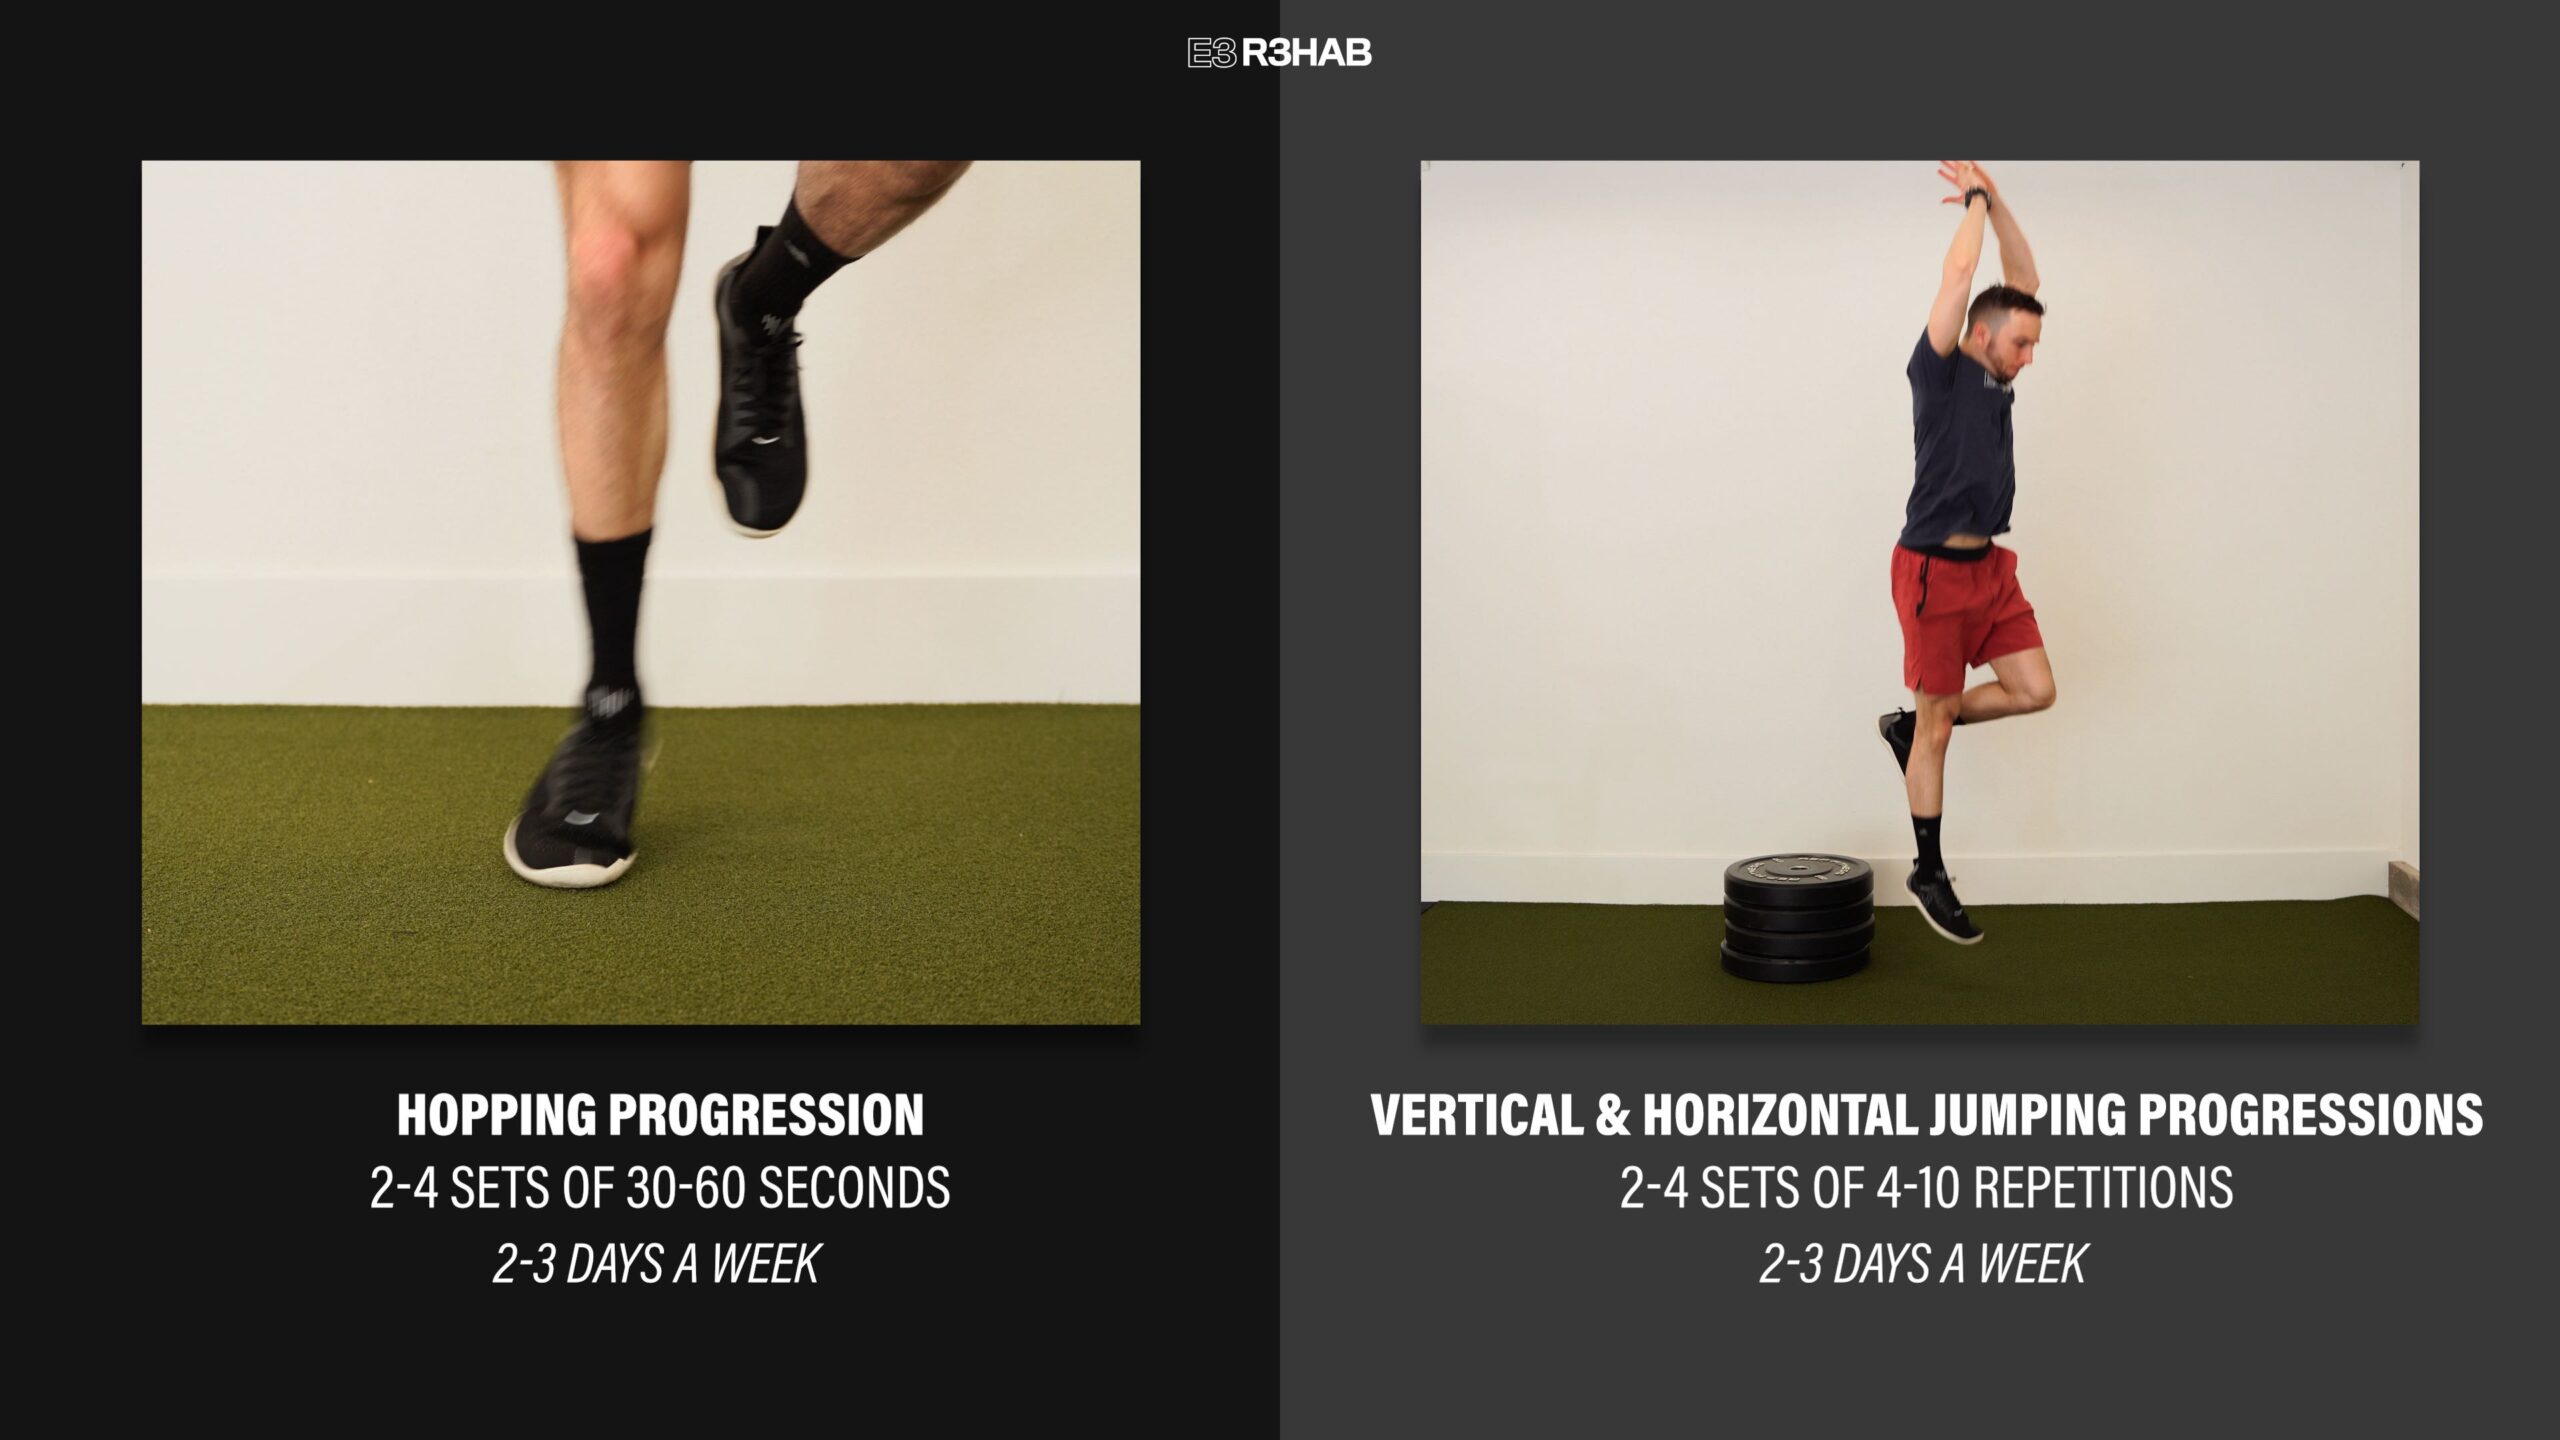
Option 1. Hopping Progression. Start with double leg hops in place, progress to side-to-side, and then forward and backward. You can then work through the same progression but on a single leg.
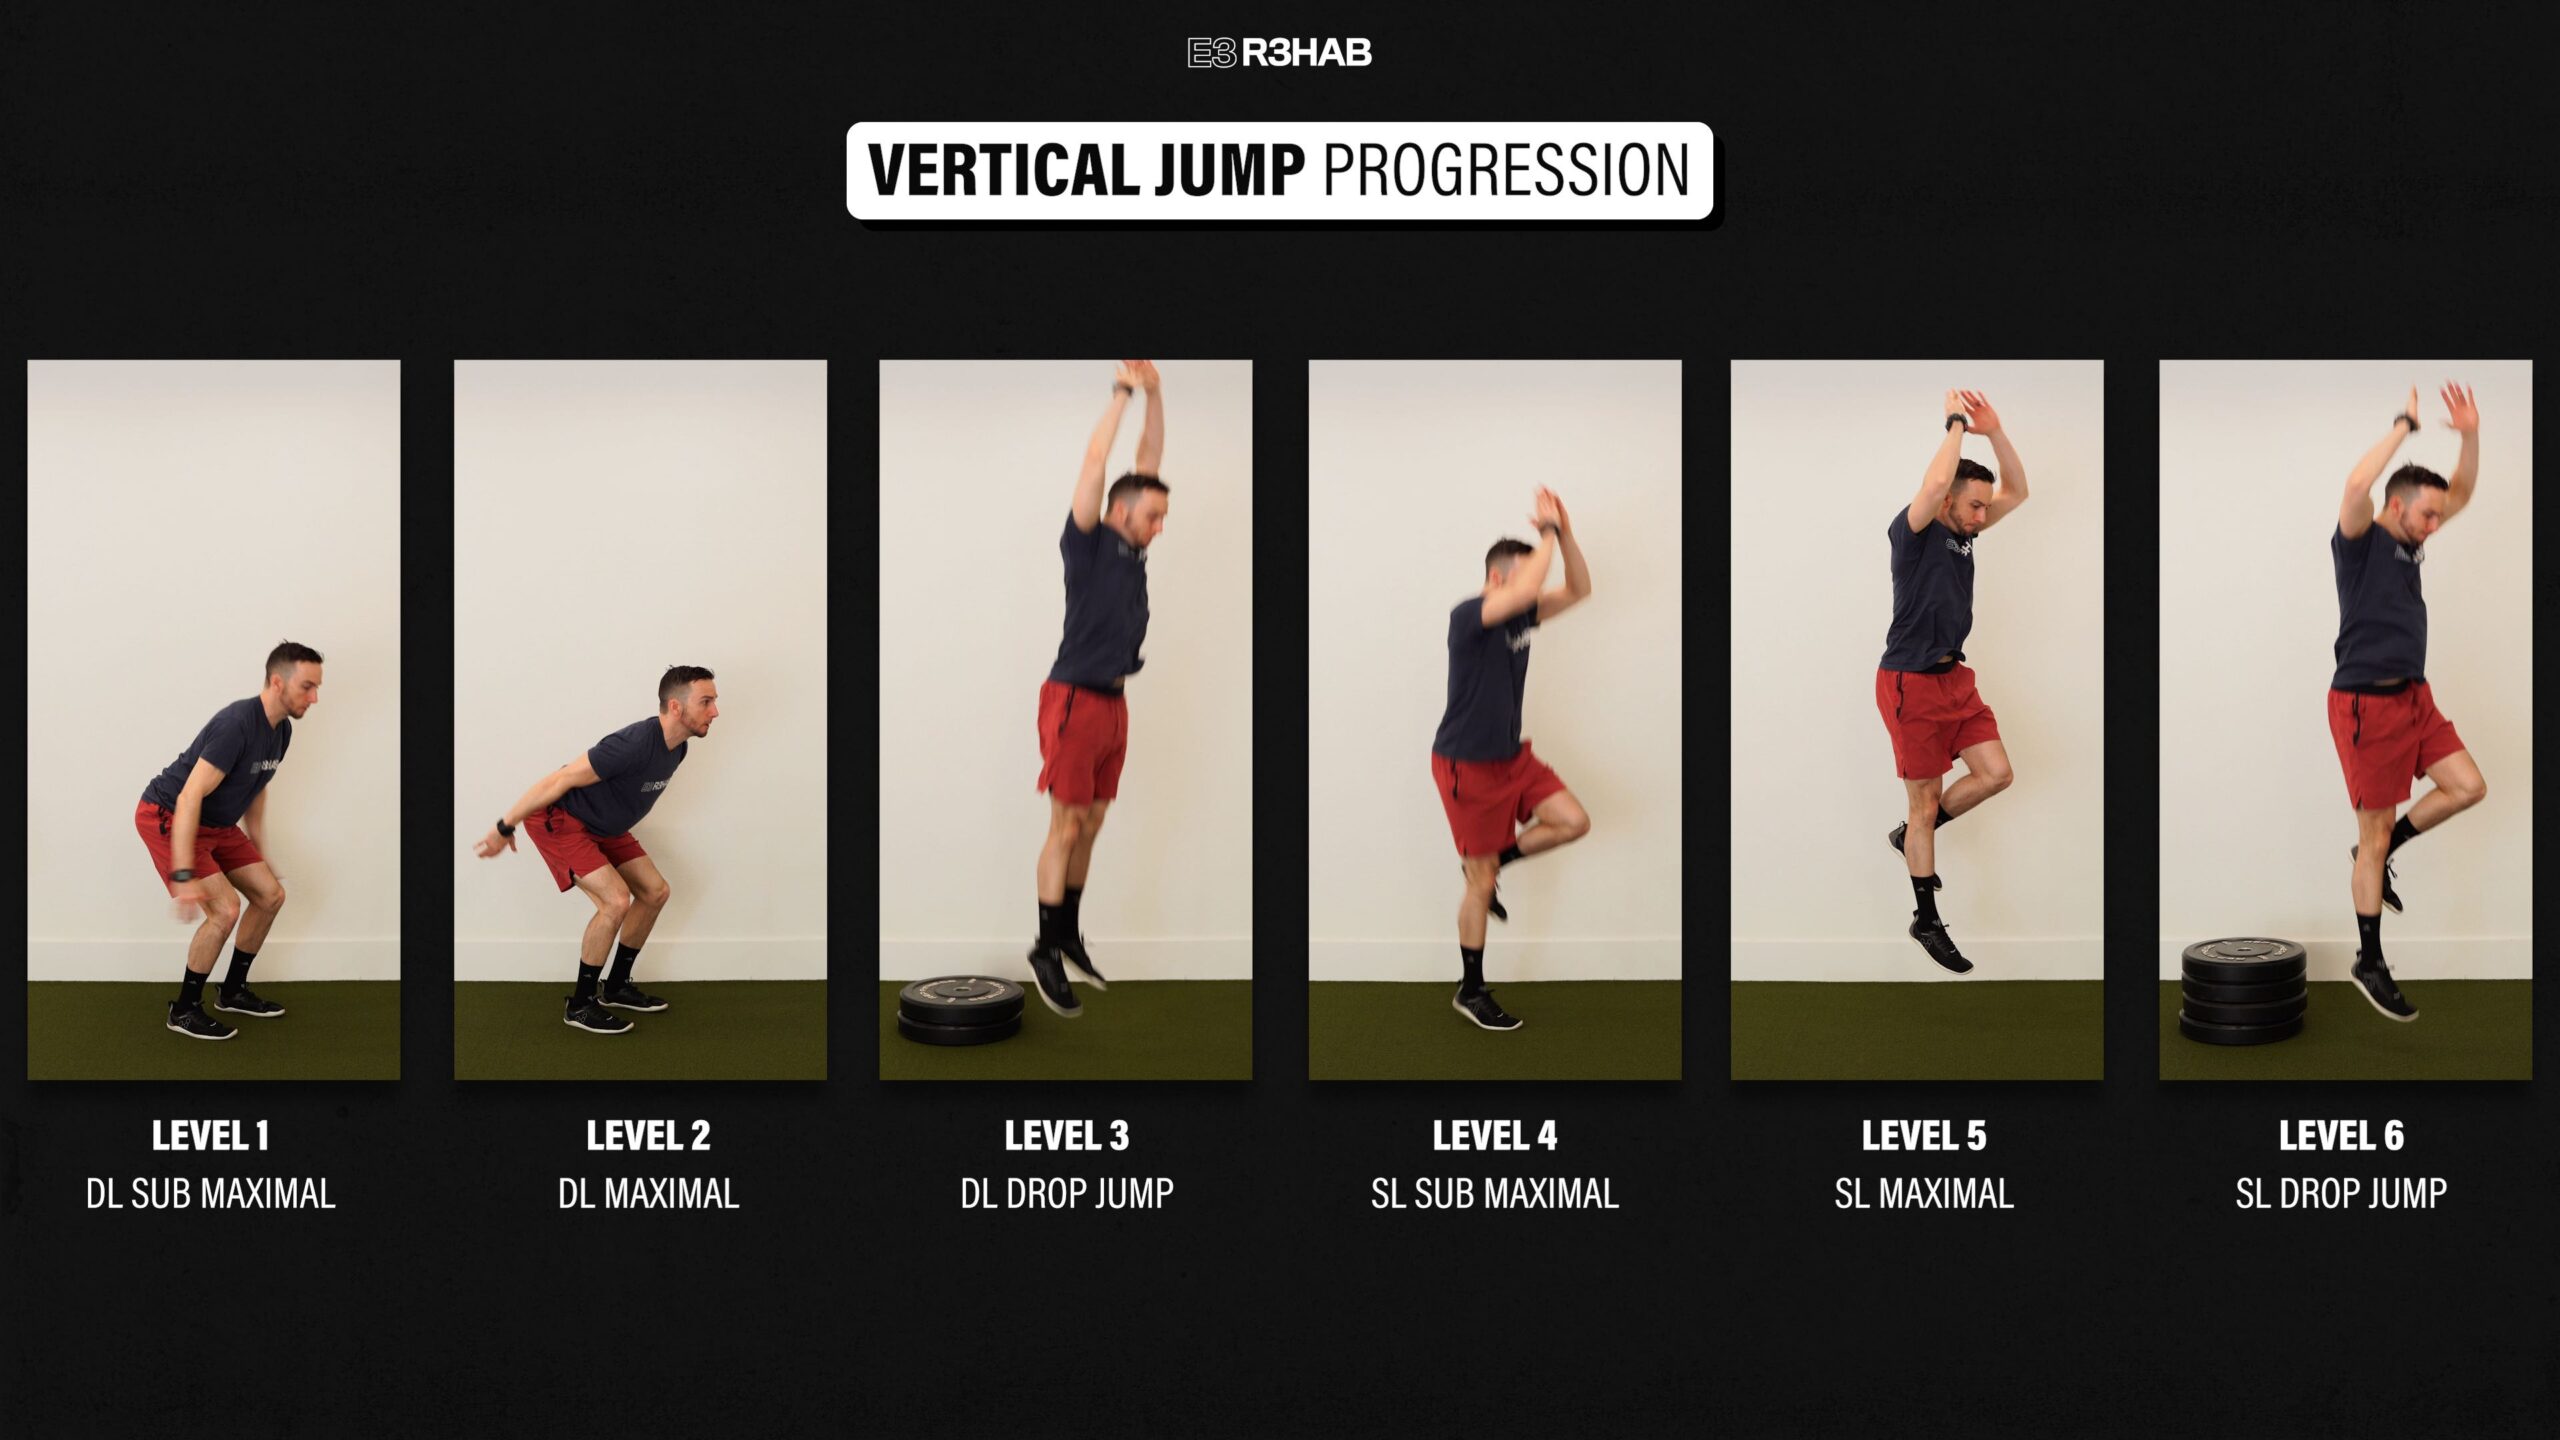
Option 2. Vertical Jump Progression.
Level 1 – Start with a sub-maximal vertical jump on 2 legs.
Level 2 – Perform a double-leg maximal vertical jump.
Level 3 – Drop Jump. Step off an elevated surface, land on two legs, and then quickly jump up as high as possible.
Level 4 – Single leg submaximal vertical jump.
Level 5 – Single-leg maximal vertical jump.
Level 6 – Single leg drop jump.
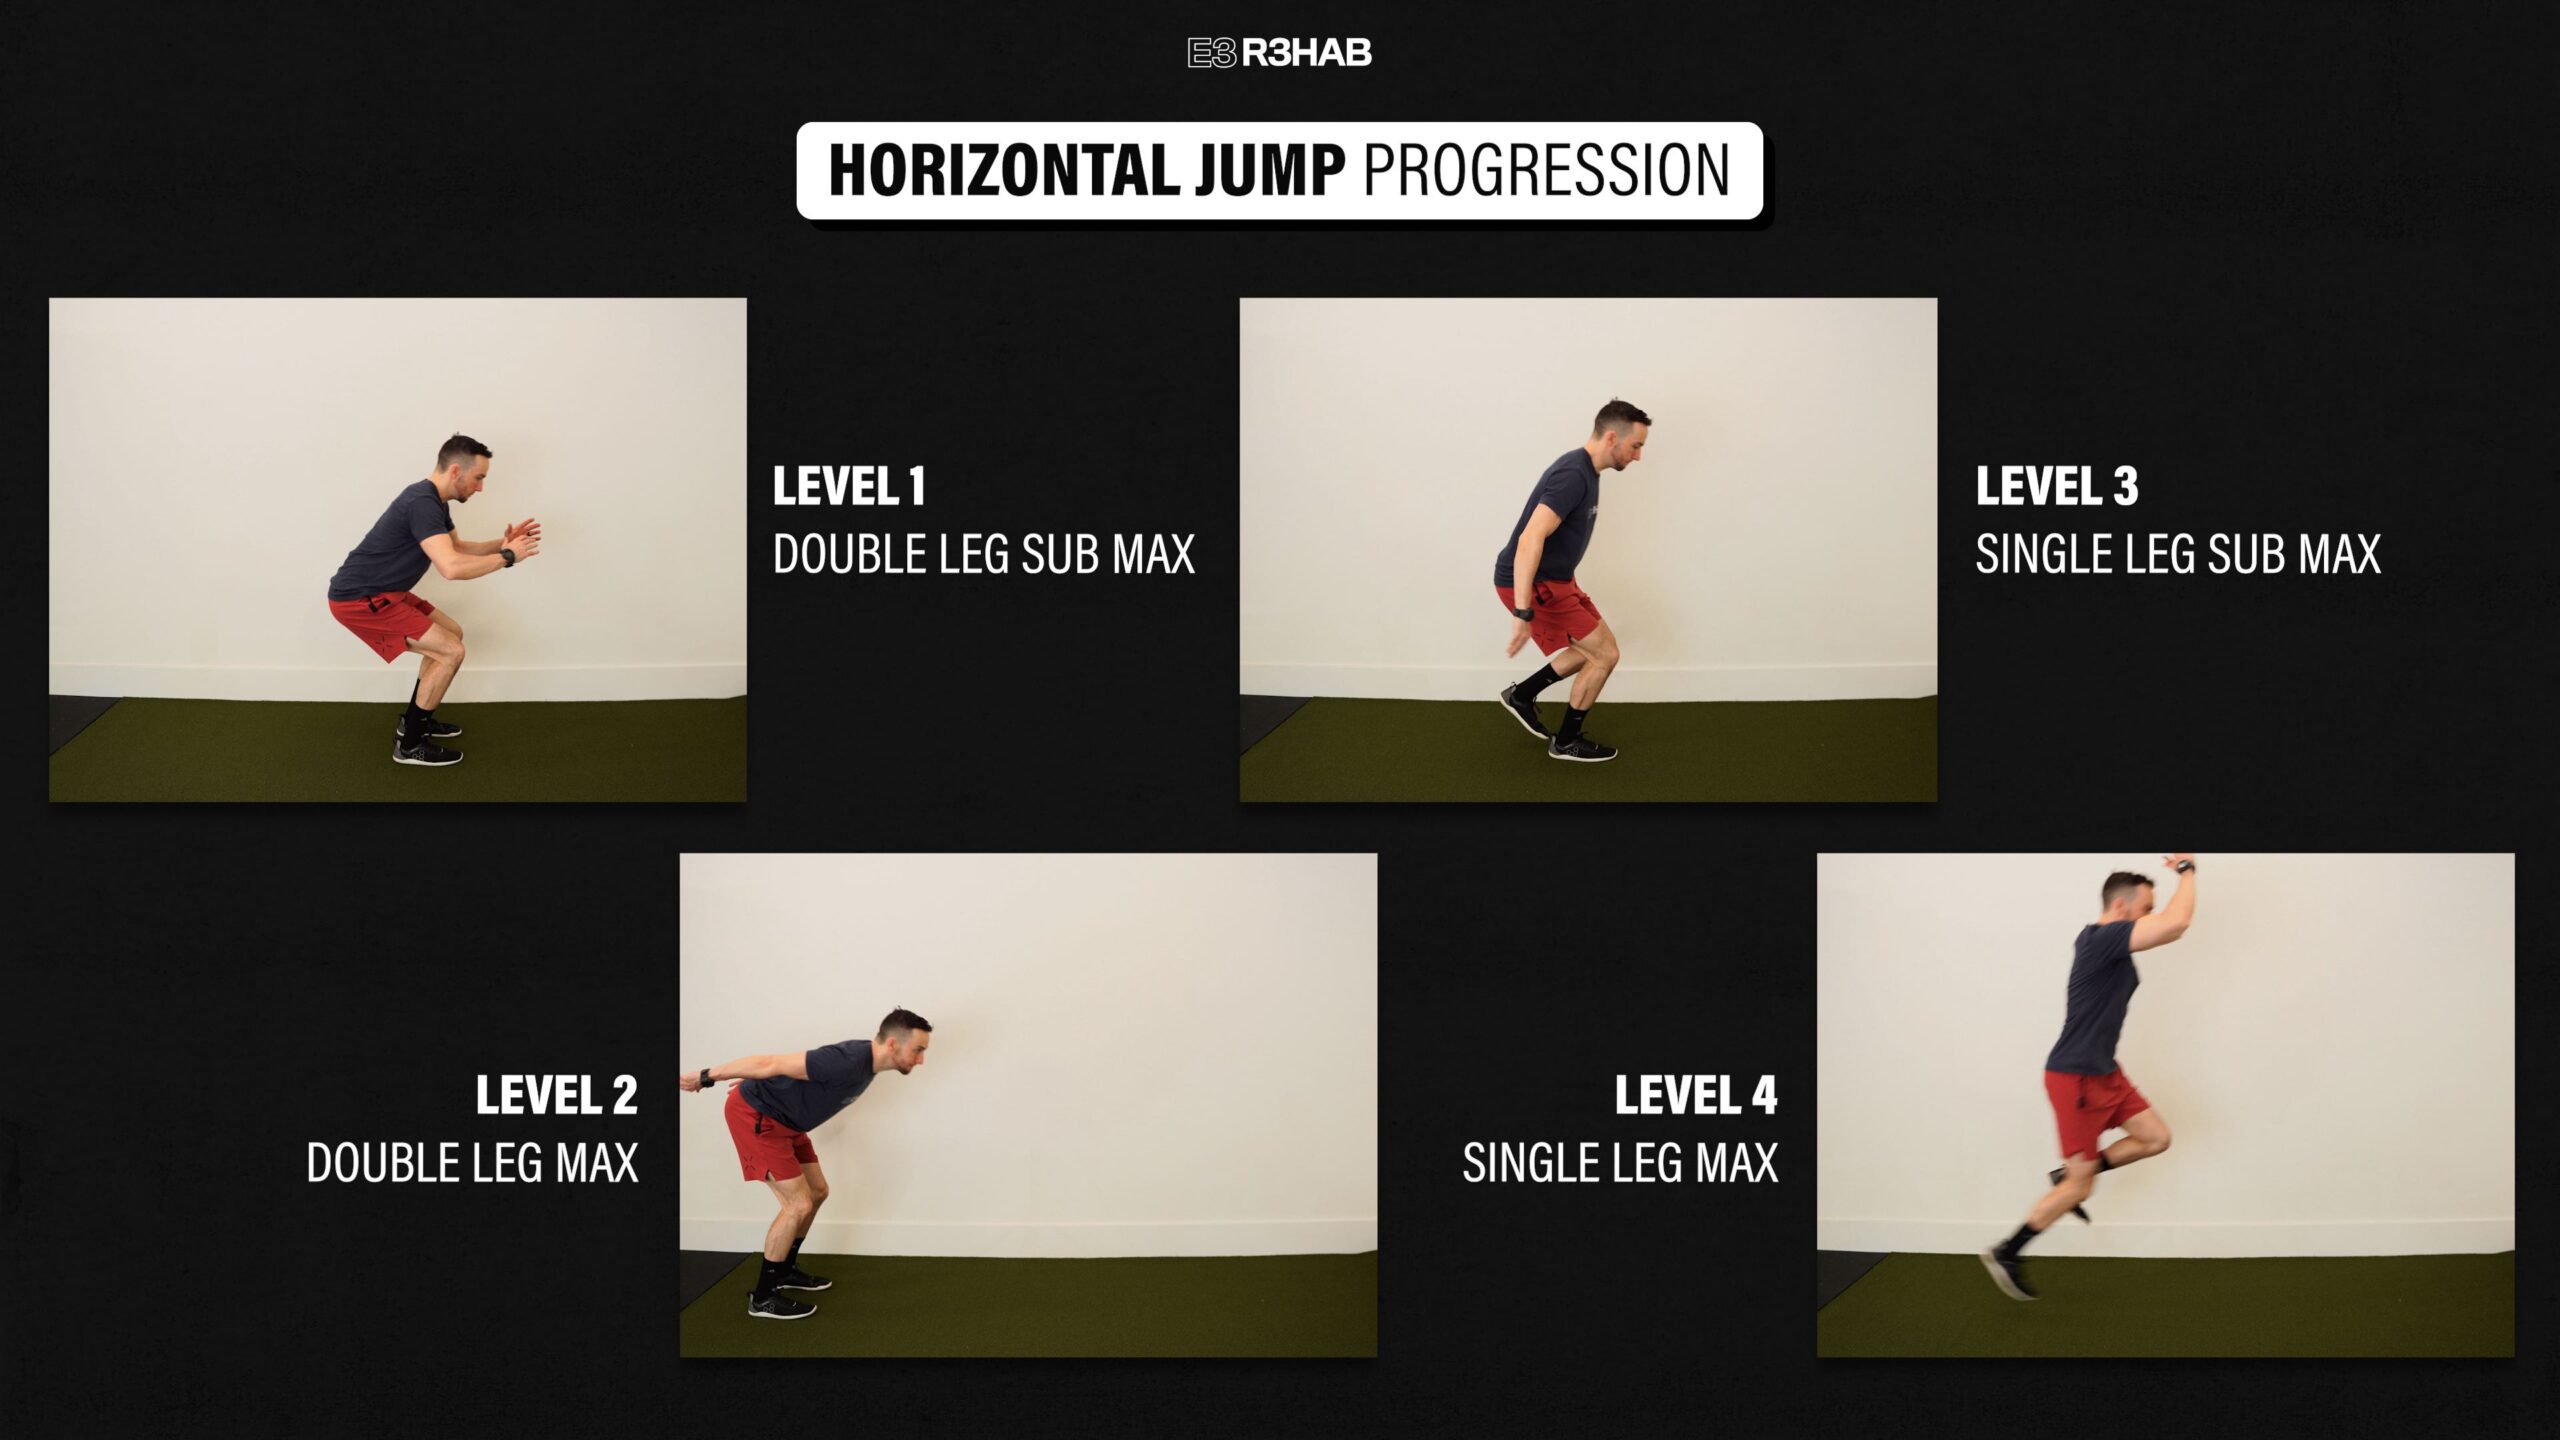
Option 3. Horizontal Jump Progression. Start with a sub-maximal horizontal jump on two legs, where you build up to about 80% effort, before progressing to a maximal horizontal jump on two legs. Then, you will perform a single-leg sub-maximal jump, followed by a single-leg maximal jump. Try and stick your landing during each repetition.
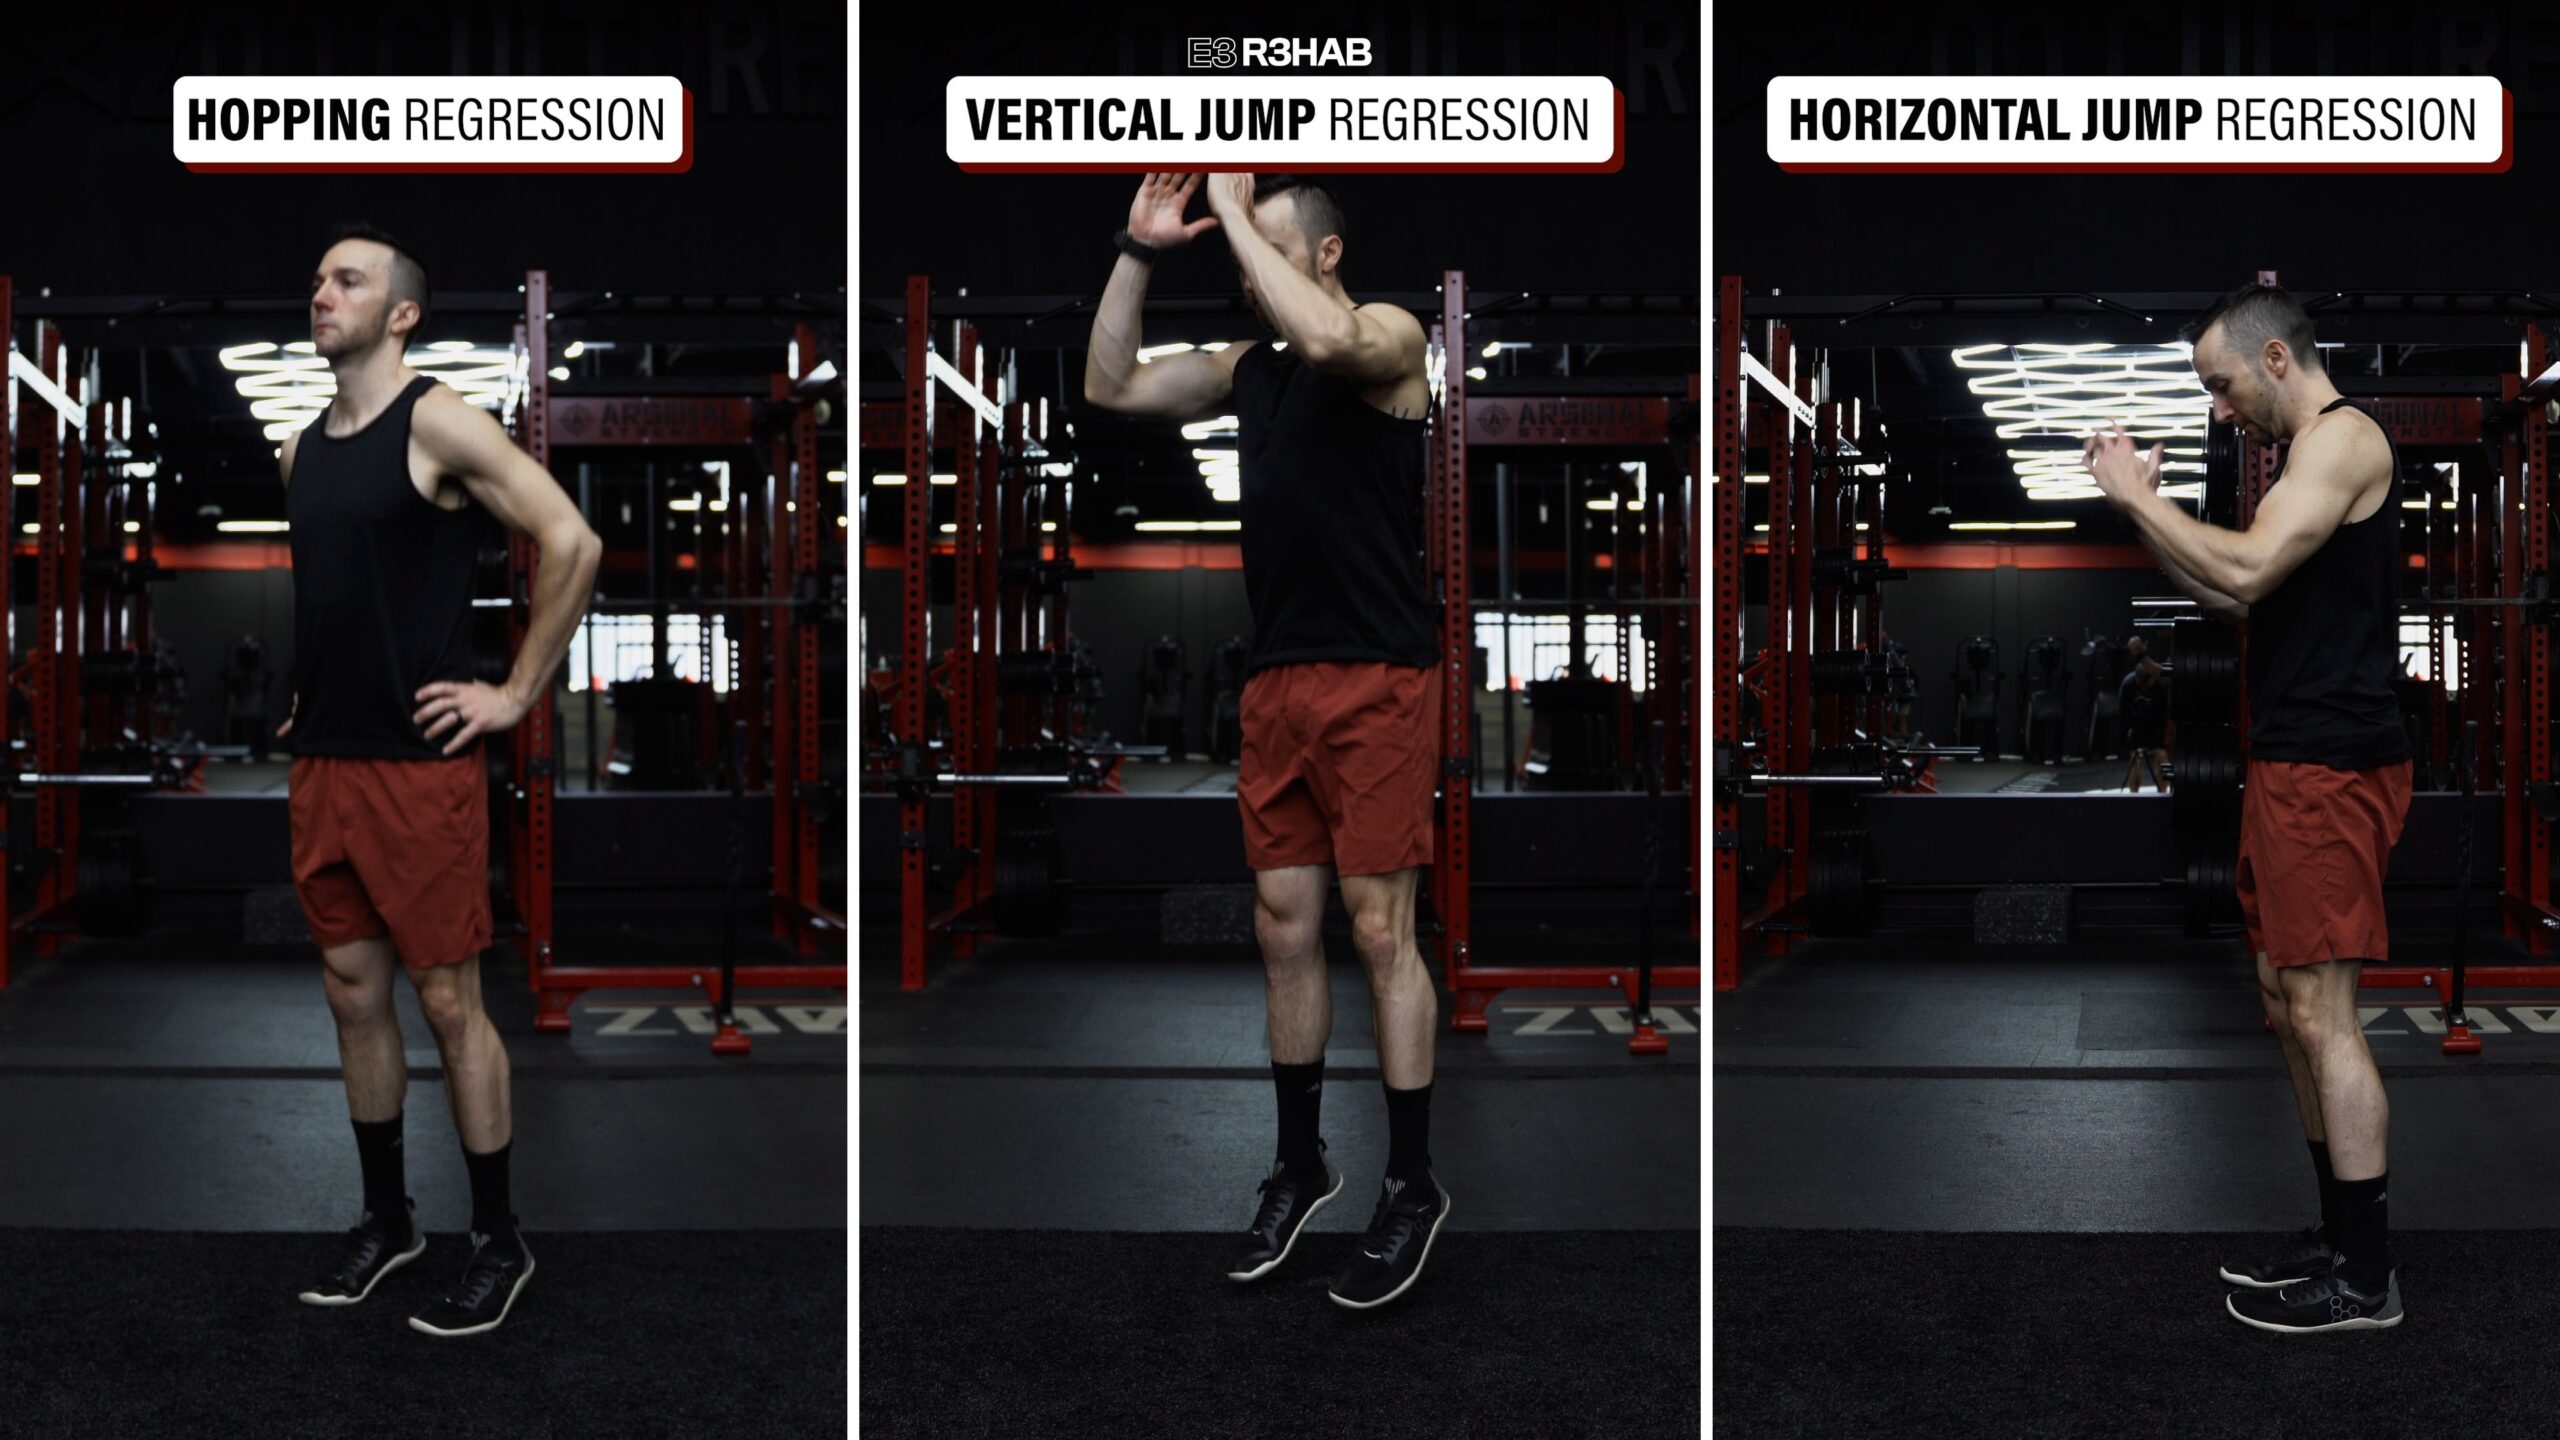
If either of the level 1 exercises is too challenging or uncomfortable, some options for making them easier include not leaving the ground (hopping progression), jumping less high (vertical jump progression), or not jumping as far (horizontal jump progression).
Programming will need to be customized based on your symptoms, function, goals, etc. For example, when first starting, you might only perform lower-intensity double leg hops in place for 10-15 seconds and or double leg sub max vertical jumps for 3-5 repetitions, 1-2 days a week.
Then, as your tolerance improves, you can gradually increase the volume and intensity.
Keeping it simple, one option is to eventually build up to 2-4 sets of 30-60 seconds for the hopping exercises, and 2-4 sets of 4-10 repetitions for the jumping progressions, 2-3 days per week.
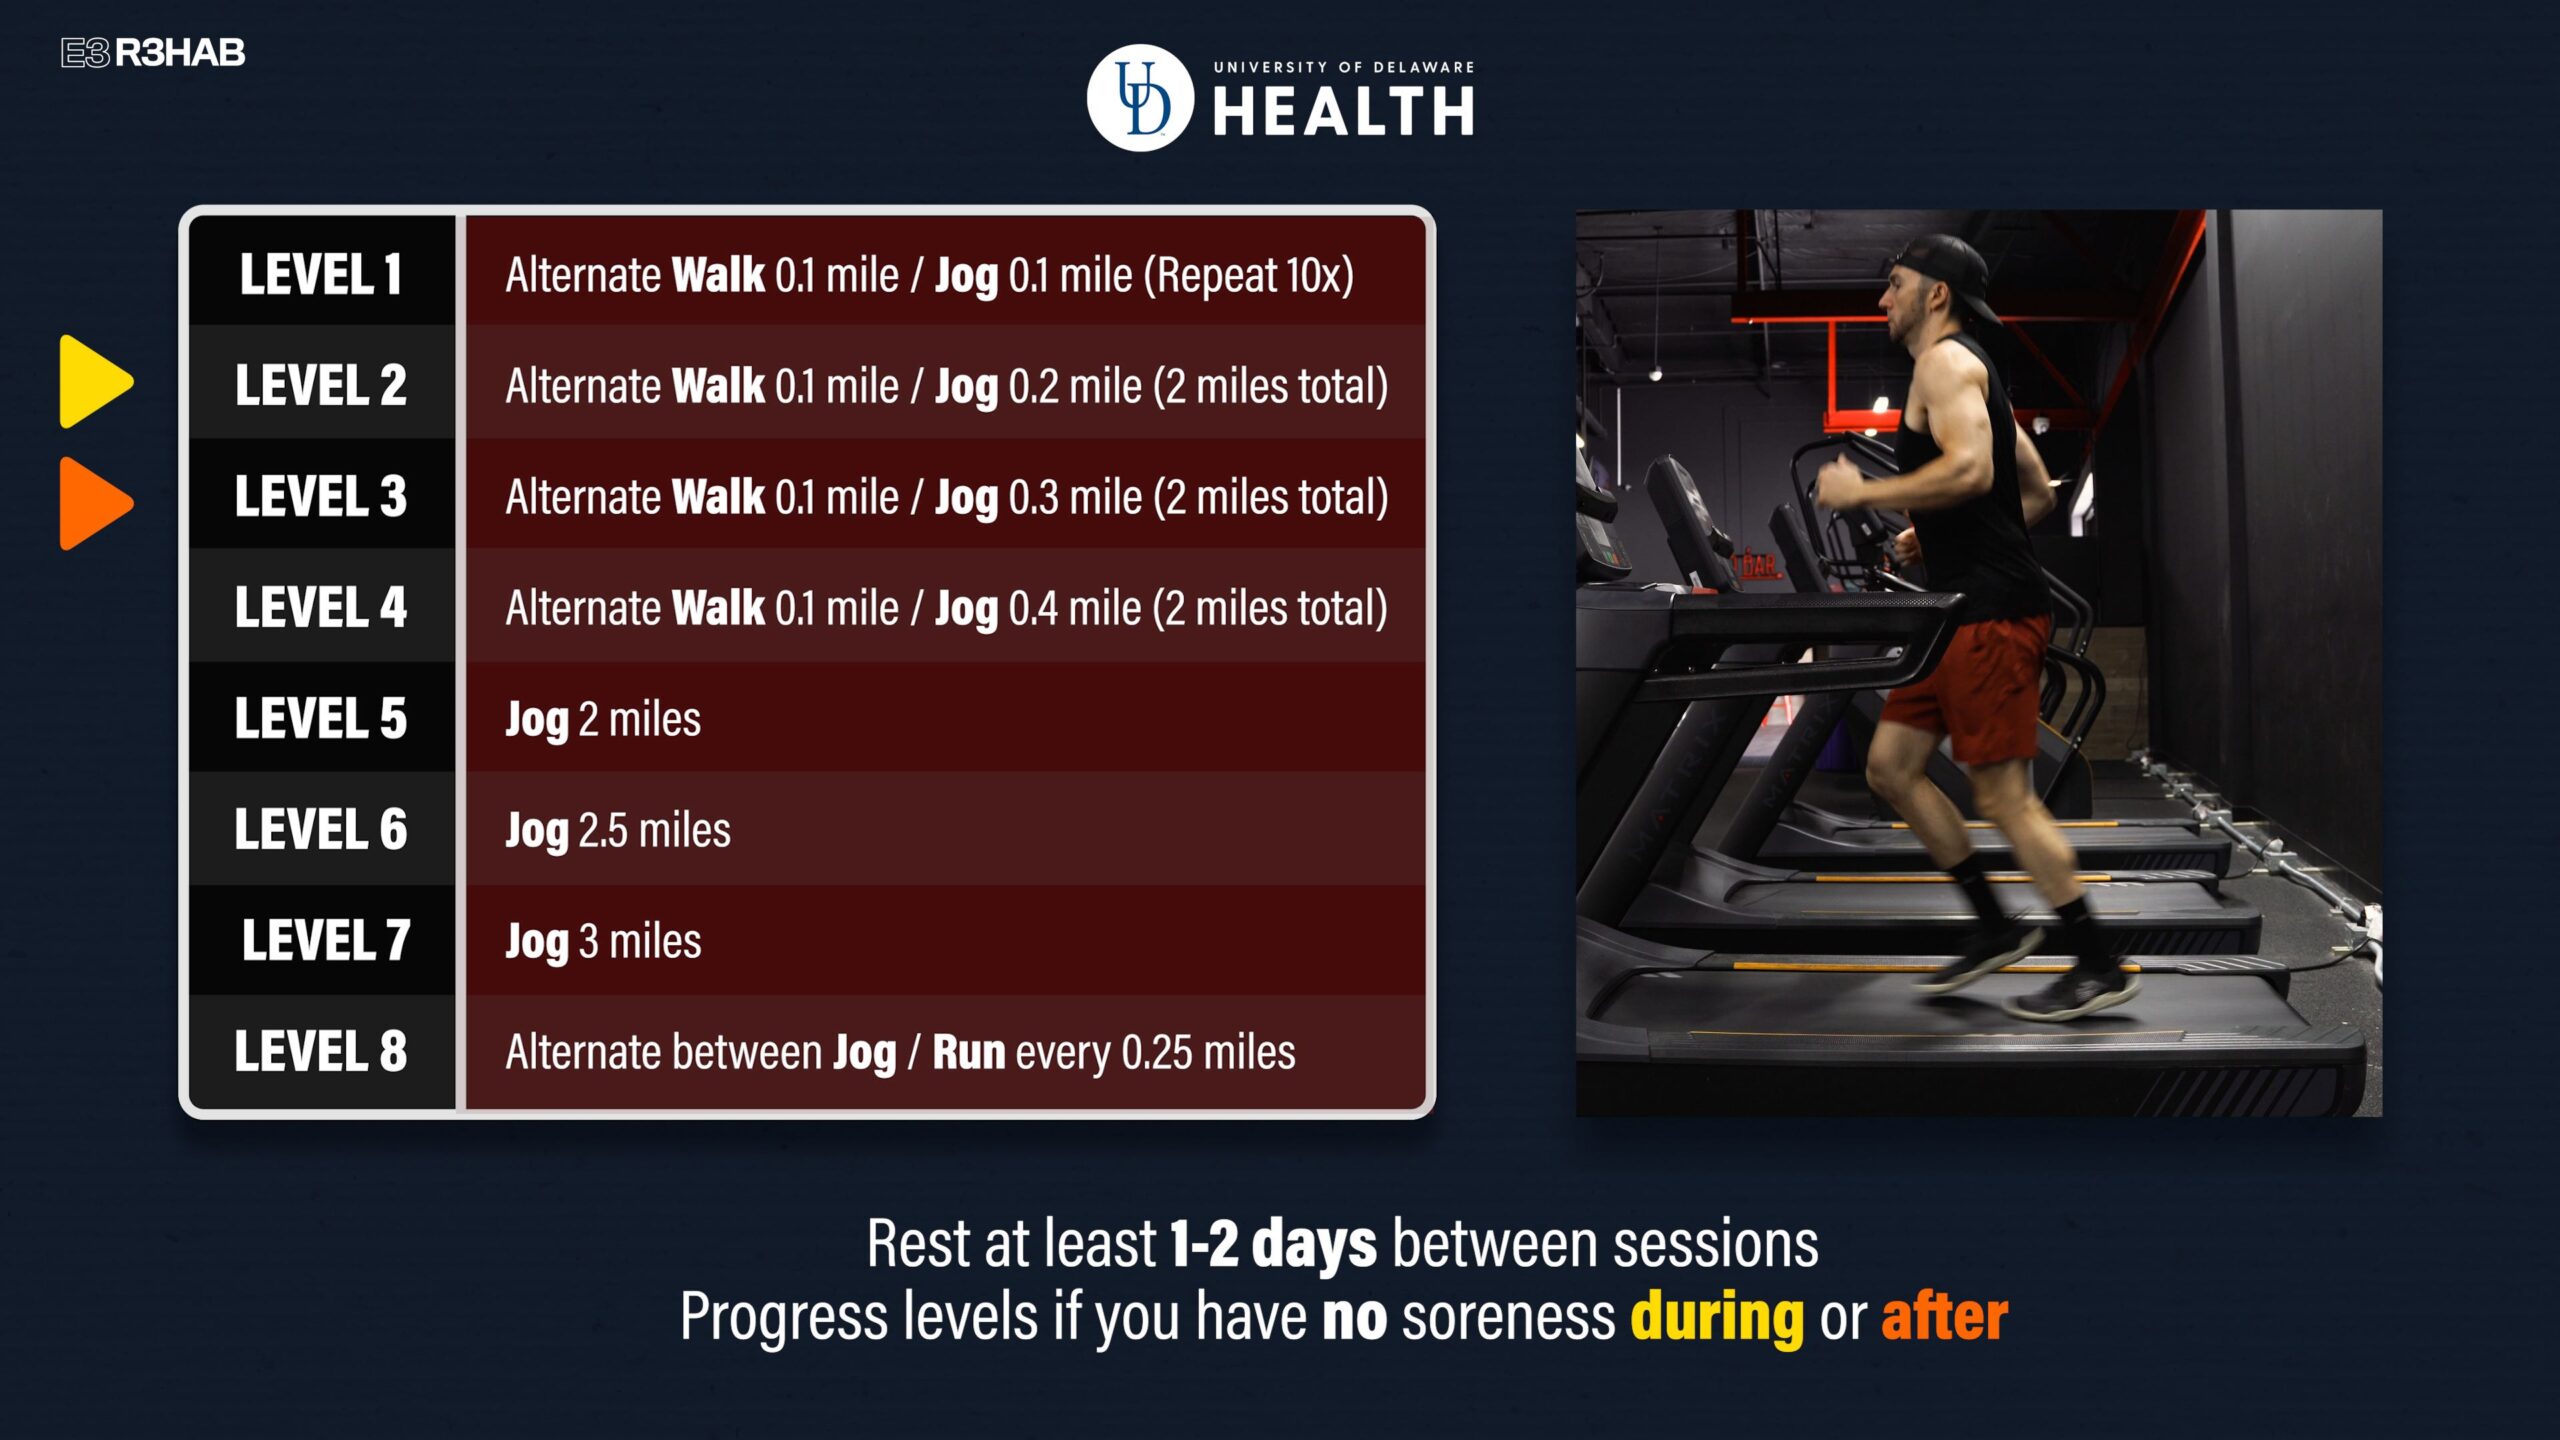
In terms of running, there is no universally accepted protocol following an Achilles tendon rupture, but here is one example from the University of Delaware that involves the use of a treadmill.
This starts with walk-to-jog intervals and progresses to continuous jogging before slowly ramping up to faster running speeds.
You should rest at least 1-2 days between sessions and only progress levels if you have no soreness during or after. If you experience soreness during, drop down a level. If you experience soreness afterward, stay at the same level the next session.
Phase 5: Return to Sport
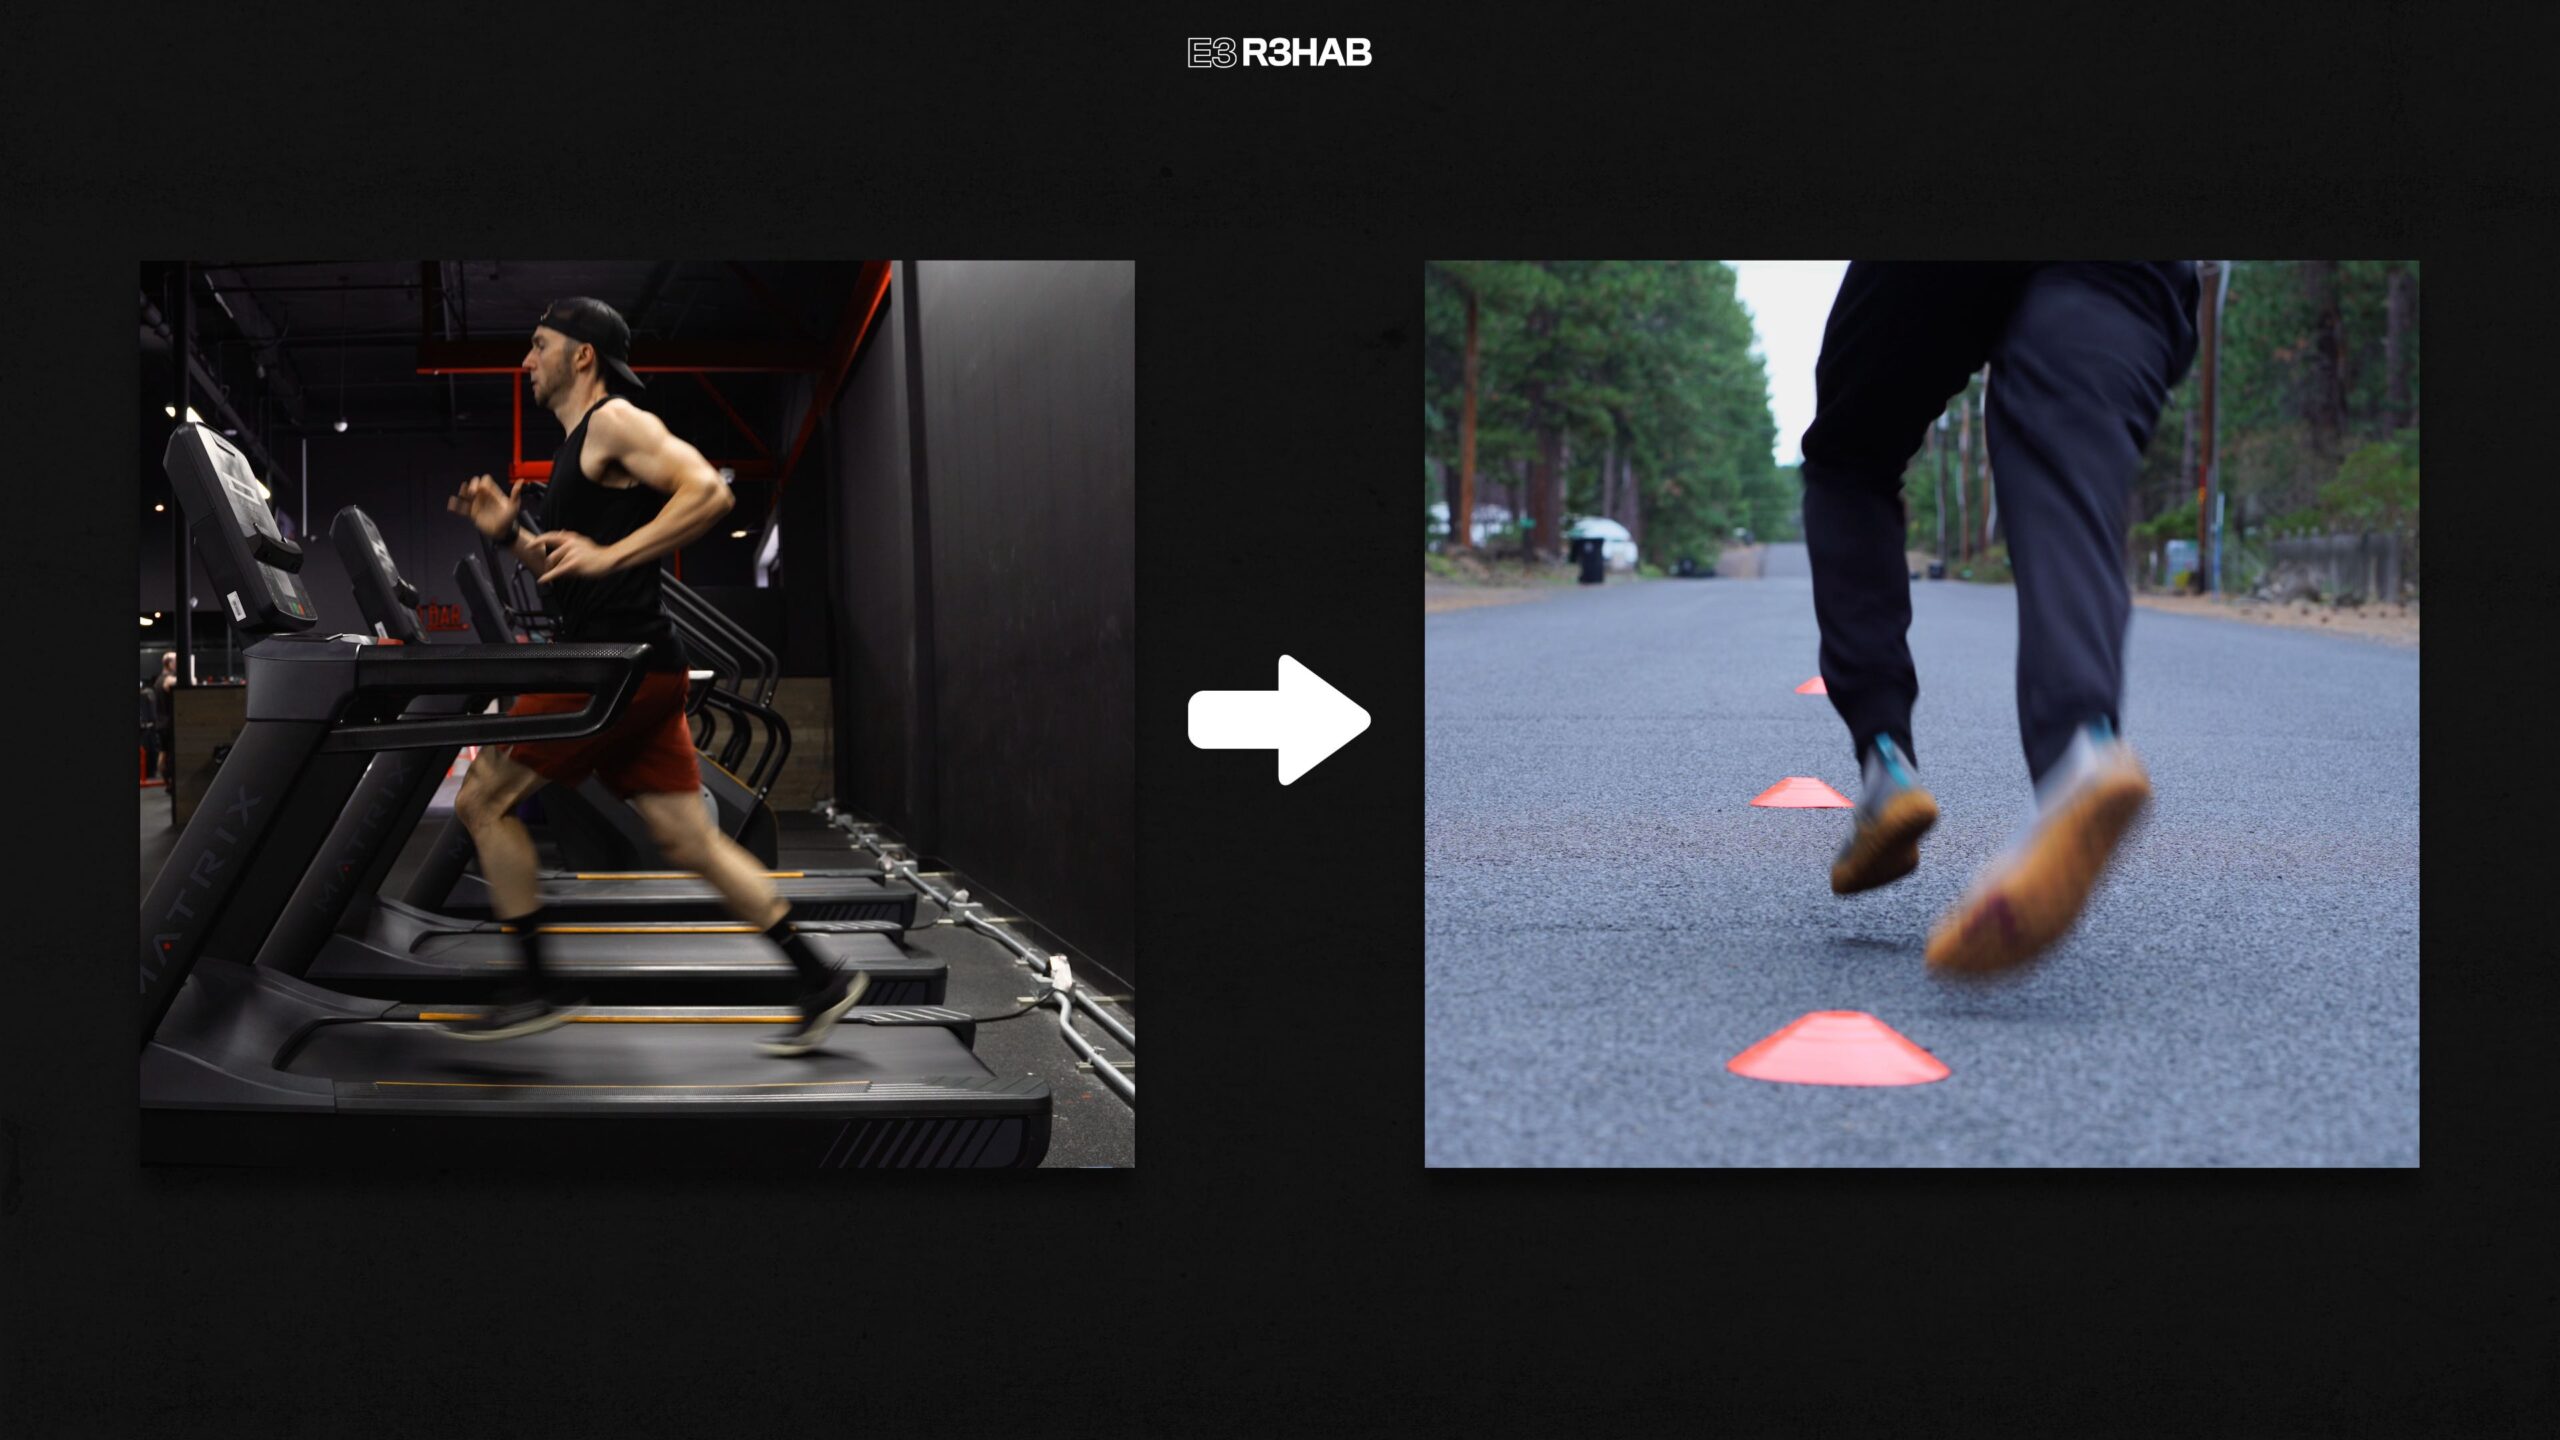
Here, you’ll perform more sport-specific movements, and gradually increase the intensity, volume, and complexity of your training. For example, running on the treadmill will eventually progress to sprinting, cutting, and change of direction drills.
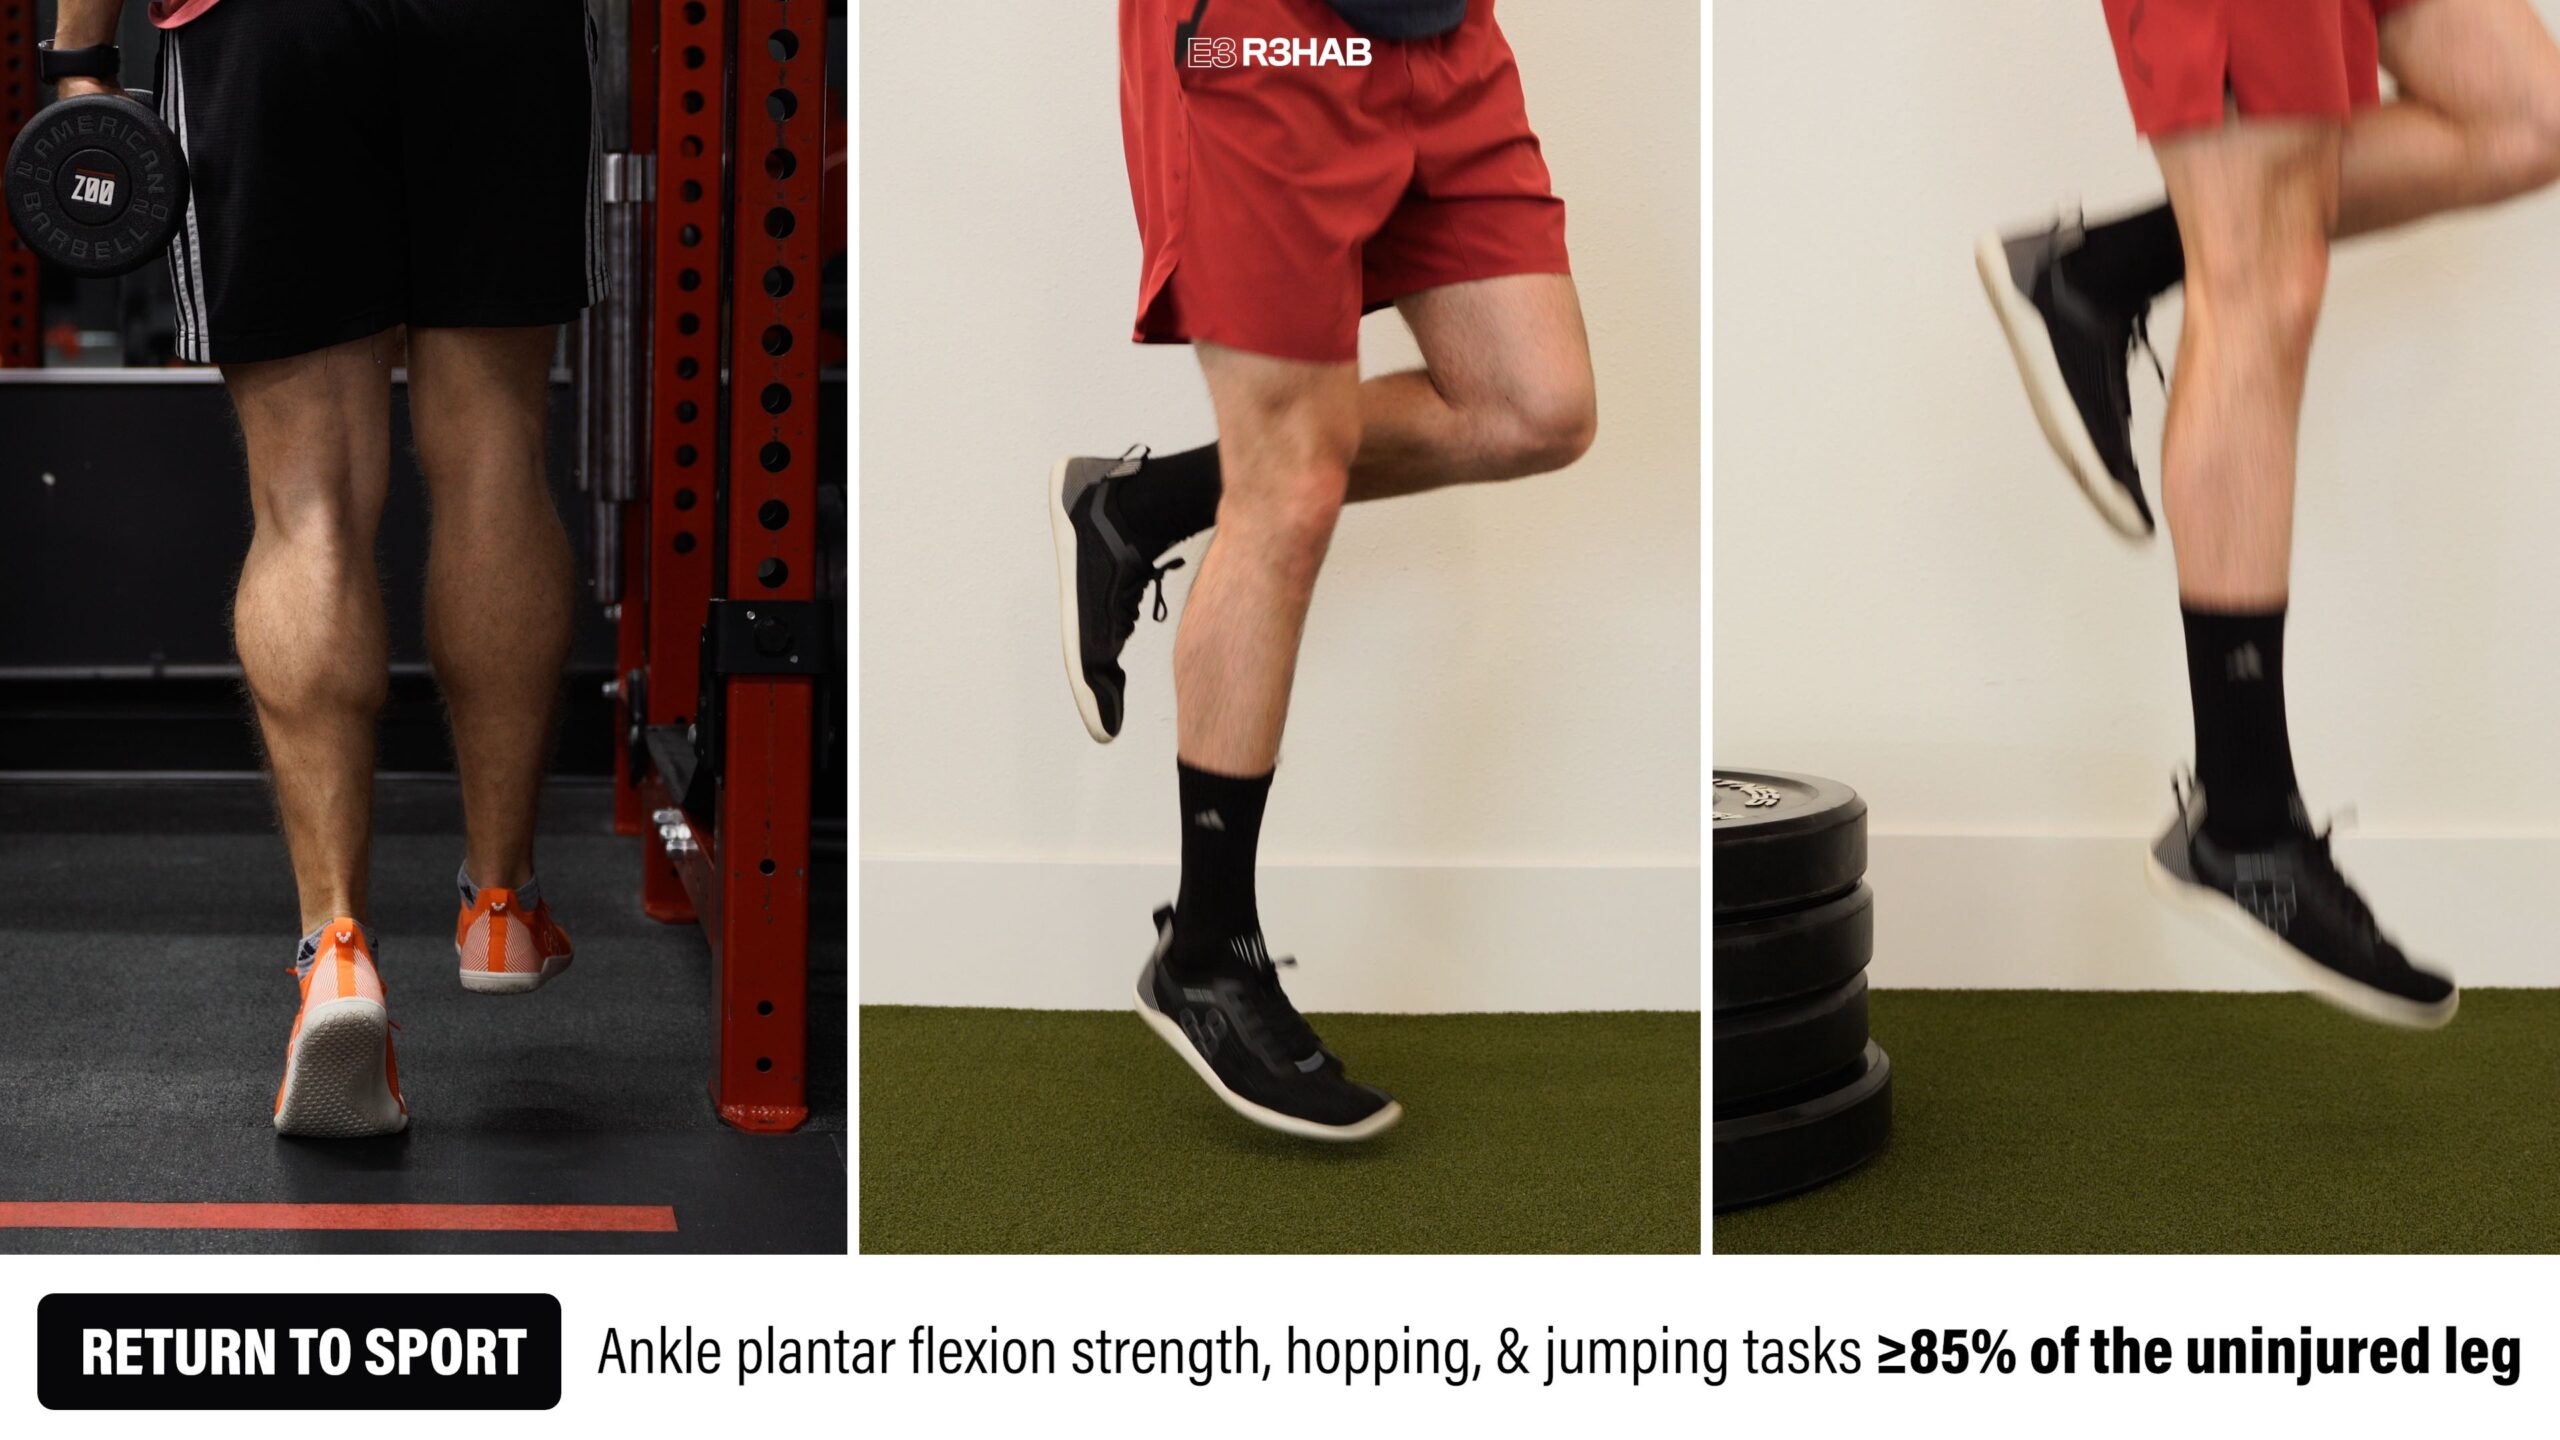
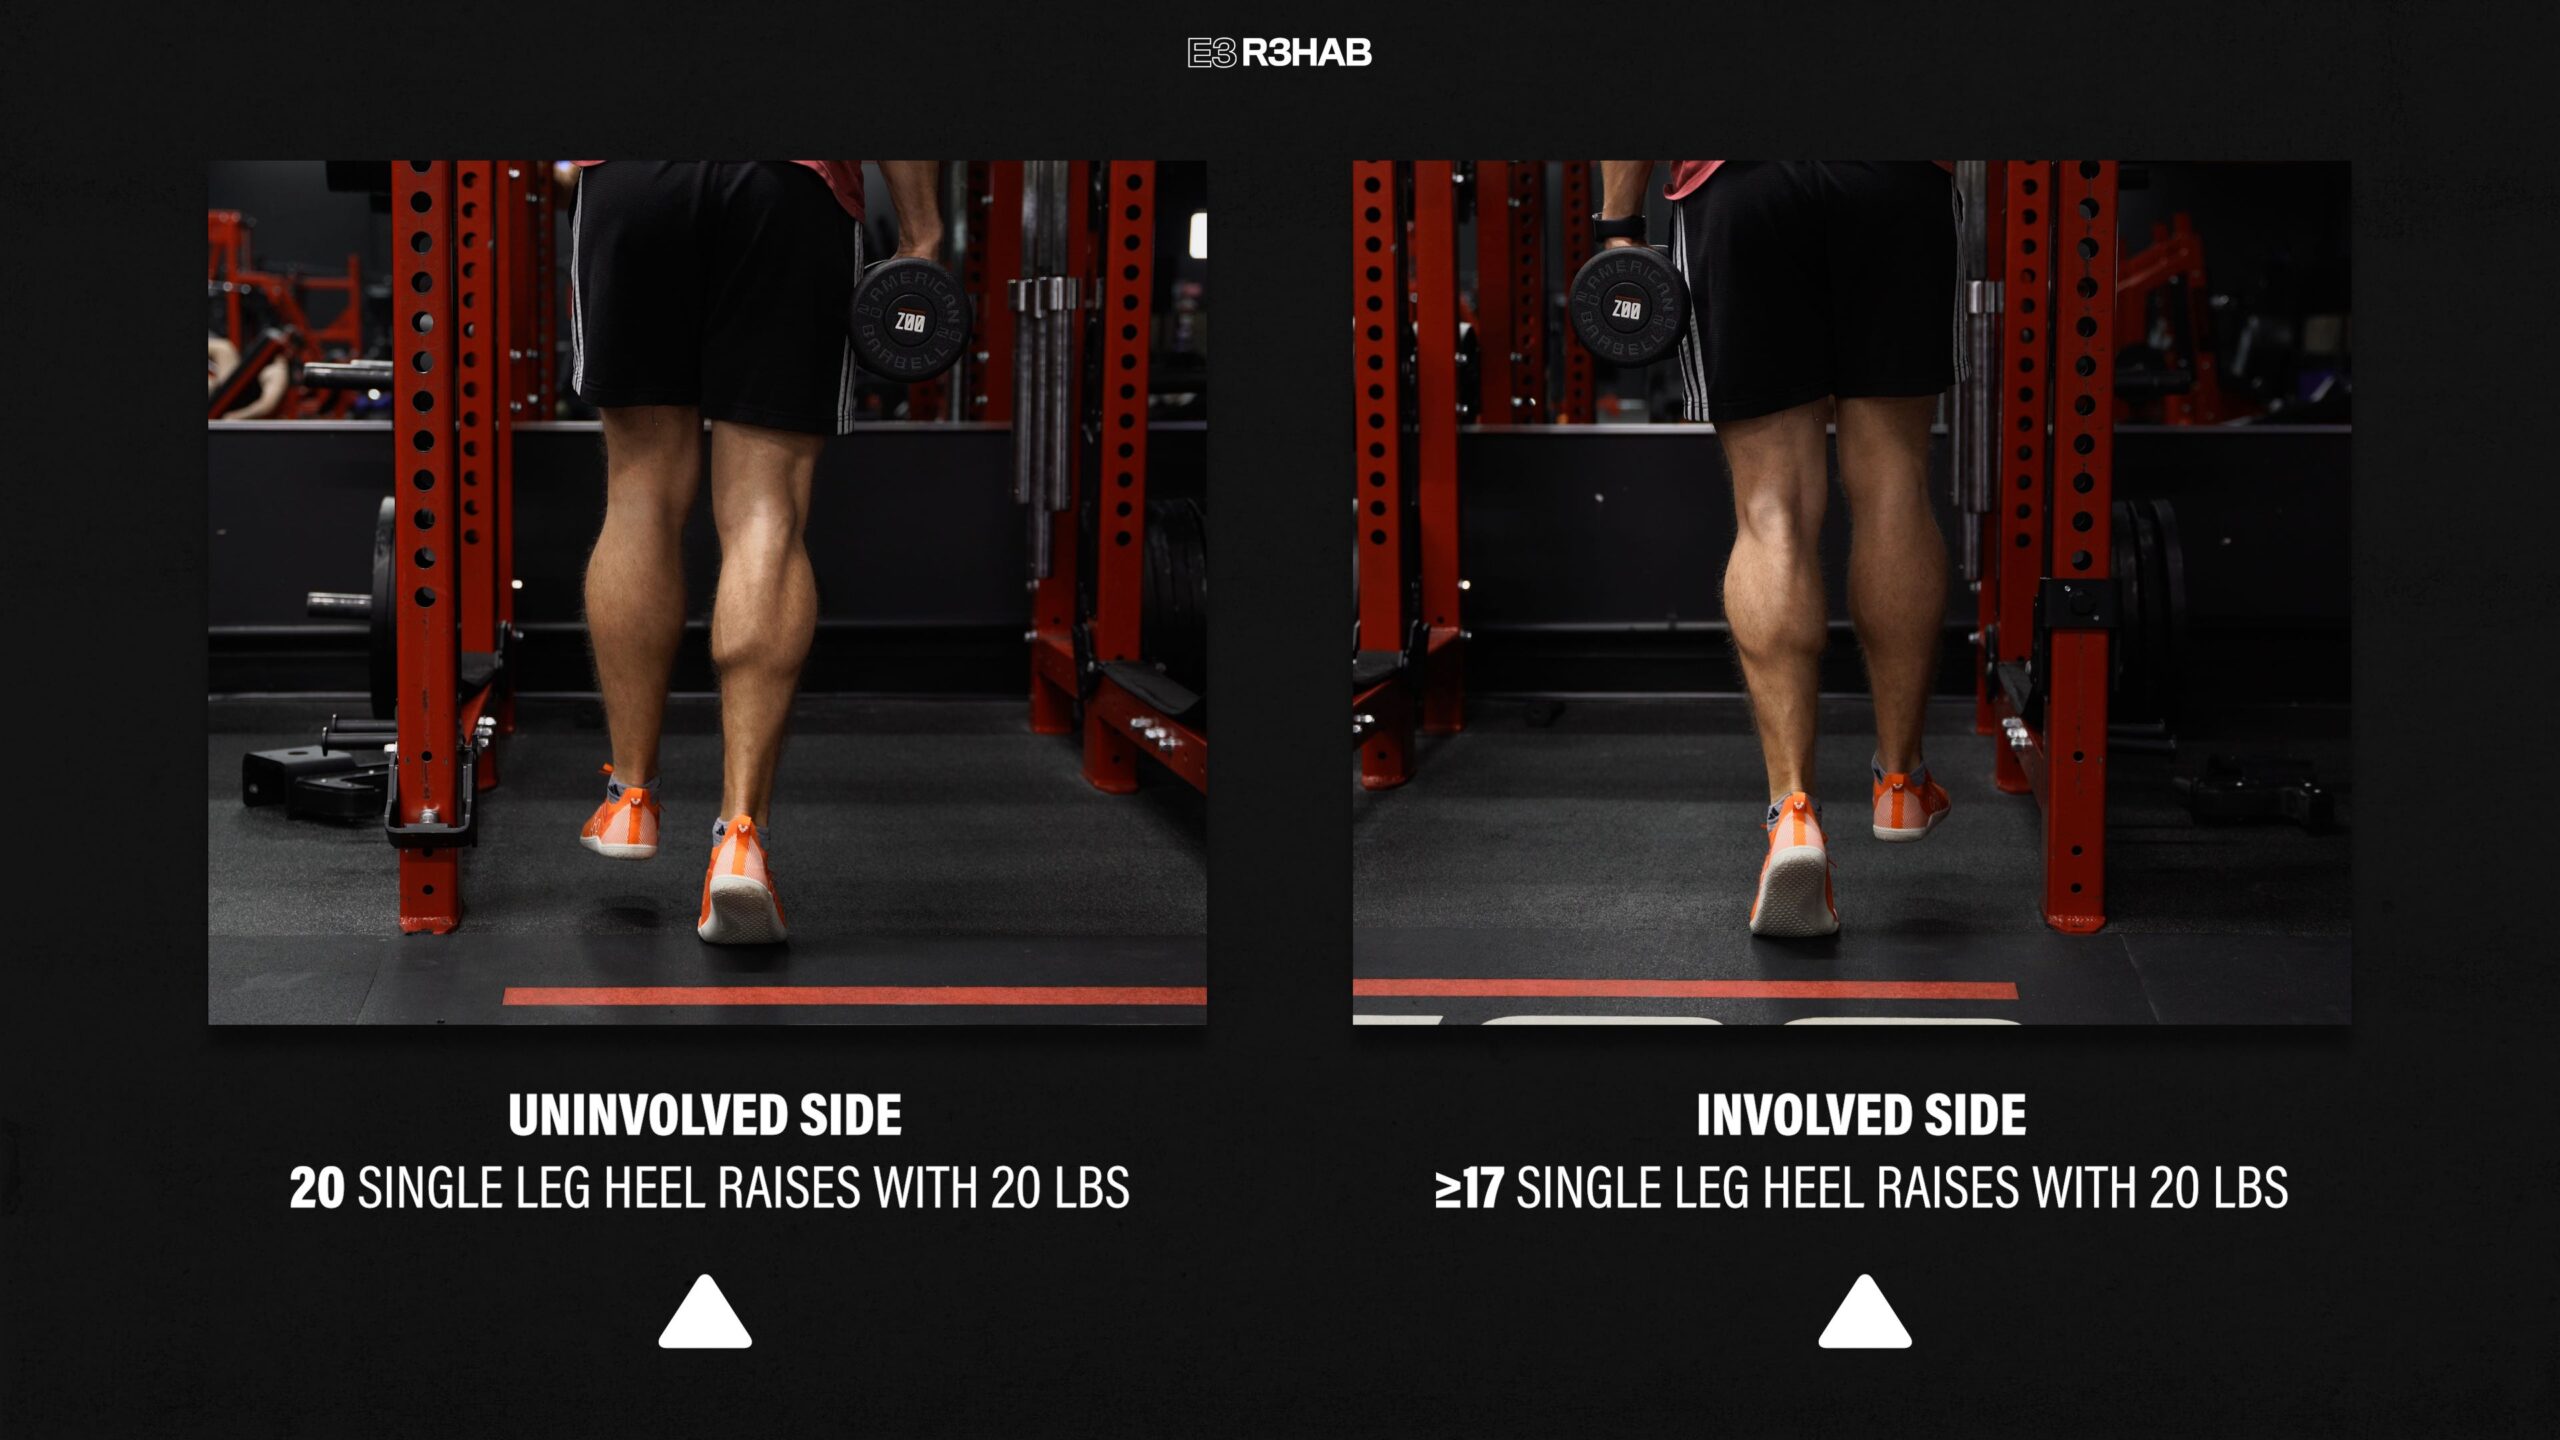
There is currently no consensus on what objective criteria you must meet before returning to your sport, however, somerecommendations suggest you demonstrate ankle plantar flexion strength, hopping, and jumping tasks ≥85% of the uninjured leg.
For instance, if you can perform 20 single-leg heel raises with 20 lbs on your uninjured side, you should be able to perform at least 17 repetitions with the same weight on your injured side.
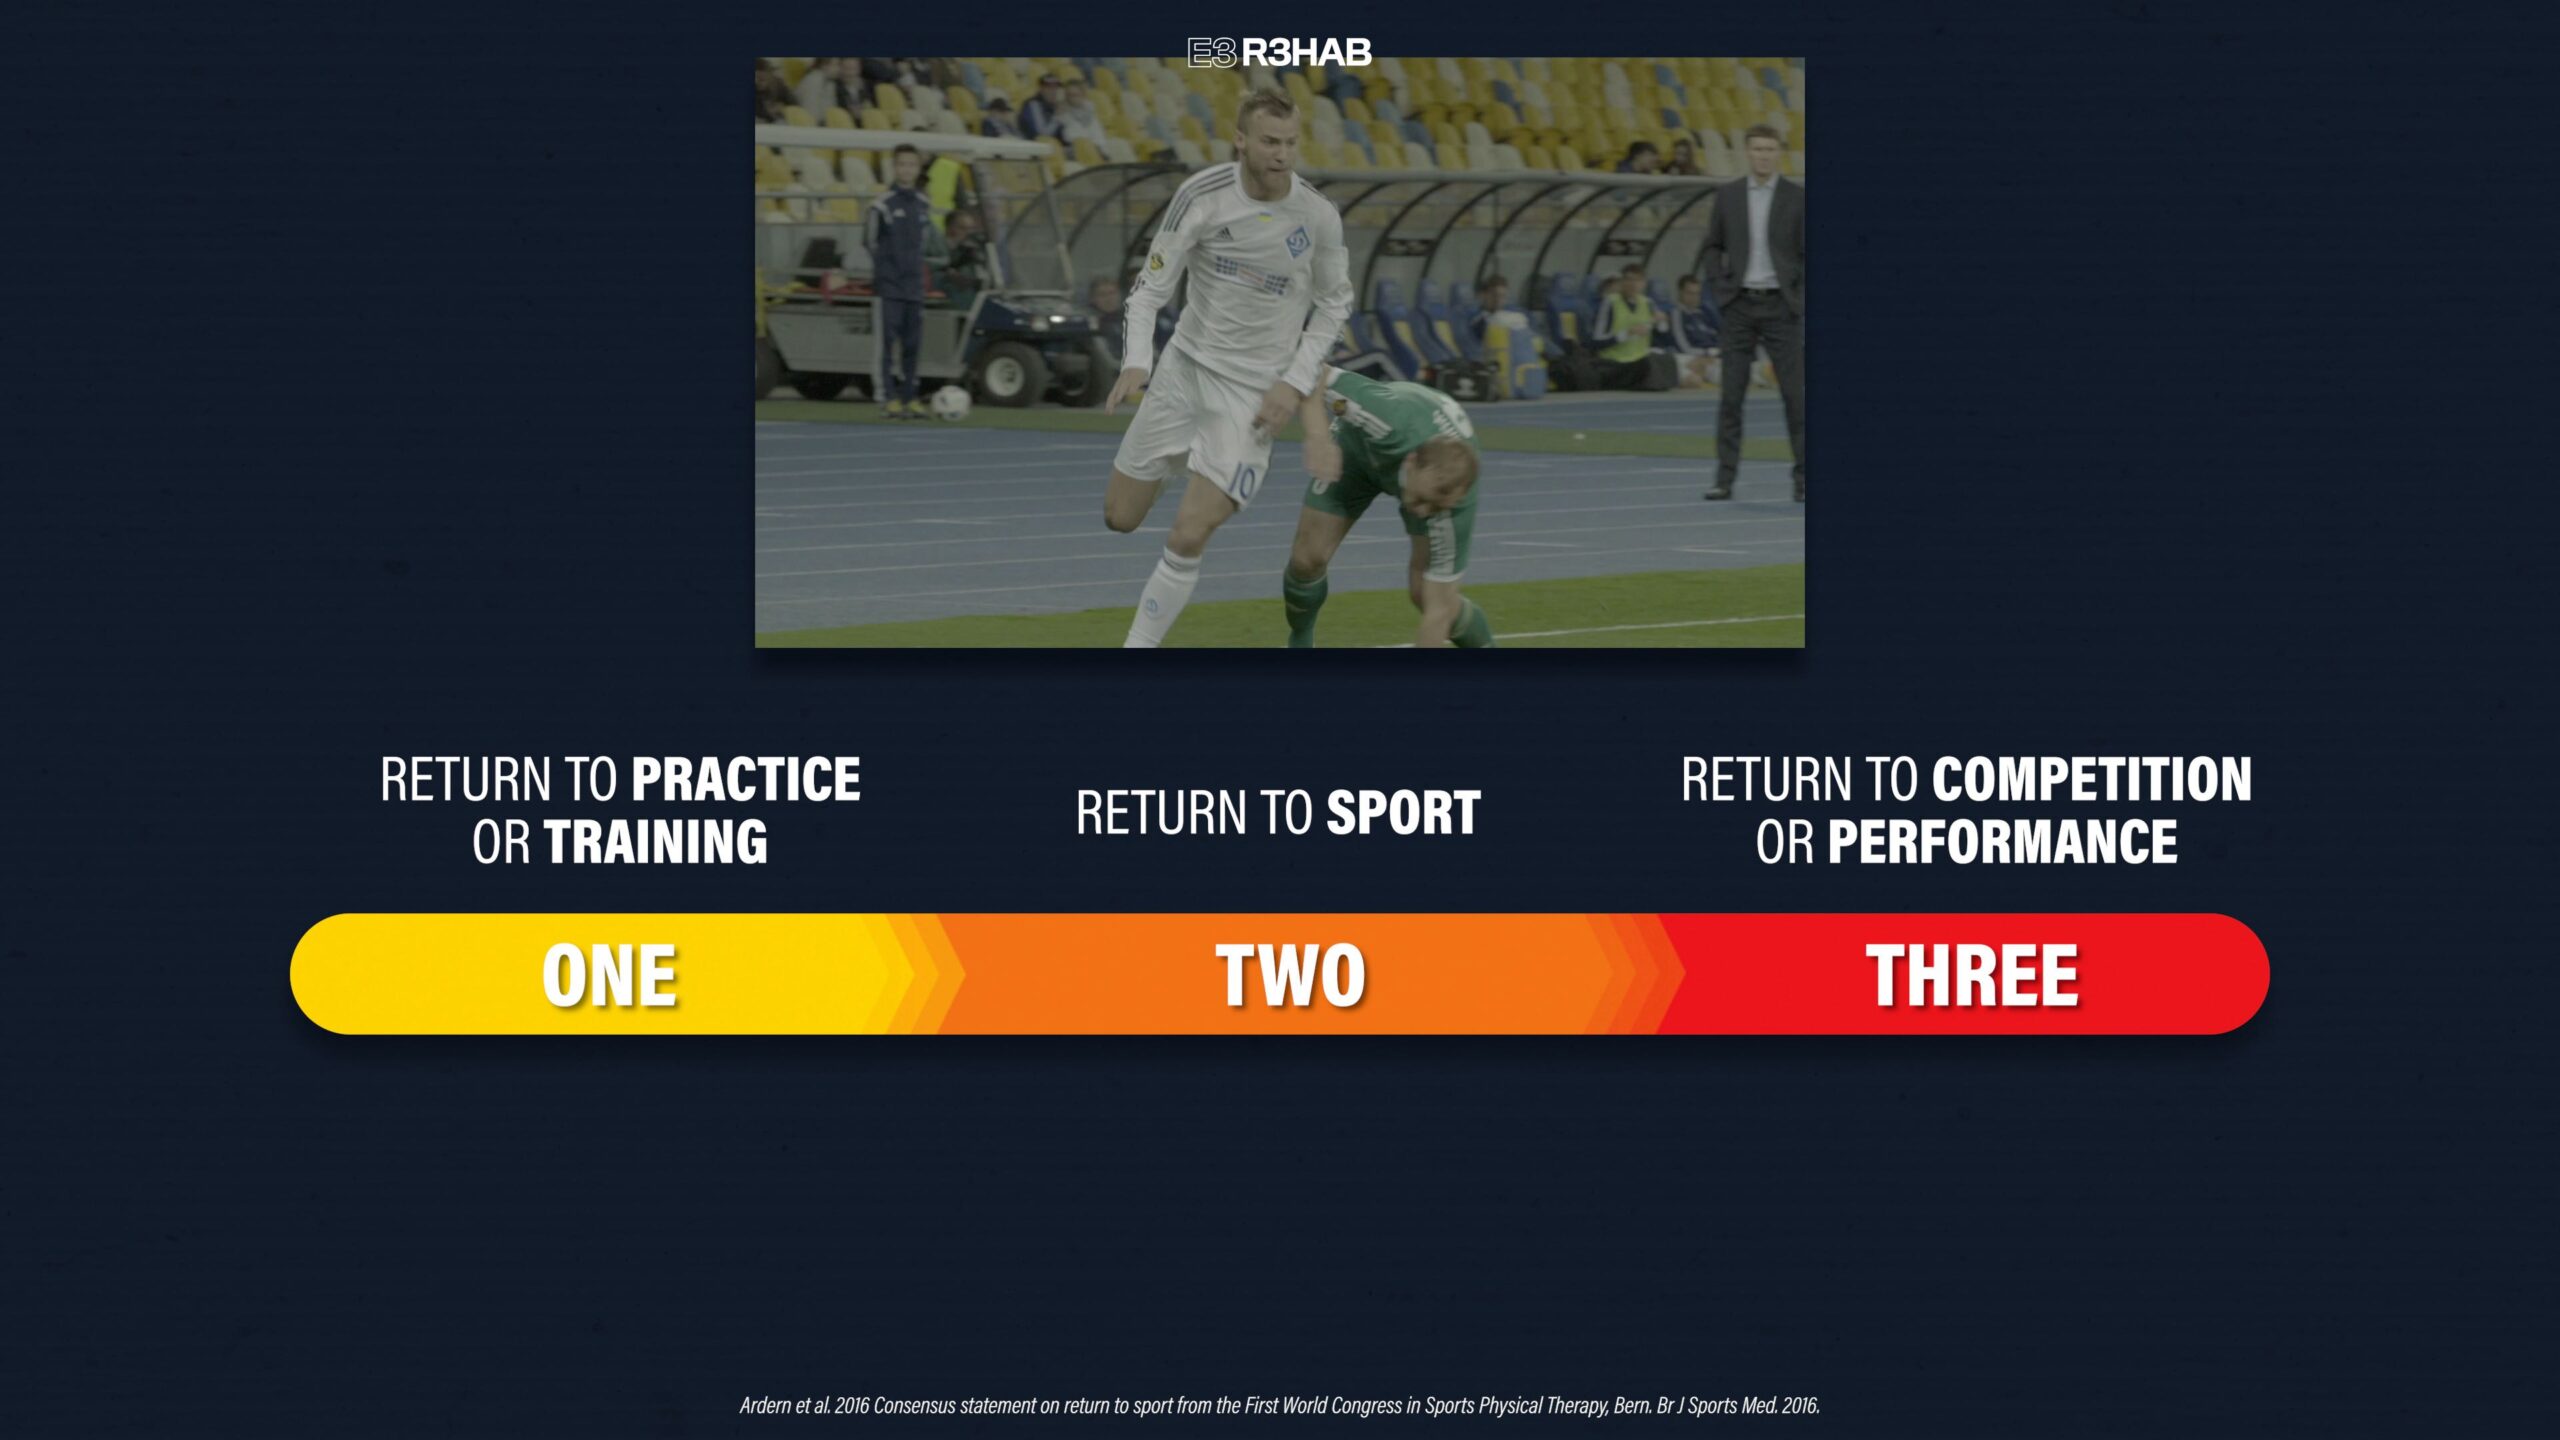
When you are cleared to return to sport, understand that this process is a continuum that usually takes place over several months. For example, when appropriate, you will start with modified practice and sport-specific drills (participation), before progressing back to full participation (return to sport). However, you do not perform at or above your pre-injury level until the final stage (return to performance).
There are 3 final points about an Achilles tendon rupture that I want to discuss before finishing this blog.
First, it’s important to reiterate that the rehab plan I presented includes 5 overlapping phases. This means that you aren’t in one phase today and another phase tomorrow.
For instance, your physical therapist may have you start more advanced strength exercises (Phase 3), even while you are still working on normalizing your walking (Phase 2).
Similarly, even if you’re cleared to begin the jumping exercises (Phase 4), it’s essential to continue performing the heel raises and other strength movements from the previous phase (Phase 3).
Second, your progress will be determined by your symptoms and function until your precautions are lifted by your surgeon or physical therapist. This varies from case to case.
For example, you probably heard of Aaron Rodgers and his recovery, returning to some football activities only 11 weeks after he had surgery. However, not everyone will experience this rate of rehab. If you are older and less active, you may progress slower and your overall recovery may take longer. That’s okay. The important thing is that you keep exercises and activities tolerable, follow your precautions, and focus on addressing your specific deficits.
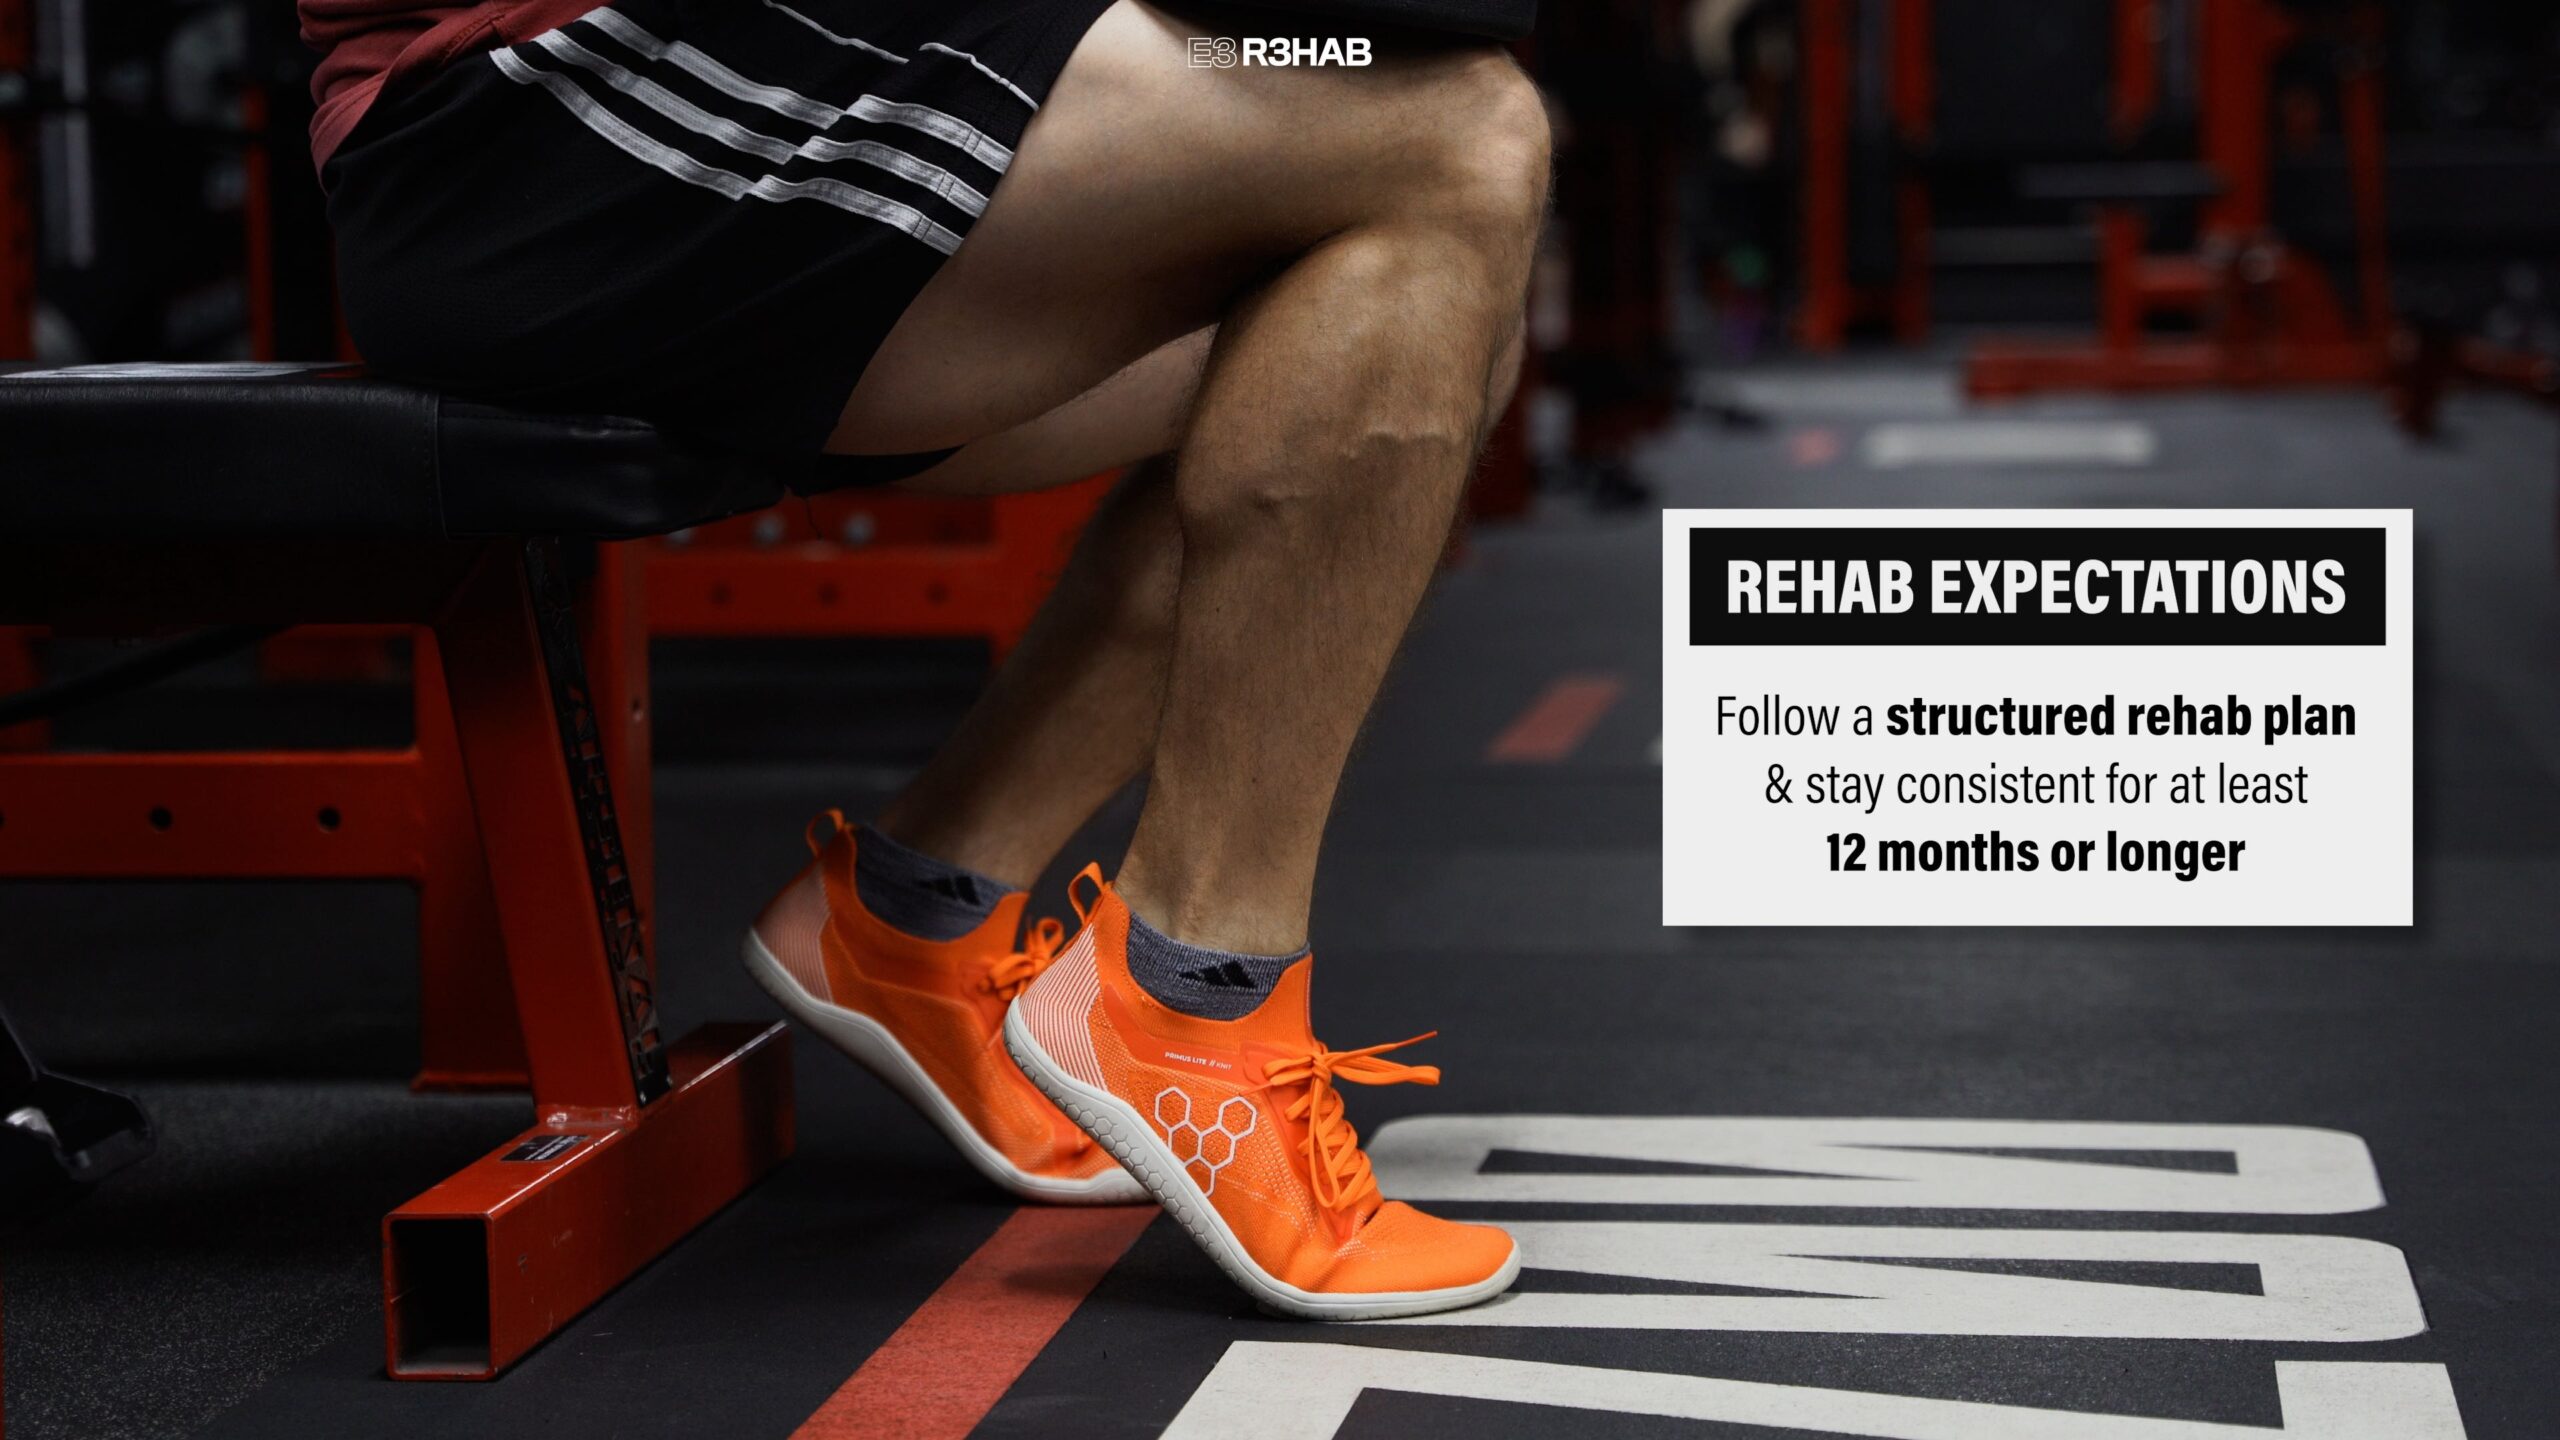
This leads me to the third and final point: you need to set realistic expectations for your recovery. If your goal is to return to your previous level of function (or higher), I cannot stress enough the importance of following a structured rehab plan and staying consistent for at least 12 months or longer.
Want to learn more? Check out some of our other similar blogs: