The purpose of this blog is to discuss abdominal muscle strains and provide a rehab plan with exercise progressions and programming suggestions.
Looking for rehab or performance programs? Check out our store here!
Abdominal Muscle Strain
An abdominal muscle strain occurs when you rapidly bend and/or twist your trunk. For example, this can happen during a serve in tennis or when throwing a baseball.
It usually involves at least one of three muscles: the rectus abdominis, external oblique, or internal oblique. All three flex your trunk, while the obliques are also responsible for rotation and side bending.
When you injure one of these muscles, you will likely be limited or have symptoms with one, two or all of these motions. This is where exercises can help, as they can improve your capacity and tolerance to various movements, ultimately allowing you to return back to your activity of choice.
This Blog is NOT About Hernias
Before continuing, it’s important to understand that an abdominal muscle strain is different from a hernia. A hernia is a bulge or protrusion of an organ or tissue through your muscle and skin. Although they have some overlap in presentation, this blog is not about hernias. If you are someone experiencing a noticeable lump around your abdominals, most often closer to your groin region, you should first consult with your medical doctor before starting any exercises.
Abdominal Muscle Strain Exercise Overview
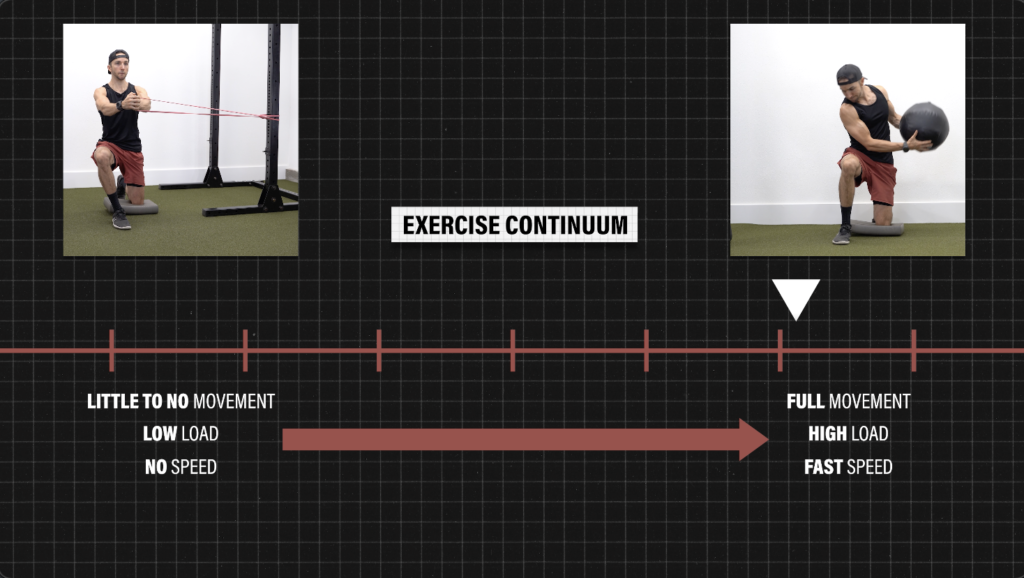
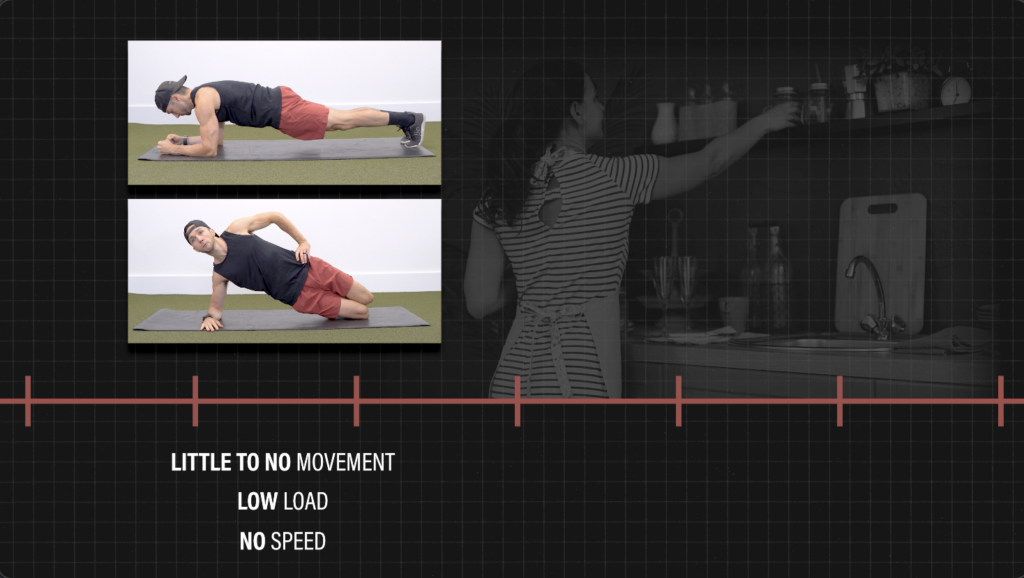
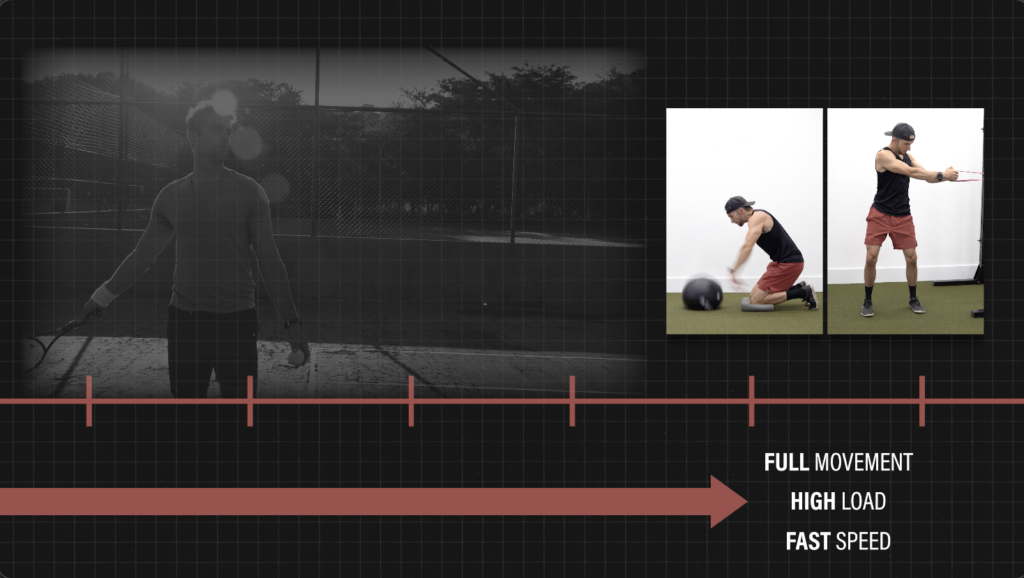
The exercises I am going to show for an abdominal muscle strain will follow along a continuum. On the left side, you have exercises that involve little to no trunk movement, low loads, and no speed. Think planks and side planks. As you move toward the right side, exercises will require more trunk range of motion, higher loads, and involve high speed movements. Think medicine ball throws and resisted trunk rotations.
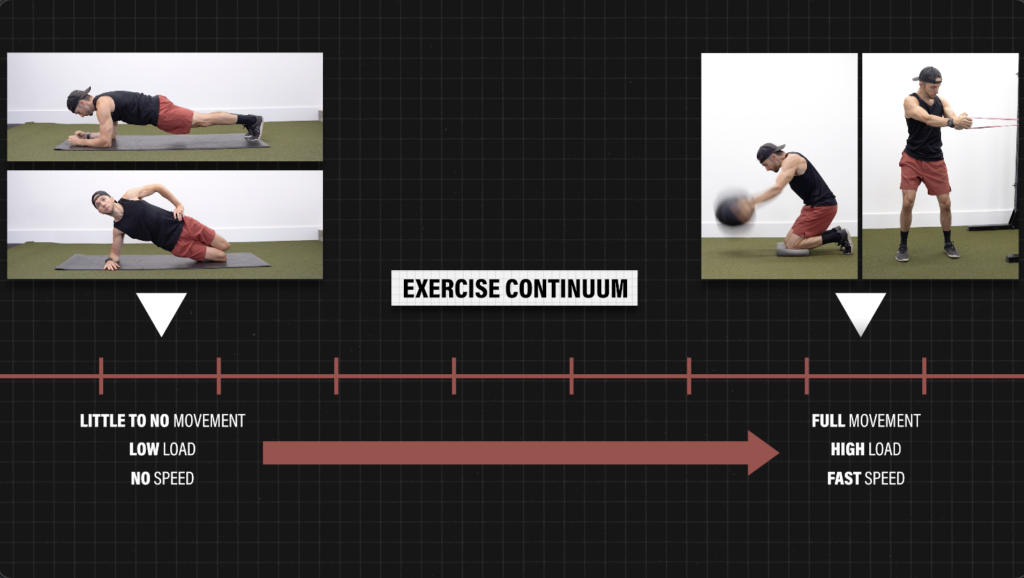
The goal of rehab is to restore your ability to move through these trunk motions at a level appropriate for your goals.
For example, if you are simply looking to return to day to day activities, you might stay toward the left side. In contrast, if you want to return to tennis, baseball, or another sport, you will need to progress toward the right side, and include exercises with higher loads and higher speeds in order to meet the demands of your activity.
There are 2 additional things worth mentioning:
1. Your abdominals will also be challenged during compound exercises like deadlifts and push ups, but to maximize desired adaptations, you should also incorporate isolated exercises like the ones shown in this video.

2. Since there is a lot of overlap between the function of each abdominal muscle, regardless of which one you injured, I would recommend including exercises targeting each trunk direction.
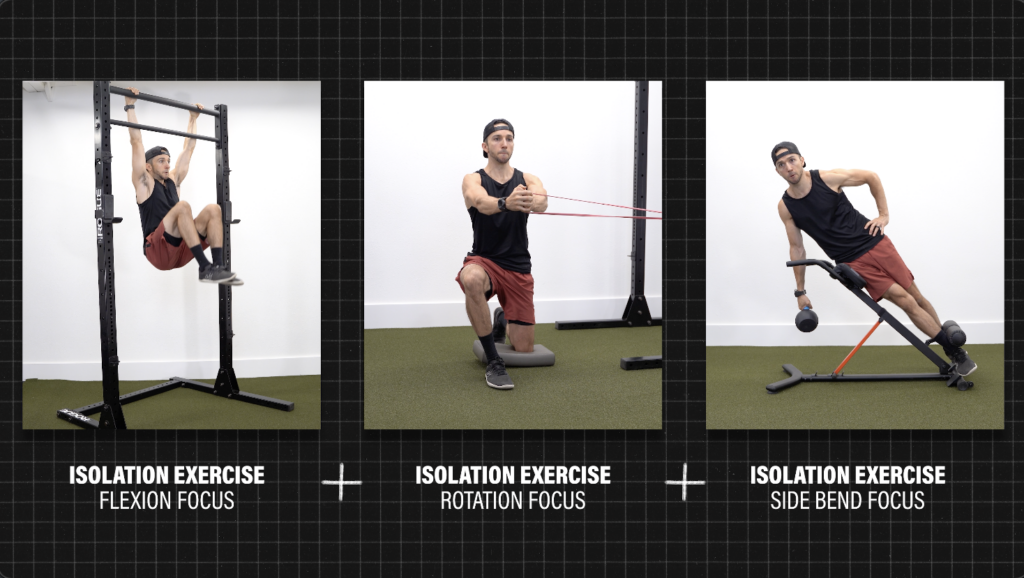
Therefore, I am going to provide multiple exercise options for each trunk movement, which I will organize into 3 exercise categories. I will also include program suggestions toward the end of the blog to help you put all this information together.

Abdominal Muscle Strain Exercises
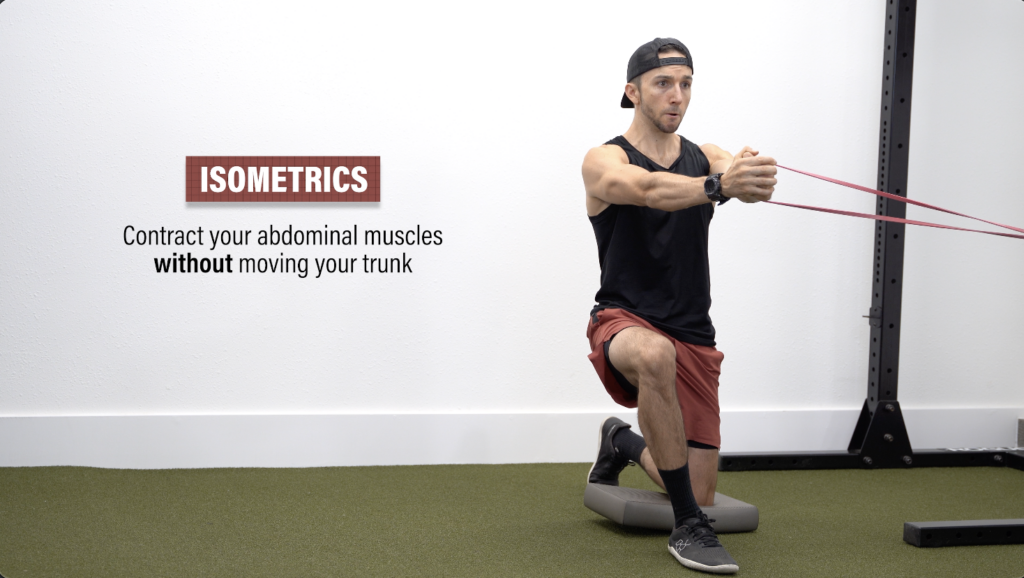
Category 1: Isometrics
These exercises contract your muscles without moving your trunk and can be a good starting point for early loading. Overtime, you can progress their difficulty and continue to use them in the later stages of rehab.
Let’s start with trunk flexion, or anti-extension. Here are 2 progressions:
Number 1. Plank Progression
Level 1 – Kneeling Plank or Elevated Plank. Squeeze your butt and keep your body in a straight line. Choose one and hold for 3 sets of 60 seconds.
Level 2 – Forearm Plank. Aim for 3 sets of 60 seconds.
Level 3 – Long Lever Plank. Place your arms further out in front of you, so your elbows are just under your nose. Hold for 3-4 sets of 30-60 seconds.
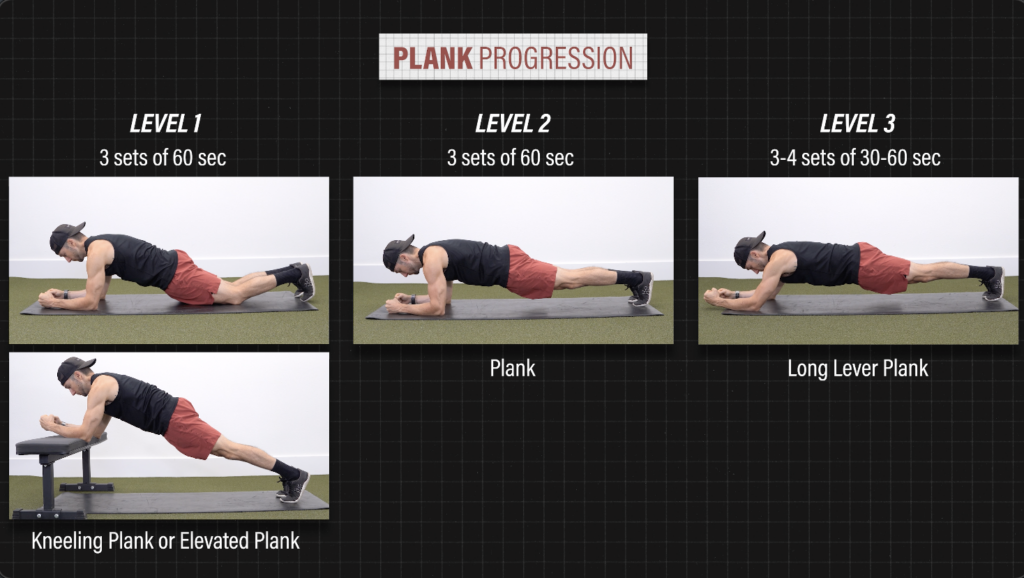
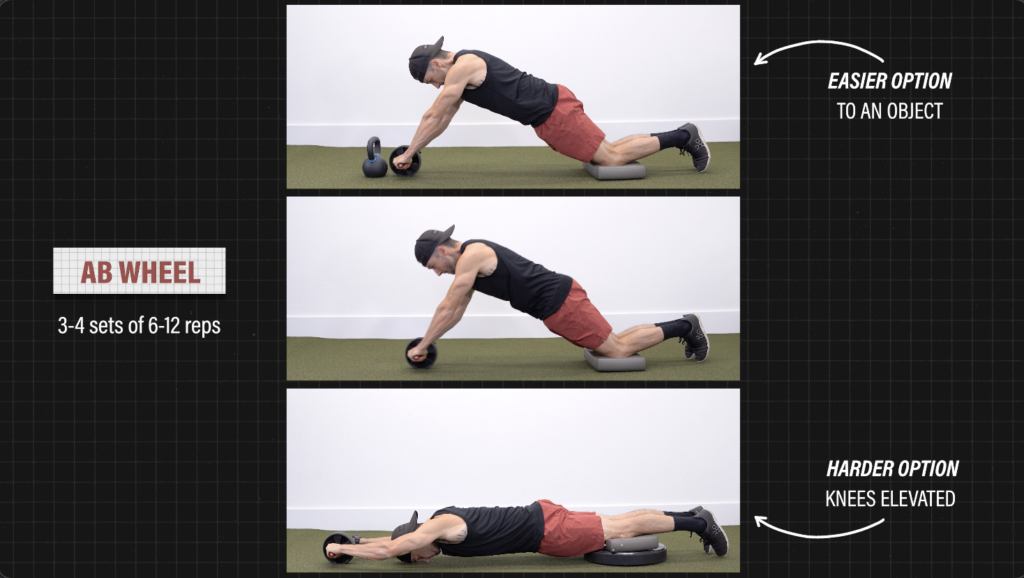
Another advanced option is using an ab wheel. Set up on your knees, squeeze your glutes, and roll out as far as you can go while maintaining a straight trunk. If this is too hard, you can shorten the range of motion by rolling to an object. If it is too easy, you can place your knees on an elevated surface a few inches high.
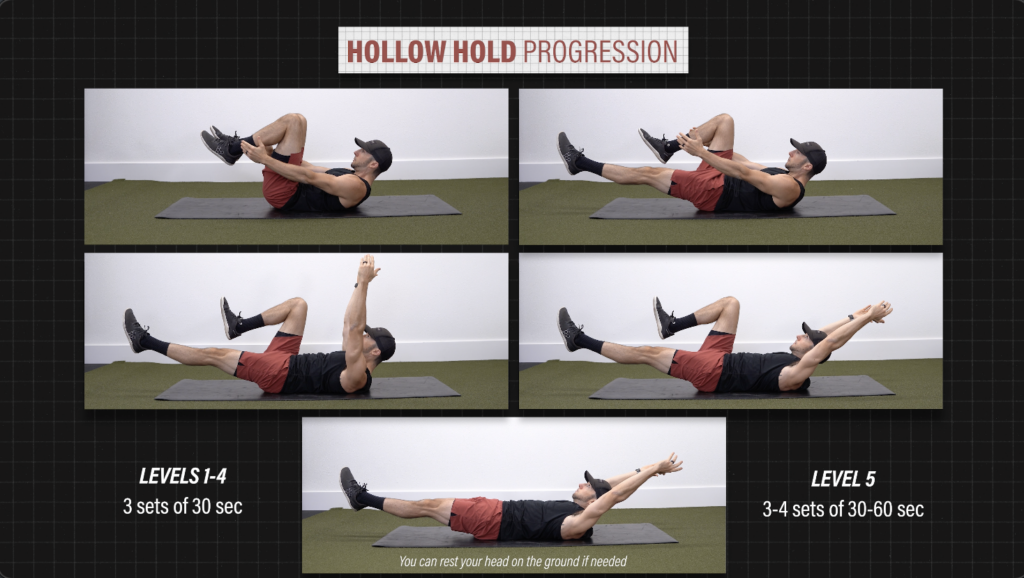
Number 2. Hollow Hold Progression
Level 1 – Knees Tucked and Arms at Side. Tuck your knees toward your chest, and curl your head and upper back off the ground while keeping your arms at your side.
Level 2 – One Knee Tucked and Arms at Side. Progress by extending one leg, holding your foot about 12 inches off the ground.
Level 3 – One Knee Tucked and Arms Toward Ceiling. Bring your arms up, so they are reaching toward the ceiling.
Level 4 – One Knee Tucked and Arms Overhead. Move your arms into an overhead position, so your biceps are next to your ears.
Level 5 – Hollow Hold. Extend your other leg, and imagine yourself in the shape of a banana.
For levels 1-4, your goal is holding for 3 sets of 30 seconds. For level 5, aim for 3-4 sets of 30-60 seconds. To increase the difficulty of level 5, you can hold a weight in your hands.
Next is trunk rotation. Here are 2 progressions:
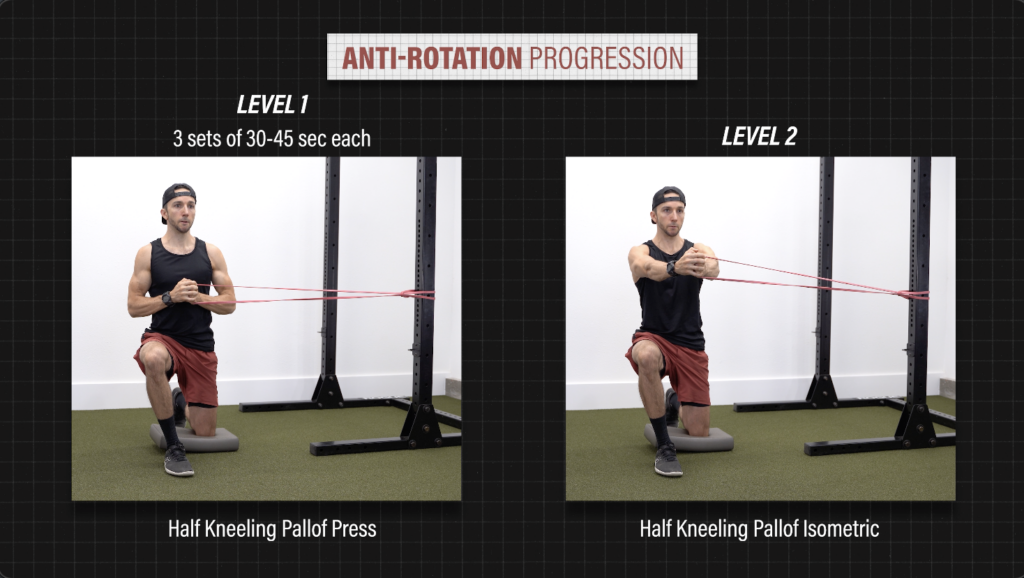
Number 1. Anti-Rotation Progression
Level 1 – Pallof Press. Set up in a half kneeling position with your inside knee “down”, and a band anchored perpendicular to your body at about chest height. Slowly press the band out, until your arms are straight and then return back to the start. Repeat for 3 sets of 30-45 seconds on each side.
Level 2 – Pallof Isometric. Same set up, but now hold the band out in front of you for 3-4 sets of 30-45 seconds on each side. To make it harder, use a heavier band or move further away from the anchor point.
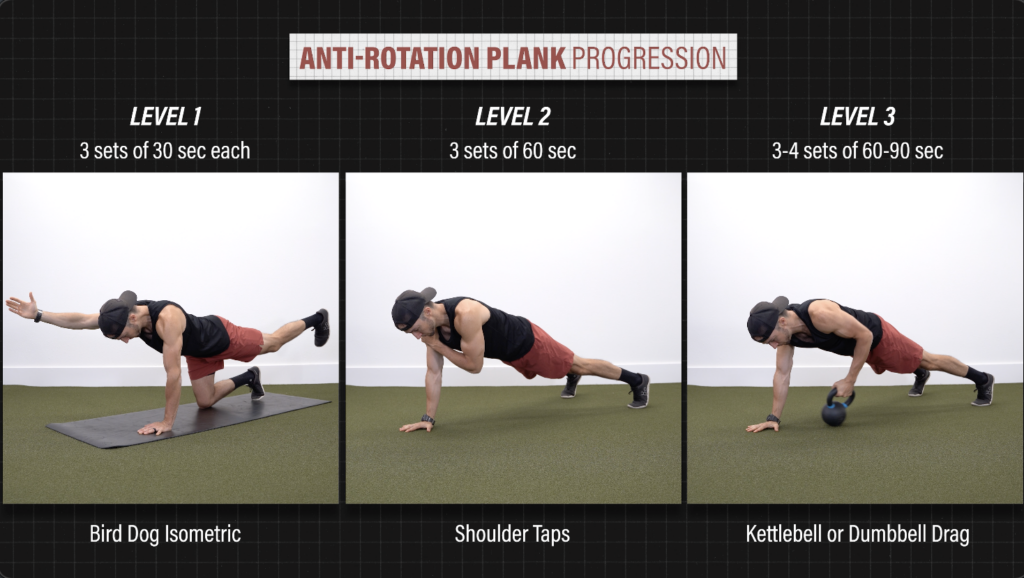
Number 2. Anti-Rotation Plank Progression
Level 1 – Bird Dog Isometric. Set up on hands and knees, and extend the opposite arm and leg while keeping your back relatively flat. Hold for 3 sets of 30 seconds on each side.
Level 2 – Shoulder Taps. Set up in a tall plank position with feet slightly wider than hip width. Press the floor away from you with one arm as you tap your opposite shoulder with your other hand. Go slow while trying to minimize movement at your hips. Aim for 3 sets of 60 seconds.
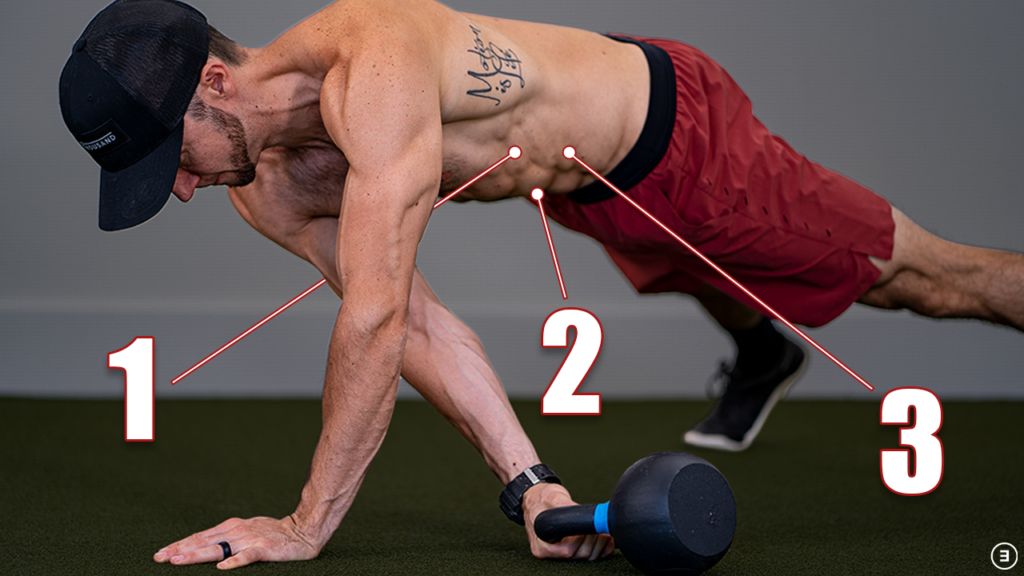
Level 3 – Kettlebell or Dumbbell Drag. From a tall plank position, drag a weight across your body with one hand, and then switch hands, and drag it back to the start. Again, keep hips level and trunk in a straight line as you perform 3-4 sets of 60-90 seconds.
And finally for lateral flexion, here are two progressions:
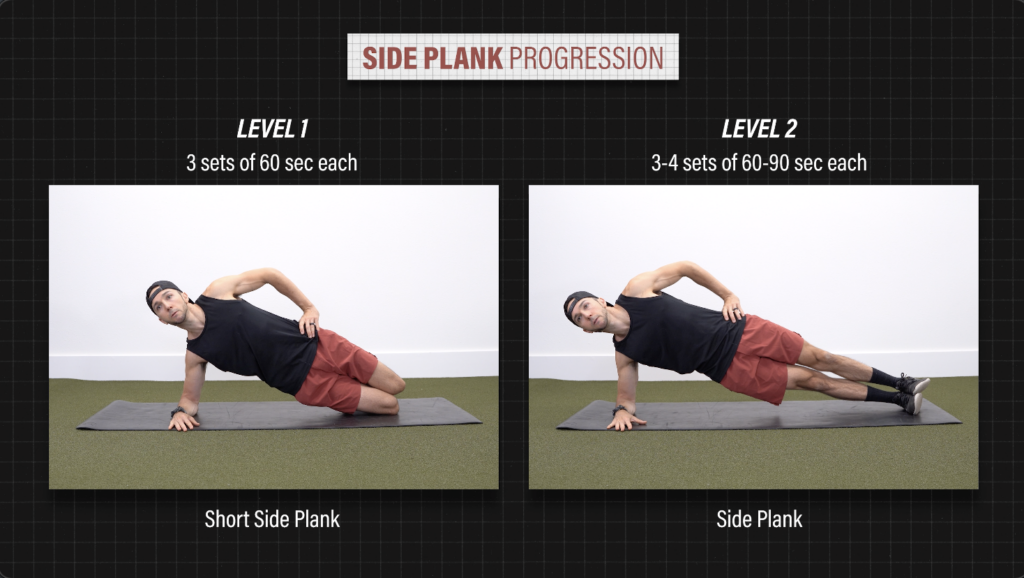
Number 1. Side Plank Progression
Level 1 – Short Side Plank. Set up with your forearm under your shoulder and maintain a straight line from head to knees. Hold for 3 sets of 60 seconds on each side.
Level 2 – Side Plank. Aim for 3 sets of 60-90 seconds on each side.
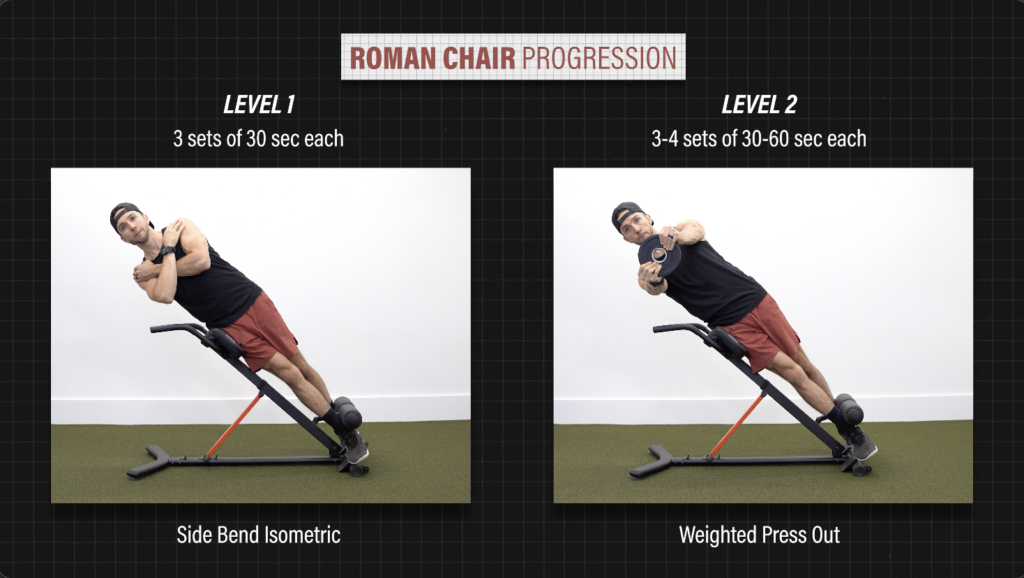
Number 2. Roman Chair Progression
Level 1 – Side Bend Isometric. Set up with the pad at the level of your hips and stagger your feet, with your bottom leg forward. Place your arms across your chest and hold this position for 3 sets of 30 seconds each side.
Level 2 – Weighted Press Out. Same set up, but hold a weight at your chest and press out until your arms are fully extended. Return back to the start and complete 3-4 sets of 30-60 seconds on each side.
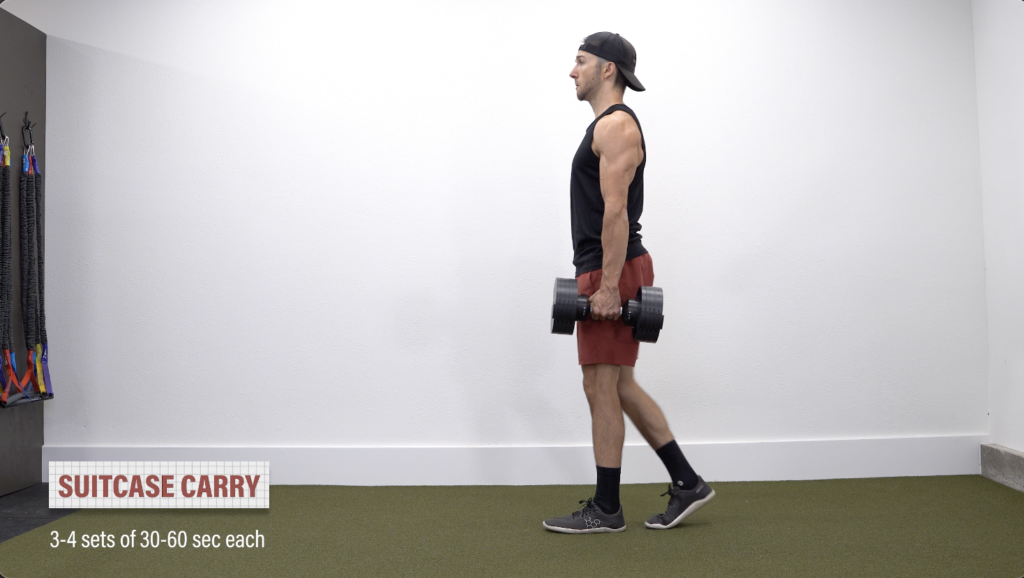
Another option for isometric lateral flexion is a suitcase carry. Hold a weight in one hand and slowly walk in a straight line while maintaining a tall, upright position. Perform 3-4 sets of 30-60 seconds on each side.
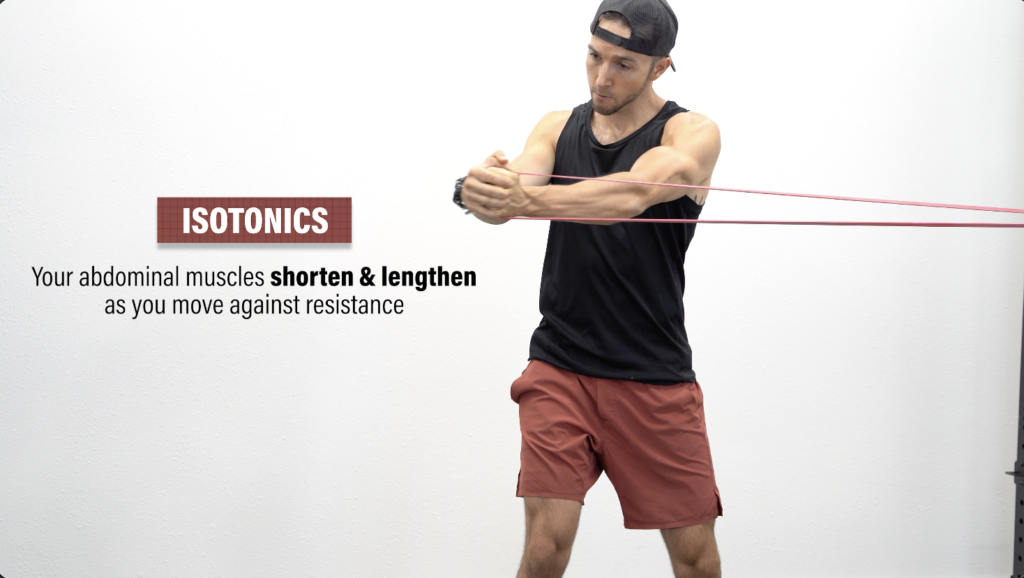
Category 2: Isotonics
These exercises shorten and lengthen your muscles as you move your trunk against resistance. You want to begin performing these exercises once you are able to tolerate the recommended parameters without pain.
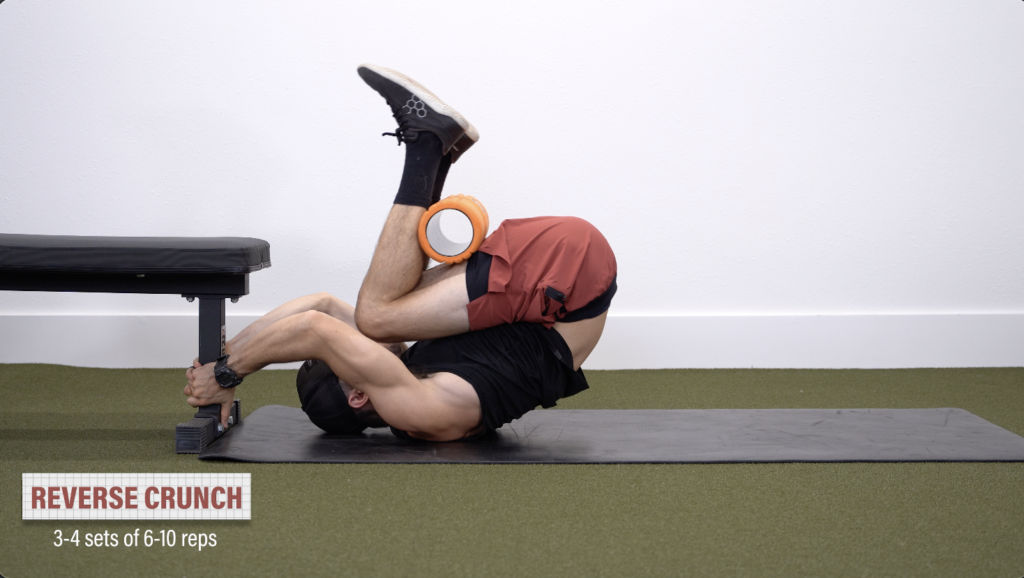
For trunk flexion, my primary recommendation would be a reverse crunch. Grab a stable object overhead, and pull your knees toward your face, rounding your low back through its full range of motion. Then, slowly lower back to the start. To help control the motion, try placing a roller or object behind your legs. Perform 3-4 sets of 6-10 slow and controlled reps.
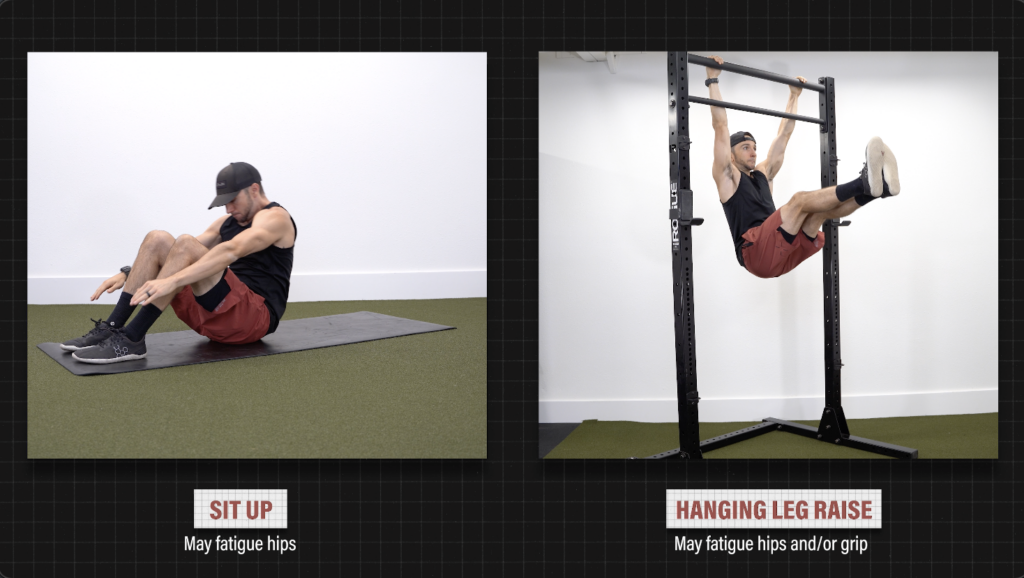
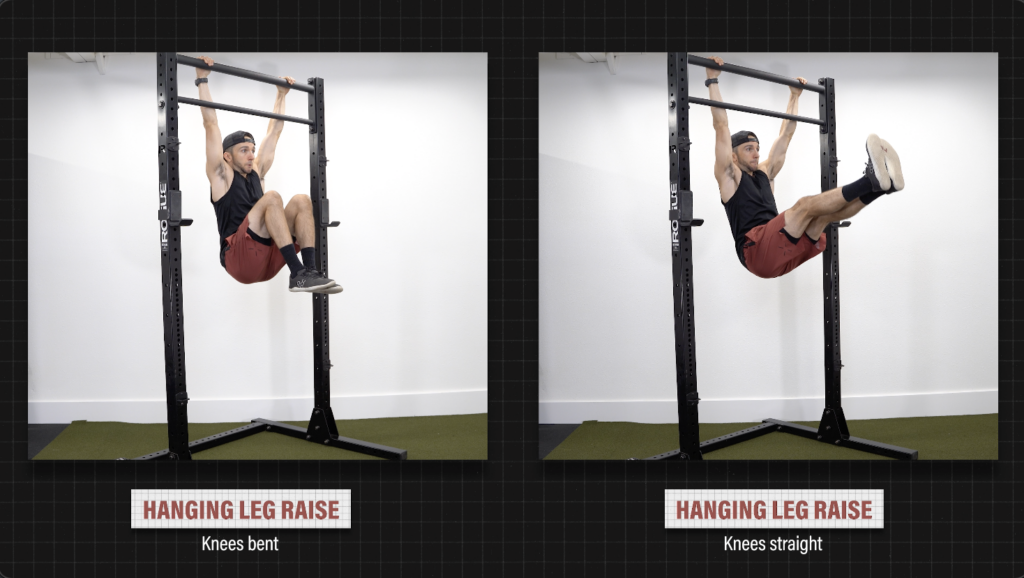
Other options include sit ups and hanging leg raises. If you choose one of these, just make sure you perform them under control and your abdominals are adequately challenged. If these fatigue your hip or grip more, you likely want to consider a different exercise.
You can also adjust the difficulty by changing the position of your knees. For example, with the reverse crunch, you can make it more challenging by straightening your legs.
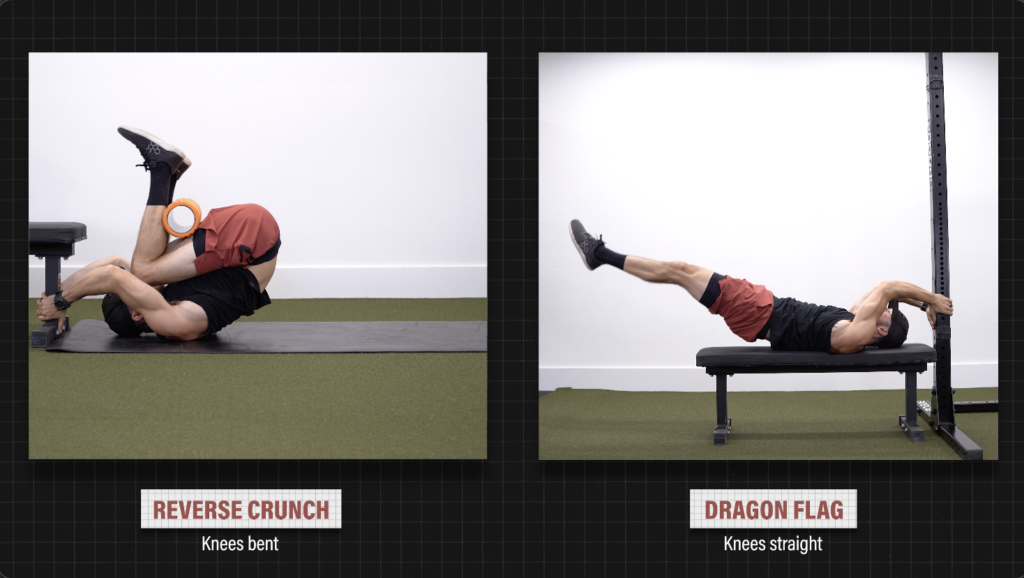
This is similar to the hanging leg raise. Start with knees bent, and if you want to make it harder, perform them with legs straight.
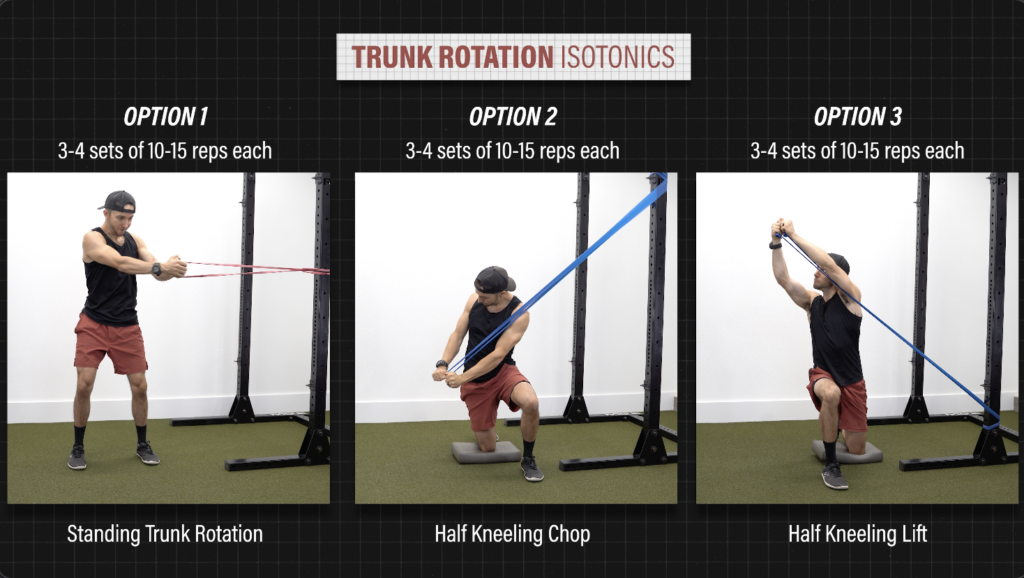
For trunk rotation, here are 3 options using a cable or band.
Option 1 – Standing Trunk Rotation. Stand with a slight bend in your hips and knees with your arms straight. Rotate from your inside hip to just past your outside hip, while keeping your pelvis facing forward.
Option 2 – Half Kneeling Chop. Set up with the inside knee “up” and a band or cable anchored above head height. Pull your hands to your chest and then push away from you toward the ground. Reverse the motion back to the start and repeat.
Option 3 – Half Kneeling Lift. Set up with the inside knee “down” and a band or cable anchored low. Pull your hands to your chest and then push away from you toward the ceiling. Reverse the motion back to the start and repeat.
For either of these options perform for 3-4 sets of 10-1 5 repetitions in each direction.
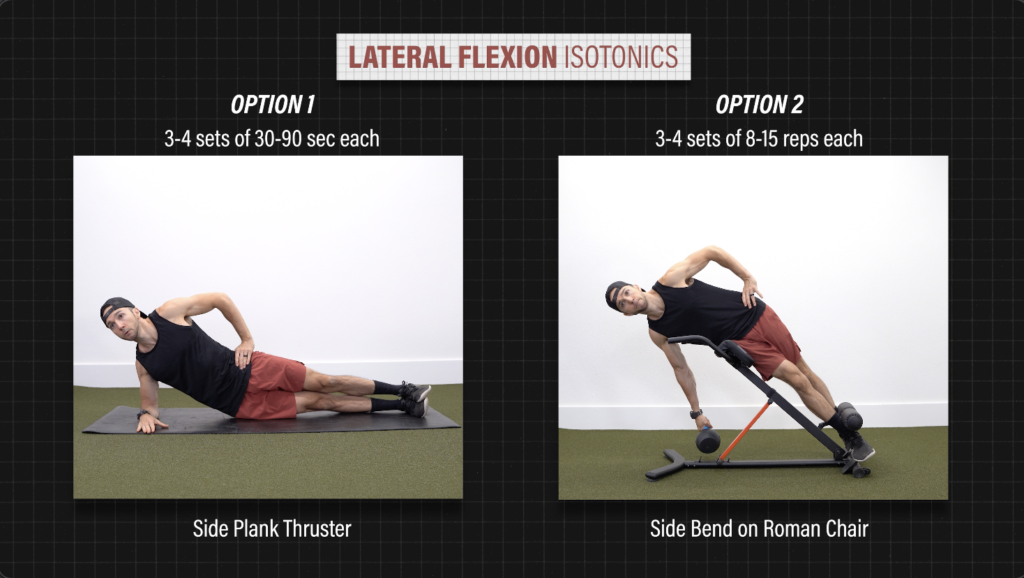
And finally for lateral flexion, here are two options.
Option 1 – Side Plank Thruster. Set up in your long side plank and lower and lift your hips under control for 3-4 sets of 30-90 seconds each side.
Option 2 – Side Bend on a Roman Chair. Side bend as far down as you can comfortably and then return back to the start. Perform 3-4 sets of 8-15 reps on each side. Overtime, you can increase the difficulty by adding weight.
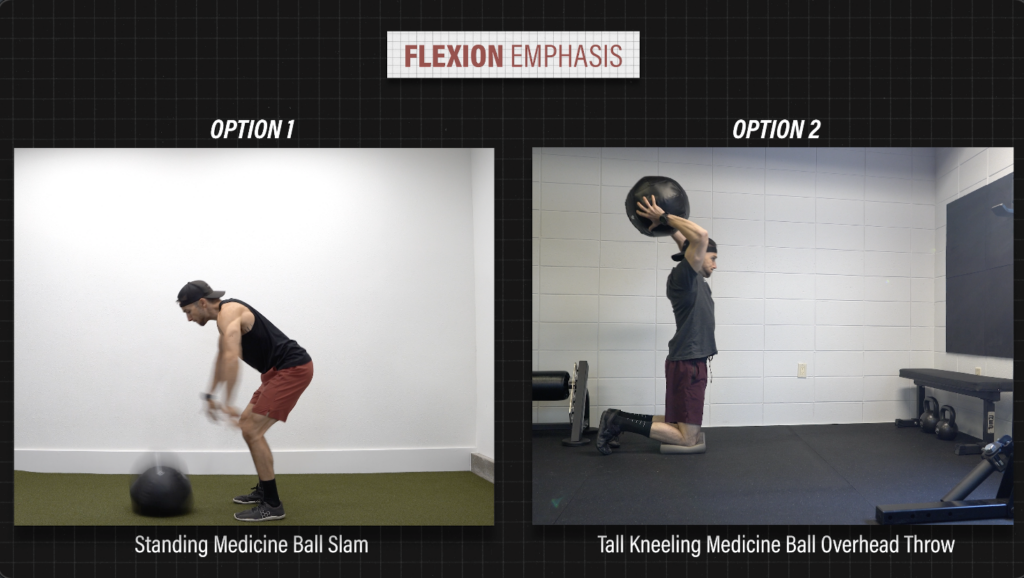
Category 3: Power
These exercises will move your trunk at a high speed with resistance and are appropriate for those looking to get back to a higher level of activity, such as rotational sports.
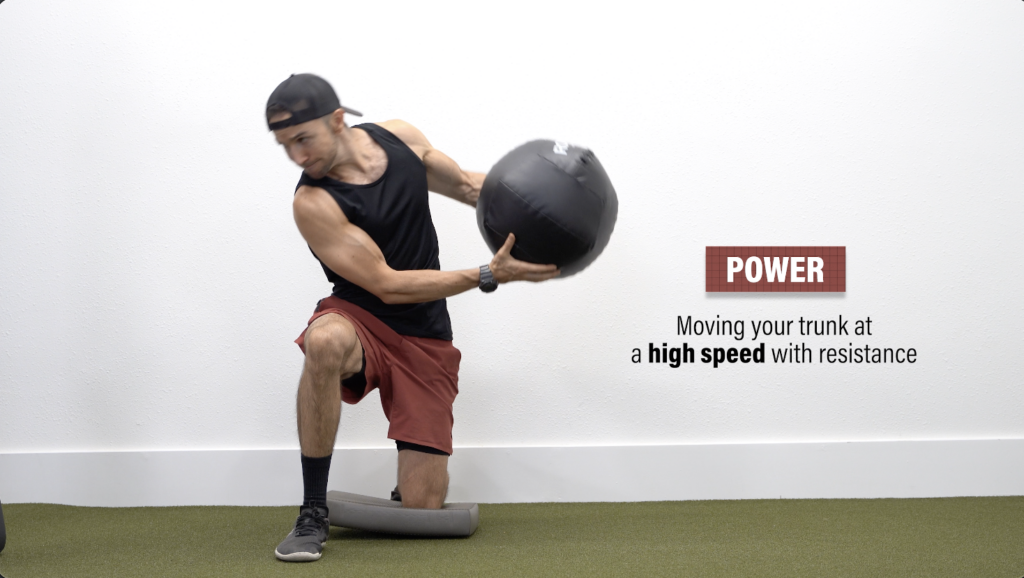
To emphasize flexion, you can perform a standing medicine ball slam or try a tall kneeling overhead throw against a wall. Your goal is maximal effort each throw for 3 sets of 6-10 reps.
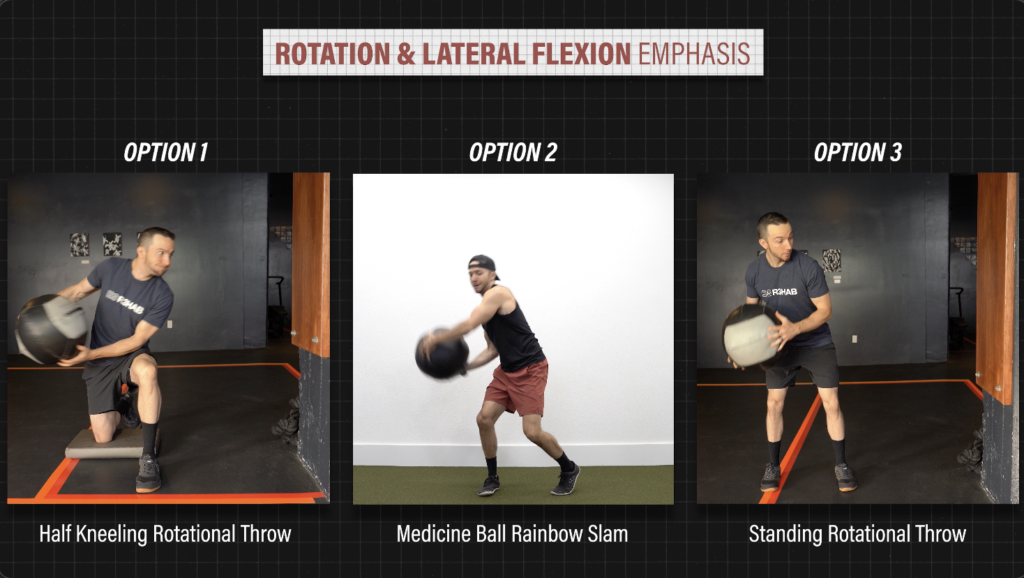
And finally, for rotation and lateral flexion, you can perform a half kneeling or standing rotational throw against a wall or a medicine ball rainbow slam. For either, aim for 3 sets of 6-8 reps on each side.
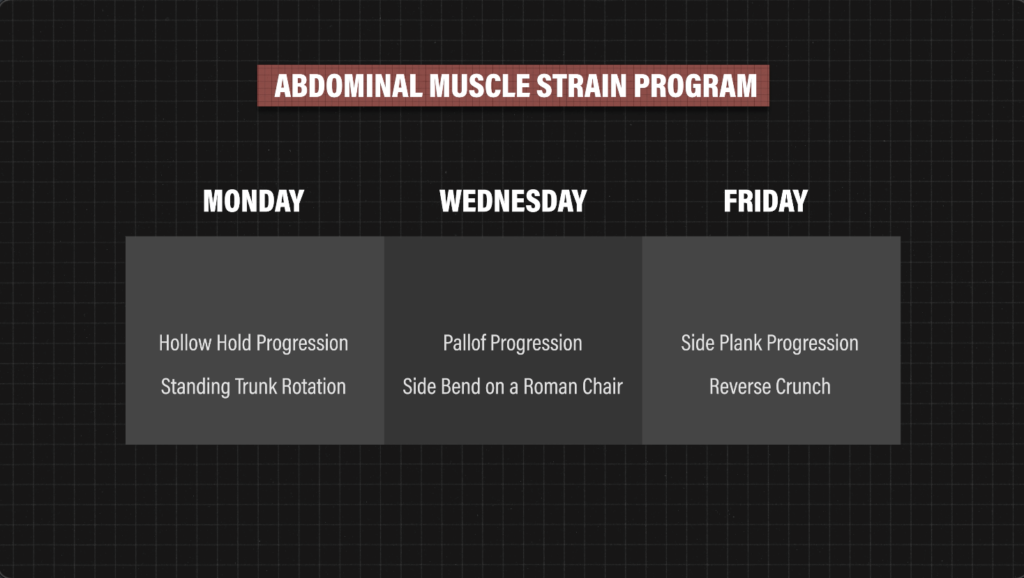
Abdominal Muscle Strain Programming
Here is an example of how you can program these exercises following an abdominal muscle strain.
Start with an isometric progression 2-3 times a week to introduce early loading. For example, you can work through the hollow hold progression on Monday, the pallof progression Wednesday, and the side plank progression on Friday.
Once tolerated, add isotonic variations. This could be the cable rotation on Monday, side bend on a roman chair on Wednesday, and the reverse crunch on Friday.
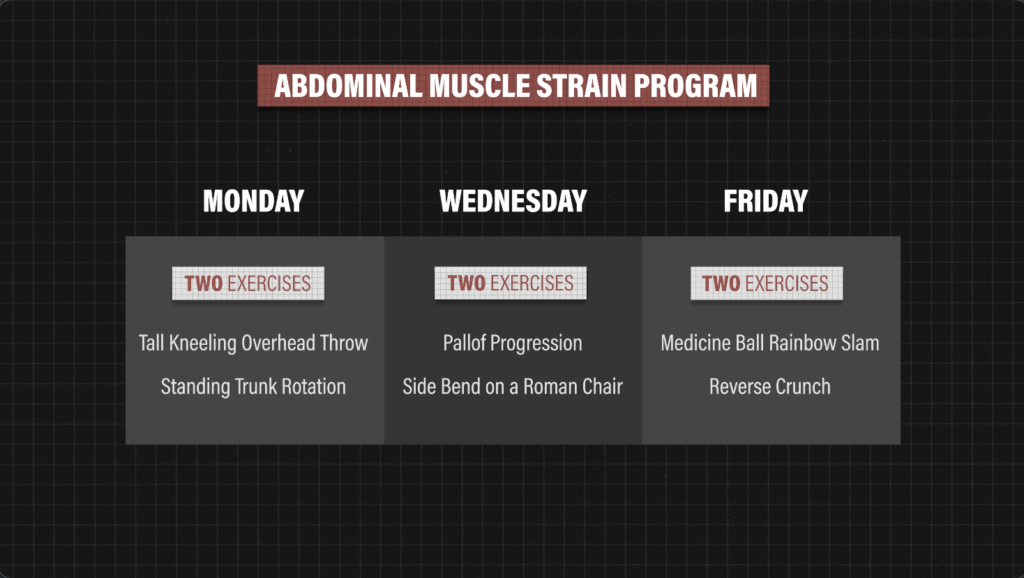
If you are looking to return to a specific sport, eventually you want to incorporate power exercises 1-2 times a week.
Since each category provides a different stimulus, you can continue to include the isometrics even if you’ve progressed to the power exercises. You might vary your exercise selection slightly each week to be as comprehensive as possible, while still aiming for 2 exercises per training session.
Perform this for at least 12 weeks, progressing the difficulty of exercises as you can.
This is just one example. How you program the exercises can vary depending on the severity of your injury, training history, etc, but essentially, you want to find a tolerable starting place, progress difficulty over time, and build up to a level appropriate for your goals.
Abdominal Muscle Strain Summary
In summary, an abdominal muscle strain can occur to either the rectus abdominis, internal or external oblique muscle, and may limit your ability to move and perform activities that involve flexion, rotation, and or lateral flexion.
Therefore, the goal of rehab is to improve your strength, capacity, and range of motion in these specific directions by incorporating isolated trunk exercises about 3 times a week. Examples include isometric, isotonic, and power variations.
These exercises will follow a continuum, which gradually introduces more trunk motion, higher loads, and increased speeds. Find an appropriate starting point, and over time, as your tolerance improves, slowly move toward the right side of the continuum, going as far as you need for your goals.