The purpose of this blog is to discuss how to assess and improve knee extension range of motion in a simple, safe, and efficient manner.
Looking to improve your strength, range of motion, and power to enhance your function and performance? Check out our Knee Resilience program!
Why is Knee Extension Important?
Ask any physical therapist and they’ll tell you how important it is to regain knee extension range of motion after an injury or surgery such as an ACL reconstruction (ACLR), meniscectomy, or total knee arthroplasty. I don’t disagree at all, but the research to suggest that normalizing knee extension improves function, performance, and the longevity of the joint is scarce.
There are two studies by Shelbourne in 2009 and 2012 that demonstrate that long-term range of motion deficits after ACLR are associated with worse subjective and objectives measures, such as increased radiographic arthritic changes and reduced quadriceps strength. However, no negative associations were reported in a recent study by Ithurburn et al. 2019.
Why am I questioning the importance of normalizing knee extension? I’m not! I just think it’s important to explore the current data. I am always going to do my best to help my patients restore their normal knee extension range of motion.
Assessing Knee Extension
A physical therapist does not leave home without their trusted goniometer. It is what we learn to use to measure the range of motion of various joints, but not everyone has a goni or wants to fuss with one. While it’s recommended to always get assessed by a licensed healthcare provider, there are some simple strategies for measuring your own knee extension at home to document progress. Here are step-by-step directions for performing a self-assessment:
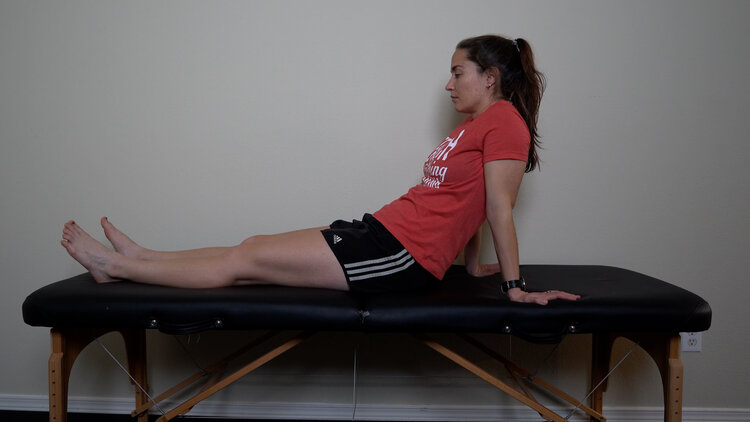
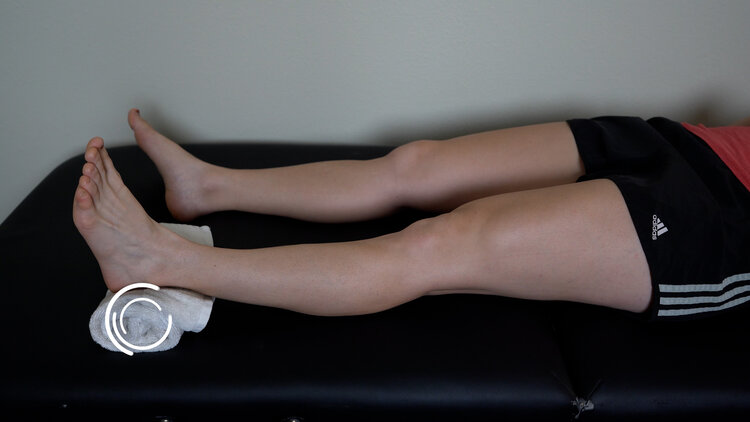
- Lie down or sit upright with hand support on a flat surface. Do not assess your range of motion on a couch or bed.
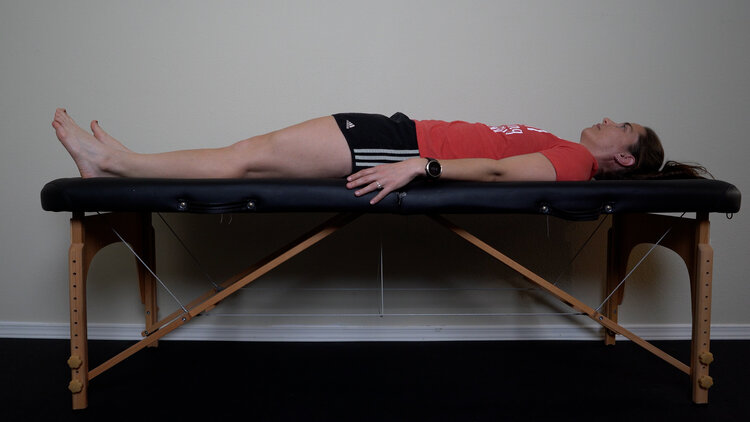
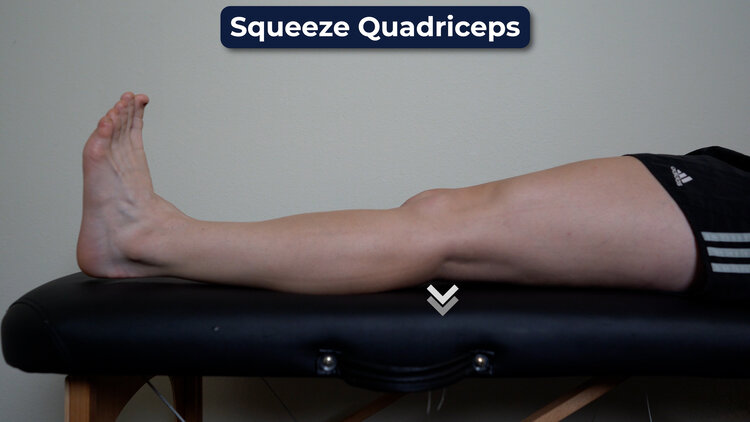
- With your toes facing up toward the ceiling, squeeze your thigh muscles (quads) while aiming to press the back of your knee into the floor or table.
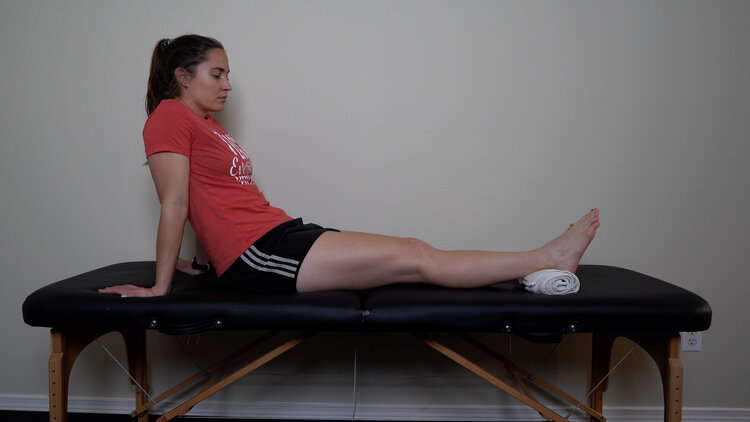
- If the back of your knee easily touches the surface or you have a large calf, prop your heel on an elevated surface such as a rolled up towel. Repeat step 2 and continue to elevate the heel as much as needed.
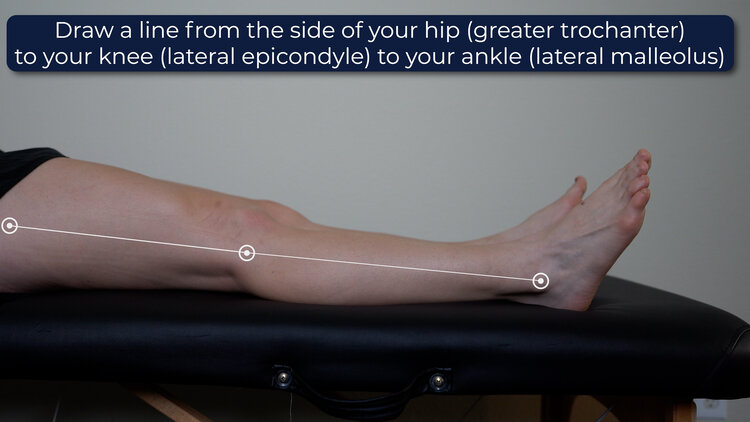
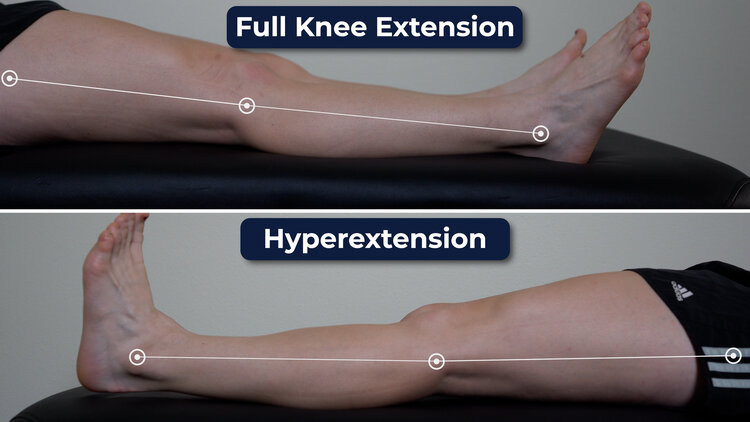
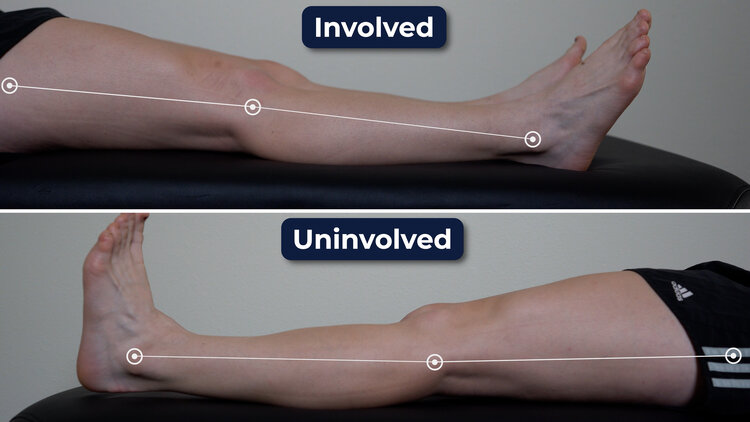
- Take a picture or video from the side at eye level. Draw a line from the hip to the knee to the ankle. If you were being precise, the line would be drawn from the greater trochanter to the lateral epicondyle of the femur to the lateral malleolus. If the knee is perfectly straight, that’s considered full knee extension. If you can go further than that, that’s considered hyperextension. Compare side to side.
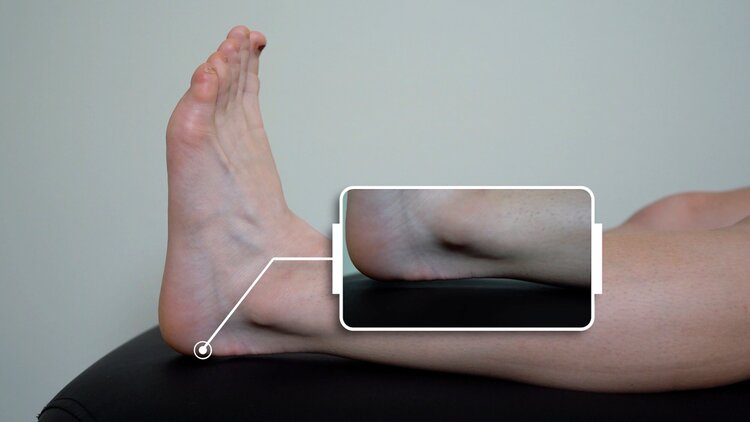
- Another option is squeezing the quads when the leg is flat and seeing how high the heel elevates from the table or floor.
How Much Knee Extension Do You Need?
Ideally, the same amount as your uninvolved side. If you can achieve 5 degrees of hyperextension on your uninvolved side, then your goal is to regain 5 degrees of hyperextension on your involved side. You’re aiming for symmetry. If you’ve had surgery on both sides or your uninvolved side isn’t a good reference due to a prior injury, then I would recommend, at the very least, aiming to get the knee completely straight.
Exercises
There are two things that I want to emphasize about the exercises: do them early and do them often. Put rehab at the top of your priority list! There is some evidence to suggest that early outcomes are related to later progress.
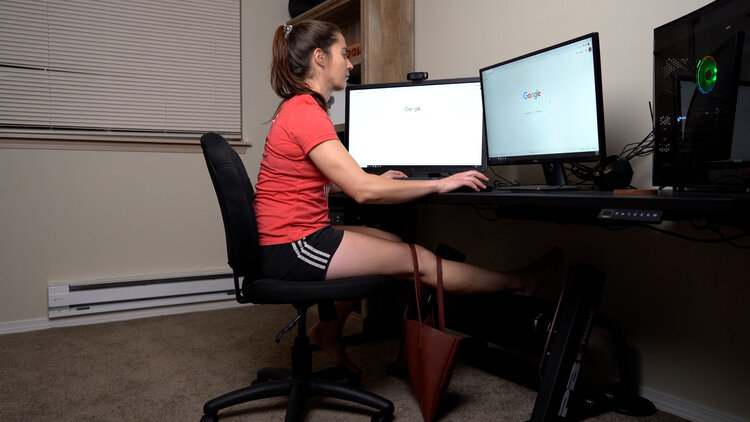
- The absolute easiest thing that you can do throughout the day, every single day, is active quad contractions. I’ve never had anyone overdo this. If you’re sitting in your office chair and you think of it, scoot forward, straighten your knee, squeeze your quads for 10 seconds, relax, and repeat 10 times. Just finished a meal? Before you get up, straighten your knee, squeeze your quads for 10 seconds, relax, and repeat 10 times. Watching sports? Every time there’s a commercial break or a timeout, squeeze your quads for 10 reps of 10 seconds. You get the idea. Super simple.
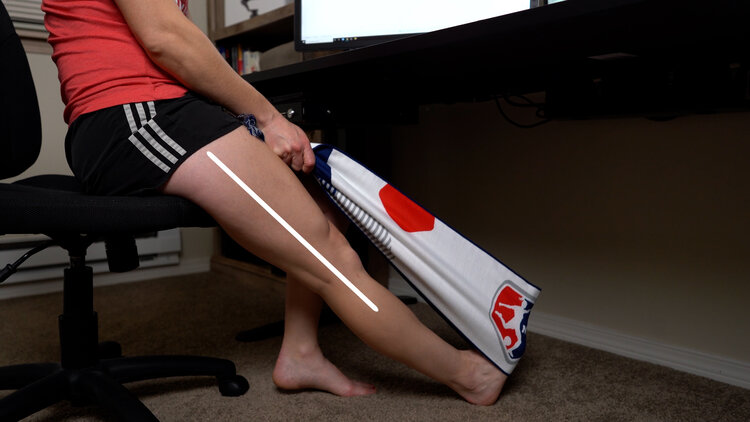
- If you need to intensify the movement because your range of motion is improving so much, you can use a towel or some other object to aid in creating a calf stretch while straightening the knee as you contract your quads.

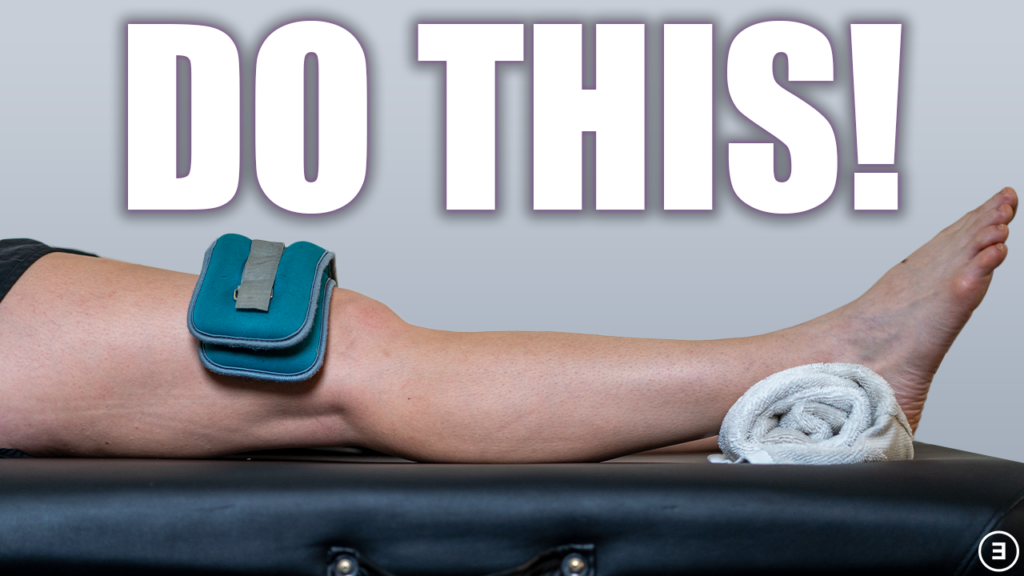
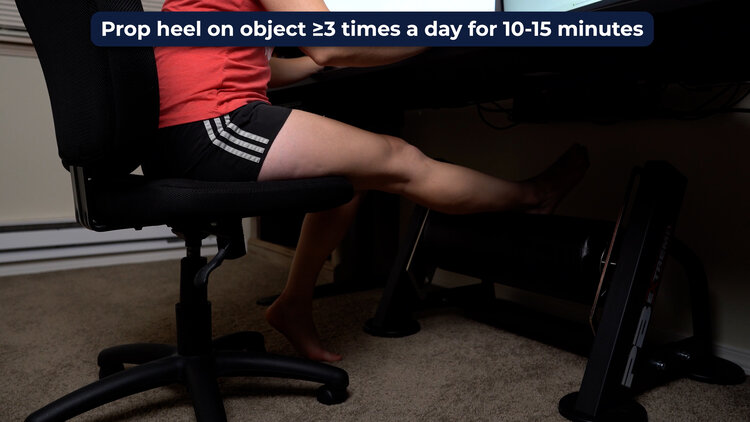
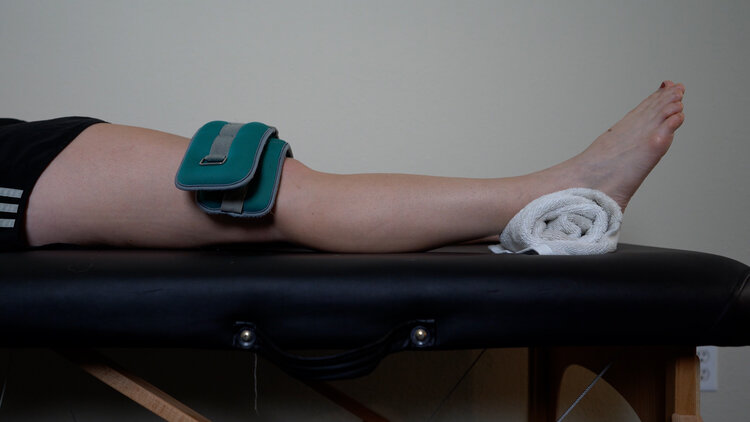
- The other thing that you want to do is prop your heel on a towel at least 3 times per day for 10-15 minutes. Remember this phrase, though: low load, long duration. You do not want to be writhing in pain for that 10-15 minutes. You want to create a stretch that might feel a little uncomfortable, but it’s tolerable for that entire 10-15 minutes. If you’re holding back tears or gritting your teeth, that’s too much and it’s counterproductive. Try to keep the toes pointing up and relax into the position. Contract your quads periodically throughout or follow up with active quad contractions and generalized movement (it may feel stiff after).
- You can progress the movement by increasing the frequency, duration, height (if needed), or adding weight. You can either add weight directly on top of the thigh or by placing it in a handbag that you place over your leg.
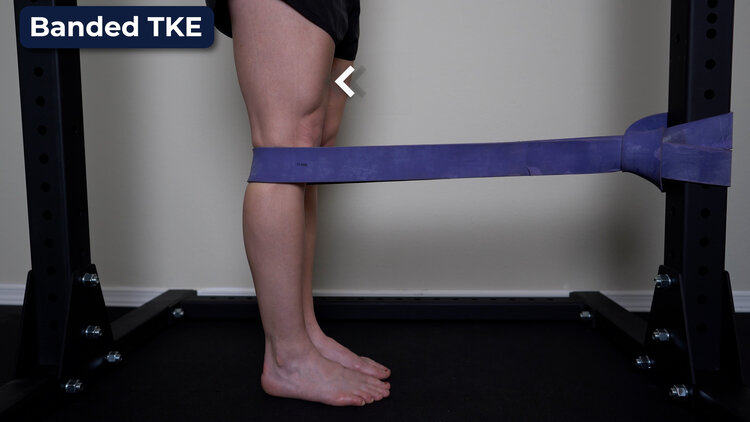
- As you gain strength and control, you can add banded TKEs which are standing quad contractions against resistance. Another great option is retro walking where you’re walking backwards on a treadmill or open space for 10-20 minutes daily or every other day.

Key Takeaways
- Actively contract your quads with a straight knee for 10 reps of 10 seconds frequently throughout the day. Do this while working, studying, eating, or lounging!
- Prop your heel on a towel for 3 sets of 10-15 minutes each day. Contract your quads on and off throughout. Add a weight if needed, but make sure the stretch is tolerable the entire time.
- As function slowly improves, add banded TKEs and retro walking and don’t forget to just strengthen the quads in general! Here’s a “Total Hip Replacement Exercise Progressions” video I made that has many useful tips for early rehab.
Disclaimer
This blog is meant for educational purposes only. Do not initiate any new exercises without consulting your medical doctor. This information is not medical advice.