
Do you get shin pain from running, jumping, playing sports, or doing other activities? Check out this blog to learn everything you need to know about shin splints, including exercise progressions with exact sets and reps.
Looking to improve the strength, range of motion, and stability of your ankles to enhance your function and performance? Check out our Ankle Resilience program!
Medial Tibial Stress Syndrome (MTSS)
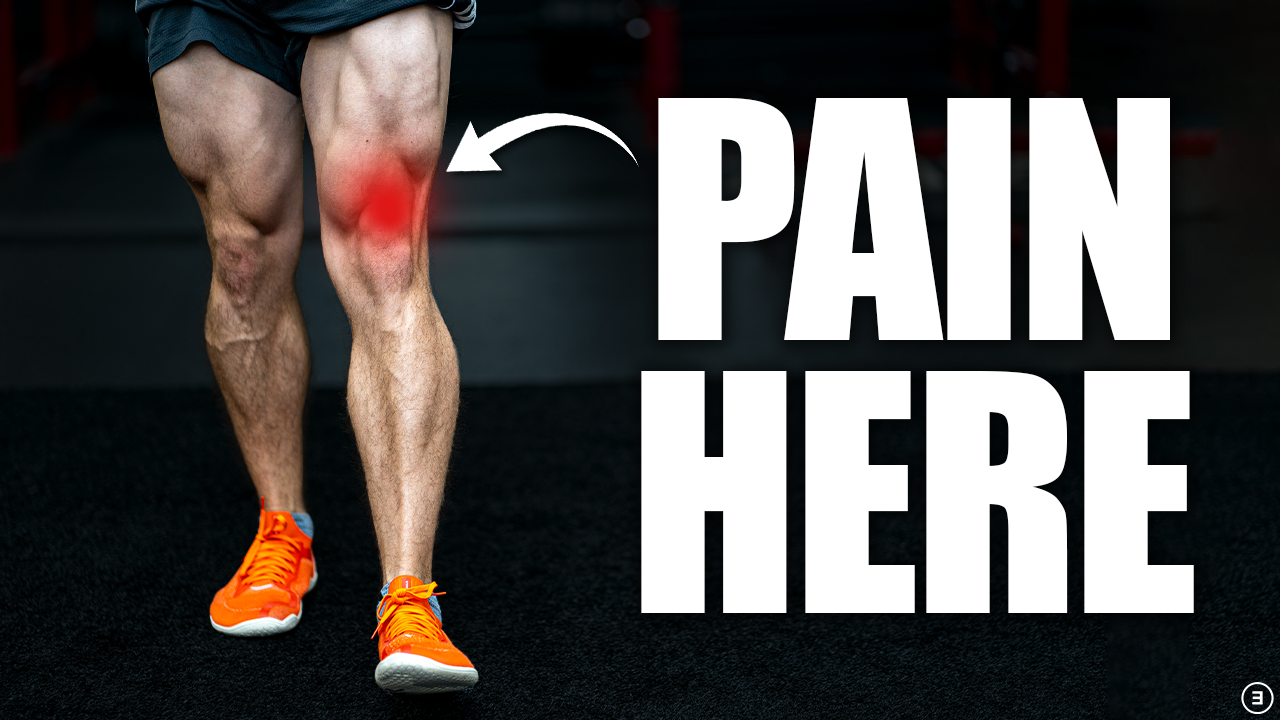
In the medical community, shin splints are referred to as medial tibial stress syndrome which is a fancy way of saying that the inside of your shin hurts. A stepwise process for assessing the condition was developed by Winters et al in 2017:
1. Do you have pain with exercise along the inner portion of your shin?
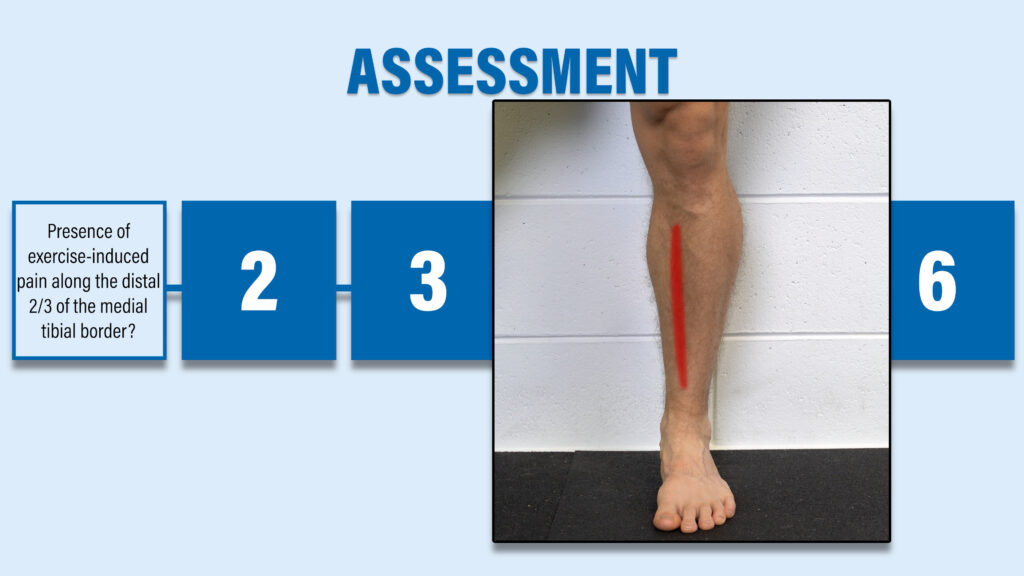
2. Is your pain worse with physical activity and better with rest?
If you answered “no” to either of those questions, you probably don’t have shin splints.
3. Do you have cramping or burning pain in your calf?
4. Do you have numbness or pins and needles in your foot during exercise?
If you answered “yes” to either of those questions, you may have to consider other diagnoses such as chronic exertional compartment syndrome.
5. Do you have recognizable pain on palpation that’s greater than 5cm in length?
Shin splints are associated with diffuse pain, whereas stress fractures are associated with focal pain.
6. Finally, do you have signs or symptoms not associated with Medial Tibial Stress Syndrome such as redness or swelling?
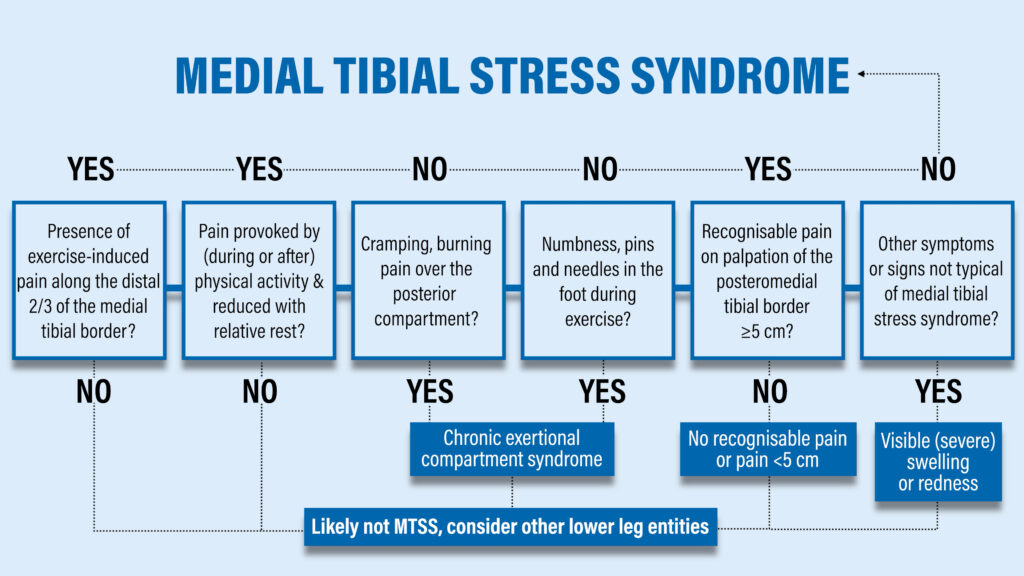
An important finding from this paper is that ⅓ of people with this condition also present with other concurrent lower leg injuries, so shin splints don’t always happen in isolation.
Who Gets Shin Splints? Why?
Papers by Becker et al and Mulvad et al in 2018 show that Medial Tibial Stress Syndrome is the most common running related injury, but the exact nature of the condition isn’t well understood. Recent research by Winters et al in 2018 suggests that it may be a bone overload injury. Running stresses bones through the muscle contractions that occur, as well as from the impact of landing. Loading causes microdamage and remodeling happens, which is normal and can lead to stronger, denser bone.
However, MTSS is thought to occur when that bone loading exceeds your ability to positively adapt. Warden et al in 2021 refer to this as an error in workload, which means that your weekly running speed, distance, and/or frequency were more than what you could handle.
The most important thing to understand is that the poison is also the antidote. Rehab is about finding the optimal amount of loading that will induce beneficial adaptations.
Load Management & Activity Modifications for Shin Splints
If you have pain with your day-to-day activities like walking or going up and down stairs, you’re doing too much. You may have to cut back on running mileage or intensity, or temporarily put a pause on it altogether. If that’s the case, you want to try to maintain your cardiovascular fitness by performing other non-impact exercises like swimming and cycling. The same thought process would apply to basketball and other sports.
Resistance Exercises for Shin Splints
The resistance exercises are based on recommendations by Winters and Warden et al, research by Becker et al in 2018 that identified hip abductor muscle weakness as a possible risk factor, and the demands of running in general. They are meant to complement your running or cross-training, not serve as a replacement. You would ideally perform the exercises two times per week and keep pain to a 2/10 or less.
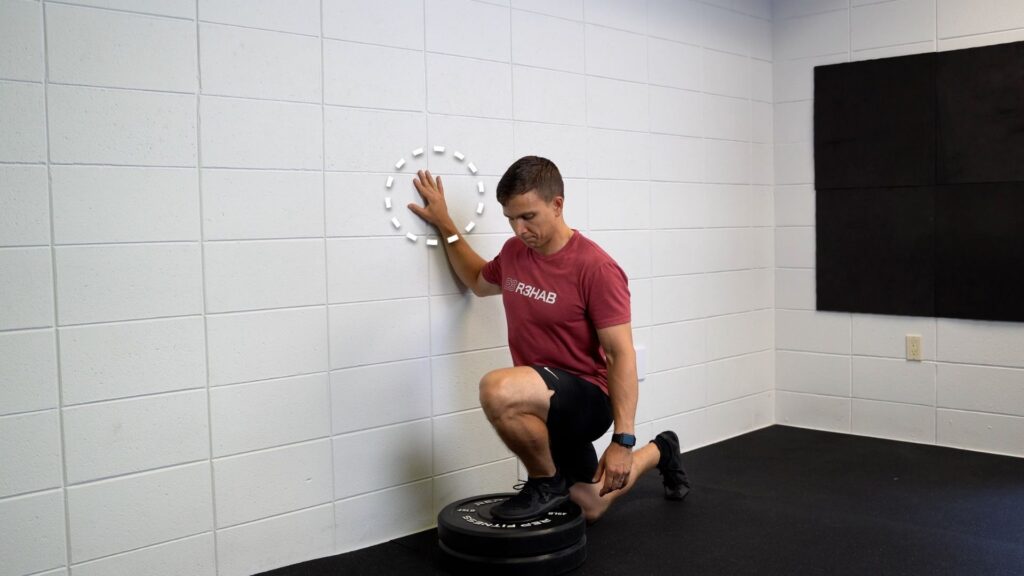
Exercise #1: Front Foot Elevated Split Squat
Start with your front foot elevated 4-8 inches off the ground by using a step, plate, curb, or some other object. Drive your front knee toward the wall in front of you until you can’t lower yourself down any further. You can keep your back knee straight or allow it to bend as needed depending on your available hip extension range of motion.
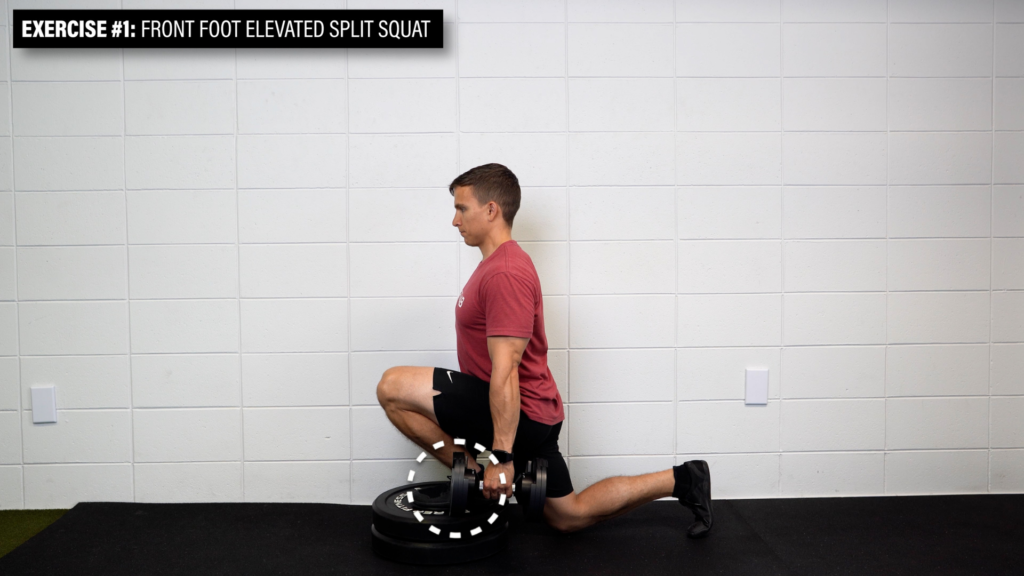
If it’s too challenging, use your hands to help with balance.
Exercise #2: Single Leg RDL w/ Knee Drive
Stand on one leg while keeping a slight bend in both knees, hinge at your hips until your trunk is almost parallel with the ground, and then bring your knee up toward the ceiling. Repeat this movement without touching your foot back to the ground.
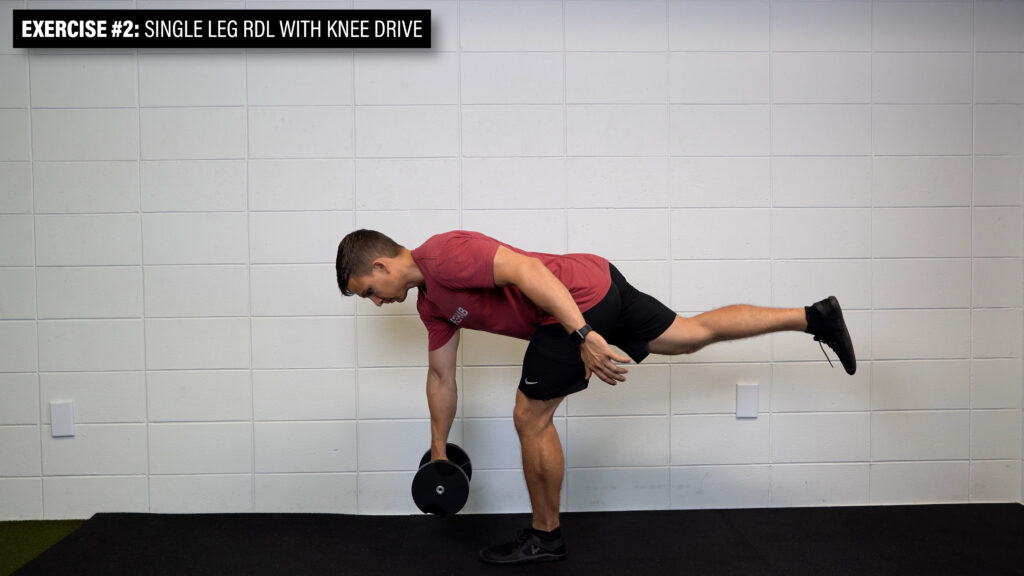
Once again, if this is too challenging, use your hands to help with balance.
Exercise #3: Heel Raise
Stand at the edge of a step on one leg, rise up on the ball of your foot as high as you can, and then lower yourself down until you feel a stretch in your calf.
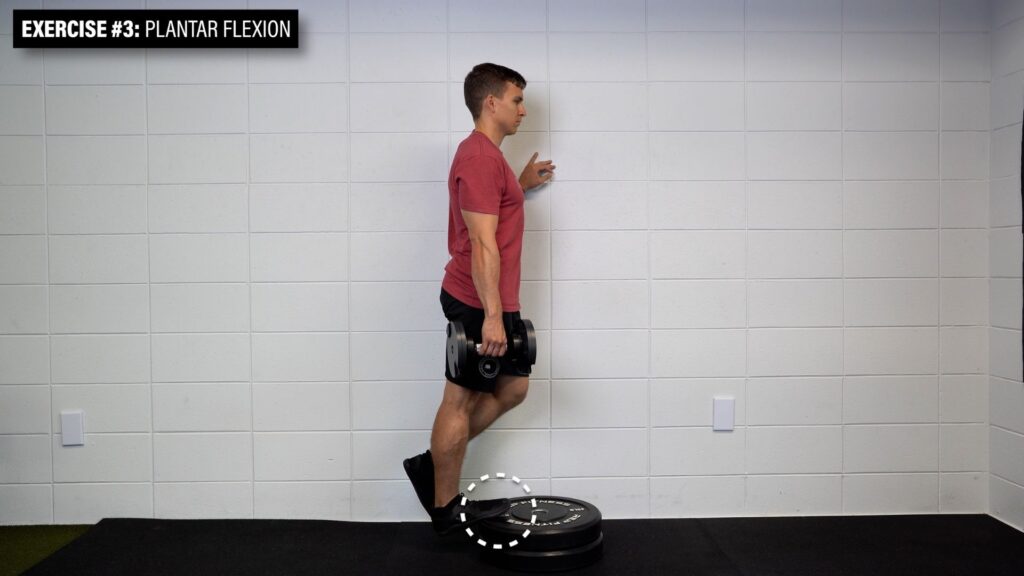
If this is too challenging, use two legs or start on flat ground.
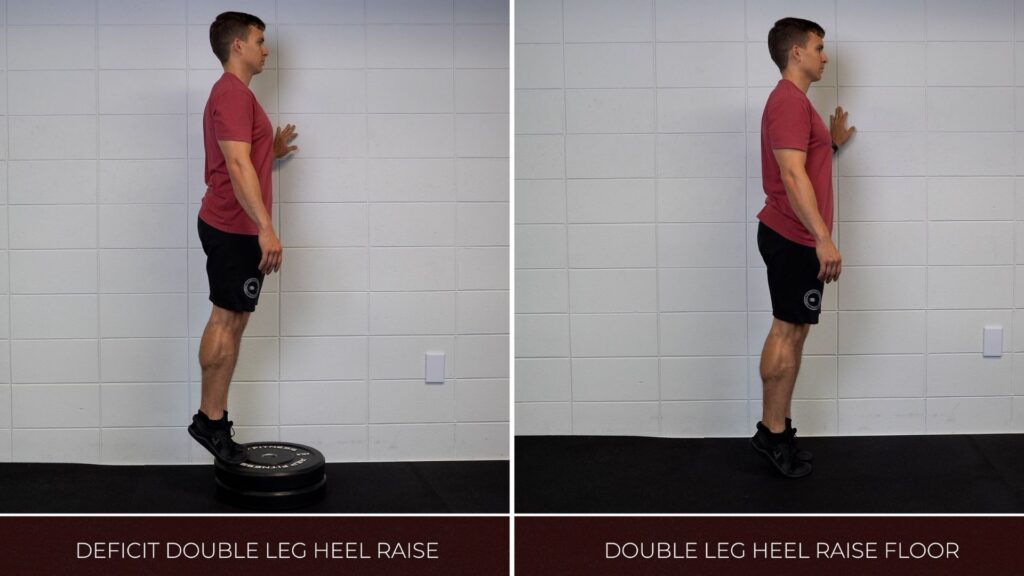
For the first three exercises, aim for 3 sets of 6-15 challenging repetitions at a controlled pace and add weight as needed.

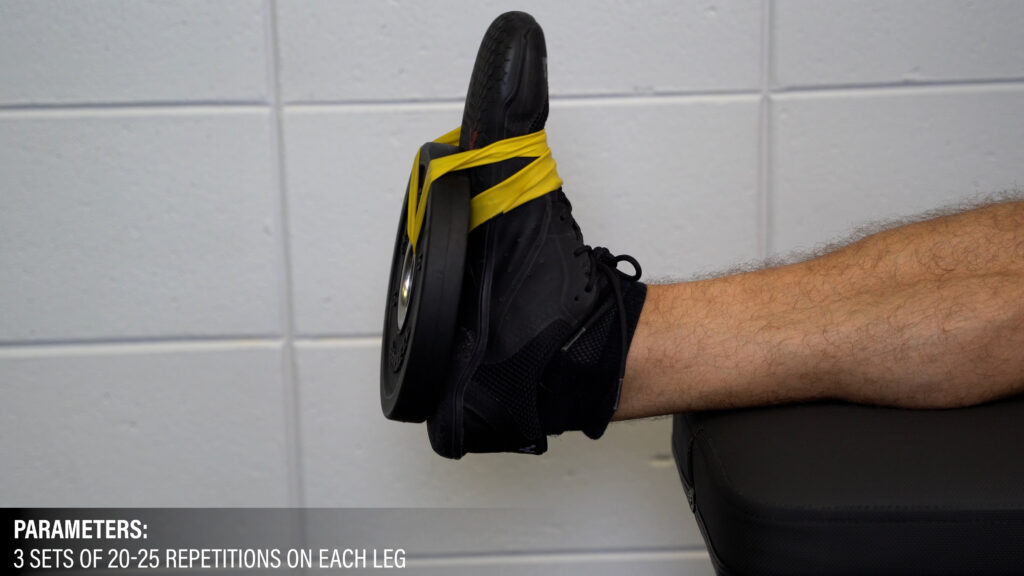
Exercise #4: Dorsiflexion
Sit on a bench with your ankle hanging off the edge, attach a band or weight to your foot, and bring the top of your foot toward your face.
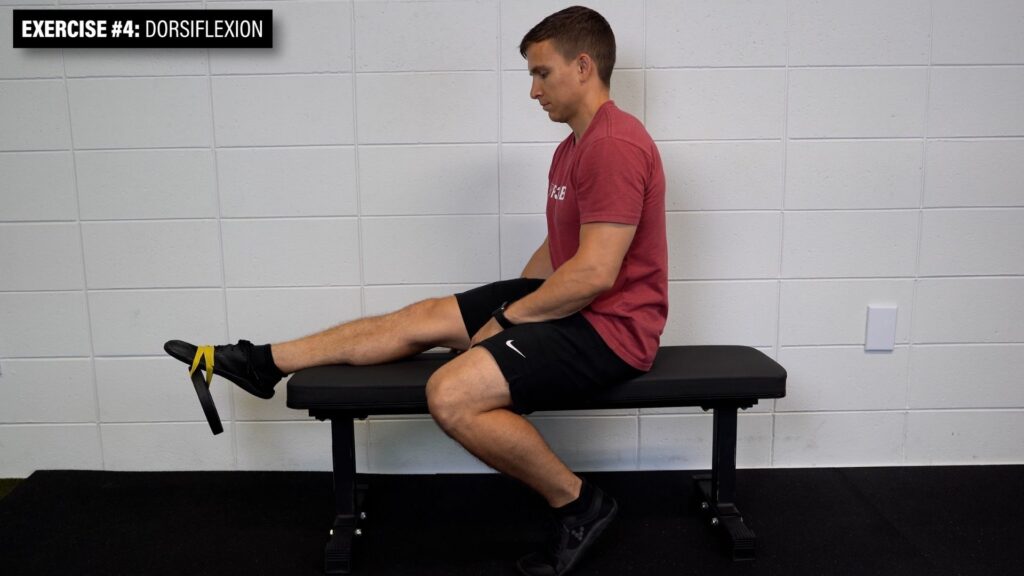
Aim for 3 sets of 20-25 repetitions at a controlled pace.
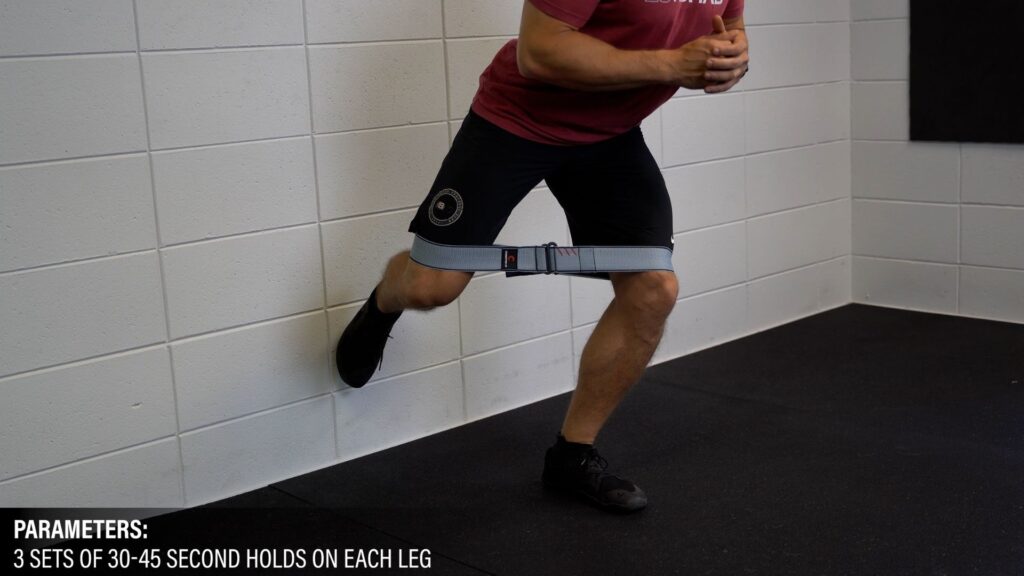
Exercise #5: Standing Fire Hydrant
Stand on one leg with a band around your knees, spread the band by separating your knees, and remain as still as possible.

Aim for 3 sets of 30-45 second holds per leg.
You can also perform non-weightbearing exercises such as leg extensions and leg curls if weightbearing exercises are not tolerable initially.
Plyometric Exercises for Shin Splints
At some point in your rehab, you want to implement pain-free plyometric exercises. Here’s a quote from Warden et al in 2021:
“To effect bone health, the loads introduced must exceed those experienced during routine activities (ie, endurance running). A jumping program that (1) applies progressively higher loads, (2) includes few loading repetitions per session, (3) occurs several times a day, and (4) occurs on at least 3 days per week may improve lower extremity bone properties.”
Two options include a maximum vertical jump and lateral jump. The maximum vertical jump can be turned into a tuck jump or completed on one leg. The lateral jumps can be progressed to single limb options that involve obstacles and different planes of motion.
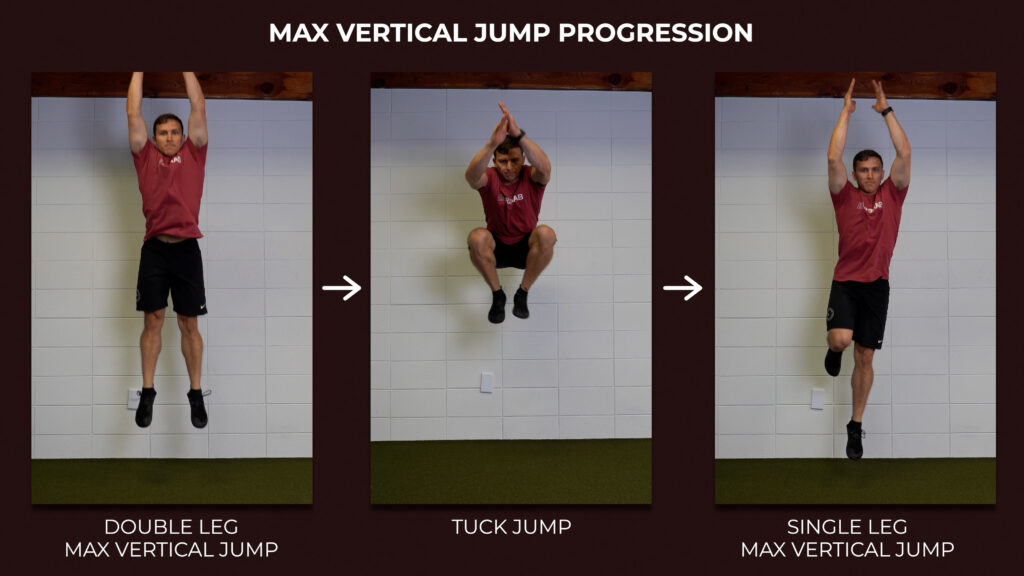
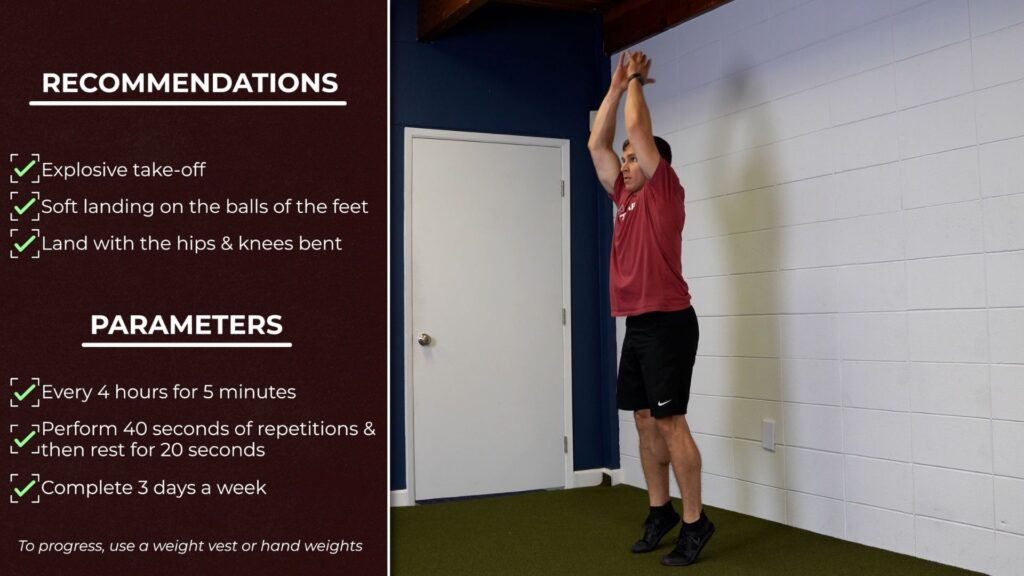
According to the authors, “the exercises should be performed by focusing on an explosive take-off and soft landing on the balls of the feet, with the hips and knees bent. Exercise sets should be performed every 4 hours for 5 minutes (with bouts of 40 seconds of repetitions followed by 20 seconds of rest) at least 3 days per week. All exercises can be progressed with the addition of a weight vest or hand weights.”
Return to Running
The process to get back to your previous level of function requires time, patience, and commitment to a structured plan. Research by Moen et al in 2012 found that it took participants over 100 days to complete a running program that concluded with their ability to run 18 minutes on concrete at a high intensity. In 2019, Winters suggested that rehab may take 9-12 months for someone who has been experiencing symptoms for 3 months or longer. I’m telling you this so you set realistic expectations.
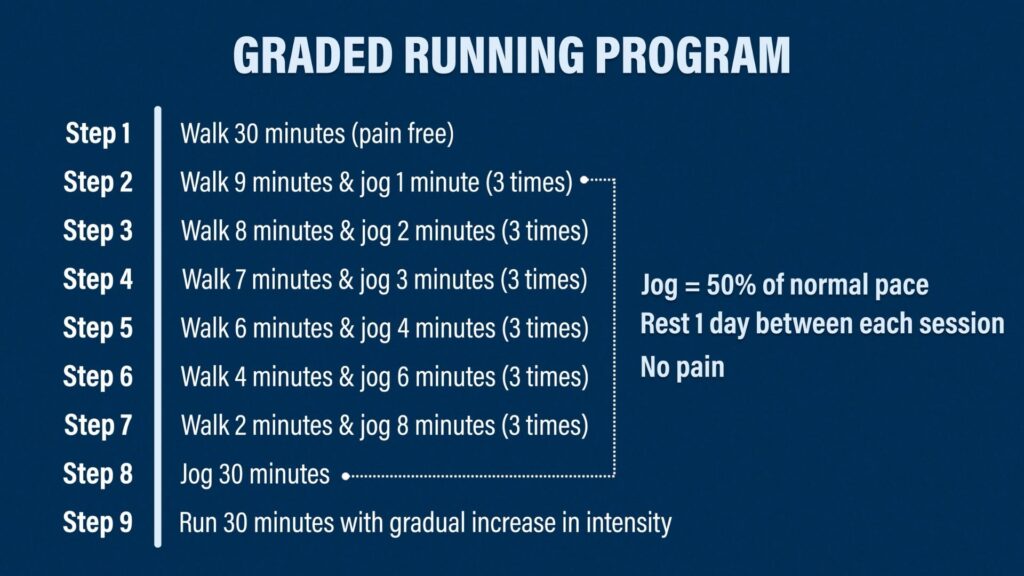
Warden et al in 2014 proposed a graded running program for individuals with a bone stress injury.
Step #1: Walk for 30 minutes pain free.
Step #2: Walk for 9 minutes, jog for 1 minute, and repeat 2 more times.
Step #3: Walk for 8 minutes, jog for 1 minute, and repeat 2 more times.
You’ll repeat this process until you’re able to jog for 30 minutes continuously. The authors note that it’s more important to increase your volume, or time spent running, before increasing intensity, or the speed at which you run. Therefore, the jogging during the walk/jog progression should be done at 50% of your normal pace. Also, you should take a rest day between sessions and running should be pain-free.
Once you’re able to accomplish 30 minutes of jogging, you’ll just slowly ramp up the intensity until you can run 30 minutes at your normal pace.
From there, you’ll want to evaluate your previous program to determine how it might have contributed to the injury in the first place.
Gait Retraining
Prospective research by Luedke et al in 2016 and Kliethermes et al in 2021 found that a “lower running step rate was associated with a greater likelihood of shin injury” or bone stress injury. The “optimal” rate is suggested to be somewhere around 180 steps per minute, but it’s going to vary from person to person. One easy thing you can do is increase your step rate by 5% and then titrate up or down from there as needed.
Guidelines, Not Rules
Please understand that this video is providing guidelines, not hard and fast rules. Not everyone needs to change their step rate or perform all of the exercises listed. You can discuss this information with your physical therapist to determine the best plan that meets your individual needs. Also, things like Relative Energy Deficiency Syndrome, as discussed by Mountjoy et al in 2014, can have adverse consequences on bone health, so you may need to discuss with your medical doctor or other healthcare professional about nutrition, supplementation, medication, etc.