The purpose of this blog is to discuss Turf toe and provide a comprehensive framework for rehabilitation. This includes exercises, management strategies, and a guideline for return to sport.
Looking to improve the strength, range of motion, and stability of your ankles to enhance your function and performance? Check out our Ankle Resilience program!
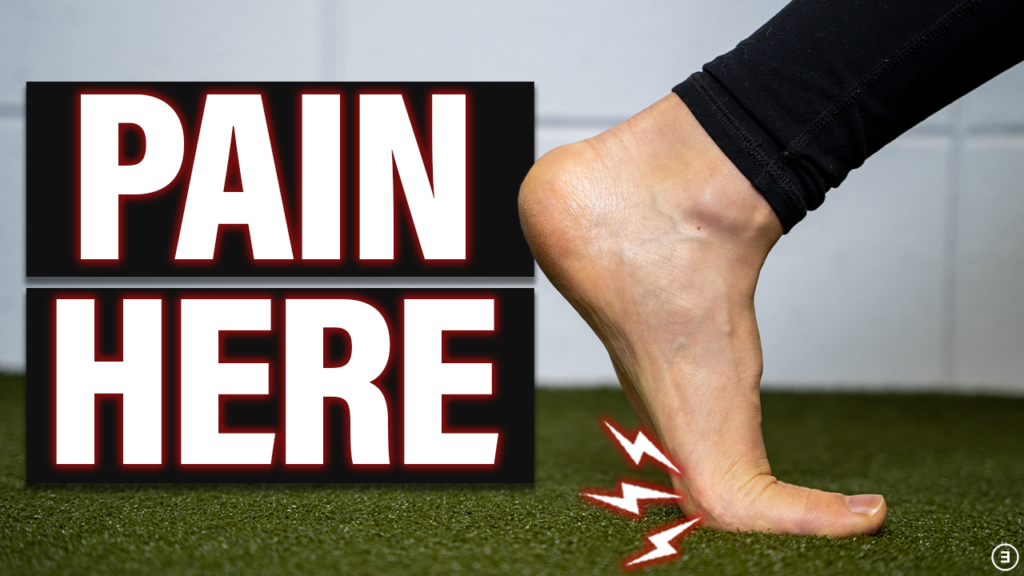
Turf Toe
Turf toe, in its simplest form, is a sprain of the ligaments and/or the joint capsule on the plantar surface, or bottom side, of the big toe joint. However, some severe cases may also include an injury to the tendons, sesamoid bones, or even result in a fracture or dislocation (Coughlin et al. 2010, McCormick & Anderson 2009)
Mechanism of Injury
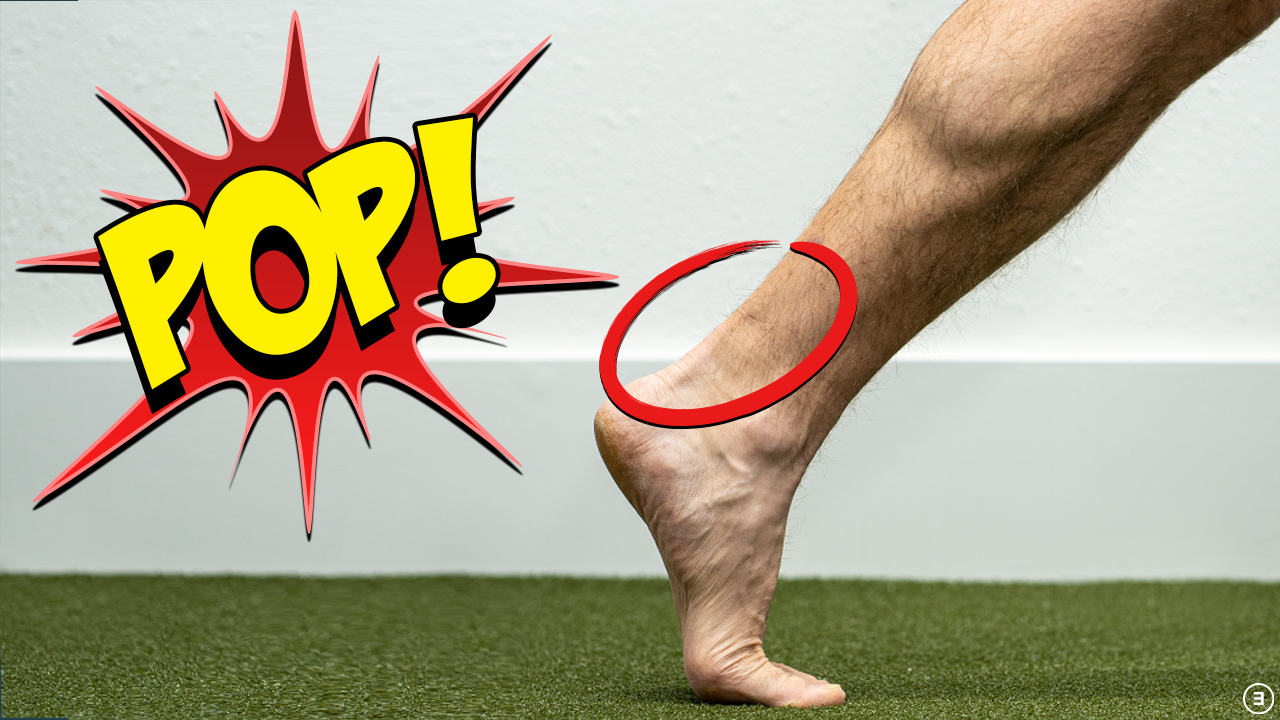
Turf toe most commonly occurs when an external force is applied to the back of a foot fixed on the ground, driving the big toe into hyperextension. For example, in football this usually occurs when a player falls onto the back of another player’s foot. It can also occur during cutting and push-off maneuvers, a similar mechanism which occurred to Patrick Mahomes in 2020, but this is less common.
Turf Toe Classification
Anderson 2002 classified turf toe into 3 grades based on clinical signs & symptoms and imaging findings.
Grade 1 injuries often present with mild swelling and joint tenderness, and show no signs of structural damage on imaging.
Grade 2 and 3 injuries will also present with swelling and joint tenderness, but have additional findings of bruising, a decrease in big toe range of motion, and an antalgic gait (a hesitancy to push off during walking secondary to pain). These will also show signs of tissue damage on an MRI scan.
Turf Toe Rehabilitation Overview
Due to the small size of the joint, an injury to this area is often brushed aside as being insignificant. However, the big toe plays a pivotal role in your ability to run, jump, cut, and change directions, so proper management and treatment is key.
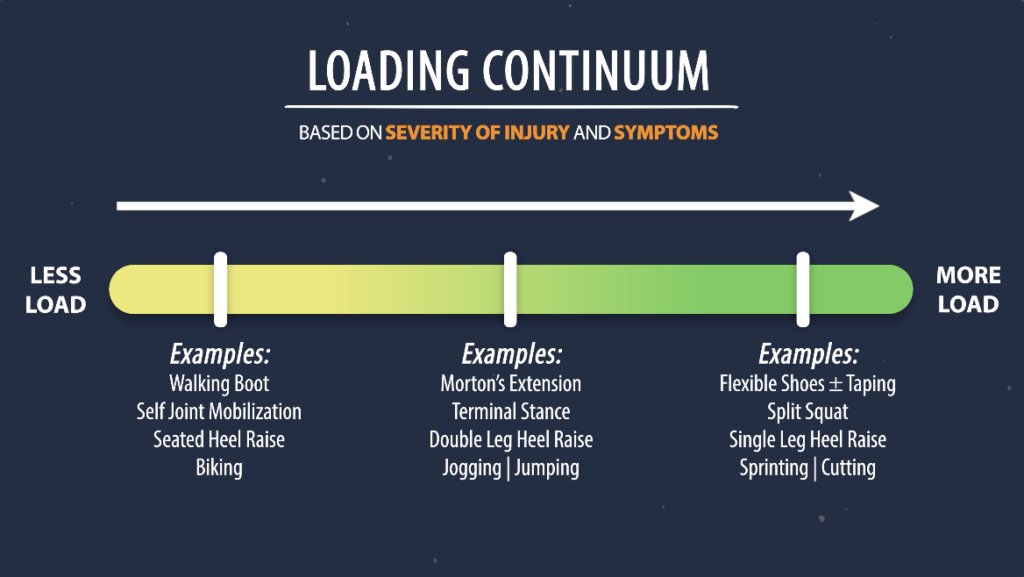
In general, rehab for turf toe will follow a loading continuum. It often begins with a period of unloading, and over time, progresses by gradually increasing the load placed through the big toe joint.
This continuum will likely be dictated by severity of injury and symptoms. For example, with more severe cases or when pain is high, your tolerance to load will likely be low. Then, as symptoms calm down, your tolerance to exercises and activities, which place higher loads on the big toe joint, will increase.
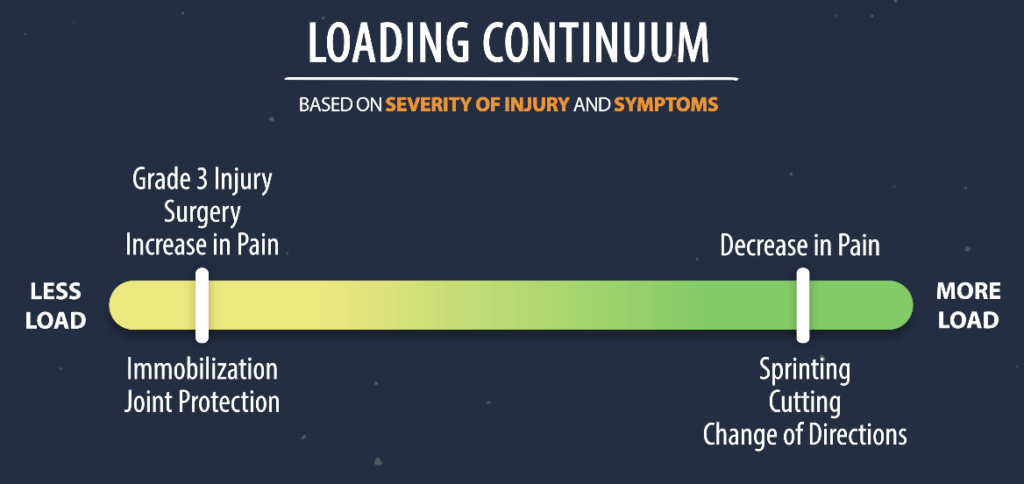
Since treatment options vary widely based on the individual, severity of injury, sport, sport position, etc, I am going to provide guidelines which follow this loading continuum. This will allow you to self-guide your rehab based on your tolerance and individual needs.
Options will include strategies for joint protection, exercises for improving range of motion, strength, and balance, and a progression for safely returning to sport.
Joint Protection
The goal is to restrict big toe extension during walking and other activities in order to manage pain and let sensitive tissues calm down.
In the initial days or weeks following a more severe injury, a walking boot or splint, with or without crutches, is used to immobilize and offload the joint.
In less severe cases, or as symptoms subside, orthotics, shoe inserts, taping, or stiffer shoes can be used to limit big toe extension.
And finally, as pain decreases and tolerance to activity improves, you can gradually transition back to a more flexible shoe. However, as you return to sport, you may continue using shoe modifications, an insert, or taping, if desired.
Big Toe Extension Range of Motion
Big toe extension can range anywhere from 55 to 80° (Frimenko et al 2012). At minimum, you should aim to restore range of motion that is equal to your uninjured side. This will help reduce risk of reinjury and prepare you for the demands of your sport.
Here are three levels based on the load placed through the big toe. Find an appropriate level which you can perform without pain, and progress over time.
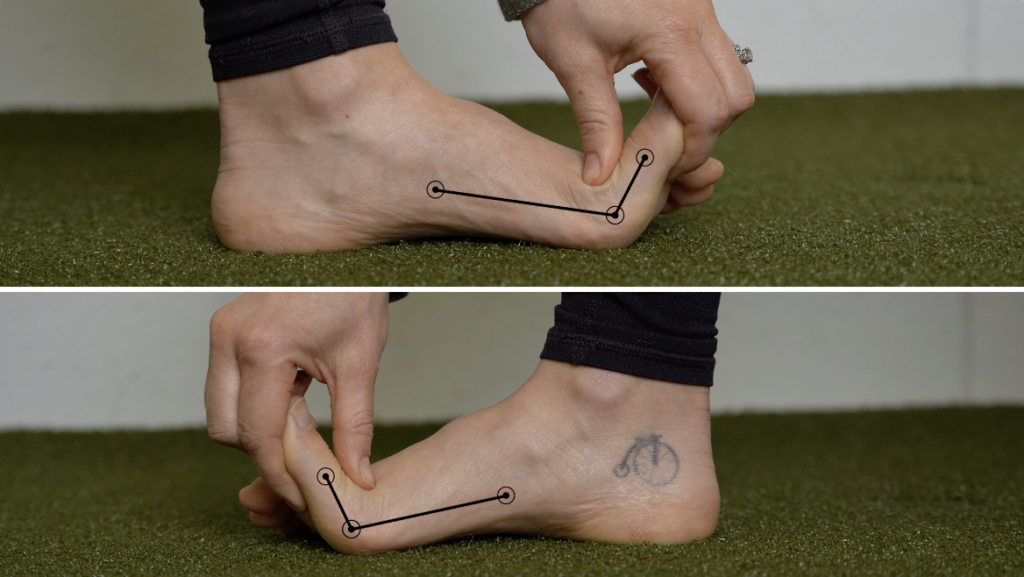
Level 1: Self joint mobilization.
Start by stabilizing the base of your big toe with one hand, while you use the other hand to pull the big toe into an extended position as far as comfortable.
Repeat this motion for 2-3 sets of 15-20 repetitions, 2 to 3 times a day, or as tolerated.

Level 2: Terminal stance.
Stand in a split stance with both feet pointing straight ahead, and shift your weight onto the lead leg. While keeping the big toe joint on the ground, lift your back heel as far off the ground as you can without pain, moving the big toe into extension.
Repeat moving in and out of this position for 2-3 sets of 15-20 repetitions, 1-2 times a day, or as tolerated.

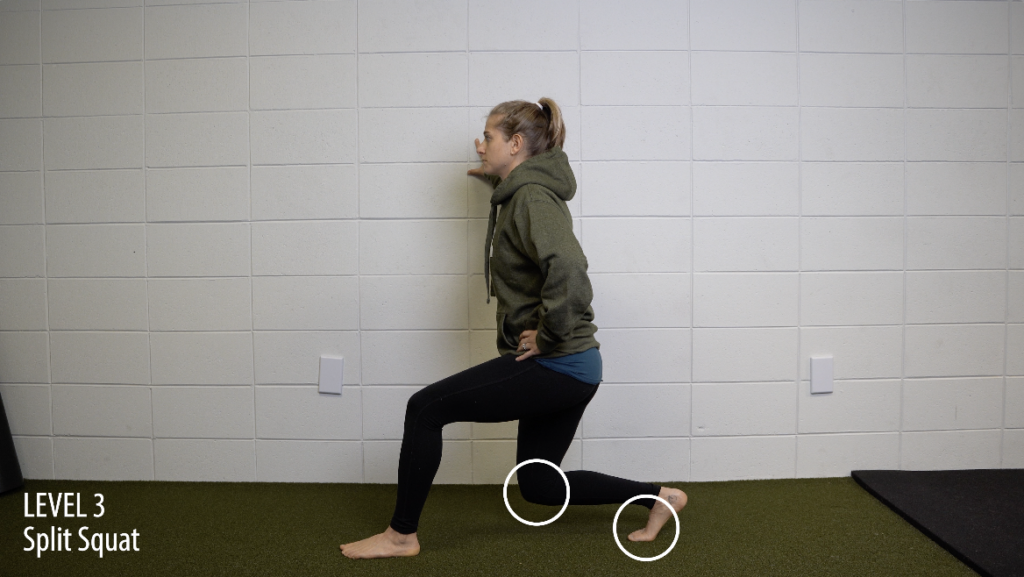
Level 3: Split squat.
Stand in a split stance and slowly lower your back knee toward the ground, moving the rear toe into extension. Unlike a standard split squat, the goal here is to eventually shift a majority of your weight onto the back leg in order to increase load through the big toe. Try and keep the big toe joint on the ground throughout the full movement.
Perform for 2 to 3 sets of 10-15 repetitions, every other day, or as tolerated.
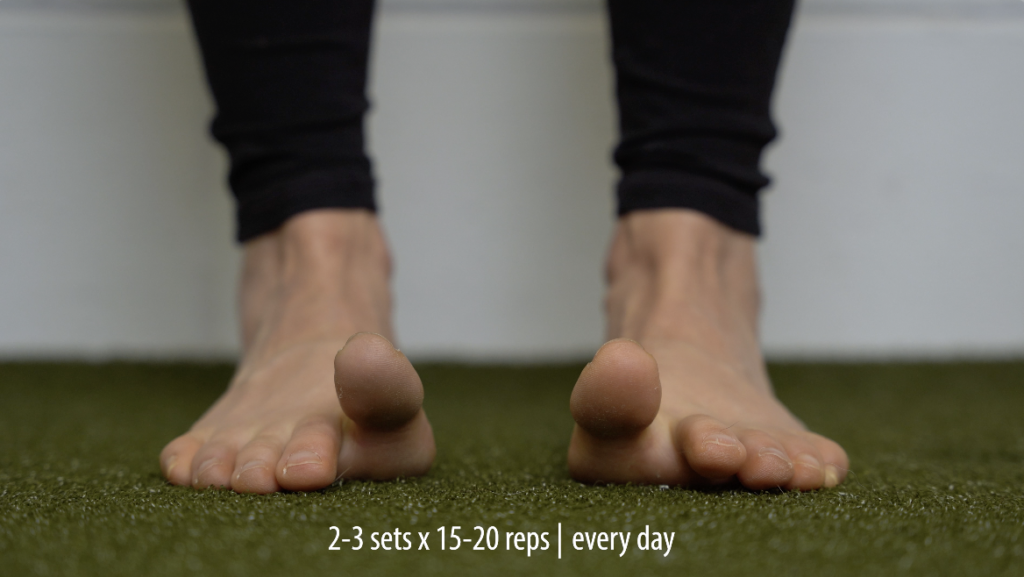
Active big toe flexion.
In addition, you should also perform active big toe extension, as soon as possible following injury.
With your foot flat on the ground, actively lift your big toe up as far as you can without pain, while keeping your other 4 toes on the ground. Early on, this might not be very high, but eventually you want to be able to move into as much active extension as your uninjured side.
Do this for 2-3 sets of 15-20 repetitions, every day.
Calf Strength
Heel raises will help maintain or improve the strength and capacity of your calf complex, while also increasing your tolerance to loaded toe extension.
Here are three levels based on the load placed through the big toe. Find an appropriate level which you can perform without pain, and progress over time.
Level 1: Seated double leg heel raise.
Sit with knees bent to about 90°. Keep your big toe joint on the ground and lift your heels as high as tolerable. Perform for 3 sets of 20-25 repetitions, every other day.
Level 2: Standing double leg heel raise.
Stand with hands supported on a wall and lift your heels as high as you can without pain, while keeping equal weight on both feet. Perform for 3 sets of 20-25 repetitions, every other day.
Level 3: Standing single leg heel raise. Stand on one leg and rise up as high as possible. Slowly lower down and repeat for 3 sets of 10-15 repetitions on each leg, every other day. Overtime, you can add weight if tolerated.

For either of these levels, if the movement is too painful, you can try to shorten the range of motion you move through. However, the goal is to move through full toe extension without pain before progressing to the next level.
Optional Exercises
In more severe cases when there is prolonged immobilization, balance and toe flexion exercises can be an additional consideration. These should be performed without pain and can be implemented as soon as tolerated following an injury.
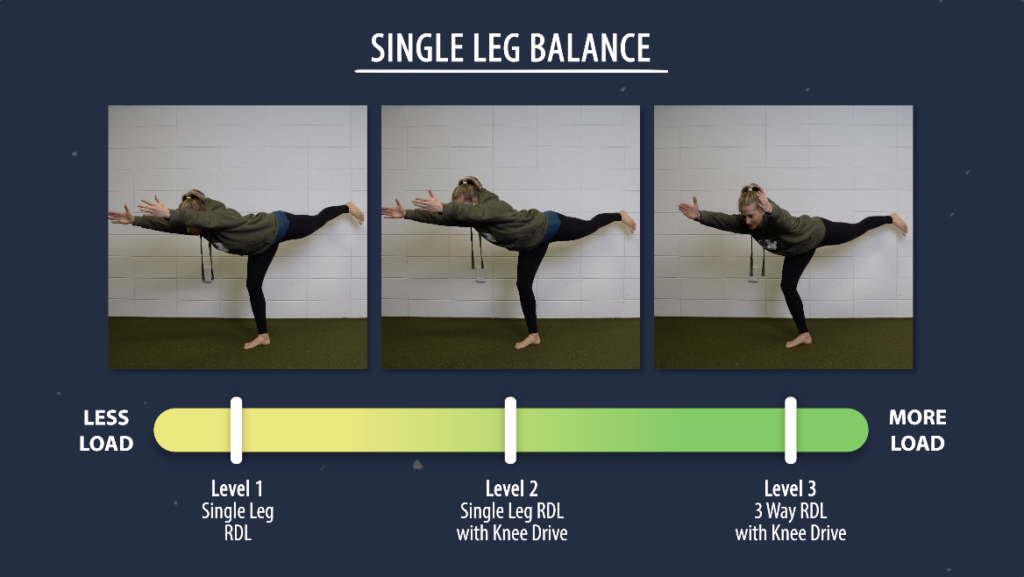
Single Leg Balance Progression:
Level 1: Single Leg RDL.
Level 2: Single Leg RDL to knee drive.
Level 3: 3 Way RDL to knee drive. Same as previous exercises but alternate reaching hands toward the left, middle, and right.
Find an appropriate starting level and perform these barefoot for 2-3 sets of 60 second on each leg, every other day.
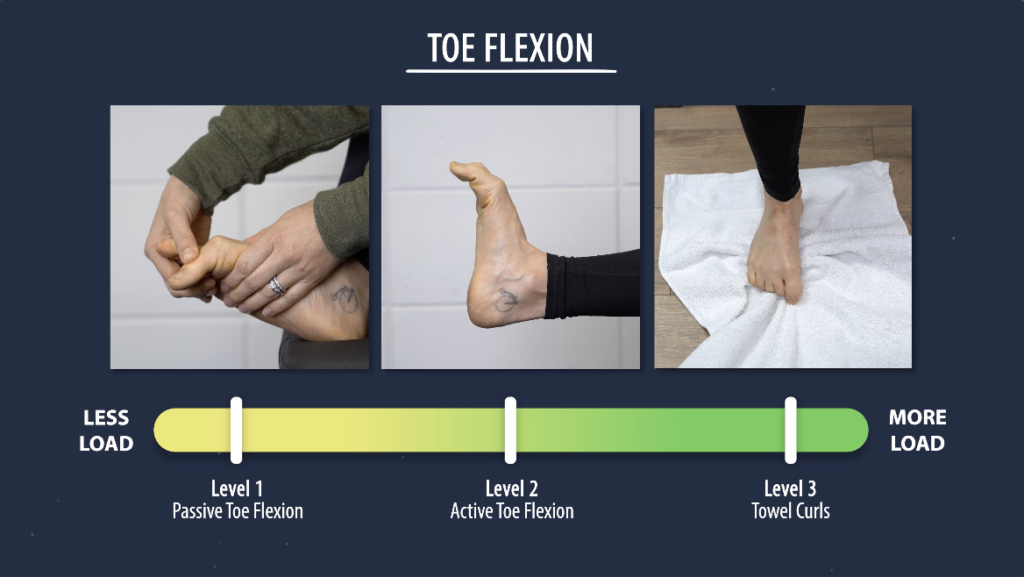
Toe Flexion Progression:
Level 1: Passive toe flexion. Stabilizing the base of your big toe with one hand, while you use the other hand to move your toe in and out of a flexed position.
Level 2: Active toe flexion. Actively curl your big toe as far as you can without pain.
Level 3: Towel curls. Sit with your feet on the ground and a towel underneath your toes. Curl your toes, pulling the towel towards you.
Find an appropriate starting level and perform for 2-3 sets of 15-20 repetitions, every day, or as tolerated.
Return to Sport
Exercises and drills in this category will vary widely depending on your sport and position, but you can use the same loading principles mentioned previously to help guide activity (Coughlin et al. 2010, McCormick & Anderson 2009).
Early on when loading is more painful, activities, such as biking or swimming, should be implemented to help maintain fitness levels. These should be performed pain free (Coughlin et al. 2010).
Once tolerated, begin walking, and then progress to jogging in a straight line.
When you are able to jog pain free without a limp and demonstrate 50 to 60° of painless passive big toe extension, you can progress to running and jumping exercises.
And finally, it is recommended you are able to perform linear running at full speeds before beginning cutting and change of direction drills. These should be completed without residual pain before gradually returning to your preferred sport or activity.

Surgery
In most cases, turf toe can be treated conservatively , but according to McCormick & Anderson in 2010, there are several indications which may lead to surgical consideration. These include:
- Large capsular avulsion with unstable joint
- Diastasis of bipartite sesamoid
- Diastasis of sesamoid fracture
- Retraction of sesamoid(s)
- Traumatic hallux valgus deformity
- Vertical instability (positive Lachman test) 7. Loose body
- Chondral injury
- Failed conservative treatment
Regardless if you do conservative management or surgery, rehabilitation will follow the same principles of the loading continuum just outlined.
Timeline
Overall, rehab for turf toe should place an emphasis on reducing symptoms and restoring function, rather than following a set timeline since recovery is widely variable person to person. For example, in less severe cases, such as with a grade 1 injury, return to sport may only take a few days, while in more severe cases that require surgery, full recovery may take anywhere from 6-12 months (Fraser & Doty 2019).
Turf Toe Summary
Turf toe occurs when the big toe is forced into hyperextension, resulting in a sprain of the ligaments and/or the joint capsule on the bottom side of the joint.
Injuries are often classified into 3 grades of severity based on clinical signs & symptoms and imaging findings.
The strategies, exercises, and return to sport guidelines outlined previously follow a loading continuum, which gradually places more stress and load through the big toe joint.
Find an appropriate starting point for you. Over time, as symptoms reduce and tolerance improves, slowly move toward the right side of the continuum, going as far as you need for your goals.